manuals.online logo
Brands
  1. Home
  2. •
  3. Brands
  4. •
  5. Canvas
  6. •
  7. Indoor Furnishing
  8. •
  9. Canvas 088-1711-4 User manual

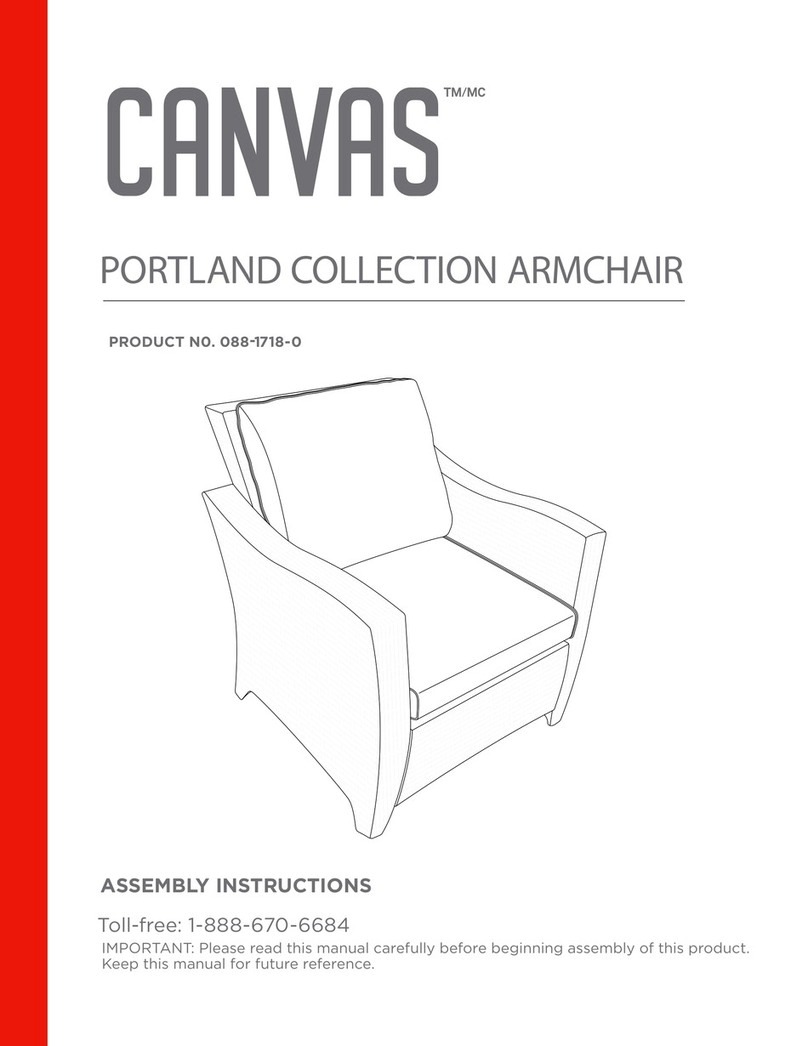
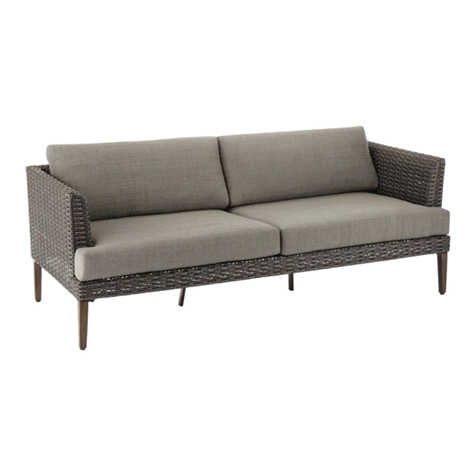
Canvas 088-1711-4 User manual

ASSEMBLY
INSTRUCTIONS
T
o
ll
-
f
r
ee
:
IMPORTANT: Please read
t
h
i
s
manual carefully before beginning assembly of
t
h
i
s
p
r
od
uc
t
.
Keep
t
h
i
s
manual for future
r
e
f
e
r
e
nc
e
.
.
LOVESEAT
PRODUCT NO.
088
-1711-4
EMERSON COLLECTION
-
888
-670-
6684
1
IMPORTANT SAFETY
I
N
S
T
R
U
C
T
I
ON
S
TABLE OF C
ON
T
E
N
TS
2
IMPORTED FOR TRILEAF DISTRIBUTION TRIFEUIL TORONTO, CANADA M4S 2B8
3
Warning! To reduce
t
h
e
risk of serious
i
n
j
u
r
y
,
read
t
h
e
following
s
a
f
e
t
y
i
n
s
t
r
u
c
t
i
o
n
s
before assemblingand using
t
h
e
product
.
C
a
u
t
i
o
n
!
Always
keep
children under close supervision while
t
h
e
y
are using
o
r
around
t
h
i
s
p
r
o
d
uc
t
.
Never
leave children un
a
tt
e
n
d
e
d
.
• The
product
should be placed on a
flat
h
o
ri
zo
n
t
a
l
gr
o
un
d
.
• Any assemblyor m
a
i
n
t
en
a
n
c
e
of
t
he
product
m
u
s
t
be carried
out
by
a
d
u
l
t
s
o
n
ly
.
• Arrange
necessary
manpower when assemblingor moving
t
he
pr
o
d
u
c
t
.
• Some
p
a
r
t
s
may co
n
t
a
i
n
sharp
e
dg
e
s
.
Wear protective gloves if
ne
c
e
ss
a
ry
.
• Keep children and
p
e
t
s
away while setting up
t
he
product.
• Reparing and replacing
p
a
r
t
s
should be done by a qualified
t
e
c
hn
i
ci
a
n
.
• Always remove
t
he
product in heavy wind co
n
di
t
i
o
n
s
,
o
t
he
rwi
s
e
it mighttip
over and
cause
damage
to
t
he
product
or injuries
to
p
a
ss
e
r
s
by
.
• If
t
he
product
will
not
be usedfor alonger period
(
e
.
g
.
winter
t
i
m
e
)
,
it
should be
s
t
o
r
e
d
in a cl
e
a
n
,
dry
en
v
ir
o
nmen
t
.
• Do
not light
any fires inside or near
t
he
pr
o
d
u
c
t
!
•
R
e
t
a
i
n
t
he
original packaging
to
s
t
o
r
e
t
he
product..
• Checkall
nu
t
s
and bolts periodically for
t
ig
h
t
ne
ss
.
When
r
e
q
u
ir
e
d
,
tighten
t
he
m
a
g
a
i
n
.
PRODUCT NO. 088-1711- 4
Table of Contents
3
Important
Safety Instructions
3
4
Assembly
5
Cleaning and Maintenance 8
Technical Data 8
Warranty
9
Parts List
IMPOR ANT :
R
e
t
a
i
n
for future
r
e
f
e
r
e
nc
e
,
and read c
a
r
e
f
u
lly
.
T
ASSEMBLY
PREPARATION
4
1
Left arm frame - 1
2
Right arm frame - 1
3
Back panel - 1
4
Seat panel - 1
5
Wrench - 1
6
Screw M6 x 23 - 3
C
Washer - 16
D
Screw cap - 13
E
Screw nut - 3
Hex key - 1
Screw nut cover - 3
Screw M6 x 41 - 6
Screw M6 x 50 - 4
Back cushion - 2
Seat cushion - 1
G
A
5
CAUT
IO
N
!
•
The maximum load of this product is 210 kg (463 lb).
•
Keep
children
away
during
a
ss
e
m
b
ly
.
This
product
co
n
t
a
i
n
s
small
p
a
r
t
s
which
can be
swallowed
by
c
h
il
dr
e
n
.
•
Keep
fingers
away
from
t
h
e
places where
they
can be
pinched
or
t
r
a
pp
e
d
.
•
Do
not attempt to
assemble
t
h
e
product
if
any
p
a
r
t
s
are
mi
ss
i
n
g
.
B
F
J
H
PRODUCT NO. 088-1711- 4
2
p
eo
pl
e
Needed for
a
ss
e
m
bl
y:
Wrench
Hex Key
PART
L
I
S
T
S
P
l
a
c
R
e
m
a
t
a
n
d
num
I
M
P
a
ss
e
li
s
t
.
Let us help
y
o
u
!
DO NOT RETURN YOUR PRODUCT TO THE STORE. CALL US
FI
RST
!
-
888
-670
-6684
If
you have
q
u
e
s
t
i
o
n
s
regarding
your
p
r
o
d
u
c
t
,
require
w
a
rr
a
n
t
y
a
ss
i
s
t
a
nc
e
,
or have
damaged
or
missing
p
a
r
t
s
,
please call our
c
u
s
t
om
e
r
service
toll-free
hel
pli
n
e
.
C
o
n
t
ac
t
us
for
a
ss
i
s
t
a
nc
e
;
we’re here
to
hel
p
.
ORTANT: Please read and
un
d
e
r
s
t
a
n
d
t
h
i
s
manual
before
any a
ss
e
m
bly
.
Before beginning
mbly of p
r
od
uc
t
,
make sure all
p
a
r
t
s
are
p
r
e
s
e
n
t
.
Compare
p
a
r
t
s
with
packaging c
o
n
t
e
n
t
s
If any
part
is missing, or
if
you have any
q
u
e
s
t
io
n
s
,
contact
t
h
e
service
c
e
n
t
e
r
a
t
(toll
f
r
ee
)
.
e all
p
a
r
t
s
from
t
h
e
box in a
cleared
area and
po
s
i
t
io
n
t
h
e
m
on
t
h
e
floor
in
front of
yo
u
.
move all
packing m
a
t
e
r
i
a
l
s
and place
t
h
e
m
back
into
t
h
e
box. Do
not
disposeof
t
h
e
p
a
ck
i
n
g
erials
until
assembly
is
c
o
m
pl
e
t
e
.
Read each
s
t
e
p
carefully before beginning
any a
ss
e
m
bly
make sure you
un
d
e
r
s
t
a
n
d
each
s
t
ep.
If you are
missing
a
p
a
r
t
,
please call our
t
oll
-
f
r
ee
ber
for
a
ss
i
s
t
a
nc
e
.
-
888
-670-
6684
:
-
1
1
-
888
-670-
6684
1
A
SS
E
M
B
LY
A
SS
E
M
B
LY
6
7
Step 1
Requires 1, 2, 4, C, D, E, H
Lock the seat panel 4to the left arm frame 1 and right arm frame 2,
using the screw Cwasher Dand screw cap E. Tighten the screws
with hex key H.
C D E H
Step
3
Requires
1, 2, 3, B, D, E, H
Lock the back panel 3to the left arm frame 1 and right arm frame 2, using the screw B,
washer Dand screw cap E. Tighten the screws with hex keyH.
E
C
2
1
Step
2
Requires 1, 2, 3, B, D, E, H
Step
4
Requires
3, 4, 5, 6, A, D, E, F, G, H, J
Lock the back panel 3to the left arm frame 1 and right arm frame 2,
using the screw B, washer Dand screw cap E. Tighten the screws
with hex key H.
Attach the seat panel 4to the back panel 3, using the screw Awith washer D. U se the
wrench Jto hold the screw nut Fwith washer D, and the hex key H to tighten the screw.
Then place the screw cap Eand screw nut cover Gon the screw.
Place the back cushion 5and seat cushion 6on the chair. Now your chair is ready for use.
A D E G
4C
E
D
B D E H
2
1
3
C
B
E
D
B D E H
2
1
3C
B
E
D
FH
J
C
D
A
D
E
G
F
43
5
6
PRODUCT NO. 088-1711- 4
TECHNICAL
DA
T
A
MAINTENANCE
W
AR
R
AN
T
Y
8 9
PRODUCT NO. 088-1711- 4
88 x 158 x 88 cm
34 5/8 x 62 1/4 x 34 5/8"
CAUT
IO
N
!
•
Check all screws
periodically
for
t
i
g
h
t
n
e
ss
,
tightening
t
h
e
m
again as
r
e
q
u
i
r
e
d
.
•Disassemble
the
product in
the
reverse order of
the
assembly
s
t
e
p
s
.
Always
disassemble
the
product
com
p
l
e
t
el
y
.
Fabric colour may fade after prolonged exposure to light. Keep cushions
indoors when not in use.
•
• When washing the fabric parts :
Spread the fabric and use a soft bristle brush to clean;
- Always use a natural soap, never detergent;
- Water should be cold to lukewarm, never more than 25 C (77 F)
- Air dry only, do not spin in washing machine nor hand squeeze.
• Do not use bleach, acid, or other abrasive cleaners on the product.
• Steel components of garden accessories and furniture are treated with rust-inhibiting
paint. However, due to the nature of steel, surface oxidation (rusting) will occur if this
protective coating is scratched. This is a natural process. To minimize this condition,
it is recommended that care be taken when assembling and handling the product in
order to prevent the paint from being scratched. Surface rust can be removed easily
using a very light application of common cooking oil. If surface oxidation (rusting)
occurs and no measures are taken to correct it, the oxidation may start dripping
onto the assembly surface, which may cause damaging stains that may be difficult to
remove.
-
oo
Dimensions ( L x W x H )
This C
ANV
A
S
™
product
carries a one
(
1
)
year
w
a
rr
a
n
t
y
a
g
a
i
n
s
t
de
f
e
c
t
s
i
n
workmanship
and
m
a
t
e
ri
a
l
s
.
Trileaf Distribution
agrees
to
replace
t
h
e
de
f
e
c
t
i
v
e
product free
of charge
within
t
h
e
s
t
a
t
e
d
w
a
rr
a
n
t
y
p
e
ri
o
d,
when
r
e
t
u
r
n
e
d
by
t
h
e
original purchaser
with proof of
p
u
r
c
h
a
s
e
.
This
product
is
no
t
g
u
a
r
a
n
t
ee
d
a
g
a
i
n
s
t
w
ea
r
or
breakage
due
to
misuse
a
n
d
/
o
r
a
b
u
s
e
.
Made in China
Imported by
Trileaf Distribution Trifeuil Toronto, Canada M4S 2B8

Other Canvas Indoor Furnishing manuals
Canvas 088-2289-4 User manual

Canvas

Canvas 088-2289-4 User manual

Canvas ROBSON 168-0046-4 User manual

Canvas

Canvas ROBSON 168-0046-4 User manual

Canvas PLAYA 088-1772-8 User manual

Canvas

Canvas PLAYA 088-1772-8 User manual

Canvas BALA YD-BTT User manual

Canvas

Canvas BALA YD-BTT User manual

Canvas MAYFIELD 068-7852-0 User manual

Canvas

Canvas MAYFIELD 068-7852-0 User manual

Canvas 088-2247-4 User manual

Canvas

Canvas 088-2247-4 User manual

Canvas CLAREVIEW SWIVEL ARM CHAIRS 088-2211-8 User manual

Canvas

Canvas CLAREVIEW SWIVEL ARM CHAIRS 088-2211-8 User manual

Canvas Manhattan 068-7667-2 User manual

Canvas

Canvas Manhattan 068-7667-2 User manual

Canvas RENFREW 088-2041-2 User manual

Canvas

Canvas RENFREW 088-2041-2 User manual

Canvas Office Landscape Private Office Hutch Installation instructions

Canvas

Canvas Office Landscape Private Office Hutch Installation instructions

Canvas ELENA 063-8950-0 User manual

Canvas

Canvas ELENA 063-8950-0 User manual

Canvas HALLWAY TREE 068-7867-6 User manual

Canvas

Canvas HALLWAY TREE 068-7867-6 User manual

Canvas 168-0038-4 User manual

Canvas

Canvas 168-0038-4 User manual

Canvas WHISTLER CONVERSATION 088-2298-2 User manual

Canvas

Canvas WHISTLER CONVERSATION 088-2298-2 User manual

Canvas JENSEN 088-1925-6 User manual

Canvas

Canvas JENSEN 088-1925-6 User manual
Canvas SHERBROOKE 088-2086-6 User manual

Canvas

Canvas SHERBROOKE 088-2086-6 User manual

Canvas BALA KVS148G User manual

Canvas

Canvas BALA KVS148G User manual

Canvas BARRINGTON 168-0112-6 User manual

Canvas

Canvas BARRINGTON 168-0112-6 User manual

Canvas ROBSON 168-0047-2 User manual

Canvas

Canvas ROBSON 168-0047-2 User manual

Canvas ROCKCLIFFE 088-2266-8 User manual

Canvas

Canvas ROCKCLIFFE 088-2266-8 User manual

Canvas ROBSON 168-0048-0 User manual

Canvas

Canvas ROBSON 168-0048-0 User manual

Canvas HALLWAY TREE 068-7571-8 User manual

Canvas

Canvas HALLWAY TREE 068-7571-8 User manual

Canvas TRINITY SIDE C-TABLE 168-0069-0 User manual

Canvas

Canvas TRINITY SIDE C-TABLE 168-0069-0 User manual

Canvas BAFFIN 088-2273-0 User manual

Canvas

Canvas BAFFIN 088-2273-0 User manual

Popular Indoor Furnishing manuals by other brands

CB2 RODNEY Assembly instructions

CB2

CB2 RODNEY Assembly instructions

Möbel AS KLTS62321 Assembling Instruction

Möbel AS

Möbel AS KLTS62321 Assembling Instruction

AFi FR-PDA-STO Assembly instructions

AFi

AFi FR-PDA-STO Assembly instructions

Patterson Medical Metron Value 923544 Assembly instructions

Patterson Medical

Patterson Medical Metron Value 923544 Assembly instructions

Dorel Asia baby relax 2-IN-1 CONVERTIBLE CRIB Instruction booklet

Dorel Asia

Dorel Asia baby relax 2-IN-1 CONVERTIBLE CRIB Instruction booklet

Actiforce STEELFORCE SLS 673 EN527 135 Assembly manual

Actiforce

Actiforce STEELFORCE SLS 673 EN527 135 Assembly manual

Rauch M1793 Assembly instructions

Rauch

Rauch M1793 Assembly instructions

Walker Edison BR1DNS Assembly instructions

Walker Edison

Walker Edison BR1DNS Assembly instructions

Oeuf PERCH BUNK 1PB-C-01 Assembly instruction

Oeuf

Oeuf PERCH BUNK 1PB-C-01 Assembly instruction

CONFORAMA IRENE 304145 Assembly instructions

CONFORAMA

CONFORAMA IRENE 304145 Assembly instructions

Core Products Augusta AG902 Assembly instructions

Core Products

Core Products Augusta AG902 Assembly instructions

Otto 46800736 manual

Otto

Otto 46800736 manual

IKEA STOLMEN quick start guide

IKEA

IKEA STOLMEN quick start guide

Kid-Man 01-8604 user manual

Kid-Man

Kid-Man 01-8604 user manual

Tresanti ODP34128 manual

Tresanti

Tresanti ODP34128 manual

Next 105857 Assembly instructions

Next

Next 105857 Assembly instructions

Altra furniture 5951325COM Assembly instructions

Altra furniture

Altra furniture 5951325COM Assembly instructions

Sealey AP6150 instructions

Sealey

Sealey AP6150 instructions

manuals.online logo
manuals.online logoBrands
  • About & Mission
  • Contact us
  • Privacy Policy
  • Terms and Conditions

Copyright 2025 Manuals.Online. All Rights Reserved.