manuals.online logo
Brands
  1. Home
  2. •
  3. Brands
  4. •
  5. Canvas
  6. •
  7. Indoor Furnishing
  8. •
  9. Canvas 088-1718-0 User manual

Canvas 088-1718-0 User manual

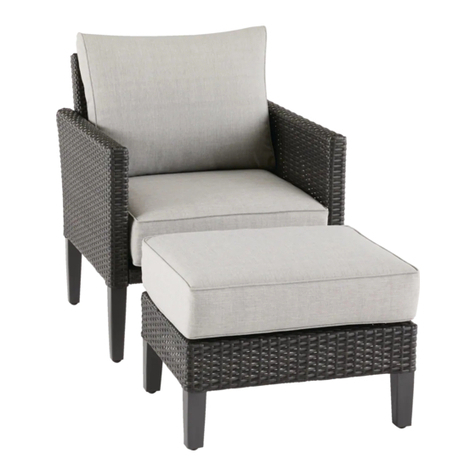
PORTLAND COLLECTION ARMCHAIR
PRODUCT N0. 088-1718- 0
ASSEMBLY INSTRUCTIONS
Toll-free: 1-888-670-6684
IMPORTANT: Please read this manual carefully before beginning assembly of this product.
Keep this manual for future reference.
3
TABLE OF CONTENTSIMPORTANT SAFETY INSTRUCTIONS
MADE IN CHINA
IMPORTED BY TRILEAF DISTRIBUTION TRIFEUIL TORONTO, CANADA M4S 2B8
Table of Contents 3
Important Safety Instructions 3
Part List 4
Assembly 5-10
Cleaning and Maintenance 11
Technical Specications 11
Warranty 12
IMPORTANT: Retain the manual for future reference, and read the instructions
carefully.
• Always place the product on at, horizontal ground.
• Any assembly or maintenance of the product must be carried out by adults only.
• Make sure there is sucient manpower when assembling or moving the product.
• Some parts may contain sharp edges. Wear protective gloves if necessary.
• Check all screws and nuts periodically for tightness. When required, tighten them.
• Repairing and replacing parts should be done by a qualied technician.
• Do not use the product in heavy wind conditions, it could tip over and cause injuries to
the user or passersby.
• Do not use the product if it is in inverted position or if its legs do not rest on the ground.
Failure to follow could result in serious injury.
• Never stand on the product. Failure to follow could result in serious injury.
• The product can accommodate only one person at a time. Failure to follow could result
in serious injury.
• Do not exceed the maximum load (120 Kg) of the product.
• If the product is not be used for a long period (e.g. winter time), store it in a clean, dry
environment.
• Do not light re near the product.
• Retain the original packaging to store the product.
WARNING!
To reduce the risk of serious injury, read the following safety instructions
before assembling and using the product.
CAUTION!
Always keep children under close supervision while they are playing near
this product. Never leave children unattended. Keep pets away while
setting up the product.
4 5
PRODUCT NO. 088-1718-0
ASS E M B LY
PART LIST
Left Arm Frame
-
1
Right Arm Frame
- 1
Back Panel
- 1
Seat Panel
- 1
Back Cushion
- 1
Seat Cushion
- 1
Screw M6 x 26
- 10
Screw M8 x 53
- 2
1
2
3
4
5
6
A
B
Needed for assembly:
Hex key (included) Wrench (included) 2 people
Washer - 20
C
Screw cap - 10
Screw nut - 10
Screw nut cover - 10
Hex Key - 1
Wrench - 1
D
E
F
G
H
Let us help you!
DO NOT RETURN YOUR PRODUCT TO THE STORE. CALL US
FIRST! 1-888-670-6684
If you have questions regarding your product, require warranty
assistance, or have damaged or missing parts, please call our
customer service toll-free helpline. Contact us for assistance, we’re
here to help.
IMPORTANT: Please read and understand this manual before any assembly.
Before beginning assembly of the product, make sure there are no missing parts.
Compare the parts with packaging contents list. If any part is missing, or if you
have any questions, contact the service center at 1-888-670-6684 (toll free).
Take all parts from the packaging box and position them on a clean oor. Remove
all packing materials and place them back into the box. Do not dispose of the
packing materials until the assembly is complete. Read each step carefully before
beginning any assembly and make sure you understand each step. If any part is
missing, please call our toll-free number for assistance: 1-888-670-6684.
CAUTION!
• Check all screws and nuts periodically for tightness. If required tighten them.
• Keep children away during assembly.
This product contains small parts which can be swallowed by children.
• Keep ngers away from places where they can be pinched or trapped.
• Do not attempt to assemble the product if any part is missing.
76 7
PRODUCT NO. 088-1718-0
ASS E M B LY
ASS E M B LY
Step 1
Requires B, G
Insert the shank of the screw (B) into the corresponding hole located on the left
side of the back panel (3). Tighten the screws using the hex key (G). Repeat the
same procedure on the right side of the back panel.
Step 3
Requires 1, 2, 3
Align holes located on the lower portion of the back panel (3) with the
corresponding holes of the right arm frame (2). Repeat the same procedure for
the left arm frame (1).
Step 2
Requires 1, 2
Lock the head of the screws (B) into the respective slots located on the left arm
frame (1) and the right arm frame (2).
G
3
B
2
1
B
GB
1
3
2
3
2
Step 4
Requires A, C, E, G, H
Insert the screw (A) with one washer (C) into the aligned hole. Tighten the screw
using another washer and a screw nut (E). Use the hex key (G) to rmly tighten
the screw. Use the wrench (H) to secure the nut from moving. Follow the same
procedure for the second screw. Repeat the same procedure for the left arm
frame.
CA EGH
G
H
A
EC
NOTE:
Do not tighten the screws completely until all four screws are installed.
8 9
PRODUCT NO. 088-1718-0
ASS E M B LY
ASS E M B LY
Step 5
Requires 1, 2, 4
Tilt the assembled panel. Align holes located on the right arm frame (2) with the
corresponding holes on the front of the seat panel (4). Repeat the same procedure
for the left arm frame (1).
Step 7
Requires 3, 4
Align holes located at the rear portion of the seat panel (4) with the corresponding
holes of the back panel (3).
1
22
4
4
4
3
4
3
G
H
E
A
C
A
E
C
G
H
CA EGHCA EGH
NOTE:
Do not tighten the screws completely until all four screws are installed.
NOTE:
Do not tighten the screws completely until all four screws are installed.
Step 6
Requires A, C, E, G, H
Insert the screw (A) with one washer (C) into the aligned hole. Tighten the screw
using another washer and a screw nut (E). Use the hex key (G) to rmly tighten
the screw. Use the wrench (H) to secure the nut from moving. Follow the same
procedure for the second screw. Repeat the same procedure for the left arm
frame.
Step 8
Requires A, C, E, G, H
Insert the screw (A) with one washer (C) into the aligned hole. Tighten the screw
using another washer and a screw nut (E). Use the hex key (G) to rmly tighten
the screw. Use the wrench (H) to secure the nut from moving. Follow the same
procedure for the second screw. Repeat the same procedure for the left arm
frame.
10 11
PRODUCT NO. 088-1718-0
WARRANTY
MAINTENANCETECHNICAL DATA
10 11
PRODUCT NO. 088-1718-0
ASS E M B LY
Step 9
Requires D, F
After assembling all the chair parts, make sure all screws are fully tightened. Cover
all screws and screw nuts using the screw caps (D) and screw nut covers (F).
D
F
FD
Step 10
Requires 5, 6
Turn the chair upright. Place the back cushion (5) and seat cushion (6) on the back
panel and seat panel, respectively. The chair is ready for use.
5
6a
6a
6b 6b
5a 6
Seat CushionBack Cushion
Dimensions (L x W x H) 83 x 77.5 x 85 cm
32 5/8 x 30 1/2 x 33 1/2"
Product weight 120 kg
265 lb
NOTE:
•When placing the back cushion, make sure that the zipper (5a) on the back
cushion is facing downward.
• When placing the seat cushion, make sure that the circular corners (6a) of the
seat cushion are facing outward and the square corners (6b) of the seat cushion
are facing inward.
CAUTION!
•Check all screws periodically for tightness. If required, tighten them.
•If required to disassemble the product, follow the assembly steps in the
reverse order.
•Fabric colour may fade after prolonged exposure to light. Keep the cushions
indoors when not in use.
• If surface oxidation (rusting) occurs and no measures are taken to correct
it, the oxidation may start dripping onto the assembly surface, which may
cause damaging stains that may be dicult to remove.
•To wash the cushions:
- Use a soft bristle brush to clean;
- Always use a mild solution of soap and water. Never use detergent;
- Rinse with clean water. The water should be cold to lukewarm, never more
than 25°C (77°F);
- Remove excess moisture from the cushions using a dry towel. Do not place in
washing machine nor hand squeeze.
•Do not use bleach, acid, or other abrasive cleaners on the product.
• Steel components of garden accessories and furniture are treated with rust
inhibiting paint. However, due to the nature of steel, surface oxidation (rusting)
will occur if this protective coating is scratched. This is a natural process. To
minimize this condition, it is recommended that care be taken when assembling
and handling the product, in order to prevent the paint from being scratched.
Surface rust can be removed easily by applying a little cooking oil.
12 PB
PRODUCT NO. 088-1718-0
WARRANTY
This CANVAS™product carries a one (1) year warranty against defects in
workmanship and materials. Trileaf Distribution agrees to replace the defective
product free of charge within the stated warranty period, when returned by
the original purchaser with proof of purchase. This product is not guaranteed
against wear or breakage due to misuse and/or abuse.

Other Canvas Indoor Furnishing manuals

Canvas 068-7826-4 User manual

Canvas

Canvas 068-7826-4 User manual

Canvas MERCIER 088-1393-0 User manual

Canvas

Canvas MERCIER 088-1393-0 User manual

Canvas ALBION 088-2230-2 User manual

Canvas

Canvas ALBION 088-2230-2 User manual

Canvas AXEL 168-0005-2 User manual

Canvas

Canvas AXEL 168-0005-2 User manual

Canvas PLAYA 088-1772-8 User manual

Canvas

Canvas PLAYA 088-1772-8 User manual

Canvas 068-1530-2 User manual

Canvas

Canvas 068-1530-2 User manual

Canvas 088-2060-6 User manual

Canvas

Canvas 088-2060-6 User manual

Canvas NELSON 168-0098-0 User manual

Canvas

Canvas NELSON 168-0098-0 User manual

Canvas WHISTLER CONVERSATION 088-2298-2 User manual

Canvas

Canvas WHISTLER CONVERSATION 088-2298-2 User manual

Canvas INVERMERE 168-0076-2 User manual

Canvas

Canvas INVERMERE 168-0076-2 User manual

Canvas CV Camrose 088-2208-8 User manual

Canvas

Canvas CV Camrose 088-2208-8 User manual

Canvas 088-2056-8 User manual

Canvas

Canvas 088-2056-8 User manual

Canvas MONTCLERC 168-0008-6 User manual

Canvas

Canvas MONTCLERC 168-0008-6 User manual

Canvas BURNABY 168-0113-4 User manual

Canvas

Canvas BURNABY 168-0113-4 User manual

Canvas EVAN'S CREEK 168-0108-8 User manual

Canvas

Canvas EVAN'S CREEK 168-0108-8 User manual

Canvas HALLWAY TREE 068-7571-8 User manual

Canvas

Canvas HALLWAY TREE 068-7571-8 User manual

Canvas THOMPSON 168-0109-6 User manual

Canvas

Canvas THOMPSON 168-0109-6 User manual

Canvas Holliston CTCSC-3 User manual

Canvas

Canvas Holliston CTCSC-3 User manual

Canvas DANVILLE CTCDAN30VNY User manual

Canvas

Canvas DANVILLE CTCDAN30VNY User manual

Canvas ROBSON 168-0046-4 User manual

Canvas

Canvas ROBSON 168-0046-4 User manual

Canvas WELLINGTON 063-6340-4 User manual
Canvas

Canvas WELLINGTON 063-6340-4 User manual

Canvas Renfrew 088-2040-4 User manual

Canvas

Canvas Renfrew 088-2040-4 User manual

Canvas ARC DINING TABLE 068-7597-8 User manual

Canvas

Canvas ARC DINING TABLE 068-7597-8 User manual

Canvas JENSEN 088-1927-2 User manual

Canvas

Canvas JENSEN 088-1927-2 User manual

Popular Indoor Furnishing manuals by other brands

Forte KZMS944 Assembling Instruction

Forte

Forte KZMS944 Assembling Instruction

Lightolier Lighting Systems A-3 Specification sheet

Lightolier

Lightolier Lighting Systems A-3 Specification sheet

Mäusbacher Dandy 0335 32 Assembly instructions

Mäusbacher

Mäusbacher Dandy 0335 32 Assembly instructions

Spectrum Industries 37310 Assembly instructions

Spectrum Industries

Spectrum Industries 37310 Assembly instructions

Safco Value Sorter 7121 manual

Safco

Safco Value Sorter 7121 manual

Outdoor Interiors Accent Table Assembly instructions

Outdoor Interiors

Outdoor Interiors Accent Table Assembly instructions

Schoolhouse Leo Mirror installation instructions

Schoolhouse

Schoolhouse Leo Mirror installation instructions

TCS Pillar Low Console 160cm Assembly instructions

TCS

TCS Pillar Low Console 160cm Assembly instructions

HOMCOM 801-300V00 manual

HOMCOM

HOMCOM 801-300V00 manual

Costway HW63248 user manual

Costway

Costway HW63248 user manual

Kinfine HOMEPOP K6499 Assembly instructions

Kinfine

Kinfine HOMEPOP K6499 Assembly instructions

Meble Wojcik MADRAS 95 Assembly instructions

Meble Wojcik

Meble Wojcik MADRAS 95 Assembly instructions

Möbel AS DURV821L Assembling Instruction

Möbel AS

Möbel AS DURV821L Assembling Instruction

RH LUCIDA COFFEE TABLE instructions

RH

RH LUCIDA COFFEE TABLE instructions

Mocka Inca Coffee Table Assembly instructions

Mocka

Mocka Inca Coffee Table Assembly instructions

Argos TOBY 8559230 quick start guide

Argos

Argos TOBY 8559230 quick start guide

IKEA BRICKAN instructions

IKEA

IKEA BRICKAN instructions

Boraam CAROLINA 31616 Assembly instructions

Boraam

Boraam CAROLINA 31616 Assembly instructions

manuals.online logo
manuals.online logoBrands
  • About & Mission
  • Contact us
  • Privacy Policy
  • Terms and Conditions

Copyright 2025 Manuals.Online. All Rights Reserved.