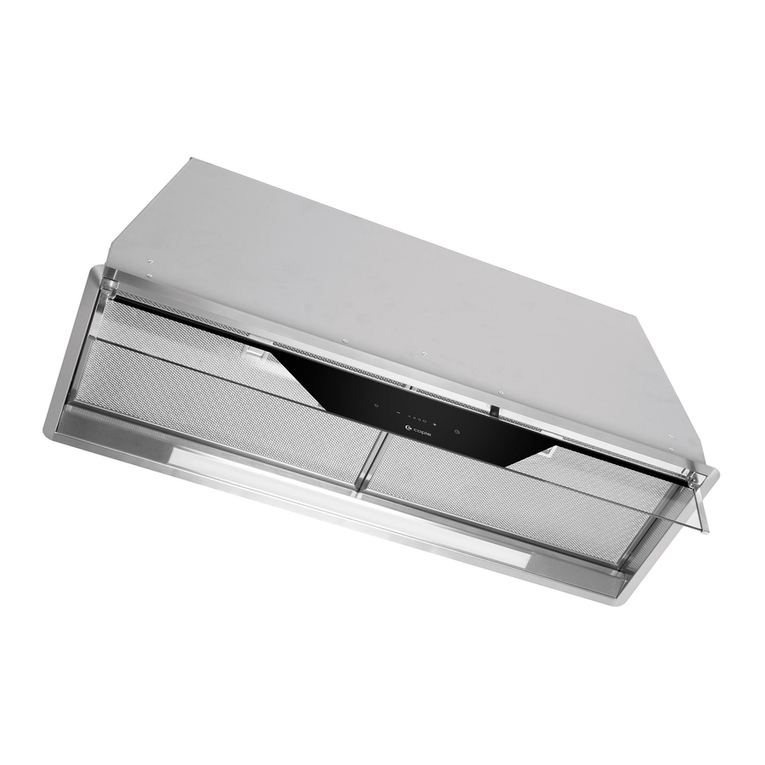
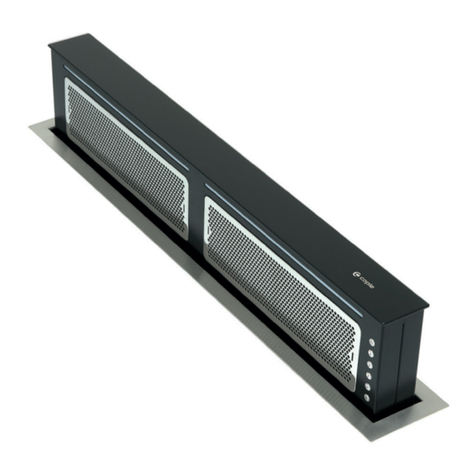
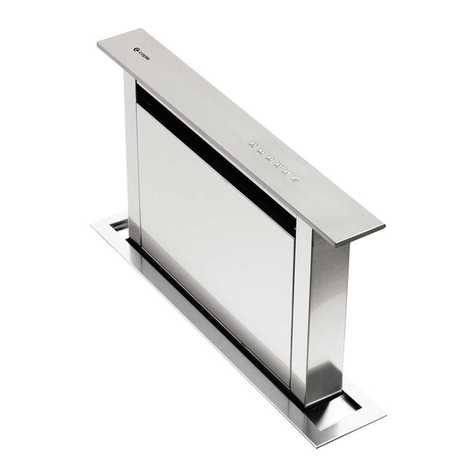
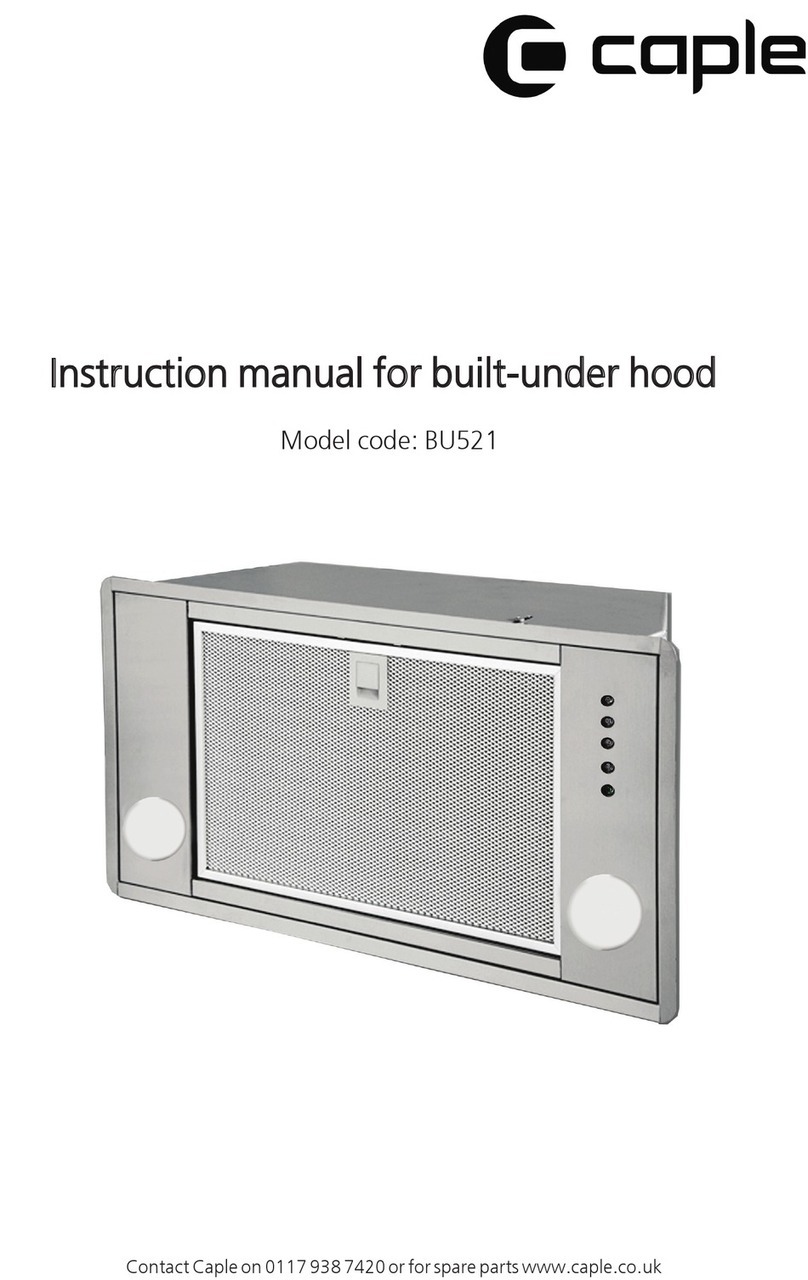
Caple INCH User manual

Contact Caple on 0117 938 7420 or for spare parts www.caple.co.uk
Built under extractor
Instruction manual
INCH
INCH Instruction manual.indd 1 06/07/2017 14:45

Instruction manual INCH
Please keep this instruction manual for future reference
2
CONTENTS
Safety Warnings 3
Safety Instructions 4
Electrical Shock Hazard 7
Environmental 8
Warranty 8
Extraction Without Intrusion 10
Installation 10
Electrical Safety 12
For Your Safety 13
Cleaning 13
Methods Of Extracting 14
Operation 17
Bulb Replacement 18
Troubleshooting 20
Technical Data 21
INCH Instruction manual.indd 2 06/07/2017 14:45

Instruction manual INCH
Please keep this instruction manual for future reference
3
IMPORTANT
This appliance must only be used for the
purpose it is intended. Other types of use are not
permitted and may prove dangerous. Caple will
not be held liable for any damage caused by the
incorrect use of the appliance
-Do not use any accessories or attachments not
recommended by Caple as this may result in fire, electric
shock or injury.
-To protect against fire, electrical shock and injury to
persons, do not immerse cords or plugs in water or any
other liquid.
-Never touch the appliance with wet or damp hands.
-Never pull the power cable as you could damage it.
If the appliance is faulty, do not attempt to repair it.
Isolate it from the mains electric supply and contact
Caple Service either by phone 0117 938 7420 or email
service@caple.co.uk
-Keep all packaging (including plastic bags, polystyrene
foam etc) out of the reach and away from children.
-Do not rest large or unstable objects on any part of the
appliance.
INCH Instruction manual.indd 3 06/07/2017 14:45

Instruction manual INCH
Please keep this instruction manual for future reference
4
Caple cannot be held responsible for injuries or
losses caused by incorrect use or installation of
this product. Please note that Caple reserve the
right to invalidate the guarantee supplied with
this product following incorrect installation or
misuse of the appliance. Under no circumstances
should any external covers be removed for
servicing or maintenance except by suitably
qualified personnel.
SAFETY INSTRUCTIONS:
-Never let children operate the machine.
-The cooker hood is for home use only, not suitable for
barbecuing, restaurants or other commercial purposes.
-The cooker hood and its filter should be cleaned regularly
in order to keep in good working condition.
-Clean the cooker hood according to the instruction
manual to reduce the risk of fire.
-When using a gas hob, do not leave naked flames under
the extractor.
-Before connecting this appliance check that the power
supply cord is not damaged.
INCH Instruction manual.indd 4 06/07/2017 14:45

Instruction manual INCH
Please keep this instruction manual for future reference
5
-If the room where the hood is to be used contains a fuel
burning appliance such as a central heating boiler then
its flue must be of the sealed or balanced flue type. If
other types of flue or appliances are fitted ensure that
there is an adequate supply of air to the room.
-The air must not be discharged into a flue that is used
for exhausting fumes from appliances burning gas or
other fuels.
-Regulations concerning the discharge of air have to be
conformed to.
-Do not flambé under the cooker hood.
-Never leave frying pans unattended during use as over-
heated fats and oils may catch fire.
-To ensure the best performance, we recommend
switching on the extractor 15 minutes before cooking
and leave it running 15 minutes after. This will ensure
that the air in the kitchen is being circulated before
cooking commences and the air is being cleaned after
cooking has finished.
-The performance of your extractor will vary depending
on a number of factors. These include type of extraction,
room volume, length of ducting, ventilation available and
the cleanliness of the filters.
INCH Instruction manual.indd 5 06/07/2017 14:45

Instruction manual INCH
Please keep this instruction manual for future reference
6
-This appliance is not intended for use by persons
(including children) with reduced physical, sensory or
mental capabilities, or lack of experience and knowledge,
unless they have been given supervision or instruction
concerning use of the appliance by a person responsible
for their safety.
-Children should be supervised to ensure that they do not
play with the appliance.
-Cleaning and user maintenance must not be made by
children without supervision.
-Never immerse the appliance in water.
-This product is not designed for commercial use, it is a
household appliance only. It is not intended to be used
in:
• Staff kitchen areas in shops, offices and other working
environments.
• Bed and breakfast type environments.
• By clients in hotels, motels and other residential type
environments.
-To avoid all risk, if the power cable is damaged, it must
only be replaced by a Caple appointed engineer.
INCH Instruction manual.indd 6 06/07/2017 14:45

Instruction manual INCH
Please keep this instruction manual for future reference
7
-Appliances can be used by persons with reduced
physical, sensory or mental capabilities or lack of
experience and knowledge if they have been given
supervision or instruction concerning use of the
appliance in a safe way and understand the hazards
involved.
-Children must not play with this appliance.
-When not in use and before cleaning, always isolate the
appliance from the electrical supply.
ELECTRICAL SHOCK HAZARD
-Only plug this unit into a properly earthed outlet. If in
doubt seek advice from a suitably qualified engineer.
-Failure to follow these instructions can result in death,
fire, or electrical shock.
-This appliance must be connected to the mains by a
competent person. We recommend that the appliance is
connected by a qualified electrician who is a member of
the N.I.C.E.I.C who will comply with the I.E.E and local
regulations. Electrical information can be found on the
rating plate.
INCH Instruction manual.indd 7 06/07/2017 14:45

Instruction manual INCH
Please keep this instruction manual for future reference
8
ENVIRONMENTAL PROTECTION
Waste electrical products should not be disposed of with household waste.
Please recycle where facilities exist. Check with your Local Authority or retailer for
recycling advice.
This appliance is marked according to the European directive 2002/96/EC on
Waste Electrical and Electronic Equipment (WEEE). By ensuring this product is
disposed of correctly, you will help prevent potential negative consequences for the
environment and human health, which could otherwise be caused by inappropriate
waste handling of this product. The symbol on the product indicates that this
product may not be treated as household waste. Instead it shall be handed over
to the applicable collection point for the recycling of electrical and electronic
equipment. Disposal must be carried out in accordance with local environmental
regulations for waste disposal.
For more detailed information about treatment, recovery and recycling of this
product, please contact your local council, your household waste disposal service
or the retailer where you purchased the product.
WARRANTY
Your new appliance is covered by warranty. The warranty card is enclosed - if it is
missing, you must provide the following information to your retailer in order to
receive a replacement: date of purchase, model and serial number. Registration can
also be completed online by visiting www.caple.co.uk.
Ensure you keep your warranty card safe, you may need to show it to Caple Service
together with proof of purchase.
If you fail to show your warranty card you will incur all repair charges.
Spare parts are only available from Caple Service and spare parts authorised centres.
INCH Instruction manual.indd 8 06/07/2017 14:45
Instruction manual INCH
Please keep this instruction manual for future reference
9
ATTENTION
Before use, remove all plastic films protecting some parts of the appliance (fascia -
panel, parts in stainless steel, etc)
Do not use the appliance to heat a room.
When the appliance is not in use, we recommend you turn it off, and isolate it from
the electrical supply.
CE DECLARATIONS OF CONFORMITY
This appliance has been designed, constructed and marketed in compliance with
safety requirements in force. This appliance has been manufactured to the strictest
standards and complies with all applicable legislation.
INCH Instruction manual.indd 9 06/07/2017 14:45

Instruction manual INCH
Please keep this instruction manual for future reference
10
EXTRACTION WITHOUT INTRUSION
The extractor is design to give you the option to extract air to the outside (via
exterior wall), or to re-circulate the air through carbon filters to minimize odours
and vapours.
The choice is yours to decide at the point of installation, and both systems are
explained in this instruction manual.
We recommend that you read this manual from cover to cover before attempting to
install or operate the extractor
INSTALLATION
THE INSTALLATION INSTRUCITON MUST BE STRICTLY FOLLOWED AS FAILURE TO
COMPLY COULD RESULT IN OVERHEATING AND SERIOUS DAMAGE TO YOUR
APPLIANCE
To secure the product to the wall you must initially remove the grease filters. This
is achieved by opening the front panel and pushing the two catches (A) upwards
which will then release the grease filters. Once the grease filters have been removed
the front door panel should also removed.
INCH Instruction manual.indd 10 06/07/2017 14:45

Instruction manual INCH
Please keep this instruction manual for future reference
11
To secure the product to the wall you must initially remove the grease filters. This is achieved by
opening the front panel and pushing the two catches (A) upwards which will then release the grease
filters. Once the grease filters have been removed the front door panel should also removed.
Open the front panel and remove the two screws (B) as illustrated above. Press the tab (C) down
and remove the front panel from its guides
Secure brackets (D) onto the top of the extractor using the fitting screws and washer (E)
provided. Check that adjustment screw (F) is fitted.
Note: Note some units this bracket may already be fitted.
2
Open the front panel and remove the
two screws (B) as illustrated above. Press
the tab (C) down and remove the front
panel from its guides
Secure brackets (D) onto the top
of the extractor using the fitting
screws and washer (E) provided.
Check that adjustment screw (F) is
fitted.
Note: Note some units this bracket
may already be fitted.
Ensuring there is a minimum distance if 65cm between the bottom of the extractor
and hob surface., the two mounting brackets (G) to the rear wall.
Once the two mounting brackets are in position hook the extractor mounting
bracket (D) onto the wall mounting bracket
Some adjustment is provide within the brackets. For forward and backward
adjustment use screw (E) and for height alignment adjust screws (F).
Once the adjustment is complete fully tightening all screws.
If after installation there is a gap between the rear wall and the extractor a spacer is
provided. This can be fixed to the rear of the extractor and cut to accommodate the
gap.
INCH Instruction manual.indd 11 06/07/2017 14:45

Instruction manual INCH
Please keep this instruction manual for future reference
12
IMPORTANT NOTE:
After the extractor has been positioned correctly the extractor must be fixed to the
adjacent through the fixing holes in the sides of the extractor.
All that remains is to fix the front wooden door panel to the extractor by using the
diagram below fix the front panel
Ensuring there is a minimum distance if 65cm between the bottom of the extractor and hob surface.,
the two mounting brackets (G) to the rear wall.
Once the two mounting brackets are in position hook the extractor mounting bracket (D) onto the wall
mounting bracket
Some adjustment is provide within the brackets. For forward and backward adjustment use screw (E)
and for height alignment adjust screws (F).
Once the adjustment is complete fully tightening all screws.
If after installation there is a gap between the rear wall and the extractor a spacer is provided. This
can be fixed to the rear of the extractor and cut to accommodate the gap.
IMPORTANT NOTE : After the extractor has been positioned correctly the extractor must be fixed to
the adjacent through the fixing holes in the sides of the extractor.
All that remains is to fix the front wooden door panel to the extractor by using the diagram below fix
the front panel
Electrical Safety
Before you think about installing this extractor, give careful consideration to the power connection. It
is vital that the supply cable should be well shielded from your grill, hob or oven. If it isn’t, heat from
any one of these sources may damage the cable insulation and give rise to a fire risk. Under no
circumstances should the exposed power supply cable come within 70cm of a direct source of heat.
Ideally it should be channeled into the wall, well out of harm’s way.
3
ELECTRICAL SAFETY
Before you think about installing this extractor, give careful consideration to the
power connection. It is vital that the supply cable should be well shielded from
your grill, hob or oven. If it isn’t, heat from any one of these sources may damage
the cable insulation and give rise to a fire risk. Under no circumstances should the
exposed power supply cable come within 70cm of a direct source of heat. Ideally it
should be channeled into the wall, well out of harm’s way.
INCH Instruction manual.indd 12 06/07/2017 14:45

Instruction manual INCH
Please keep this instruction manual for future reference
13
FOR YOUR SAFETY
In order to protect your appliance and minimize the risk of fire, do not prepare
flambé dishes under the extractor. Your extractor is designed to draw cooking
fumes and vapours up and away from your hob. This means that exposed flames
may behave unpredictably in the vicinity of the appliance while it is switch on.
When frying take particular care to prevent the oil from catching fire and never
leave unattended.
CLEANING
IMPORTANT:
Before attempting any cleaning or maintenance, ensure your extractor is
disconnected from the power source.
GENERAL CLEANING: Regular cleaning guarantees correct and long lasting
operation.
Wipe the external surface of the appliance regularly using warm and a mild
detergent, never use products containing abrasive cleaners.
Particular care must be paid to the grease filtering panels which must be periodically
cleaned in relation to use (at least once every two months). These can be cleaned
in warm soapy water or placed in the dishwasher (using the dishwasher may cause
some slight discoloration, this is normal and not as fault with the product).
INCH Instruction manual.indd 13 06/07/2017 14:45

Instruction manual INCH
Please keep this instruction manual for future reference
14
METHODS OF EXTRACTING
Extraction Via Ducting
The very best method of cleaning the kitchen of
unwanted odours is by connecting the appliance to an
exhaust duct and venting to the outside atmosphere via
exterior wall (suitable 150mm diameter ducting kits may
be purchased from the retailer where you purchased
your extractor, alternatively www.caple.co.uk.) Ducting
your extractor negates the need for charcoal filters.
(Fig.1)
For Your Safety
In order to protect your appliance and minimize the risk of fire, do not prepare flambé dishes under
the extractor. Your extractor is designed to draw cooking fumes and vapours up and away from your
hob. This means that exposed flames may behave unpredictably in the vicinity of the appliance
while it is switch on. When frying take particular care to prevent the oil from catching fire and never
leave unattended.
Cleaning
IMPORTANT: Before attempting any cleaning or maintenance, ensure your extractor is
disconnected from the power source.
GENERAL CLEANING: Regular cleaning guarantees correct and long lasting operation.
Wipe the external surface of the appliance regularly using warm and a mild detergent, never use
products containing abrasive cleaners.
Particular care must be paid to the grease filtering panels which must be periodically cleaned in
relation to use (at least once every two months). These can be cleaned in warm soapy water or
placed in the dishwasher (using the dishwasher may cause some slight discoloration, this is normal
and not as fault with the product).
Alternative Methods of Extracting
1. Extraction Via Ducting (fig.1)
The very best method of cleaning the kitchen of unwanted odours is by connecting the appliance
to an exhaust duct and venting to the outside atmosphere via exterior wall (suitable 150mm
diameter ducting kits may be purchased from the retailer where you purchased your extractor,
alternatively www.caple.co.uk.) Ducting your extractor negates the need for charcoal
filters.(Fig.1)
Remember: Before drilling or chiseling the wall, check for the pipes and power cables.
NOTE: 150mm diameter ducting must be used to vent this extractor.
1. Ensure the ducting tube is kept as short as possible and with minimum of bends to ensure a
smooth airflow movement. (Maximum length 3M)
4
Remember:
Before drilling or chiseling the wall, check for the pipes and power cables.
NOTE:
150mm diameter ducting must be used to vent this extractor.
1. Ensure the ducting tube is kept as short as possible and with minimum of bends to
ensure a smooth airflow movement. (Maximum length 3M)
2. Ducted air must not be discharged into a flue which is used for exhausting fumes
from appliances supplied with energy other than electricity.
3. Ensure the requirement of the local authorities and building regulations are
adhered to concerning the discharged of exhaust air.
4. Ensure adequate room ventilation is provided when the extractor is used on the
same room as appliances supplied with energy other than electricity.
5. Never duct into a hot air flow such as a central heating duct.
We strongly advise that all exterior outlets be fitted with a non return valve with
louvered slots.
INCH Instruction manual.indd 14 06/07/2017 14:45

Instruction manual INCH
Please keep this instruction manual for future reference
15
The Re-circulation Mode
When there is no easy access to an outside wall, the
extractor can easily be adapted to clean air
polluted by cooking smells by using a charcoal filter
(code: CAP73CF). Replacements can be purchased from
www.caple.co.uk. Remember the re-circulation mode
cannot be used without a charcoal filter.
For Your Safety
In order to protect your appliance and minimize the risk of fire, do not prepare flambé dishes under
the extractor. Your extractor is designed to draw cooking fumes and vapours up and away from your
hob. This means that exposed flames may behave unpredictably in the vicinity of the appliance
while it is switch on. When frying take particular care to prevent the oil from catching fire and never
leave unattended.
Cleaning
IMPORTANT: Before attempting any cleaning or maintenance, ensure your extractor is
disconnected from the power source.
GENERAL CLEANING: Regular cleaning guarantees correct and long lasting operation.
Wipe the external surface of the appliance regularly using warm and a mild detergent, never use
products containing abrasive cleaners.
Particular care must be paid to the grease filtering panels which must be periodically cleaned in
relation to use (at least once every two months). These can be cleaned in warm soapy water or
placed in the dishwasher (using the dishwasher may cause some slight discoloration, this is normal
and not as fault with the product).
Alternative Methods of Extracting
1. Extraction Via Ducting (fig.1)
The very best method of cleaning the kitchen of unwanted odours is by connecting the appliance
to an exhaust duct and venting to the outside atmosphere via exterior wall (suitable 150mm
diameter ducting kits may be purchased from the retailer where you purchased your extractor,
alternatively www.caple.co.uk.) Ducting your extractor negates the need for charcoal
filters.(Fig.1)
Remember: Before drilling or chiseling the wall, check for the pipes and power cables.
NOTE: 150mm diameter ducting must be used to vent this extractor.
1. Ensure the ducting tube is kept as short as possible and with minimum of bends to ensure a
smooth airflow movement. (Maximum length 3M)
4
The Charcoal Filter
Charcoal filters have a limited life. We advise you to change it when there is a
noticeable drop in performance. The intervals between changing the filter will be
depend entirely upon the amount of cooking you do. But on average they will last
about 6 months, they should then be replaced.
The motor will automatically operate by opening and closing the front door panel
as long as the switch is set to the desired speed level. The extractor fan has three
speed settings for light, medium or heavy extraction of cooking vapors. The
different levels of extraction are number 1, 2 & 3 and can be recognized by the
changes in noise level of the extractor fan when operating.
INCH Instruction manual.indd 15 06/07/2017 14:45

Instruction manual INCH
Please keep this instruction manual for future reference
16
Top outlet to rear ducting outlet
Top extraction and rear extraction modes can be selected depending on the cabinet
and other requirements. Please follow the below instructions if the change in
extraction is required:
2. Ducted air must not be discharged into a flue which is used for exhausting fumes from appliances
supplied with energy other than electricity.
3. Ensure the requirement of the local authorities and building regulations are adhered to concerning
the discharged of exhaust air.
4. Ensure adequate room ventilation is provided when the extractor is used on the same room as
appliances supplied with energy other than electricity.
5. Never duct into a hot air flow such as a central heating duct.
We strongly advise that all exterior outlets be fitted with a non return valve with louvered slots.
2. The Re-circulation Mode (Fig.2)
When there is no easy access to an outside wall, the extractor can easily be adapted to clean air
polluted by cooking smells by using a charcoal filter (code: CAP73CF). Replacements can be
purchased from www.caple.co.uk. Remember the re-circulation mode cannot be used without a
charcoal filter.
The Charcoal Filter
Charcoal filters have a limited life. We advise you to change it when there is a noticeable drop in
performance. The intervals between changing the filter will be depend entirely upon the amount of
cooking you do. But on average they will last about 6 months, they should then be replaced.
Operating Your Extractor
The motor will automatically operate by opening and closing the front door panel as long as the
switch is set to the desired speed level. The extractor fan has three speed settings for light, medium
or heavy extraction of cooking vapors. The different levels of extraction are number 1, 2 & 3 and can
be recognized by the changes in noise level of the extractor fan when operating.
3.Top outlet to rear ducting outlet
Top extraction and rear extraction modes can be selected depending on the cabinet and other
requirements. Please follow the below instructions if the change in extraction is required:
1.Top outlet 2.Open the front panel ,take out the 3.Remove the transfer
filters and release the wiring tie screws shown above
5
1.Top outlet
4.Turn round the
transfer box to the
back position and
replace the screws
2.Open the front panel
,take out the filters and
release the wiring tie
3.Remove the
transfer screws
shown above
4.Turn round the transfer box to 5.The rear outlet is now selected
the back position and replace the screws
Operation
To switch on the light simply move the switch to position 1.
NOTE: The light is not effected by opening or closing the front panel.
To change the charcoal filter remove the old cassette by twisting an pulling off. Re-fit the new
version my pushing onto the lugs and twisting to fixing in position.
6
5.The rear outlet is
now selected
INCH Instruction manual.indd 16 06/07/2017 14:45

Instruction manual INCH
Please keep this instruction manual for future reference
17
OPERATION
To switch on the light simply move the switch to position 1.
NOTE:
The light is not effected by opening or closing the front panel.
4.Turn round the transfer box to 5.The rear outlet is now selected
the back position and replace the screws
Operation
To switch on the light simply move the switch to position 1.
NOTE: The light is not effected by opening or closing the front panel.
To change the charcoal filter remove the old cassette by twisting an pulling off. Re-fit the new
version my pushing onto the lugs and twisting to fixing in position.
6
To change the charcoal filter remove the old cassette by twisting an pulling off. Re-
fit the new version my pushing onto the lugs and twisting to fixing in position.
INCH Instruction manual.indd 17 06/07/2017 14:45

Instruction manual INCH
Please keep this instruction manual for future reference
18
BULB REPLACEMENT
This product is supplied with LED lamps. To replace, isolate the electrical supply,
release the spring holding the lamp and remove the lamp. Then replace a new
damp of the identical type.
NOTE:
The bulb is a consumable part and it not covered by the guarantee.
Always switch off the electricity supply prior to changing the bulb.
Electrical Connections
IMPORTANT:
ENSURE THAT THE ELECTRICITY SUPPLY IS SWITCHED OFF BEFORE
CONNECTING.
Your appliance must be connected to fix wiring via the use of a double pole
switched fused spur outlet with at least 3 mm contact separation, and preferably
with a pilot lamp. (See technical data for fuse rating). We strongly recommend the
appliance is connected by a qualified electrician who is a member of the N.I.C.E.I.C
or Corgi who will comply with the I.E.E and any local regulations.
NOTE:
The terminology “DOUBLE POLE” means that both the live and neutral supplies are
switched and disconnected at the same time.
Bulb Replacement
This product is supplied with LED lamps. To replace, isolate the electrical supply, release the spring
holding the lamp and remove the lamp. Then replace a new damp of the identical type.
Note: The bulb is a consumable part and it not covered by the guarantee.
Always switch off the electricity supply prior to changing the bulb.
Electrical Connections
IMPORTANT: ENSURE THAT THE ELECTRICITY SUPPLY IS SWITCHED OFF BEFORE
CONNECTING.
Your appliance must be connected to fix wiring via the use of a double pole switched fused
spur outlet with at least 3 mm contact separation, and preferably with a pilot lamp. (See
technical data for fuse rating). We strongly recommend the appliance is connected by a
qualified electrician who is a member of the N.I.C.E.I.C or Corgi who will comply with the
I.E.E and any local regulations
NOTE: The terminology “DOUBLE POLE” means that both the
live and neutral supplies are switched and disconnected at the
same time.
The terminations labelled SUPPLY are for the connection of the internal house wiring and
the terminations labelled LOAD are for connection of the appliance.
Important:
The wires in this mains lead are coloured in accordance with the following code:
Blue Neutral
Brown Live
As the colors of the wires in the mains lead of this appliance may not correspond with the colors markings
identifying the terminals in your spur box, proceed as follow:
The wire which is colored blue must be connected to the terminal which is marked with the letter “N” or
colored black. The wire which is colored brown must be connected to the terminal which is marked with
the Letter ‘L’ or colored red.
7
The terminations labelled SUPPLY are for the connection of the internal house
wiring and the terminations labelled LOAD are for connection of the appliance.
INCH Instruction manual.indd 18 06/07/2017 14:45
Instruction manual INCH
Please keep this instruction manual for future reference
19
IMPORTANT:
The wires in this mains lead are coloured in accordance with the following code:
Blue - Neutral
Brown - Live
As the colors of the wires in the mains lead of this appliance may not correspond
with the colors markings identifying the terminals in your spur box, proceed as
follow:
The wire which is colored blue must be connected to the terminal which is marked
with the letter “N” or colored black. The wire which is colored brown must be
connected to the terminal which is marked with the Letter ‘L’ or colored red.
WARNING:
This appliance has such technical particulars that it belongs to Class 2 insulation
and therefore neither wire should be connected to the terminal marked with the
letter E or by the earth symbol.
INCH Instruction manual.indd 19 06/07/2017 14:45

Instruction manual INCH
Please keep this instruction manual for future reference
20
TROUBLESHOOTING
Troubles Reason / Solution
Light bulb doesn’t
come on
A replacement may be necessary, but first check the extractor is connected
to the power supply and switched on. If a replacement is needed
remember to disconnect power supply before removing the bulb.
The motor is on
but fan doesn’t
seem to be as
efficient as usual
Check grease filter, if it has not been cleaned recently, it might be clogged
with grease. If filter is relatively clean, check charcoal filters. If this has not
been replaced for more than six months. Remove and insert new a one.
As charcoal filters clog in just the same way as the grease filter, thereby
reducing the efficiency of both the fan and the filter itself.
Works normally
but cooking smells
linger
If you’re using the unit in re-circulation mode, change charcoal filter. It
may be past its prime. Also ensure you switch the extractor on 15 minutes
before cooking and leave it running for at least 15 minutes after you
finish. This will help clear the cooking odours more efficiently.
Controls fail to
switch motor on
Check plug/electrical supply, socket and fuse. If these are in order and
fault persists, it could be that an accumulation of grease has impaired
the efficiency of the switch mechanism. Try rapidly moving switch on and
off several times in succession to clear grease deposit. If fault continues,
contact Caple service on 0117 938 7420 or email service@caple.co.uk.
Appliance does
not work at all
Check your extractor is switched on at the mains. Next, check for an
unexpected power outage by switching on adjacent lights etc. If all is in
order, contact Caple Service on 0117 9387420 or email service@caple.
co.uk.
Still not working?
Call the service
agent
If, having consulted the above diagnostic chart you are still unable to
remedy the situation, please call Caple service on 0117 938 7420 or email
service@caple.co.uk.
INCH Instruction manual.indd 20 06/07/2017 14:45
Other manuals for INCH
3
Table of contents
Other Caple Ventilation Hood manuals

Caple
Caple INCHP3 User manual

Caple
Caple CGC910BK User manual

Caple
Caple Orbit OI363 User manual

Caple
Caple BODY/DD600BK User manual

Caple
Caple SP912 User manual

Caple
Caple BXI1050SS User manual

Caple
Caple LC610WH User manual

Caple
Caple SP612 User manual

Caple
Caple INCHW3 User manual

Caple
Caple SP612 User manual
Popular Ventilation Hood manuals by other brands

Artusi
Artusi ASO601RX Operation manual

Zephyr
Zephyr Cypress AK7836CS Use, care and installation guide

Faber
Faber Jewel JEWL2430 Dimensions and installation

Bosch
Bosch DHU665EL Operating and installation instructions

Scheppach
Scheppach DC100 Translation of original instruction manual

Aroua
Aroua Vortix installation instructions