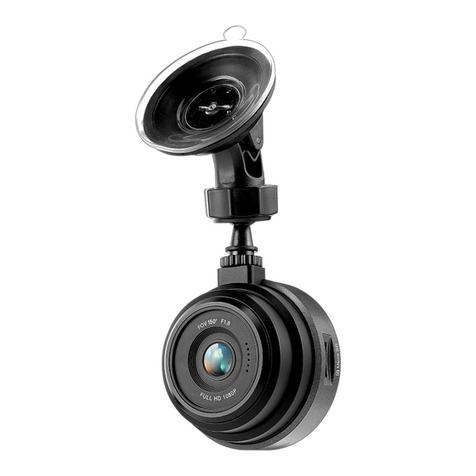
Car and Driver Eye1Pro CDC-632 User manual


Read Me
Important Safety Instructions
1) Read these instructions.
2) Keep these instructions.
3) Heed all warnings.
4) Follow all instructions.
5) Do not use this apparatus near water.
6) Clean only with dry cloth.
7) Do not block any ventilation openings. Install in accordance with the manufacturer’s
instructions.
8) Do not install near any heat sources such as radiators, heat registers, stoves, or other
apparatus (including amplifiers) that produce heat.
9) Protect the power cord from being walked on or pinched particularly at plugs,
convenience receptacles, and the point where they exit from the apparatus.
10) Only use attachments/accessories specified by the manufacturer.
11) Use only with the cart, stand, tripod, bracket, or table specified by the manufacturer,
or sold with the apparatus. When a cart is used, use caution when moving the cart/
apparatus combination to avoid injury from tip-over.
12) Unplug this apparatus during lightning storms or when unused for long periods of time.
13) Refer all servicing to qualified service personnel. Servicing is required when the
apparatus has been damaged in any way, such as power-supply cord or plug is damaged,
liquid has been spilled or objects have fallen into the apparatus, the apparatus has been
exposed to rain or moisture, does not operate normally, or has been dropped.
FCC NOTICE TO USERS:
FCC ID: 2AMSOCDC-632
Caution: Changes or modifications not expressly approved by the Party responsible for
compliance could void the user’s authority to operate the equipment.
Note: This equipment has been tested and found to comply with the limits for a Class B
digital device, pursuant to part 15 of the FCC Rules. These limits are designed to provide
reasonable protection Against harmful interference in a residential installation. This
equipment generates, uses and can radiate radio frequency energy and, if not installed
and used in accordance with the instructions, may cause harmful interference to radio
communications, however there is no guarantee that interference will not occur in a
particular installation. If this equipment does cause harmful interference to radio or
television reception, which can be determined by turning the equipment off and on, the
user is encouraged to try to correct the interference by one or more of the following
measures:
- Reorient or relocate the receiving antenna.
- Increase the separation between the equipment and receiver.
- Connect the equipment into an outlet on a circuit different from that to which the
receiver is connected.
- Consult the dealer or an experienced radio/TV technician for Help.
The device complies with part 15 of the FCC Rules. Operation is subject to the following
two conditions: (1) this device may not cause harmful interference, and (2) this device must
accept any interference received, including interference that may cause undesired operation.
1
PRODUCT OVERVIEW
EN
1) Menu/Mode Button
2) Up Button
3) SOS/WIFI Button
4) Down Button
5) OK Button
6) Power Button
7) SD Card Slot
8) HDMI Port
9) USB Port
10) Microphone
11) Reset Button
12) Speaker
13) Camera
14) Mount
15) TV Out Port
16) LCD Screen

2
FUNCTIONS
Power
1) Turn On: Press to turn the
dash cam on.
2) Turn Off: Press and hold to
turn the dash cam off.
Reset If the device crashes, use a
small pin to press this button
and reset the dash cam.
OK
1) In Video Mode, press to start
or stop recording.
2) In Photo Mode, press to take
a photo.
3) In Menus, press to conrm
settings.
4) In Playback Mode, press to
start or stop playback.
Menu/Mode
1) In Video Mode, press to
enter the Video Menu.
2) In Photo Mode, press to
enter the Photo Menu.
3) In Playback Mode, press to
enter the Playback Menu.
4) In any Menu, press to enter
the Settings Menu.
5) In any mode, press and hold
to switch modes (Video Mode/
Photo Mode/Playback Mode).
Up
1) In any Menu, press to move
up in the options.
2) In Video Mode, press to
switch the mute on or off.
3) In Photo Mode, press to
zoom in.

3
Down
1) In any Menu, press to move
down in the options.
2) In Photo Mode, press to
zoom out.
SD Card Slot Insert the SD Card into this slot,
with the golden teeth facing the
camera side.
HDMI Connect to a TV to view videos
and photos.
USB Port
1) Connect to a PC using the
included USB cable to view or
transfer videos and photos.
2) Connect to a charger to
charge the dash cam.
SOS/WIFI
1) During recording, press to
immediately save the video and
prevent it from being overwrit-
ten during usage.
2) Press and hold to switch
WiFi.
CHARGING AND POWERING ON
Before using your dash cam, you must charge
the internal battery. You can charge it one
of two ways: by connecting it to your car’s
cigarette lighter, using the included plug, or
connecting the USB cable to a computer. The
green indicator light will be on when charging,
and should be fully charged within 1-2 hours.
The indicator light will turn off when it is fully
charged.

4
Note: The internal battery is meant to extend
the battery’s life in case of sudden loss of pow-
er. When using the dash cam, keep it plugged
in and powered.
When connected to your car’s cigarette lighter,
the dash cam will start up automatically when
the car is started. You can also manually
turn on the dash cam by pressing the Power
Button.
VIDEO MODE
In Video Mode, a video recording icon will ap-
pear in the top left of the screen. Press the OK
Button to start recording. A red light will start to
ash when the dash cam is recording. To stop
recording, press the OK Button.
To enter the Video Mode Menu, press the
Menu/Mode Button. A blue video icon will ap-
pear in the top right corner of the screen. You
can adjust the video resolution, set the length
of loop recording, adjust the exposure, adjust
the G-Sensor sensitivity, set the time stamp
and GPS stamp, track the speed, and more.
In this menu, select Motion Detection to turn
the function on or off. Motion Detection turns
the camera on when it senses movement,
and turns it off when it cannot sense any more
movement.

5
In this menu, select Parking Mode to turn the
function on or off. This option turns the camera
on and records for a minute when sudden
movement is detected (such as being hit while
parked), and automatically locks the video.
PHOTO MODE
When in Video Mode, press and hold the
Menu/Mode Button to switch to Photo Mode.
The photo icon will appear in the top left corner
of the screen. Press the OK Button to take a
picture.
To enter the Photo Mode Menu, press the
Menu/Mode Button. The photo icon will appear
in the top right corner of the screen. Here,
you can change the capture mode, resolution,
sequence, quality, and more.
PLAYBACK MODE
When in Photo Mode, press and hold the
Menu/Mode Button to switch to Playback
Mode. The playback icon will appear in the
top left corner of the screen. Use the Up and
Down Buttons to scroll through the available
les, and press the OK Button to play the
selected video.
When a le is selected, press the Menu/Mode
Button to open the options for that le. Here,
you can delete or protect the le from being
overwritten. You can also select “Slideshow,”

6
the Up and Down Buttons to select an option,
SETTINGS MENU
When in any Menu, press the Menu/Mode
Button again to enter the Settings Menu. In
this menu, you can adjust the WiFi, date and
time, display language, auto power off time,
sound, and more.
In this menu, you can also Format your mem-
-
tion, be sure to back up any important videos
and photos. You can also restore the Default
Settings, which will set your dash cam back to
the factory default, including all features you’ve
adjusted in the three Modes.
GPS
To check GPS information, you must first
install the app. Once the app is installed, go to
File, then Open and select the video file you
wish to view.

iOS users can download the app from the Apple
app store by searching for “Road Cover
Eye1Pro” app and then downloading.
Android users can download the app from the
Google play store by searching for “Road Cover
Eye1Pro” app and then downloading.

8
TROUBLESHOOTING
Cannot take picture or record video.
Check if there is enough space on the SD
card, and consider deleting some locked les
or formatting the SD card.
Stopping automatically while recording.
Check that your SD card is a high-speed Class
10 card with SDHC compatibility. Lower class-
es of cards will have difculty recording in HD.
“Wrong le” appears when replaying a
photo or video.
The le is incomplete because of an SD card
error, back up all important les and format the
SD card.
Fuzzy image.
Check if the lens is smudged or dirty, and
clean with a microber cloth.
Dark image when shooting a scene featur-
ing sky or water.
Adjust the EV exposure in the Video Mode
Menu or the Photo Mode Menu.
Horizontal stripes appear in the image.
Change the Light Frequency option to either
60HZ or 50HZ.

9
Display: 2.4” LCD Screen
Lens: F 1.8, 130oA+ HD ultra wide angle
Photo Resolution:
High resolution
Medium resolution
Low resolution
Video Format: H.264, MP4
Photo Format: JPG
Memory: SD Card, Class 10+, max. 64 GB.
Power: 5V 1.5A
Battery: Built-in Li-Ion Battery
SPECIFICATIONS
Video Resolution:
2K UltraHD 30FPS
1296p SuperHD 30FPS
1080p FullHD 60FPS
(default setting)
1080p FullHD 30FPS
720p HD 120FPS
720p HD 30FPS

10
SUMMIT CE GROUP ONE YEAR LIMITED WARRANTY
SUMMIT CE GROUP LIMITED WARRANTY (“Warranty”) ―For Product
Categories Listed in Chart Below (as applicable, “Product”) Before returning your
Product for service under this Warranty, please (i) read the instruction manual
carefully. If you are still having trouble with your Product, please contact Technical
Support at support@cddashcams.com
Warning: Some Products may contain components that are small enough to be
swallowed. Please keep out of reach of children.
Subject to the terms and conditions herein, SUMMIT CE GROUP LLC
(hereinafter called “SUMMIT CE GROUP”) warrants to the original purchaser
of the Product (“Customer”) that for the applicable Warranty Period listed below,
the Product will be free from defects in material or workmanship under normal,
non-commercial use (“Defects”). Warranty Period encompasses, as listed below,
separate “Coverage Periods” for Parts and Labor, each Coverage Period for one
year, to begin from the original date of Customer purchase. If Customer returns
a defective Product (or any component thereof) during the applicable Warranty
Periods for Parts and Labor (as applicable) either: (i) repair the Product (or, as
applicable, any component thereof) or (ii) replace the Product (or, as applicable,
any component thereof) with a new or refurbished Product (or, as applicable, any
component thereof), in either case free of charge to Customer for Parts and/or
Labor (as
applicable shipping charges (noted below), for which the Customer is responsible.
The foregoing states the Customer’s exclusive remedy and SUMMIT CE
GROUP’s sole liability for breach of the limited warranty contained herein.
component thereof) that has been subject to or Defects resulting from: (a) any
neglect or misuse
by a Customer, an accident, improper application, violation
of operating instructions for the Product, any other Customer-induced damage,
or the alteration or removal
or repair to Product (or, as applicable, any component thereof) by any party
other than SUMMIT CE GROUP or a party authorized in writing by SUMMIT
CE GROUP; (c) any damage to Product (or, as applicable, any component
thereof) due to power surges, incorrect electrical voltage,
misconnection to any
device, or malfunction of any device used with the Product (or, as applicable,
any component thereof); (d) cosmetic damage to the Product (or, as
applicable,
any component thereof) caused by normal wear and tear; (e) shipping damage
that occurs while the Product is in transit; (f) damage caused by heat sources,
sunlight, electromagnetic conditions, or other climatic conditions; or (g) any acts of
God. Product is sold to Customer for personal, non-commercial use only. Product
is
not warranted for Customer’s commercial or rental use.
In addition, Product is not warranted against failure, and should not be used by
Customer for any application
where (i) there is a risk that any data stored on
Product will be breached or otherwise compromised, or (ii) the data stored on
Product is relied upon for medical or
lifesaving applications.
SUMMIT CE GROUP disclaims any Warranty for any of the foregoing uses to the

11
fullest extent permitted by law. Customer assumes any and all risks
associated
with such uses of Product, and agrees to indemnify SUMMIT CE GROUP for
any damages claimed against SUMMIT CE GROUP for such uses. EXCEPT
FOR EXPRESS
WARRANTIES STATED ABOVE AND TO THE MAXIMUM
EXTENT PERMITTED BY LAW, THE PRODUCTS ARE PROVIDED “AS
IS”, AND SUMMIT CE GROUP DISCLAIMS ALL OTHER WARRANTIES,
INCLUDING WITHOUT LIMITATION ANY IMPLIED WARRANTY (I) OF
MERCHANTABILITY, (II) OF FITNESS FOR A PARTICULAR PURPOSE, OR
(III) OF NON-INFRINGEMENT OF THIRD PARTY RIGHTS. TO THE MAXIMUM
EXTENT PERMITTED BY APPLICABLE LAW,
IN NO EVENT WILL SUMMIT
CE GROUP BE LIABLE TO CUSTOMER OR ANY THIRD PARTY FOR ANY
INDIRECT, SPECIAL, INCIDENTAL, CONSEQUENTIAL,
EXEMPLARY OR
PUNITIVE DAMAGES, INCLUDING, WITHOUT LIMITATION, ANY LOST
PROFITS OR REVENUES, LOSS OR INACCURACY OF ANY DATA OR COST
OF SUBSTITUTE GOODS, REGARDLESS OF THE THEORY OF LIABILITY
(INCLUDING NEGLIGENCE) AND EVEN IF SUMMIT CE GROUP HAS BEEN
ADVISED OF THE POSSIBILITY OF SUCH DAMAGES, SUMMIT CE GROUP’S
AGGREGATE LIABILITY TO CUSTOMER FOR ACTUAL DIRECT DAMAGES
FOR ANY CAUSE WHATSOEVER SHALL BE LIMITED TO THE CUMULATIVE
PRODUCT FEES PAID BY THAT CUSTOMER FOR THE PRODUCT CAUSING
THE DAMAGES, IF ANY. This Warranty gives Customer specic rights, and
Customer may also have other rights that vary from jurisdiction to jurisdiction. To
obtain
Warranty service, Customer must email SUMMIT CE GROUP Technical
Support prior to making a Product return. Customer must include with Product
return the following items (failure to enclose any of these items may result in a
delay in the processing of your Warranty claim): (i) a dated sales receipt that
indicates the place of purchase,
model number of Product, and amount paid; (ii)
a detailed description of Customer’s problem with Product; (iii) Customer’s full
name, phone number, and return
address, and; (iv) a money order made out to
SUMMIT CE GROUP Electronics Corporation to cover return shipping charges
to US destinations only, for the applicable dollar
amount shown for the Product
in the table above. SUMMIT CE GROUP will not make return shipments to a
P.O. Box. For shipping to international addresses, actual freight will
be charged
to Customer. Return your Product freight-prepaid in its original packaging, or
packaging that affords an equal measure of protection. Please allow 4 to 6 weeks
for the processing of your claim (6 to 8 weeks from November to February).

12
SHIPPING COSTS: The original consumer is responsible for any shipping
charges incurred to ship the Product or part(s) to the authorized service provider,
for diagnosis, repair or replacement.
*US destinations only.
Contact Us at
or call us toll free at
833-227-3274
if you have any questions or
regarding return information.

13
DESCRIPCIÓN DEL PRODUCTO
ES
1) Botón Menú / Modo
2) Botón de arriba
3) Botón SOS/WIFI
4) Botón Abajo
5) Botón OK
6) Botón de encendido
7) Ranura para tarjeta SD
8) Puerto HDMI
9) Puerto USB
10) Micrófono
11) Botón de reinicio
12) Altavoz
13) Cámara
14) Montura
15) Puerto de salida
de TV
16) Pantalla LCD

14
FUNCIONES
Poder
1) Activar: Presione para activar la
función de guión.
2) Apagar: Mantenga presionada la
tecla para apagar la cámara.
Reiniciar Si el dispositivo se bloquea, utilice un
pequeño pasador para presionar este
botón y restablecer la leva de guión.
OK
1)En el modo de video, presione para
iniciar o detener la grabación.
2) En el modo Foto, presione para
tomar una foto.
3) En Menús, presione para conrmar
los ajustes.
4) En el modo de reproducción,
presione para iniciar o detener la
reproducción.
Menú / Modo
1) En el modo de video, presione
para entrar en el menú de video.
2) En el modo Foto, presione para
ingresar al menú Foto.
3) En el modo de reproducción,
presione para ingresar al menú de
reproducción.
4) En cualquier menú, presione para
entrar en el menú de conguración.
5) En cualquier modo, mantenga
presionado para cambiar de modo
(Modo Video / Modo Foto / Modo
Reproducción).
Arriba
1) En cualquier Menú, presione para
subir las opciones.
2) En el modo de video, presione
para encender o apagar el mudo.
3) En el modo Foto, presione para
acercar.

15
Abajo
1) En cualquier menú, presione
para desplazarse hacia abajo en las
opciones.
2) En el modo Foto, presione para
alejar.
Ranura para Tarjeta
SD
Inserte la tarjeta SD en esta ranura,
con los dientes dorados mirando
hacia la cámara.
HDMI Conéctese a un televisor para ver
videos y fotos.
Puerto USB
1) Conéctese a un PC usando el ca-
ble USB incluido para ver o transferir
videos y fotos.
2) Conéctese a un cargador para
cargar la cámara.
SOS/WIFI
1) Durante la grabación, presione
para guardar inmediatamente el
video e impedir que se sobrescriba
durante el uso.
2) Presione y mantenga presionado
para cambiar de WiFi.
CARGA Y ENCENDIDO
Antes de usar su leva de guión, debe cargar la
batería interna. Puede cargarlo de dos maneras:
conectándolo al encendedor de su coche, utilizando
el enchufe incluido o conectando el cable USB a
una computadora. El indicador luminoso verde se
encenderá al cargarse y deberá estar completamente
cargado dentro de 1-2 horas. La luz indicadora se
apagará cuando esté completamente cargada.

16
Nota: La batería interna está destinada a prolongar
la vida de la batería en caso de pérdida repentina de
energía. Cuando utilice la leva de guión, manténgala
enchufada y encendida.
Cuando se conecta al encendedor de cigarrillos
del coche, la leva del tablero se pondrá en marcha
automáticamente cuando se arranque el coche. Tam-
bién puede activar manualmente la cámara de trazos
presionando el botón de encendido.
MODO DE VÍDEO
En el modo de vídeo, aparecerá un icono de
grabación de vídeo en la parte superior izquierda
de la pantalla. Pulse el botón OK para iniciar la
grabación. Una luz roja comenzará a parpadear
cuando se graba la cámara de trazos. Para detener
la grabación, pulse el botón OK.
Para entrar en el Menú de Modo de Video, presione
el botón de Menú / Modo. Aparecerá un icono de
vídeo azul en la esquina superior derecha de la
pantalla. Puede ajustar la resolución de vídeo,
ajustar la duración de la grabación de bucle, ajustar
la exposición, ajustar la sensibilidad del sensor G,
establecer la marca de tiempo y el sello de GPS,
seguir la velocidad y más.
En este menú, seleccione Detección de movimiento
para activar o desactivar la función. La detección
de movimiento enciende la cámara cuando detecta
movimiento y la apaga cuando no detecta más
movimiento.

17
En este menú, seleccione Modo de estacionamiento
para activar o desactivar la función. Esta opción enci-
ende la cámara y registra durante un minuto cuando
se detecta movimiento repentino (por ejemplo, cuan-
do se golpea mientras está estacionado) y bloquea
automáticamente el vídeo.
MODO FOTO
Cuando esté en modo de video, mantenga presiona-
do el botón de menú / modo para cambiar al modo
de foto. El icono de la foto aparecerá en la esquina
superior izquierda de la pantalla. Presione el botón
OK para tomar una foto.
Para entrar en el menú de modo de foto, presione el
botón de menú / modo. El icono de la foto aparecerá
en la esquina superior derecha de la pantalla. Aquí,
puede cambiar el modo de captura, resolución,
secuencia, calidad y más.
MODO DE REPRODUCCIÓN
Cuando está en el modo Foto, presione y mantenga
presionado el botón Menú / Modo para cambiar al
modo Reproducción. El ícono de reproducción apare-
cerá en la esquina superior izquierda de la pantalla.
Utilice los botones Arriba y Abajo para desplazarse
por los archivos disponibles y presione el botón OK
para reproducir el video seleccionado.
Cuando se selecciona un archivo, presione el botón
Menú / Modo para abrir las opciones para ese
archivo. Aquí, puede eliminar o proteger el archivo de
sobrescribirse. También puede seleccionar “Present-
ación de diapositivas,”

18
que recorrerá los archivos disponibles. Utilice los
botones Arriba y Abajo para seleccionar una opción y
pulse el botón OK para conrmarla.
MENÚ DE CONFIGURACIONES
Cuando en cualquier menú, presione nuevamente
el botón de menú / modo para entrar en el menú de
conguración. En este menú, puede ajustar el WiFi,
la fecha y la hora, el idioma de la pantalla, el tiempo
de apagado automático, el sonido y mucho más.
En este menú, también puede Formatear su tarjeta
de memoria. Esto borrará todos los archivos de la
memoria, incluso los archivos bloqueados. Antes
de realizar esta acción, asegúrese de realizar una
copia de seguridad de los vídeos y fotos importantes.
También puede restaurar la conguración prede-
terminada, que establecerá su guión de nuevo a la
conguración predeterminada de fábrica, incluyendo
todas las características que ha ajustado en los tres
modos.
GPS
Para comprobar la información del GPS, primero
debe instalar el reproductor. Enchufe su came de la
rociada en una computadora, e instale el jugador vid-
eo modicado para requisitos particulares. Una vez
instalado el reproductor, vaya a Archivo, luego Abrir y
seleccione el archivo de vídeo que desea ver.
Other manuals for Eye1Pro CDC-632
1
Table of contents
Languages:
Other Car and Driver Dashcam manuals

Car and Driver
Car and Driver CDC609 User manual

Car and Driver
Car and Driver ZX-1222 User manual

Car and Driver
Car and Driver CDC-560 User manual

Car and Driver
Car and Driver CDC-634 User manual

Car and Driver
Car and Driver Eye1Pro CDC-632 User manual

Car and Driver
Car and Driver CAD-BUC100 User manual

Car and Driver
Car and Driver INTELLIDASH+ DU900 User manual

Car and Driver
Car and Driver EAGLEEYE CDC-570 User manual

Car and Driver
Car and Driver MINIOPRO CDC-628 User manual

Car and Driver
Car and Driver CDC-629 User manual