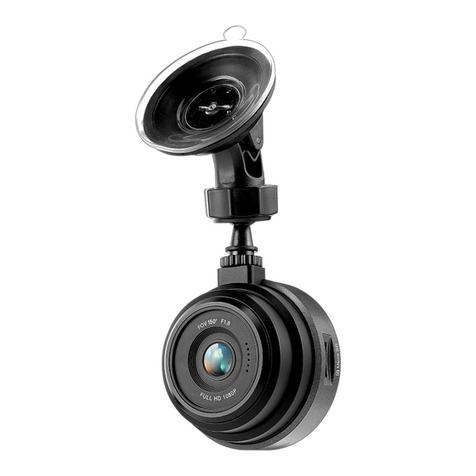
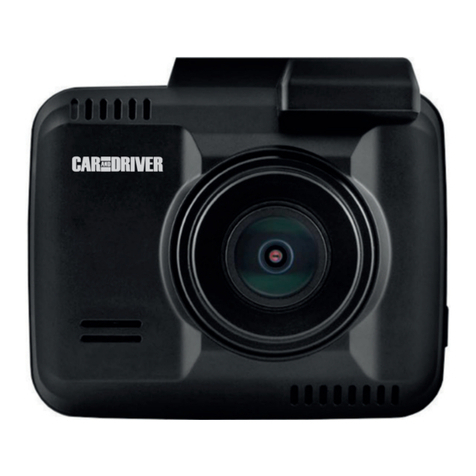
Car and Driver CDC-E4000 User manual

4K UHD DASH CAM
CDC - E4000
User Manual Manual de usuario
4K UHD
4K UHD WDRPANTALLA IPS DE 3 ’’ GRABACIÓN EN BUCLE SUPER AMPLIO ÁNGULO
3’’ IPS SCREEN LOOP RECORDING SUPER WIDE ANGLE WDR

Table of Contents
Precautions and Notices...............................................................................................2
1. Basics.........................................................................................................................3
1-1 In the Box.......................................................................................................................................3
1-2 Buttons and Parts........................................................................................................................4
2. Getting Started..........................................................................................................5
2-1 Inserting a memory card..........................................................................................................5
2-2 Mounting the Dash Cam..........................................................................................................5
2-3 Connecting the Dash Cam to power supply........................................................................7
3. Operations.................................................................................................................8
3-1 Turning the device on/off.........................................................................................................8
3-2 Date and Time settings............................................................................................................9
3-3 Video Recording Mode...........................................................................................................10
3-3-1 Continuous recording..........................................................................................................10
3-3-2 Manual recording................................................................................................................10
3-4 Playback Mode........................................................................................................................10
3-5 Connecting to Computer.........................................................................................................11
3-5-1 Playback or backup on your computer ............................................................................11
3-5-2
Using as webcam
....................................................................................................................11
3-6 Formatting a memory card....................................................................................................12
4. Settings....................................................................................................................12
Video Resolution...................................................................................................................12
Photo Resolution...................................................................................................................12
Loop Recording......................................................................................................................12
Exposure..................................................................................................................................12
WDR.........................................................................................................................................13
Parking Monitor.....................................................................................................................13
G Sensor..................................................................................................................................13
Sleep Timer.............................................................................................................................13
Language.................................................................................................................................14
Tones........................................................................................................................................14
Record Audio..........................................................................................................................14
Motion Detection..................................................................................................................14
Frequency................................................................................................................................15
Reserve Power........................................................................................................................15
Date/Time..............................................................................................................................15
Format......................................................................................................................................15
Default Setting.......................................................................................................................15
Version.....................................................................................................................................15
Specifications..............................................................................................................16
FCC Statement.............................................................................................................17
Notice...........................................................................................................................17
SUMMIT ELECTRONICS LLC One Year Limited Warranty.........................................18
English
1 EN


Precautions and Notices
• Due to local laws and vehicle safety considerations, do not manually operate
the device while driving.
• Keep the windshield and the Dash Cam lens clean for optimal video quality.
If there is a foreign object attached to the lens, this might reduce the quality
of the recorded videos.
• Before attaching to your windshield, please check in with your local DMV
about trac laws that dictate the positioning/method of mounting the device.
• Keep the device away from excessive heat, such as direct sunlight , fire or
the like.
• Use original or certified cables.
• Do not use any corrosive cleaner/oil to clean.
• Keep out of reach of children. It contains small parts which may be a choking
hazard.
• Observe local laws and regulations while using the device.
• To prevent damage to your device’s parts or internal circuits, do not use it in
dusty, smoky, damp or dirty environments.
• Do not use, store or transport the device where flammables or explosives are stored.
Using your device in these environments increases the risk of explosion or fire.
• Car and Driver is NOT responsible for the loss of any data/content during
operation.
• Car and Driver does NOT guarantee recording of accidents where the impact
may cause the device to be damaged.
• Install the device near your vehicle’s rear-view mirror to obtain the best
open-field view.
• Do NOT install the Dash Cam in a location that will obstruct your view of the
road while you’re driving.
• Make sure that the lens is within wiping range of your windshield wipers to
ensure a clear view even when it rains.
• Do not touch the lens with your fingers. Finger grease left on the lens will
result in unclear videos or snapshots. Clean the lens on a regular basis.
• Do not install the device on a tinted window. Doing so may damage the tint
film. Make sure that the camera’s view is not hindered by a tinted window.
• For some vehicles, a DC power socket will keep providing power after the
engine is turned o. To avoid draining your car battery, please manually
unplug the Dash Cam when the engine is turned o.
• Do not disassemble this device.
• Do not expose this device to rain or moisture or submerge in water.
• Ideal temperatures are 0°C to 35°C. Avoid extreme temperatures.
2 EN

1. Basics
1-1 In the box
CDC-E4000 Mounting option 1: Suction Mount
Mounting Option 2:
3M Adhesive Mount
TF card
USB Car power
adapter Charging cable
USB- TYPE C cable
Tool for tucking wire
User manual
Cable clips
3 EN

1-2 Buttons and Parts
Front View
Rear View
No. Definition Description
1 Magnetic
Mounting slot The magnetic mount is inserted here
2 Type C port For DC power input or connecting to computer.
3 Power button
Press and hold for 1 second to manually turn the device on/o.
4 LED Indicator Indicates the device operating status.
5 Rear camera jack For optional backup Camera, not available in all regions
6 TF card slot Slot for included memory card.
7 Camera Lens Front facing camera for video recording.
8 Speaker For audio sound output
9 Reset button Press to restore all the system settings to factory defaults.
10 Microphone For recording audio.
1
5
6
2
3
4
10
78
9
4 EN

2-2 Mounting your Dash Cam
Method 1: Mounting your Dash Cam with suction cup.
1. Angle the mount so that it can slide into the magnetic
slot on top of the camera. Align the magnets of the
mount with the camera’s magnetic contacts and slide
it into place. Then remove the protective film from the
camera lens and the protective film from the suction
cup.
You can mount the Dash Cam with either of these methods:
2. Getting started
2-1 Inserting a memory card
Class 10 or higher TF memory card with a storage capacity of 8GB - 256GB must be
used.
1. As shown in the illustration, hold the edge of the card, and insert it into the slot, with
the metal contacts facing up. Push until you hear a click.
To remove the TF memory card, gently push on the edge of the card in until it clicks
out from the slot, then pull out the card.
Note: Make sure the contacts of the
TF memory card are facing the same
direction as the display.
Inserting a TF card
Do not apply excessive force to the card or attempt to insert it in the
wrong direction. This may cause damage to the card and the card slot.
Note
5
-
Note
5 EN

6 EN
2. Find a good spot on the windshield to install the Dash Cam, and clean the area.
NOTE: The view should be unobstructed, and not blocking the drivers view of the road.
3. Press the mounts Suction Cup into the windshield, and turn the lock clockwise to
secure it in place.
4. Turn the knob of the mount to adjust the camera’s angle. Make sure the Dash Cam
remains level with the vehicle and the road. Turn the Dash Cam on to check the camera
angle.
Suction
Cup
Lock
Knob
Method 2: Mounting your Dash Cam with 3M Adhesive Mount.
1. Unscrew counterclockwise to remove the suction cup from the mount.
2. Attach the 3M Adhesive Mount to the magnetic mount, and make sure the
screw holes are aligned. Screw them tightly counterclockwise.
1 2
3. Angle the mount so that it can slide into the magnetic
slot on top of the camera. Align the magnets of the
mount with the camera’s magnetic contacts and slide
it into place. Then remove the protective film from the
camera lens and the protective film from the suction
cup.

7 EN
1. Connect one end of the supplied USB - Type C cable to the CDC-E4000’s Type
C port, and the other end to the supplied car power adapter. Plug the Car power
adapter into your car’s DC power outlet.
2. Route the power cable around the ceiling/passenger seat so that it does not
interfere with driving. Included cable clips can be used to secure the cables out
of harms’ way. Remove the film from the adhesive side to stick the cable clips on
the dashboard along the routing way, then place the cable into the clip and press
in to fix it.
You may choose to tuck the cable with included tool between the paneling
of your windshield and/or A-pillar space if available.
Make sure that the cable routing does not interfere with your car’s airbags
or other safety features.
4. Find a good spot on the windshield to install the Dash Cam, and clean the area.
NOTE: The view should be unobstructed, and not blocking the drivers view of the road.
5. Remove the film from the adhesive side, and then stick the mount onto the wind-
shield, make sure it is firmly adhered.
6. Turn the knob of the mount to adjust the camera’s angle. Make sure the Dash Cam
remains level with the vehicle and the road. Turn the Dash Cam on to check the camera
angle.
3M adhesive tape
Knob
Screw
2-3 Connecting the Dash Cam to power supply
Notes
5
-
Note
To your car’s DC
power outlet
To CDC-E4000
Dash Cam’s
Type-C port
Press
USB Car power
adapter (Supplied)

8 EN
3. Operations
3-1 Turning the device on/o
The device will automatically turn on when you start your car’s engine, and
automatically turn o when you shut o your car.
To manually turn your Dash Cam on/o, press and hold the Power button for 2
seconds.
LED
Indicator
LED Indicator on the device
Description
Restarting the Dash Cam
Occasionally, you may need to perform a hardware reset if the Dash Cam stops
responding or if it appears to be “frozen” or unresponsive. To restart the Dash
Cam, press and hold the Power button until the system powers o. Press the Power
button again to turn the Dash Cam on.
If the system does not shut down from holding the Power button, you can do a
forced reboot by inserting a paper clip into the “RESET” button hole on the device.
REC
indicator
Charging
indicator
REC
indicator
Charging
indicator
When the device is charging, the
charging indicator glows blue.
When fully charged, the charging
indicator will turn o.
When you turn on the device, the
REC indicator glows blue. While
recording, the REC indicator will
glow blue to indicate that record-
ing is in progress.

AM
1. When in Video Recording mode, press the Settings icon to go into System
settings, then scroll and select “Date /Time” to enter date and time settings.
2. Press the +/- buttons on the Dash Cam to make changes to date or time, then
press the OK button to confirm.
1
11
9
2
12
3
13
4
14
5
15
6 7 8
10
When done, press the back icon to return to previous menu.
9 EN
3-2 Date and Time Settings
Make sure you set the date and time before recording to “Protect Your Side of The
Story”.
1. Recording status indicator
2. Recording duration
3. Time
4. Loop Recording (Enabled by default)
5. WDR (Enabled by default)
6. UHD (Current Video resolution)
7. TF card is inserted
8. Battery status
9. Date
10. Playback button
11. Camera button
12. Camera recording button
13. System settings button
14. File lock button
15. Audio recording button (Enabled by
default)
Scroll Left/Right

10 EN
3-3 Video Recording Mode
3-4 Playback Mode
By default, the system will automatically begin continuous recording a few sec-
onds after start-up. The icon on the upper left corner of the screen will flash.
The LED light indicator besides the power button should flash red, indicating that
recording is in progress. You can manually stop the recording by pressing this
icon . Pressing it again will restart recording. The recorded video will be saved
under the “DCIM” folder on your Dash Cam’s TF memory card.
• In Recording mode, you can take photos by pressing this icon .
• You can also enable or disable voice recording by pressing this icon on
the bottom right corner of the screen.
• You can lock/unlock a recorded file by pressing this icon .
• When the memory card is full, new videos will record over the oldest videos.
3-3-1 Continuous Recording
Notes
5
-
Note
You can press this icon on the Dash Cam to begin manual recording.
Press this icon again to stop manual recording.
3-3-2 Manual Recording
1. When in Recording mode, press this icon to shift to Playback mode.
2. Press / to select your desired video clip or photo, and press it to start
playback. You can also delete it by pressing this icon . A dialog box will ask to
delete the current file or all. Make sure the file is unlocked before you delete it.
3. Press this icon to lock/unlock your file. The file will be labeled with this
icon When you lock a file, it is protected and cannot be replaced by new files
until you delete the file or reformat the memory card.
4. Press the back icon to exit playback mode.

11 EN
Your Dash Cam can act as a “Removable Disk”; you can copy recorded files for
backup and playback on your computer.
1. Connect your supplied USB- TYPE C cable to the Type C port of the Dash Cam,
and to your computer’s USB Port. Tap Mass Storage, and the Dash Cam should
be recognized by your PC.
2. Click to select your desired recorded files to copy and/or play back on your
computer.
Connect your supplied USB- TYPE C cable to the Type C port of the Dash Cam,
and to your computer’s USB Port. Tap PC Camera on your Dash Cam, and click
the Camera App Icon in the Start menu on your computer to open the Camera,
and the Dash Cam will be identified.
3-5-1 Playback on your computer
3-5-2 Using as webcam
3-5 Connecting to your computer

12 EN
3-6 Formatting TF Memory Card
Video Resolution
Photo Resolution
Loop Recording
Exposure
We recommend you format the TF memory card every 2 weeks to maximize its
lifetime.
To format the memory card, press the Settings icon to enter system settings,
scroll and select Format, then tap the icon and all data will be erased.
Set your video output resolution (3840X2160P 30FPS, 2560X1440P 30FPS,
2304X1296P 30FPS, 1920X1080P 60FPS, 1920X1080P 30FPS).
Set your photo output resolution (4032x3024 12M, 3648x2736 10M,
3264x2448 8M, 2992x1696 5M, 2048x1536 3M, 1920x1080 2M).
Set the length of each video clip for a continuous recording (O, 1 min., 3 min., 5
min.). The default settings is on.
Set or reset the exposure level as desire (+2.0, +5/3, +4/3, +1.0, +2/3, +1/3, +0.0, -1/3,
-2/3, -1.0, -4/3, -5/3, -2.0).
4. Settings
When in Video Recording mode, press the Settings icon to go into System
settings Menu, then scroll and select to enter specific settings.

13 EN
WDR
Parking Monitor
G Sensor
Sleep Timer
The WDR (Wide Dynamic Range) on the device improves the camera’s image quality
under high-contrast lighting conditions where both dimly and brightly lit areas are
present in the field of view. It enables the camera to capture details clearly in both the
poorly and strongly illuminated areas of the video.
The default setting is on.
If the parking monitoring mode is turned on, the device will power o automatically. If
your vehicle is involved in a hit and run while parked, the device will automatically start
up for 15 second recording, then automatically power o again. When the car starts up,
the device will restart
continuous recording.
It can provide around-the-clock protec-
tion and surveillance for the vehicle.
If the G Sensor is turned on, any hard braking/shock/vibration that occurs during
recording device will be automatically locked, ensuring it will not be overwritten.
(Options: O/Low/Medium/High)
Set the Sleep timer (O, 1 Min., 3 Min.,5 Min., 10 Min.) in standby mode. If you set the
Sleep timer to 3 minutes, the Dash Cam will automatically enter sleep mode after 3
minutes of inactivity.

14 EN
Language
Set the system language.
Tones
Turn tones for tapping on/o
Record Audio
Allows you to turn ON and OFF audio recording for video. The default setting is
on.
Motion Detection
1. To enable “Motion Detection”, check the settings menu and make sure “On” is
selected.
2. When enabled, any movement in the camera’s surrounding area will automatically
begin recording. It will only stop recording after it doesn’t see any movement for 20
seconds.
Attention: Please do not use the Motion Detection feature while driving. The recording
will repeatedly play/pause, which will aect the video’s quality and duration.

15 EN
Frequency
Set the light frequency (50Hz, 60Hz).
Reserve Power
When the device is unexpectedly turned o, it can stay on for several seconds.
The amount of time can be customized (O, 5s, 10s, 30s).
Version
Display the system firmware version.
Date/Time
Set the system date and time.
Format
Format the TF memory card to erase all data.
Default Setting
Restores the system settings to factory defaults. Press this icon to confirm.

16 EN
Specifications
Model Name CDC-E4000
Display 3 inch IPS screen
Lens Super wide angle lens
Languages
English/French/Dutch/Spanish/Portuguese/
German/Italian/SimpleChinese/Traditional
Chinese/Hebrew/Japanese
Storage TF memory card, Max 256GB
Video Resolution
3840X2160P 30FPS, 2560X1440P 30FPS,
2304X1296P 30FPS, 1920X1080P 60FPS,
1920X1080P 30FPS
Photo Resolution
4032x3024 12M, 3648x2736 10M,
3264x2448 8M, 2992x1696 5M,
2048x1536 3M, 1920x1080 2M
Video Format MP4
Photo Format JPG
WDR Supported
Microphone Supported
Built-in speaker Supported
Power Input/Output Input: DC 12-24V/2.5A max, Output: DC 5V/4.8A
Battery Capacity Polymer Li Battery 300mAh

17 EN
FCC Statement
This device complies with Part 15 of the FCC Rules. Operation is subject to the fol-
lowing two conditions:
(1) this device may not cause harmful interference, and (2) this device must accept
any interference received, including interference that may cause undesired operation.
Warning: Changes or modifications not expressly approved by the party responsible
for compliance could void the user’s authority to operate the equipment.
Note: This equipment has been tested and found to comply with the limits for a Class
B digital device, pursuant to Part 15 of the FCC Rules. These limits are designed to pro-
vide reasonable protection against harmful interference in a residential installation.
This equipment generates, uses and can radiate radio frequency energy and, if not
installed and used in accordance with the instructions, may cause harmful inter-
ference to radio communications. However, there is no guarantee that interference
will not occur in a particular installation. If this equipment does cause harmful in-
terference to radio or television reception, which can be determined by turning the
equipment o and on, the user is encouraged to try to correct the interference by
one or more of the following measures: (1) Reorient or relocate the receiving anten-
na. (2) Increase the separation between the equipment and receiver. (3) Connect
the equipment into an outlet on a circuit dierent from that to which the receiver is
connected. (4) Consult the dealer or an experienced radio / TV technician for help.
Disclaimer
Notice
All information, design and specifications contained in this manual were correct at
the time of this publication. As the product goes under continuous upgrades and
changes, however, the final device may have slight dierences. The contents of this
manual are subject to change without prior notice, and Summit Electronics LLC will
not be liable for any errors contained herein or for incidental or consequential dam-
ages in connection with the furnishing performance or use of this manual.
This symbol means the product must not be discarded as household waste,
and should be delivered to an appropriate collection facility for recycling.
Follow local rules and never dispose of the product and rechargeable bat-
teries with normal household waste. Correct disposal of old products and
rechargeable batteries helps prevent negative consequences for the envi-
ronment and human health.
CAR AND DRIVERIS A REGISTERED TRADEMARK OF HEARST COMMUNICA-
TION, INC. AND USED UNDER LICENSE BY SUMMIT ELECTRONICS, LLC.
©2021 HEARST COMMUNICATION, INC. ALL RIGHTS RESERVED AND ANY USE
OF SUCH MARKS BY SUMMIT ELECTRONICS LLC IS UNDER LICENSE.
OTHER TRADEMARKS AND TRADE NAMES ARE THOSE OF THEIR RESPECTIVE
OWNERS.
WARNING: CANCER AND REPRODUCTIVE HARM - WWW. P65WARN-
INGS.CA.GOV.

18 EN
SUMMIT ELECTRONICS, LLC LIMITED WARRANTY (“Warranty”) ― For Product
Categories Listed in Chart Below (as applicable, “Product”) Before returning your
Product for service under this Warranty, please (i) read the instruction manual
carefully. If you are still having trouble with your Product, please contact Technical
Support at
Warning: Some Products may contain components that are small enough to be
swallowed. Please keep out of reach of children.
Subject to the terms and conditions herein,SUMMIT ELECTRONICS, LLC warrants to
the original purchaser of the Product (“Customer”) that for the applicable Warranty
Period listed below, the Product will be free from defects in material or workmanship
under normal, non-commercial use (“Defects”). Warranty Period encompasses, as
listed below, separate “Coverage Periods” for Parts and Labor, each Coverage Peri-
od for one year, to begin from the original date of Customer purchase. If Customer
returns a defective Product (or any component thereof) during the applicable War-
ranty Period, SUMMIT ELECTRONICS, LLC will, as its option, during the specified
Coverage Periods for Parts and Labor (as applicable) either: (i) repair the Product
(or, as applicable, any component thereof) or (ii) replace the Product (or, as appli-
cable, any component thereof) with a new or refurbished Product (or, as applicable,
any component thereof), in either case free of charge to Customer for Parts and/
or Labor (as applicable) during the specified Coverage Period only, and excluding
applicable shipping charges (noted below), for which the Customer is responsible.
The foregoing states the Customer’s exclusive remedy and SUMMIT ELECTRONICS,
LLC’s sole liability for breach of the limited warranty contained herein.
This Warranty specifically excludes any Product (or, as applicable, any compo-
nent thereof) that has been subject to or Defects resulting from: (a) any neglect
or misuse by a Customer, an accident, improper application, violation of operating
instructions for the Product, any other Customer-induced damage, or the alteration
or removal of any Product serial number; (b) any modification or repair to Product
(or, as applicable, any component thereof) by any party other than SUMMIT CE
GROUP or a party authorized in writing by SUMMIT ELECTRONICS, LLC; (c) any
damage to Product (or, as applicable, any component thereof) due to power surges,
incorrect electrical voltage, misconnection to any device, or malfunction of any de-
vice used with the Product (or, as applicable, any component thereof); (d) cosmetic
damage to the Product (or, as applicable, any component thereof) caused by normal
wear and tear; (e) shipping damage that occurs while the Product is in transit; (f)
damage caused by heat sources, sunlight, electromagnetic conditions, or other cli-
matic conditions; or (g) any acts of God. Product is sold to Customer for personal,
non-commercial use only. Product is not warranted for Customer’s commercial or
rental use. In addition, Product is not warranted against failure, and should not be
used by Customer for any application where (i) there is a risk that any data stored
on Product will be breached or otherwise compromised, or (ii) the data stored on
Product is relied upon for medical or lifesaving applications.
SUMMIT ELECTRONICS LLC One Year Limited Warranty

WITHOUT LIMITATION ANY IMPLIED WARRANTY (I) OF MERCHANTABILITY,
(II) OF FITNESS FOR A PARTICULAR PURPOSE, OR (III) OF NON-INFRINGEMENT
OF THIRD PARTY RIGHTS. TO THE MAXIMUM EXTENT PERMITTED BY AP-
PLICABLE LAW, IN NO EVENT WILL SUMMIT ELECTRONICS, LLC BE LIABLE TO
CUSTOMER OR ANY THIRD PARTY FOR ANY INDIRECT, SPECIAL, INCIDENTAL,
CONSEQUENTIAL, EXEMPLARY OR PUNITIVE DAMAGES, INCLUDING, WITH-
OUT LIMITATION, ANY LOST PROFITS OR REVENUES, LOSS OR INACCURACY
OF ANY DATA OR COST OF SUBSTITUTE GOODS, REGARDLESS OF THE THEO-
RY OF LIABILITY (INCLUDING NEGLIGENCE) AND EVEN IF SUMMIT ELECTRON-
ICS, LLC HAS BEEN ADVISED OF THE POSSIBILITY OF SUCH DAMAGES, SUM-
MIT ELECTRONICS, LLC’S AGGREGATE LIABILITY TO CUSTOMER FOR ACTUAL
DIRECT DAMAGES FOR ANY CAUSE WHATSOEVER SHALL BE LIMITED TO THE
CUMULATIVE PRODUCT FEES PAID BY THAT CUSTOMER FOR THE PRODUCT
CAUSING THE DAMAGES, IF ANY. This Warranty gives Customer specific rights,
and Customer may also have other rights that vary from jurisdiction to jurisdiction.
To obtain Warranty service, Customer must email SUMMIT ELECTRONICS, LLC
Technical Support prior to making a Product return. Customer must include with
Product return the following items (failure to enclose any of these items may result
in a delay in the processing of your Warranty claim): (i) a dated sales receipt that
indicates the place of purchase, model number of Product, and amount paid; (ii)
a detailed description of Customer’s problem with Product; (iii) Customer’s full
name, phone number, and return address, and; (iv) a money order made out to
SUMMIT ELECTRONICS, LLC Corporation to cover return shipping charges to US
destinations only, for the applicable dollar amount shown for the Product in the
table above. SUMMIT ELECTRONICS, LLC will not make return shipments to a
P.O. Box. For shipping to international addresses, actual freight will be charged to
Customer. Return your Product freight-prepaid in its original packaging, or packag-
ing that aords an equal measure of protection. Please allow 4 to 6 weeks for the
processing of your claim (6 to 8 weeks from November to February).
You must email
SUMMIT ELECTRONICS, LLC
Technical Support prior to making a
return. Please ask if you are unsure of which category your product falls under.
*US destinations only.
SUMMIT ELECTRONICS, LLC disclaims any Warranty for any of the foregoing uses
to the fullest extent permitted by law. Customer assumes any and all risks associ-
ated with such uses of Product, and agrees to indemnify SUMMIT ELECTRONICS,
LLC for any damages claimed against SUMMIT ELECTRONICS, LLC for such uses.
EXCEPT FOR EXPRESS WARRANTIES STATED ABOVE AND TO THE MAXIMUM
EXTENT PERMITTED BY LAW, THE PRODUCTS ARE PROVIDED “AS IS”, AND
SUMMIT ELECTRONICS, LLC DISCLAIMS ALL OTHER WARRANTIES, INCLUDING
19 EN
This manual suits for next models
1
Table of contents
Languages:
Other Car and Driver Dashcam manuals

Car and Driver
Car and Driver CDC-560 User manual

Car and Driver
Car and Driver CDC-634 User manual

Car and Driver
Car and Driver CDC609 User manual

Car and Driver
Car and Driver MINIOPRO CDC-628 User manual

Car and Driver
Car and Driver Eye1Pro CDC-632 User manual

Car and Driver
Car and Driver CAD-BUC100 User manual

Car and Driver
Car and Driver EAGLEEYE CDC-570 User manual

Car and Driver
Car and Driver Copilot CP-1001 User manual

Car and Driver
Car and Driver Eye1Pro CDC-632 User manual

Car and Driver
Car and Driver INTELLIDASH+ DU900 User manual