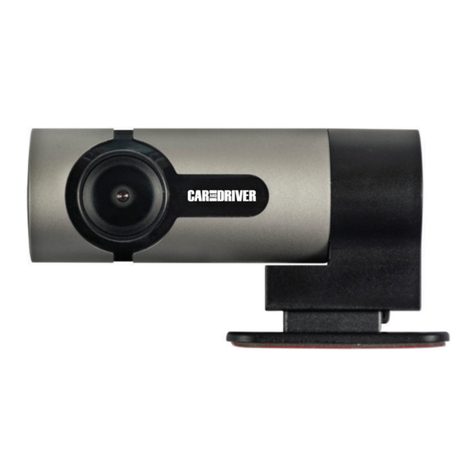
Car and Driver CDC-646 User manual

Road Patrol
1080p Full HD Accident Avoidance System Dash Cam
User Manual
CDC-646

2
Tab le of C on ten ts
FCC NOTICE TO USERS
............................................................................. 3
WARNINGS ............................................................................................... 3
1 INTRODUCTION ...................................................................................... 5
1.1 Features ............................................................................................................. 5
1.2 Package Contents .............................................................................................. 5
2 GETTING STARTED ................................................................................... 6
2.1 Protective Plastic............................................................................................... 6
2.2 Inserting and Removing the Memory Card ..................................................... 6
2.3 Powering the Dash Cam On and Off ................................................................ 7
2.4 Date and Time Setting ...................................................................................... 7
2.5 Installation Guide .............................................................................................. 8
3 PRODUCT OVERVIEW............................................................................... 9
3.1 Menu/Mode Button ......................................................................................... 9
3.2 Up Button ........................................................................................................ 10
3.3 Down Button ................................................................................................... 10
3.4 Power/OK Button ............................................................................................ 10
4 FEATURES AND FUNCTIONS .................................................................... 11
4.1 Recording ......................................................................................................... 11
4.2 Incident Detection .......................................................................................... 11
4.3 Parking Mode .................................................................................................. 11
4.4 Loop Recording ............................................................................................... 12
4.5 Lock Video ....................................................................................................... 12
4.6 Lane Departure Warning ................................................................................ 12
4.7 Forward Collision Warning ............................................................................. 12
4.8 Screen Standby Mode..................................................................................... 12
4.9 Media Playback and Management ................................................................ 13
4.9.1 Playback .................................................................................................... 13
4.9.2 Management ............................................................................................ 13
4.10 Audio Recording ............................................................................................ 14
4.11 Lens LED Ring ................................................................................................ 14
5 MENU .................................................................................................. 15
5.1 Menu Tree ....................................................................................................... 15
5.2 Menu Adjustments and Options .................................................................... 15
5.2.1 Button Audio Feedback ........................................................................... 15
5.2.2 Language................................................................................................... 15
5.2.3 Lane Departure Warning Calibration ...................................................... 15
5.2.4 Reset Default Settings.............................................................................. 16
5.2.5 Format Memory Card .............................................................................. 16
6 SPECS................................................................................................... 17
7 FAQ ..................................................................................................... 17
8 WARRANTY .......................................................................................... 18

3
FCC Notice to Users
Caution: Changes or modifications not expressly approved by the Party responsible for compliance
could void the user’s authority to operate the equipment.
NOTE: This equipm ent has been test ed and found to comply with the limits for a Class B digital
device, pursuant to part 15 of the FCC Rules. These limits are designed to provide reasonable
protection Against harmful interference in a residential installation. This equipment generates,
uses and can radiate radio frequency energy and, if not installedand used in accordance with the
instructions, may cause harmful interference to radio communications, however there is no
guarantee that interference will not occur in a particular installation. If this equipment does cause
harmful interference to radio ortelevision reception, which can be determined by turning the
equipment off and on, theuser is encouraged to try to correct the interference by one or more of
the following measures:
• Reorient or relocate the receiving antenna.
• Increase the separation between the equipment and receiver.
• Connect the equipment into an outlet on a circuit different from that to which thereceiver
is connected.
• Consult the dealer or an experienced radio/TV technician for Help.
The device complies with part 15 of the FCC Rules. Operation is subject to the followingtwo
conditions: (1) this device may not cause harmful interference, and (2) this device must accept any
interference received, including interference that may cause undesired operation.
Warnings
• Do not disassemble the product or
accessories and peripherals as it may damage
the product and will void the Car and Driver
warranty.
• Do not place or store the Dash Cam in child or
pet accessible areas.
• The Dash Cam has adjustable parts that may
be jostled and shift in extreme road
conditions such as unpaved or dirt roads.
Check frequently to ensure the device is
positioned correctly and securely.
• Do not pull, push, insert or bend the power
cable using undue force.
• Do not clean the product using chemical
cleaner or solvents to avoid damaging the
plastic components. Use soft, clean, dry
fabric and gently wipe the Dash Cam.
• Do not place foreign objects on the Dash Cam
or the power cable.
• Only use genuine accessories and peripherals
from Car and Driver. Car and Driver does not
guararntee the safety and compatibility of
peripherals from other manufacturers.
• Do not operate or handle the power cable
with wet hands or in a moist environment.
• Avoid touching the lens or getting foreign
substances on it as that may reduce the
quality of recorded videos.
• The quality of a video might be negatively
affected by weather conditions and the road
environment such as daytime or nighttime
recording, presence of street-lights, tunnels,
and the surrounding temperature or humidity.
• Power may be supplied to the Dash Cam even
if the ignition is turned off depending on the
make and model of your car. This may result in
vehicle battery depletion.
• Keep the Dash Cam within the temperature
range specified in this manual or the device
may not function as intended and cause, at
extreme temperatures, permanent physical
damage which is not covered by warranty.
• Install this Dash Cam in a location where it has
an unobstructed view of the road and
surroundings but does not interfere with the
driver's view. Consult your local and regional
laws regarding the use of a mounted device
on your windshield.
• Do not apply undue force when pushing the
buttons on the device.
• Lane Departure and Forward Collision
Warning Systems are a driver's aid only. They
do not activate in every driving, traffi c,
weather, or road condition. The driver bears
ultimate responsibility for ensuring that the
vehicle is driven safely and that applicable
laws and road traffic regulations are followed.

4
• Car and Driver is not responsible for the loss
of any recorded video.
• Do not insert foreign objects or liquids into or
put them on the Dash Cam and accessories; it
may cause device malfunction, fire, or electric
shock.
• Handle with care. Dropping, shocking,
shaking, or mishandling the product in any
way may result in device malfunction or
damage.
• Do not place the device in direct sunlight or
extreme conditions where the product is
exposed to high temperatures or humidity.
• This device is only intended to be used inside
a vehicle.
• Keep the windshield clean of dirt and
smudges for optimal video quality.
• Although the device is designed to withstand
the high impact of a collision, Car and Driver
does not guarantee recording of accidents
when the device is damaged or rendered
unusable.
• Keep the power cable away from your
vehicle’s heater or other hot objects.
• Do not change the device’s settings or
position while driving your vehicle.
• Make sure that you use a power cable with
the correct connector and the connection is
secure.
• Do not use a damaged power cable.
• Do not cut the power cable, or modify it in
any way.

5
1 Introduction
Thank you for purchasing a Car and Driver Dash Cam. This
device is specifically designed for recording real-time video and
audio while driving.
Features
• 1080p Full HD Dash Cam
• Advanced Driver Assistance Systems (ADAS)
o Forward Collision Warning System (FCWS)
o Lane Departure Warning System (LDWS)
• 3.7” IPS Color Screen
• High Dynamic Range (HDR)
• 145° Wide Angle Lens
• Incident Detection
• Parking Mode
• Motion Detection
• Supports up to 128 GB Memory Card
• Loop Recording
• G-Sensor
• Audio Recording
• Theft Deterrent Red LED Light
Package Contents
The package contains the following items. If there are any
missing or damaged items, contact your dealer immediately:
• CDC-646 Road Patrol Dash Cam
• 8GB Memory Card
• 12 ft. Car Adapter with USB Charging Port
• Dash Mount
• User Manual

6
2 Getting Started
Protective Plastic
Remove the thin sheet of protective plastic covering the
screen and front lens of the camera.
Inserting and Removing the Memory Card
Insert the memory card with the gold contacts facing
away from the screen of the Dash Cam. Push the memory
card in until it clicks into place. Use Class 10 or above
memory card for this Dash Cam. We recommend you
format your memory card before using your Dash Cam for
the first time. (For instruction on how to format memory
cards please proceed to 5.2.5 Format Memory Card on
page 16)
User Manual
Suction
Mount
Dash Cam
12 ft. Car Adapter with USB
charging port
8GB Memory
Card

7
To remove the memory card, press down on the exposed
edge of the memory card until you hear or feel a click.
Remove your finger and the card will pop out and away
from the device. You can then easily remove it from the
Dash Cam.
Powering the Dash Cam On and Off
Once the vehicle engine is started, the Dash Cam
automatically turns on and begins recording.
When you shut your car off, the Dash Cam automatically
saves the current recording and turns off 5 seconds later.
To manually turn on the power, press the Power/OK
button. To turn it off, press and hold the Power/OK button
for 2 seconds.
Date and Time Setting
While video is not being recorded, press the
Menu/Mode button to enter the Settings menu and
using the Up and Down buttons navigate to General
Settings then Date and Time. Press the Power/OK
NOTE:
• Do not remove or insert the memory card when the device
is powered on. This may damage the memory card.
• It is recommended to use up to a 128 GB, Class 10 speed or
above memory card.
• It is recommended to format the memory card before initial
use.
NOTE:
On some vehicles, the power socket will continue providing
power after the engine is turned off. If this is the case, to avoid
draining your car battery, please manually unplug the Dash Cam
when the engine is turned off.

8
button to move on to the next option and save changes
when done.
Installation Guide
• Make sure that your vehicle is parked, and the
engine is not running.
• Mount the Dash Cam onto your windshield.
• Remove the stickers from the adhesive car cable clips
to expose the adhesive. Then, firmly press along the
edge of the windshield to avoid obstructing the
drivers view.
• Plug the car adapter into the cigarette lighter socket.
Next, place the cable into the adhesive car cable clips.
Finally, connect the Micro USB connector to the Dash
Cam.
• Check the Dash Cam to ensure that it is recording the
portion of the road you desire. If it is not, adjust
accordingly.
• Start your engine and double check that the device is
installed and functioning properly.
NOTE:
The Red LED indicator on the right of the screen will light up
if the device is installed properly. The device will start
recording automatically, and the indicator will begin flashing.
Pay attention to the image on the LCD panel. If the image is
inverted contact us immediately.
The Red LED indicator on the right of the
screen will light up if the device is installed
properly. The device will start recording
automatically, and the indicator will begin
flashing. Pay attention to the image on the
LCD panel. If the image is inverted contact
us immediately.
NOTE:
Be sure to set the time and date immediately when setting up your
device; if you don’t, you will not have the correct incident data if
you get into an accident.

9
3 Product Overview
Menu/Mode Button
Menu
While the device is NOT recording a video, press the
Menu/Mode button to enter the Menu settings (if the Dash
Cam is currently recording press the Power/OK button to
stop recording). Press the up or down button to select your
desired Menu/Mode option, and the OK button to confirm.
After confirming, press the Menu/Mode button to go back
or exit.
Mode
While the device is NOT recording video, hold the
Menu/Mode button to change modes (if the Dash Cam is
currently recording press the Power/OK button to stop
recording). The mode cycle order is:
• Video Mode
• Photo Mode
• Playback Mode (see 4.9 Media Playback and
Management on page 13)

Back/Exit
While playing a video or viewing an image under Playback
Mode, press the Menu/Mode button to switch back to File
Browsing Mode. Hold Menu/Mode while browsing to cycle
to Video Recording Mode.
Lock File
While recording video, hold the Menu/Mode button to
lock the current loop.
Up Button
While navigating a menu or in Playback mode, press the Up
button to navigate up the page.
Down Button
While navigating a menu or in Playback mode, press the
Down button to navigate down the page.
Power/OK Button
Power Toggle
To turn your device on or off, press the Power button for 3
seconds. If the device has a memory card inserted, videos
and user settings will be saved automatically when the
device is turned off.
OK
When navigating a menu on the device, press the Up/Down
buttons to browse, then select an option by pressing the
Power/OK button.
Take a Photo
While in Picture Mode press the Power/OK button to
capture a picture from the camera.

11
4 Features and Functions
Recording
To manually begin or end recording press the Power/OK
button. The video recording icon in the upper left corner
of the screen as well as an LED indicator on the top right
of the Dash Cam off the screen will flash, to indicate that
recording is in progress.
When the vehicle engine starts up the Dash Cam
automatically turns on and begins recording. Recording
will automatically stop when the engine is switched off.
Incident Detection
In the event of a vehicle collision while already recording,
the Dash Cam’s G-sensor will detect the collision and lock
the current loop. A Lock icon will appear on the upper
mid-left portion of the screen to indicate that this feature
has activated. The locked emergency content will be
placed in a new file. It will not be overwritten by normal,
cyclical recording.
Parking Mode
If your vehicle is parked, off, and someone hits it, the G-
sensor will detect the collision and the camera will
automatically turn on and begin recording to capture the
offending driver’s license plate and vehicle information.
NOTE:
On some cars, the recording will continue when the engine is
switched off. If this happens, do one of the following:
• If possible, manually turn off the cigarette lighter socket.
• Remove the car adapter from the cigarette lighter socket.

12
Loop Recording
Videos are recorded in short segments which reduces
the file size of your recordings. Recording smaller files
better facilitates file transfers and enables the
overwriting of old videos without losing important data.
Videos that are locked manually, through the Parking
Mode or Incident Detection features will not be
overwritten.
Lock Video
To ensure your current vi deo c an’t be overwritten, whi le
recording, press and hold the Menu/Mode button to lock
the current loop. A lock icon will appear on the screen, to
indicate that this portion of the video will not be
overwritten.
Lane Departure Warning
While you’re driving, your device will sound an alarm if
your vehicle drifts or suddenly veers out of your lane.
(For instructions on how to calibrate the Lane Departure
Warning proceed to 5.2.3 Lane Departure Warning
Calibration on page 15.)
Forward Collision Warning
While you’re driving, the device will sound an alarm when
your front bumper is within collision range of an
approaching vehicle.
Screen Standby Mode
To make the Dash Cam screen go to sleep automatically

13
after a certain amount of time—but continue
recording—press the Menu/Mode button, navigate to
Screen Standby Mode and select the desired option.
Media Playback and Management
4.9.1 Playback
Hold the Menu/Mode button twice when the device is not
recording video to cycle to Playback mode. Use the Up
and Down buttons to cycle between Video, Event and
Photo files and Press Power/Ok to confirm. Navigate to a
file you want to play and press the Power/OK to begin
playback. To exit Playback mode, hold the Menu/Mode
button.
While playing a video in Playback mode, press the Up or
Down button to fast-forward or rewind at 2x speed.
Subsequent presses of the Up or Down button will
increase the speed to 4x and 8x respectively.
4.9.2 Management
Deleting Media
To delete files, enter Video Playback or Image
Playback Mode by holding the Menu/Mode Button.
Navigate to the specific file you want to delete, press
the Menu/Mode Button and select Delete.
• To delete a specific video or image select Delete One,
press the Power/OK button and navigate to the file
you would like to delete. Press the Power/OK button
then select Yes.

14
• To del ete all videos or i mages, first select Delete All,
and select Videos or Images. Next, press the
Power/OK button. Finally, select Yes.
Locking Media
To lock files—and ensure they won’t be overwritten
when your memory card runs out of space—enter
Video Playback or Image Playback Mode by holding
the Menu/Mode Button. Then, press the Menu/Mode
Button and select Lock.
• To Loc k or Unloc k a spec ific video or image select
Lock One, press the Power/OK button and navigate
to the file you would like to lock. Press the
Power/OK button then select Yes .
• To Lock or Unlock all videos or images select Lock
All or Unlock All, and select Videos or Images Press
the Power/OK button then select Yes .
Audio Recording
While recording video, press the Up button to toggle
recording audio. A microphone with a red line through it
will appear if audio is NOT recording.
Audio recording can also be toggled through the menu
under video settings.
Lens LED Ring
While recording video, press the Up button to toggle the
Lens LED Ring on or off. The Lens LED Ring can also be
toggled through the menu under video settings.

15
5 Menu
Menu Tree
The default setting is bolded in the table below
Menu Adjustments and Options
5.2.1 Button Audio Feedback
To tog gle Button Audio Feedback on or off, while not
recording, navigate to Video Settings by pressing the
Menu/Mode button twice. Then, select Button Audio
Feedback and select the desired option.
5.2.2 Language
To select a new language, navigate to General Settings,
select Language, then select the desired option.
Menu Option
Available Options
Resolution
1080p Full HD 1920 x 1080 30fps
Loop Recording
1 Minute
3 Minutes
LCD Power Saver
Off
1 Minute
3 Minutes
Lens Ring LED
On
Off
Audio Recording
On
Off
Parking Mode
On
Off
Lane Departure Warning
On
Off
Forward Collision Warning
On
Off

16
5.2.3 Lane Departure Warning Calibration
To cali brate the Lane Departure Warning on your Dash
Cam, navigate to General Settings, then select Lane
Departure Warning Calibration. Attach your Dash Cam
onto the windshield of your car and use the Up and
Down buttons to make adjustments and the Power/OK
button to commit to changes.
You must adjust the triangle so that the vertex is on the
horizon and the the 2 bottom angles are at either end
of the sides of your car. Press the Power/OK button
when the position is properly set.
5.2.4 Reset Default Settings
To r eset to default settings, navigate to General Settings
then select Reset Default Settings, then select Yes.
5.2.5 Format Memory Card
To format your memory Card, navigate to General
Settings, then select Format Memory Card, and
confirm.

17
6 Specs
Video Resolution: 1920x1080 @ 30 fps
Screen Size: 3.7" IPS
Field of View: 145°
Memory Card Capacity: Up to 128 GB
Lens Aperture: F1.8
Storage and Compression: H.264
Video Format: MOV
Image Format: JPEG
Storage Temperature: -22°F to 158°F
Operating Temperature: 32°F to 122°F
Operating Humidity: 15-65% RH
Standard Voltage: DC5V
7 FAQ
Q: Where on my windshield should I mount the Dash Cam?
A: It is recommended that you mount the Dash Cam as close
to the center of windshield as possible. However, you should
consult your local DMV for your area’s legal Dash Cam
positioning.
Q: Why does my Dash Cam stop recording after a certain
amount of time?
A: Your memory card may be full of locked files and needs to
be formatted before you use it again. Because 1080p Full HD
videos are large files, we recommend you to manually format
your card every 1-2 weeks.
Q: Why do you recommend a Class 10 memory card or
above?

18
A: 1080p HD cameras have a larger data flow and need a
memory card with faster writing speed. If lower than Class 10
cards are used, they may cause the Dash Cam to freeze or
cause issues with recording and erasing.
Q: How long will a battery last after a full charge?
A: In Standby Mode when the car is off, not supplying power
to the Dash Cam, and Parking Mode is on the Dash Cam will
detect accidents and begin recording for up to 30 days on one
full charge.
8 Warranty
SUMMIT CE GROUP LIMITED WARRANTY (“Warranty”) ― For Product Categories Listed in
Chart Below (as applicable, “Product”) Before returning your Product for service under this
Warranty, please (i) read the instruction manual carefully. If you are still having trouble with
your Product, please contact Technical Support at support@cddashcams.com
Warning: Some Products may contain components that are small enough to be
swallowed. Please keep out of reach of children.
Subject to the terms and conditions herein, SUMMIT CE GROUP LLC (hereinafter called
“SUMMIT CE GROUP”) warrants to the original purchaser of the Product (“Customer”) that
for the applicable Warranty Period listed below, the Product will be free from defects in
material or workmanship under normal, non-commercial use (“Defects”). Warranty Period
encompasses, as listed below, separate “Coverage Periods” for Parts and Labor, each
Coverage Period for one year, to begin from the original date of Customer purchase. If
Customer returns a defective Product (or any component thereof) during the applicable
Warranty Period, SUMMIT CE GROUP will, as its option, during the specified Coverage
Periods for Parts and Labor (as applicable) either: (i) repair the Product (or, as applicable, any
component thereof) or (ii) replace the Product (or, as applicable, any component thereof)
with a new or refurbished Product (or, as applicable, any component thereof), in either case
free of charge to Customer for Parts and/or Labor (as applicable) during the specified
Coverage Period only, and excluding applicable shipping charges (noted below), for which the
Customer is responsible. The foregoing states the Customer’s exclusive remedy and SUMMIT
CE
GROUP’s sole liability for breach of the limited warranty contained herein.
This Warranty specifically excludes any Product (or, as applicable, any component thereof)
that has been subject to or Defects resulting from:
(a) any neglect or misuse by a Customer, an accident, improper application, violation of
operating instructions for the Product, any other Customer-induced damage, or the alteration
or removal of any Product serial number;
(b) any modification or repair to Product (or, as applicable, any component thereof) by any
party other than SUMMIT CE GROUP or a party authorized in writing by SUMMIT CE GROUP;
(c) any damage to Product (or, as applicable, any component thereof) due to power surges,
incorrect electrical voltage, misconnection to any device, or malfunction of any device used

19
with the Product (or, as applicable, any component thereof);
(d) cosmetic damage to the Product (or, as applicable, any component thereof) caused by
normal wear and tear;
(e) shipping damage that occurs while the Product is in transit;
(f) damage caused by heat sources, sunlight, electromagnetic conditions, or other climatic
conditions; or
(g) any acts of God. Product is sold to Customer for personal, non-commercial use only.
Product is not warranted for Customer’s commercial or rental use. In addition, Product is not
warranted against failure, and should not be used by Customer for any application where
(i) there is a risk that any data stored on Product will be breached or otherwise
compromised, or
(ii) the data stored on Product is relied upon for medical or lifesaving applications.
SUMMIT CE GROUP disclaims any Warranty for any of the foregoing uses to the fullest extent
permitted by law. Customer assumes any and all risks associated with such uses of Product
and agrees to indemnify SUMMIT CE GROUP for any damages claimed against SUMMIT CE
GROUP for such uses. EXCEPT FOR EXPRESS WARRANTIES STATED ABOVE AND TO THE
MAXIMUM EXTENT PERMITTED BY LAW, THE PRODUCTS ARE PROVIDED “AS IS”, AND
SUMMIT CE GROUP DISCLAIMS ALL OTHER WARRANTIES, INCLUDING WITHOUT LIMITATION
ANY IMPLIED WARRANTY (I) OF MERCHANTABILITY, (II) OF FITNESS FOR A PARTICULAR
PURPOSE, OR (III) OF NON-INFRINGEMENT OF THIRD PARTY RIGHTS. TO THE MAXIMUM
EXTENT PERMITTED BY APPLICABLE LAW, IN NO EVENT WILL SUMMIT CE GROUP BE LIABLE
TO CUSTOMER OR ANY THIRD PARTY FOR ANY INDIRECT, SPECIAL, INCIDENTAL,
CONSEQUENTIAL, EXEMPLARY OR PUNITIVE DAMAGES, INCLUDING, WITHOUT LIMITATION,
ANY LOST PROFITS OR REVENUES, LOSS OR INACCURACY OF ANY DATA OR COST OF
SUBSTITUTE GOODS, REGARDLESS OF THE THEORY OF LIABILITY (INCLUDING NEGLIG ENCE)
AND EVEN IF SUMMIT CE GROUP HAS BEEN ADVISED OF THE POSSIBILITY OF SUCH
DAMAGES, SUMMIT CE GROUP’S AGGREGATE LIABILITY TO CUSTOMER FOR ACTUAL DIRECT
DAMAGES FOR ANY CAUSE WHATSOEVER SHALL BE LIMITED TO THE CUMULATIVE PRODUCT
FEES PAID BY THAT CUSTOMER FOR THE PRODUCT CAUSING THE DAMAGES, IF ANY. This
Warranty gives Customer specific rights, and Custom er may also have other rights that vary
from jurisdiction to jurisdiction. To obtain Warranty service, Customer must email SUMMIT
CE GROUP Technical Support prior to making a Product return. Customer must include with
Product return the following items (failure to enclose any of these items may result in a delay
in the processing of your Warranty claim): (i) a dated sales receipt that indicates the place of
purchase, model number of Product, and amount paid; (ii) a detailed description of
Customer’s problem with Product; (iii) Customer’s full name, phone number, and return
address, and; (iv) a money order made out to SUMMIT CE GROUP Electronics Corporation to
cover return shipping charges to US destinations only, for the applicable dollar amount
shown for the Product in the table above. SUMMIT CE GROUP will not make return
shipments to a P.O. Box. For shipping to international addresses, actual freight will be charged
to Customer. Return your Product freight-prepaid in its original packaging, or packaging that
affords an equal measure of protection. Please allow 4 to 6 weeks for the processing of your
claim (6 to 8 weeks from November to February).

2
Tab la de c onte nidos
AVISO DE LA FCC PARA LOS USUARIOS ....................................................... 3
ADVERTENCIAS........................................................................................ 3
1 INTRODUCCIÓN .................................................................................... 5
1.1 Características ........................................................................................................ 5
1.2 Contenidos del paquete ........................................................................................ 5
2 INICIO .................................................................................................. 6
2.1 Plástico protector ................................................................................................... 6
2.2 Insertar y quitar la tarjeta de memoria ................................................................ 6
2.3 Encender y apagar la cámara de salpicadero....................................................... 7
2.4 Configuración de fecha y hora .............................................................................. 8
2.5 Guía de instalación................................................................................................. 8
3 RESUMEN DEL PRODUCTO ..................................................................... 9
3.1 Botón Menú/Modo................................................................................................ 9
3.2 Botón Arriba ......................................................................................................... 10
3.3 Botón Abajo.......................................................................................................... 10
3.4 Botón Encendido/OK ........................................................................................... 11
4 CARACTERÍSTICAS Y FUNCIONES ........................................................... 11
4.1 Grabación ............................................................................................................. 11
4.2 Detección de accidentes...................................................................................... 12
4.3 Modo de estacionamiento .................................................................................. 12
4.4 Grabación en bucle .............................................................................................. 12
4.5 Bloquear video ..................................................................................................... 12
4.6 Advertencia de salida de carril ............................................................................ 13
4.7 Advertencia de colisión frontal ........................................................................... 13
4.8 Modo de pantalla en espera ............................................................................... 13
4.9 Reproducción y gestión de archivos multimedia ............................................... 13
4.9.1 Reproducción ................................................................................................ 13
4.9.2 Gestión........................................................................................................... 14
4.10 Grabación de audio............................................................................................ 15
4.11 Anillo LED de lente ............................................................................................. 15
5 MENÚ ................................................................................................ 16
5.1 Árbol de menús .................................................................................................... 16
5.2 Ajustes y opciones de menús .............................................................................. 16
5.2.1 Botón comentario de audio ......................................................................... 16
5.2.2 Idioma ............................................................................................................ 16
5.2.3 Calibración de advertencia de salida de carril ............................................ 16
5.2.4 Restablecer la configuración predeterminada ............................................ 17
5.2.5 Formatear tarjeta de memoria .................................................................... 17
6 ESPECIFICACIONES............................................................................... 17
7 PREGUNTAS FRECUENTES ..................................................................... 18
8 GARANTÍA .......................................................................................... 20
Table of contents
Languages:
Other Car and Driver Dashcam manuals

Car and Driver
Car and Driver INTELLIDASH+ DU900 User manual

Car and Driver
Car and Driver MINIOPRO CDC-628 User manual

Car and Driver
Car and Driver CDC609 User manual

Car and Driver
Car and Driver CDC-900 User manual

Car and Driver
Car and Driver CDC-629 User manual

Car and Driver
Car and Driver Eye1Pro CDC-632 User manual

Car and Driver
Car and Driver CDC-E4000 User manual

Car and Driver
Car and Driver MINIOPRO CDC-628 User manual

Car and Driver
Car and Driver Copilot CP-1001 User manual

Car and Driver
Car and Driver EAGLEEYE CDC-570 User manual