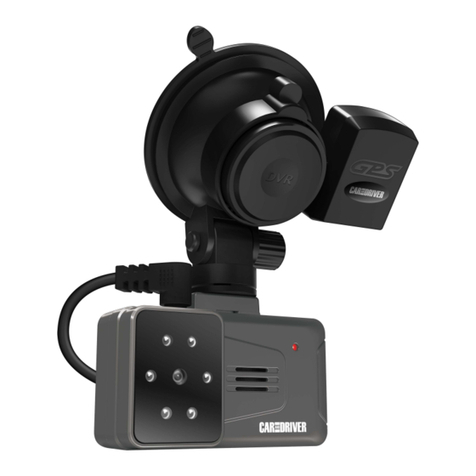
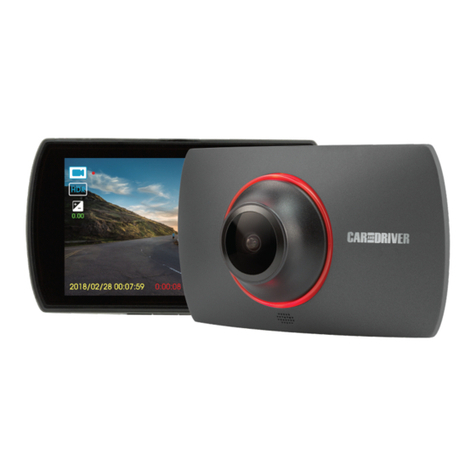
Car and Driver Eye1Pro CDC-632 User manual

MODEL #: CDC-632
WE’RE HERE TO HELP
Call Us:
(833) 227-3274
Live Chat With Us:
www.CarAndDriverTech.com
Email Us:
Support@CarAndDriverTech.com
Eye1Pro
2K ULTRA HD DASHCAM

Read Me
Important Safety Instructions
1) Read these instructions.
2) Keep these instructions.
3) Heed all warnings.
4) Follow all instructions.
5) Do not use this apparatus near water.
6) Clean only with dry cloth.
7) Do not block any ventilation openings. Install in accordance with the manufacturer’s
instructions.
8) Do not install near any heat sources such as radiators, heat registers, stoves, or other
apparatus (including amplifiers) that produce heat.
9) Protect the power cord from being walked on or pinched particularly at plugs,
convenience receptacles, and the point where they exit from the apparatus.
10) Only use attachments/accessories specified by the manufacturer.
11) Use only with the cart, stand, tripod, bracket, or table specified by the manufacturer,
or sold with the apparatus. When a cart is used, use caution when moving the cart/
apparatus combination to avoid injury from tip-over.
12) Unplug this apparatus during lightning storms or when unused for long periods of time.
13) Refer all servicing to qualified service personnel. Servicing is required when the
apparatus has been damaged in any way, such as power-supply cord or plug is damaged,
liquid has been spilled or objects have fallen into the apparatus, the apparatus has been
exposed to rain or moisture, does not operate normally, or has been dropped.
FCC NOTICE TO USERS:
FCC ID: 2AMSOCDC-632
Caution: Changes or modifications not expressly approved by the Party responsible for
compliance could void the user’s authority to operate the equipment.
Note: This equipment has been tested and found to comply with the limits for a Class B
digital device, pursuant to part 15 of the FCC Rules. These limits are designed to provide
reasonable protection Against harmful interference in a residential installation. This
equipment generates, uses and can radiate radio frequency energy and, if not installed
and used in accordance with the instructions, may cause harmful interference to radio
communications, however there is no guarantee that interference will not occur in a
particular installation. If this equipment does cause harmful interference to radio or
television reception, which can be determined by turning the equipment off and on, the
user is encouraged to try to correct the interference by one or more of the following
measures:
- Reorient or relocate the receiving antenna.
- Increase the separation between the equipment and receiver.
- Connect the equipment into an outlet on a circuit different from that to which the
receiver is connected.
- Consult the dealer or an experienced radio/TV technician for Help.
The device complies with part 15 of the FCC Rules. Operation is subject to the following
two conditions: (1) this device may not cause harmful interference, and (2) this device must
accept any interference received, including interference that may cause undesired operation.
1
2
PRODUCT OVERVIEW
EN
1) Menu/Mode Button
2) Up Button
3) SOS/WIFI Button
4) Down Button
5) OK Button
6) Power Button
7) SD Card Slot
8) HDMI Port
9) USB Port
10) Microphone
11) Reset Button
12) Speaker
13) Camera
14) Mount
15) AV Out Port
16) LCD Screen
17) Mini USB
18) Mini USB to Cigarette Port
19) Suction Cup
_
_
_
_
_
__
______
______
___
____
__
__
__
__
__
__
__
__
__
12 3 45
6
78
9
10
11
12
13
14
15
16
17
18
19

FUNCTIONS
Power
1) Turn On: Press to turn the
dash cam on.
2) Turn Off: Press and hold to
turn the dash cam off.
Reset If the device crashes, use a
small pin to press this button
and reset the dash cam.
OK
Menu/Mode
1) In Video Mode, press to
enter the Video Menu.
2) In Photo Mode, press to
enter the Photo Menu.
3) In Playback Mode, press to
enter the Playback Menu.
4) In any Menu, press to enter
the Settings Menu.
5) In any mode, press and hold
to switch modes (Video Mode/
Photo Mode/Playback Mode).
Up
1) In any Menu, press to move
up in the options.
2) In Video Mode, press to
switch the mute on or off.
3) In Photo Mode, press to
zoom in.
3
1) In Video Mode, press to
start or stop recording.
2) In Photo Mode, press to
take a photo.
3) In Menus, press to confirm
settings.
4) In Playback Mode, press to
start or stop playback.

Down
1) In any Menu, press to
move down in the options.
2) In Photo Mode, press to
zoom out.
SD Card Slot Insert the SD Card into this slot,
with the golden teeth facing the
camera side.
HDMI Connect to a TV to view videos
and photos.
USB Port
1) Connect to a PC using the
included USB cable to view
or transfer videos and photos.
2) Connect to a charger to
charge the dash cam.
SOS/WIFI
1) During recording, press to
immediately save the video
and prevent it from being
overwrit-ten during usage.
2) Press and hold to turn On/
Off WiFi.
CHARGING AND POWERING ON
You can charge the dash cam by connecting it to
your car’s cigarette lighter using the included
power cable.
Powered On: While charging and powered on the
LED indicator will flash red and yellow. When not
charging the LED indicator will flash red.
Powered Off: While charging and powered off
the LED indicator will remain yellow.
4

The dash cam will power up automatically when
the car is started and will power off automatically
when power to the dash cam is cut. You can also
manually turn On/Off the dash cam by pressing
and holding the Power Button.
Note: When disconnected from a power source
the dash cam will automatically begin powering
off. The internal battery will ensure the dash cam
remains on long enough to save any ongoing
recording.
RECORDING MODE
After powering on, the dash cam will automatically
enter recording mode. This is indicated by a red
recording icon appearing in the top left corner of
the screen. Press the OK Button to start/stop
recording. Press the SOS/Wifi button to lock an
ongoing recording and prevent it from being loop
recorded over.
Recording Sub-menu: To enter the recording
sub-menu press the Menu/Mode Button while not
recording. A blue video icon will appear in the top
left corner of the screen. You can adjust the video
resolution, set the length of the loop recording,
adjust the exposure, adjust the G-Sensor
sensitivity, set the time stamp and GPS stamp,
track the speed, and more.
In this menu, you may choose to turn Motion
Detection on or off. This feature turns the camera
5

on when it senses movement and turns it off
when movement has stopped. In this menu, you
may choose to turn Parking Mode on or off. This
feature turns the dash cam on and records and
locks a one minute video when sudden
movement is detected (For example being hit
while parked).
CAMERA MODE
When not recording, press and hold the Menu/
Mode Button to switch to Camera Mode. A
camera icon will appear in the top left corner of
the screen. Press the OK Button to take a
picture.
Camera Sub-menu: To enter the camera sub -
menu, press the Menu/Mode Button. A blue
camera icon will appear in the top right corner of
the screen. Here, you can change the capture
mode, resolution, sequence, quality, and more.
PLAYBACK MODE
When in Camera Mode, press and hold the
Menu/Mode Button to switch to Playback Mode.
The playback icon will appear in the top left
corner of the screen. Use the Up and Down
Buttons to scroll through the available files, and
press the OK Button to play the selected video.
Note: All videos and pictures are stored here in
chronological order.
When a file has been selected, press the Menu/
6

7
Mode Button to choose to either delete the file or
protect the file from being overwritten via loop
recording. You can also select “Slideshow,”
which will cycle through the available files. Use
the Up and Down Buttons to select an option,
and press the OK Button to confirm it.
SYSTEM SETTINGS
When in any Menu, press the Menu/Mode
Button again to enter the System Settings. In
this menu, you can adjust the WiFi, date and
time, displayed language, auto power-off time,
sound, and more.
In this menu, you can also Format your memory
card. This will erase all files on the memory
card, even locked files. Before performing this
action, be sure to back up any important videos
and photos. In addition, you can restore the
dashcam to its Default Settings.
Note: You should be sure to turn on the dash
cam's wifi if you intend to pair it with your phone
via the app.
Downloading And Installing The App
IOS users can download the app
from the Apple app store by
searching for “Road Cover Eye1Pro” app and
then downloading it.

8
by searching for “Road Cover Eye1Pro” app and
then downloading it.
In the app, you can control most of the
functions and settings of your dash cam from
your phone, and control recording, photo-
taking, and file management.
Pairing Your Phone To The Dash Cam
•Turn On Wifi: Make sure the wifi on the
dash cam has been turned on. This can
be done in the settings menu or by
pressing and holding the SOS/Wifi button.
•You will see an SSID number starting with
CDC632 displayed on the dash cam's
screen. Open your phones wifi settings
and select the wifi source that matches
this SSID number.
•You may be prompted for a password. If
so, enter "12345678".
•After the password is entered open the
app.
Android users can download the
app from the Google play store
Note: After pairing the dash cam to your phone
using the app, some of the buttons on the dash
cam will not remain operational. As such, most
controls must be maid on your phone via the
app.

9
RECORDING MODE USING THE APP
After connecting the dash cam with your phone
you will be able to control most features of the
device via the Eye1 pro app.
Start/Stop Recording On The App: Press the red
circle button on the app.
Start/Stop Recording On The Dashcam: Press
the OK Button directly on the dashcam.
Note: Press the SOS/Wifi button directly on the
dash cam to lock an ongoing recording and
prevent it from being loop recorded over.
Recording Sub-menu On The App: To enter the
recording sub-menu press the icon while not
recording. A red menu will open up on the screen.
This menu allows you to adjust both your recording
settings and your system settings. Note: For more
details on individual settings that can be adjusted
in the recording sub menu and the system setting
menu please refer to the System Settings and
Recording Mode sections.
CAMERA MODE ON THE APP
Taking A Picture On The App: Press the red
circle button on the app. In camera mode the red
button will have a camera icon in it. Where as in
recording mode the red button will not.
Note: While your phone and the dash cam are
paired, pictures can not be initiated via the dash
cam and must be taken via the app.

Camera Sub-menu On The App: To enter the
camera sub-menu press the icon. A red
menu will open up on the screen. This menu
allows you to adjust both your camera settings
and your system settings. Note: For more details
on individual settings that can be adjusted in the
camera sub menu and the system setting menu
please refer to the System Settings and Camera
Mode sections.
PLAYBACK MODE ON THE APP
After opening the Camera Folder on the app
you will see three sub-camera folders.
1. contains all locked and unlocked files
currently in memory. This includes both
photos and videos (Only On Android).
2. contains all locked and unlocked videos
currently in memory.
3. contains all locked and unlocked
pictures currently in memory.
You can download any files from these three
folders by pressing the icon, navigate back to
your previously visited page by pressing the
icon (top left side of the screen) and choose to
either download( ) or delete( ) all files by
selecting the icon (top right side of the screen).
Any files downloaded on this page will be saved in
the Local Folder( ).
Note: To access the local folder on IOS you
should swipe the switch icon from left to right.
10

11
After opening the Local Folder( ) on the app
you will see two sub-camera folders.
1. contains all videos saved to the local
folder.
2. contains all pictures saved to the local
folder.
After selecting any video or photo from the
Local Folder( ) the user may choose to either
delete( ) or share( ) the file. Note: On IOS
devices the user may need select( ) prior to
using delete( ).
After selecting any video from the Local Folder
or the Camera Folder you will see three water-
marks on the bottom of the video.
1. The date displayed in the format of
YYYY/MM/DD.
2. The Time displayed in the format of
HH:MM:SS
3. In addition, you will see Speed in MPH as
well as longitude and latitude.
IMPORTANT: The share( ) function on the
app will not work while your phone is paired to
the dash cam via wifi. To use the share( )
function. Disconnect your phone from the dash
cam's wifi source and reconnect it to a secure
wifi source that has Internet access.

Stopping automatically while recording. Check
that your SD card is a high-speed Class 10 card
with SDHC compatibility. Lower classes of cards
will have difficulty recording in HD.
“Wrong file” appears when replaying a photo
or video.
The file is incomplete because of an SD card
error, back up all important files and format the
SD card.
Fuzzy image.
Check if the lens is smudged or dirty, and clean
with a microfiber cloth.
Dark image when shooting a scene featuring
sky or water.
Adjust the EV exposure in the Video Mode Menu
or the Photo Mode Menu.
Horizontal stripes appear in the image.
Change the Light Frequency option to either
60HZ or 50HZ.
12
TROUBLESHOOTING
Cannot take pictures or record videos. Check
if there is enough space on the SD card, and
consider deleting some locked files or formatting
the SD card.

13
Display: 2.4” LCD Screen
Lens: F 1.8, 130o A+ HD ultra wide angle
Photo Resolution:
SPECIFICATIONS
•High resolution
•Medium resolution
•Low resolution
Video Resolution:
•2K UltraHD 30FPS
•1296p SuperHD 30FPS
•1080p FullHD 60FPS (default setting) 1080p
FullHD 30FPS
•720p HD 120FPS
•720p HD 30FPS
Video Format: H.264, MP4
Photo Format: JPG
Memory: SD Card, Class 10+, max. 64 GB.
Power: 5V 1.5A
Battery: Built-in Li-Ion Battery

SUMMIT ELECTRONICS LLC ONE YEAR LIMITED WARRANTY
SUMMIT ELECTRONICS LLC LIMITED WARRANTY (“Warranty”) ― For Product
Categories Listed in Chart Below (as applicable, “Product”) Before returning your
Product for service under this Warranty, please (i) read the instruction manual carefully.
If you are still having trouble with your Product, please contact Technical Support at
Warning: Some Products may contain components that are small enough to be
swallowed. Please keep out of reach of children.
Subject to the terms and conditions herein, SUMMIT ELECTRONICS LLC (hereinafter
called “SUMMIT ELECTRONICS LLC”) warrants to the original purchaser of the Product
(“Customer”) that for the applicable Warranty Period listed below, the Product will be
free from defects in material or workmanship under normal, non-commercial use
(“Defects”). Warranty Period encompasses, as listed below, separate “Coverage
Periods” for Parts and Labor, each Coverage Period for one year, to begin from the
original date of Customer purchase. If Customer returns a defective Product (or any
component thereof) during the applicable
Warranty Period, SUMMIT ELECTRONICS LLC will, at its option, during the specified
Coverage Periods for Parts and Labor (as applicable) either: (i) repair Product (or, as
applicable, any component thereof) or (ii) replace the Product (or, as applicable, any
component thereof) with a new or refurbished Product (or, as applicable, any
component thereof), in either case free of charge to Customer for Parts and/or Labor
(as applicable) during the specified Coverage Period only, and excluding applicable
shipping charges (noted below), for which the Customer is responsible. The foregoing
states the Customer’s exclusive remedy and SUMMIT ELECTRONICS LLC’s sole
liability for breach of the limited warranty contained herein.
This Warranty specifically excludes any Product (or, as applicable, any component
thereof) that has been subject to or Defects resulting from: (a) any neglect or misuse by
a Customer, an accident, improper application, violation of operating instructions for the
Product, any other Customer-induced damage, or the alteration or removal of any
Product serial number: (b) any modification or repair to Product (or, as applicable, any
component thereof) by any party other than SUMMIT ELECTRONICS LLC or a party
authorized in writing by SUMMIT ELECTRONICS LLC; (c) any damage to Product (or,
as applicable, any component thereof) due to power surges, incorrect electrical voltage,
misconnection to any device, or malfunction of any device used with the Product (or, as
applicable, any component thereof); (d) cosmetic damage to the Product (or, as
applicable, any component thereof) caused by normal wear and tear; (e) shipping
damage that occurs while the Product is in transit; (f) damage caused by heat sources,
sunlight, electromagnetic conditions, or other climatic conditions; or (g) any acts of God.
Product is sold to Customer for personal, non-commercial use only. Product is not
warranted for Customer’s commercial or rental use. In addition, Product is not
warranted against failure, and should not be used by Customer for any application
where (i) there is a risk that any data stored on Product will be breached or otherwise
compromised, or (ii) the data stored on Product is relied upon for medical or lifesaving
applications. SUMMIT ELECTRONICS LLC disclaims any Warranty for any of the
foregoing uses to the fullest extent permitted by law. Customer assumes any and all
risks associated with such uses of Product, and agrees to indemnify SUMMIT ELECTR-
ONICS LLC for any damages claimed against SUMMIT ELECTRONICS LLC for such
uses. EXCEPT FOR
14

EXPRESS WARRANTIES STATED ABOVE AND TO THE MAXIMUM EXTENT
PERMITTED BY LAW, THE PRODUCTS ARE PROVIDED “AS IS”, AND SUMMIT
ELECTRONICS LLC DISCLAIMS ALL OTHER WARRANTIES, INCLUDING
WITHOUT LIMITATION ANY IMPLIED WARRANTY (I) OF MERCHANTABILITY, (II)
OF FITNESS FOR A PARTICULAR PURPOSE, OR (III) OF NON-INFRINGEMENT
OF THIRD PARTY RIGHTS. TO THE MAXIMUM EXTENT PERMITTED BY
APPLICABLE LAW, IN NO EVENT WILL SUMMIT ELECTRONICS LLC BE LIABLE
TO CUSTOMER OR ANY THIRD PARTY FOR ANY INDIRECT, SPECIAL,
INCIDENTAL, CONSEQUENTIAL, EXEMPLARY OR PUNITIVE DAMAGES,
INCLUDING, WITHOUT LIMITATION, ANY LOST PROFITS OR REVENUES, LOSS
OR INACCURACY OF ANY DATA OR COST OF SUBSTITUTE GOODS,
REGARDLESS OF THE THEORY OF LIABILITY (INCLUDING NEGLIGENCE) AND
EVEN IF SUMMIT ELECTRONICS LLC HAS BEEN ADV ISED OF THE POSSIBILITY
OF SUCH DAMAGES,
SUMMIT ELECTRONICS LLC’S AGGREGATE LIABILITY TO CUSTOMER FOR
ACTUAL DIRECT DAMAGES FOR ANY CAUSE WHATSOEVER SHALL BE LIMITED
TO THE CUMULATIVE PRODUCT FEES PAID BY THAT CUSTOMER FOR THE
PRODUCT CAUSING THE DAMAGES, IF ANY. This Warranty gives Customer
specifics rights, and Customer may also have other rights that vary from jurisdiction to
jurisdiction. To obtain Warranty service, Customer must email SUMMIT
ELECTRONICS LLC Technical Support prior to making a Product return. Customer
must include with Product return the following items (failure to enclose any of these
items may result in a delay in the processing of your Warranty claim): (i) a dated sales
receipt that indicates the place of purchase, model number of Product, and amount
paid; (ii) a detailed description of Customer’s problem with Product; (iii) Customer’s full
name, phone number, and return address, and; (iv) a money order made out to
SUMMIT ELECTRONICS LLC Electronics Corporation to cover return shipping
charges to US destinations only, for the applicable dollar amount shown for the
Product in the table above. SUMMIT ELECTRONICS LLC will not make return
shipments to a P.O. Box. For shipping to international addresses, actual freight will be
charged to Customer. Return your Product freight-prepaid in its original packaging, or
packaging that affords an equal measure of protection. Please allow 4 to 6 weeks for
the processing of your claim (6 to 8 weeks from November to February).
You must email SUMMIT ELECTRONICS LLC Technical Support prior to making a
return. Please ask if you are unsure of which category your product falls under
*US destinations only.
SHIPPING*
(USD)
Adapters, Converters, Chargers, Headphones, Microphones,
Cellular Accessories $7.99
$7.99
Portable Stereo Systems, Speaker Systems, Cordless
Telephones, Home DVD Players $14.99
$21.99
Alarm Clocks, Portable CD Players, Radios, Corded Telephones,
MP3 Players, Digital Photo Frames (screen size less than 5”)
Home Theater DVD Systems, Portable DVD Players, Portable
Media Players, Digital Photo Frames (screen sizes 5” to 11”)
PRODUCT CATEGORY
15

MODELO #: CDC-632
ESTAMOS AQUÍ PARA AYUDAR
Llámenos:
(833) 227-3274
Chat En Vivo Con Nosotros:
www.CarAndDriverTech.com
Envíanos Un Correo Electrónico:
Support@CarAndDriverTech.com
Eye1Pro
2K ULTRA HD DASHCAM

Read Me
Important Safety Instructions
1) Read these instructions.
2) Keep these instructions.
3) Heed all warnings.
4) Follow all instructions.
5) Do not use this apparatus near water.
6) Clean only with dry cloth.
7) Do not block any ventilation openings. Install in accordance with the manufacturer’s
instructions.
8) Do not install near any heat sources such as radiators, heat registers, stoves, or other
apparatus (including amplifiers) that produce heat.
9) Protect the power cord from being walked on or pinched particularly at plugs,
convenience receptacles, and the point where they exit from the apparatus.
10) Only use attachments/accessories specified by the manufacturer.
11) Use only with the cart, stand, tripod, bracket, or table specified by the manufacturer,
or sold with the apparatus. When a cart is used, use caution when moving the cart/
apparatus combination to avoid injury from tip-over.
12) Unplug this apparatus during lightning storms or when unused for long periods of time.
13) Refer all servicing to qualified service personnel. Servicing is required when the
apparatus has been damaged in any way, such as power-supply cord or plug is damaged,
liquid has been spilled or objects have fallen into the apparatus, the apparatus has been
exposed to rain or moisture, does not operate normally, or has been dropped.
FCC NOTICE TO USERS:
FCC ID: 2AMSOCDC-632
Caution: Changes or modifications not expressly approved by the Party responsible for
compliance could void the user’s authority to operate the equipment.
Note: This equipment has been tested and found to comply with the limits for a Class B
digital device, pursuant to part 15 of the FCC Rules. These limits are designed to provide
reasonable protection Against harmful interference in a residential installation. This
equipment generates, uses and can radiate radio frequency energy and, if not installed
and used in accordance with the instructions, may cause harmful interference to radio
communications, however there is no guarantee that interference will not occur in a
particular installation. If this equipment does cause harmful interference to radio or
television reception, which can be determined by turning the equipment off and on, the
user is encouraged to try to correct the interference by one or more of the following
measures:
- Reorient or relocate the receiving antenna.
- Increase the separation between the equipment and receiver.
- Connect the equipment into an outlet on a circuit different from that to which the
receiver is connected.
- Consult the dealer or an experienced radio/TV technician for Help.
The device complies with part 15 of the FCC Rules. Operation is subject to the following
two conditions: (1) this device may not cause harmful interference, and (2) this device must
accept any interference received, including interference that may cause undesired operation.
1

2
DESCRIPCIÓN DEL PRODUCTO
SP
1) Botón De Menú/Modo
2) Botón Arriba
3) Botón SOS/WIFI
4) Botón Abajo
5) Botón OK
6) Botón De Encendido
7)
Ranura Para Tarjeta SD
8) Puerto HDMI
9) Puerto USB
10) micrófono
11) Botón De Reinicio
12) Orador
13) Cámara
14) Monte
15)
Puerto De Salida De AV
16) Pantalla LCD
17) Mini USB
18) Mini USB A Puerto De
Cigarrillos
19) Ventosa
_
_
_
_
_
__
______
______
___
____
__
__
__
__
__
__
__
__
__
12 3 45
6
78
9
10
11
12
13
14
15
16
17
18
19

FUNCIONES
Poder
1) Encender: presione para encender la
cámara del tablero.
2) Apagar: Mantenga presionado para
apagar la cámara del tablero.
Reiniciar Si el dispositivo falla, use un alfiler
pequeño para presionar este botón y
reinicie la cámara del tablero.
OK
1) En el modo de video, presione para
iniciar o detener la grabación.
2) En el modo Foto, presione para
tomar una foto
3) En Menús, presione para confirmar
la configuración.
4) En el modo de reproducción,
presione para iniciar o detener la
reproducción.
Menú/Modo
1) En el modo de video, presione para
ingresar al menú de video.
2) En Modo Foto, presione para
ingresar al Menú Foto.
3) En el modo de reproducción,
presione para ingresar al menú de
reproducción.
4) En cualquier menú, presione para
ingresar al menú de configuración.
5) En cualquier modo, mantenga
presionado para cambiar de modo
(Modo de video / Modo de foto /
Modo de reproducción).
Arriba
1) En cualquier menú, presione para
subir en las opciones.
2) En el modo de video, presione para
activar o desactivar el silencio.
3) En el modo Foto, presione para
acercar.
3
Other manuals for Eye1Pro CDC-632
1
This manual suits for next models
1
Table of contents
Languages:
Other Car and Driver Dashcam manuals

Car and Driver
Car and Driver CAD-BUC100 User manual

Car and Driver
Car and Driver Eye1Pro CDC-632 User manual

Car and Driver
Car and Driver CDC-560 User manual

Car and Driver
Car and Driver CDC-629 User manual

Car and Driver
Car and Driver EAGLEEYE CDC-570 User manual

Car and Driver
Car and Driver MINIOPRO CDC-628 User manual

Car and Driver
Car and Driver CDC-634 User manual

Car and Driver
Car and Driver INTELLIDASH+ DU900 User manual

Car and Driver
Car and Driver CDC-646 User manual

Car and Driver
Car and Driver MINIOPRO CDC-628 User manual