Catalog No. 11-808-639-01
Specifications subject to change without notice.
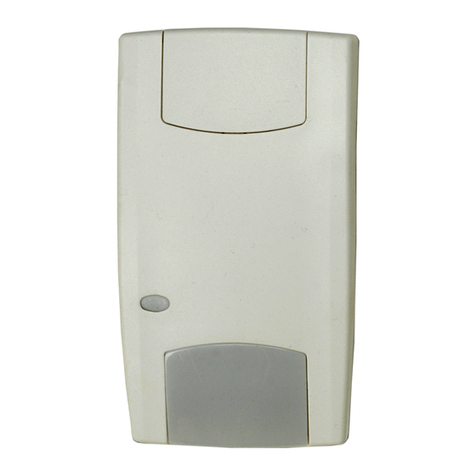
Water Leak Detector
Installation and Troubleshooting
#26268 –02/28/2020
Set Up and Commissioning
Indication/Controls Description
Red LED LED illuminates when water is detected
Green LED LED illuminates when normal power is applied
Reset Button Resets latching alarm contact (only if water is no longer present)
Latching Relay Left side of J1 set to top two pins listed as “L”
Non-Latching Relay Left side of J1 set to bottom two pins listed as “N” (Default)
Supervised Relay*** Right side of J1 set to top two pins listed as “S” (Default)
Unsupervised Relay Right side of J1 set to bottom two pins listed as “U”
*** Supervised means the relay is energized when not in alarm and the relay de-energizes ona power failure or alarm.
1.
After the unit is installed and wired, turn on the power. (24VAC +/-10%)
2.
Check that the green LED is on. If it is not on, check the power source.
3.
Dampen a cloth or sponge and touch both the sensor probe tip and the sensor base. An alarm should occur
within 5 seconds.
4.
The red LED should illuminate and the relay(s) should de-energize, or energize if set up as unsupervised. (To
check relay status, measure the resistance at the relay contacts or monitor the status from the BAS screen.)
5.
Remove the dampened rag or sponge to clear the alarm. If the unit is set up for a non-latching relay (J1 jumper
across the “N” pins), the red LED and relay(s) will energize, or de-energize if set up as an unsupervised relay. If the
unit is set up for a latching relay (J1 jumper across the “L” pins), the operator must push the reset switch on the
detector board or interrupt power to clear the alarm.
6.
Check the depth of the sensor probe screw (see Mounting) to be sure it’s at the appropriate water depth for alarm.
Operation Sequence
When power is applied, the green LED will illuminate and the unit will start to detect for water at the sensor probe. When
there is no detection of water (normal condition), the relays are not in an alarm state and the red LED remains off. For
units set up in the unsupervised relay mode, the relays are de-energized. For units set up in the supervised relay mode
(default), the relays will be energized. (NOTE When there is a loss of power, a supervised relay will drop out indicating
a water detection alarm.)
Within 5 seconds of water detection, the relays go into an alarm state and the red LED illuminates. For units set up
in the unsupervised relay mode, the relays are energized. For units set up in the supervised relay mode (default), the
relays are de-energized.
If the unit is in non-latching or auto-reset (default) operation, then the alarm state will automatically reset when the water
has dried up. If the unit is in latching or manual-reset operation, then the unit will stay in an alarm state until the reset
button is pressed or power is cycled. If there is still water detected during a reset button push, the unit will not reset. If
there is still water detected after a power interrupt, the unit will initiate another alarm within 5 seconds.
Diagnostics
Possible Problem Possible Solution
Green LED not on Check for proper power to the unit (see Power spec on page 6).
Red LED not working 1. Check for proper power to the unit (see Power spec on page 6).
or relay
not energizing 2. Check if water is touching the sensor probe and reference probe.
3.Adjust sensor probe depth.
4. For rope sensor units, check the sensitivity adjustment as described on page 4.
Unit will not reset 1. Check for the presence of water or debris touching the two sensor probes.
2.
Be sure the sensor wires are not shorted.
3.
If the L pins on J1 are shorted, push the reset button or cycle power.
4.
For rope sensor units, check the sensitivity adjustment as described on page 4.
