8
OPERATIONS
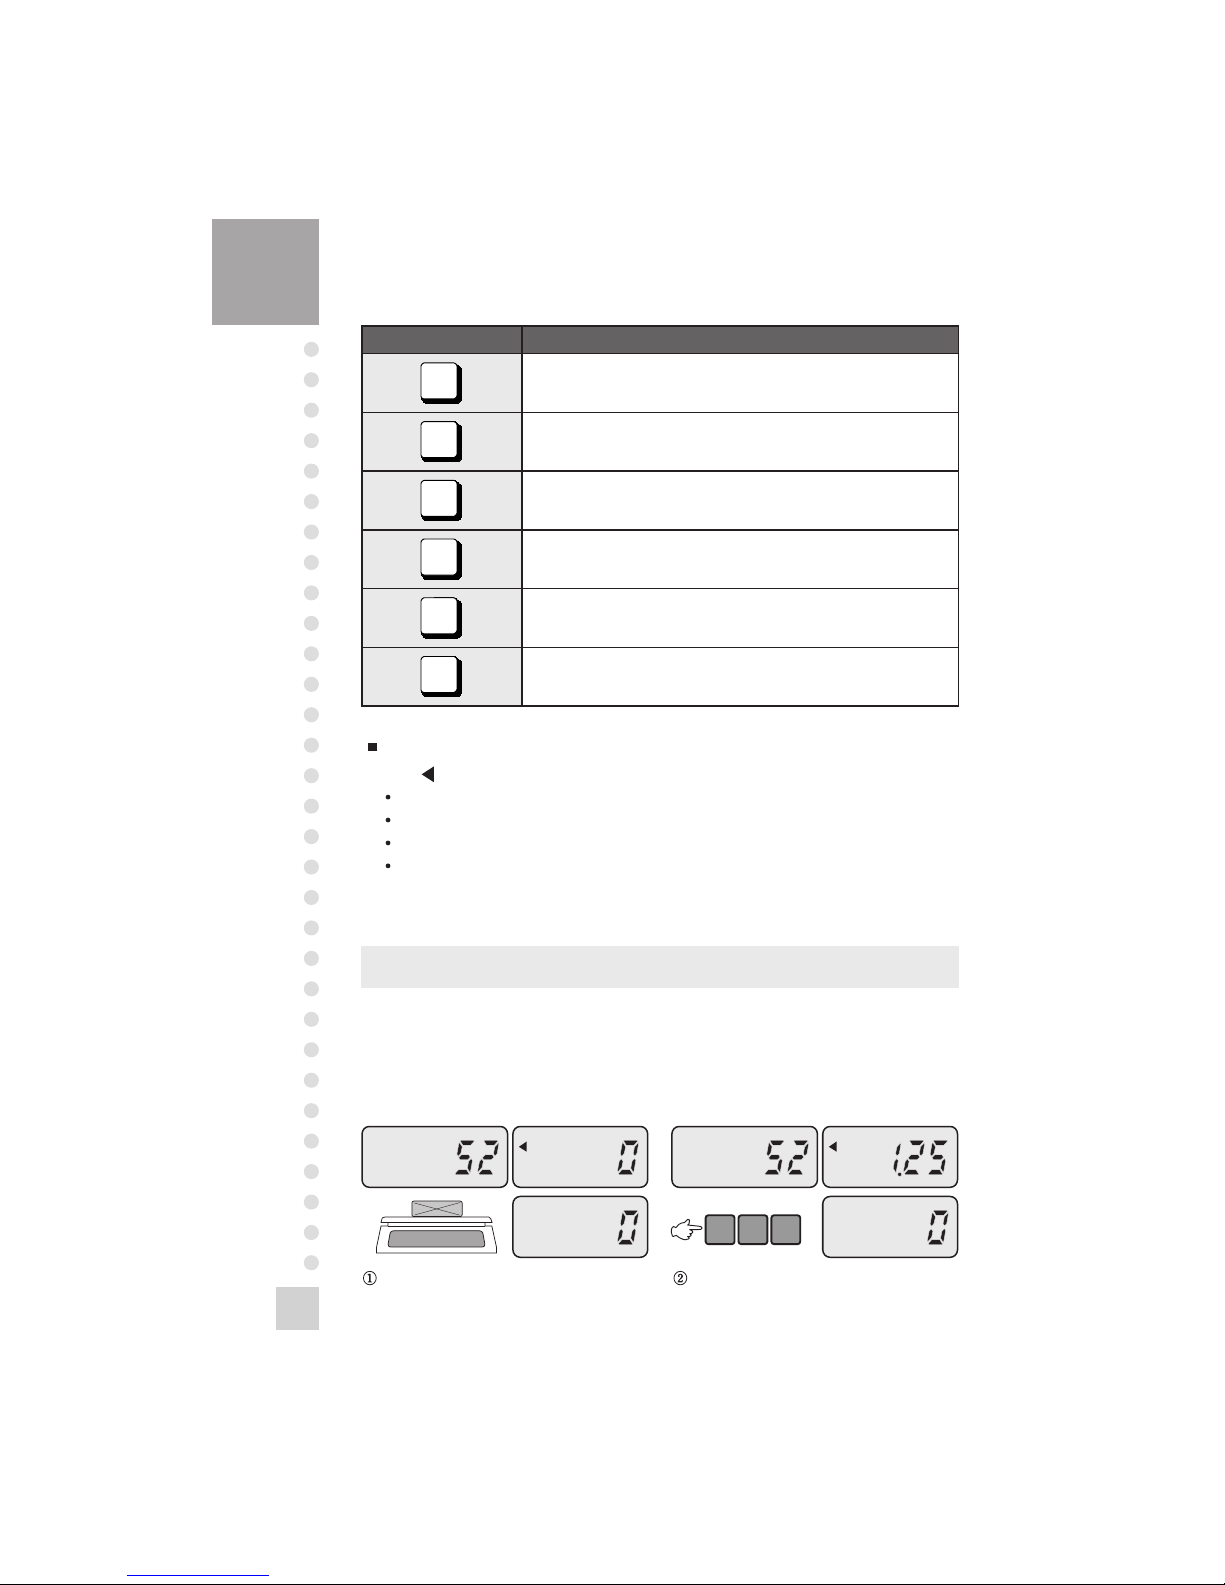
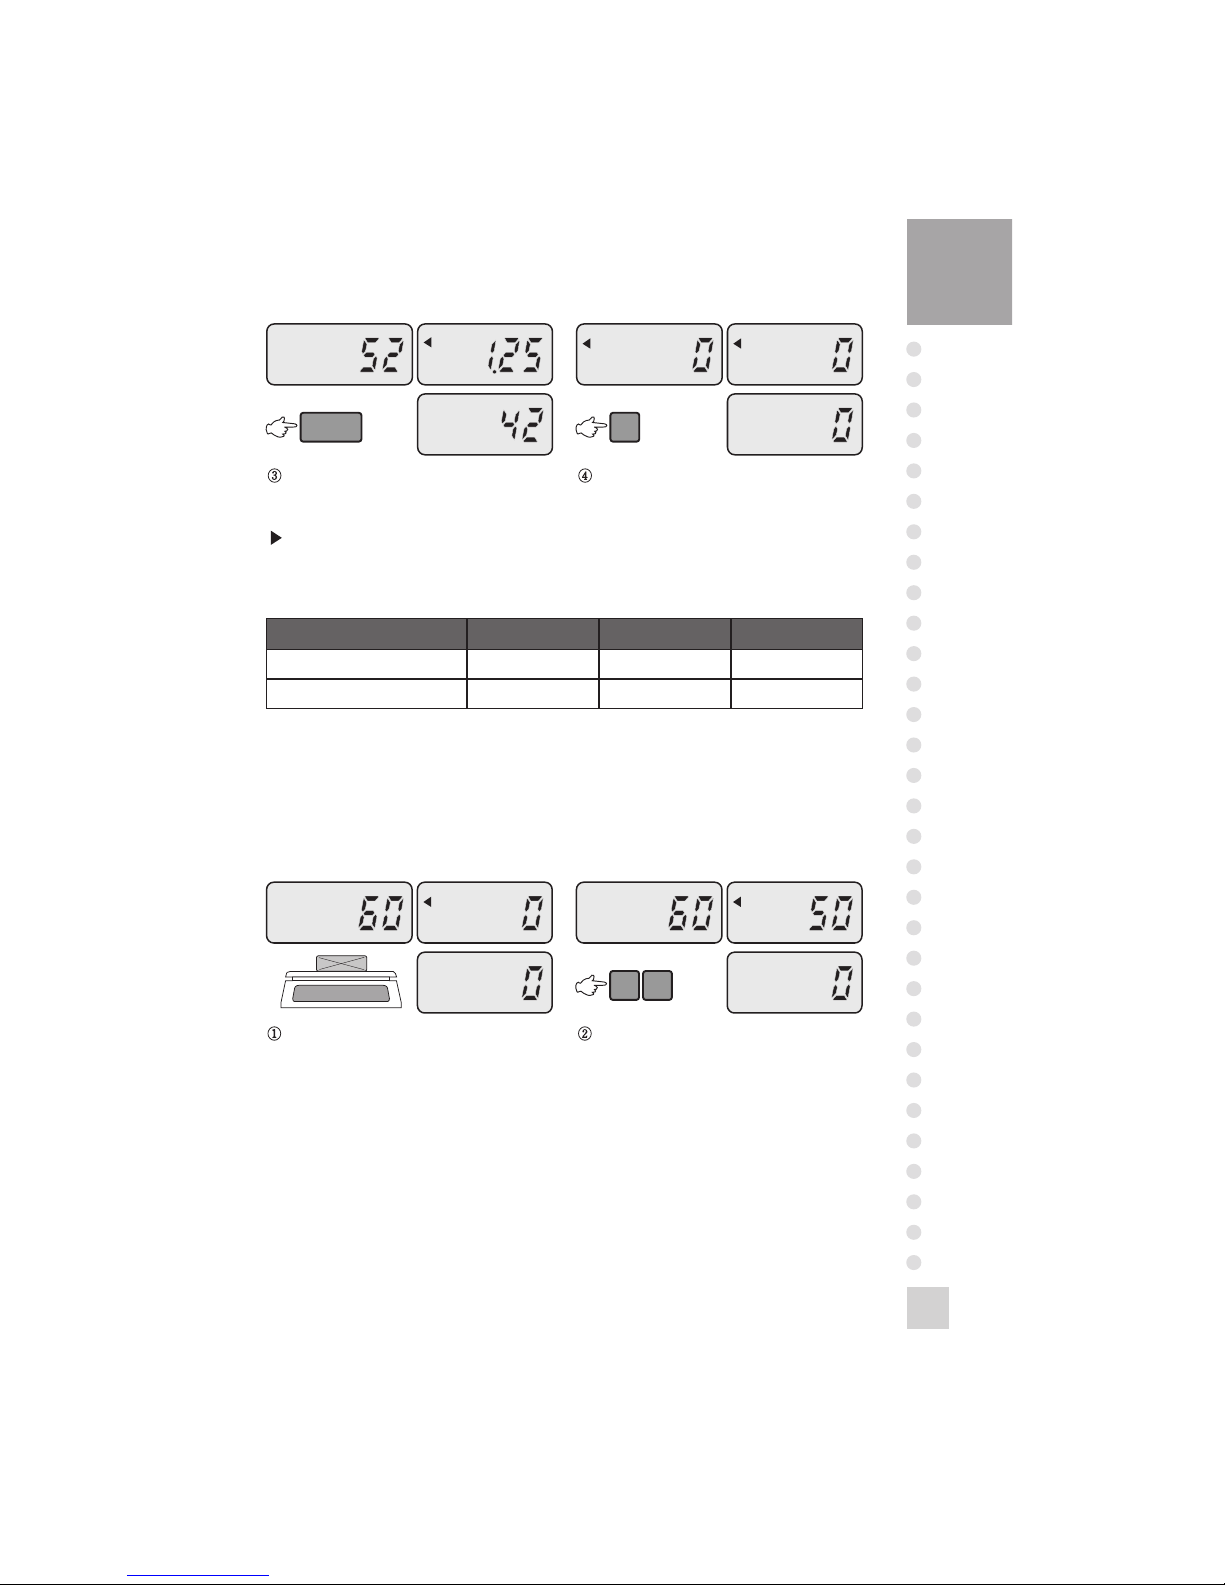
1. When You Know the Unit Weight of a Sample
When you know the unit weight of a sample, you can count samples.
For example) unit weight - 1.25g
Used to enter the unit weight of a sample.
Used to enter quantity of samples.
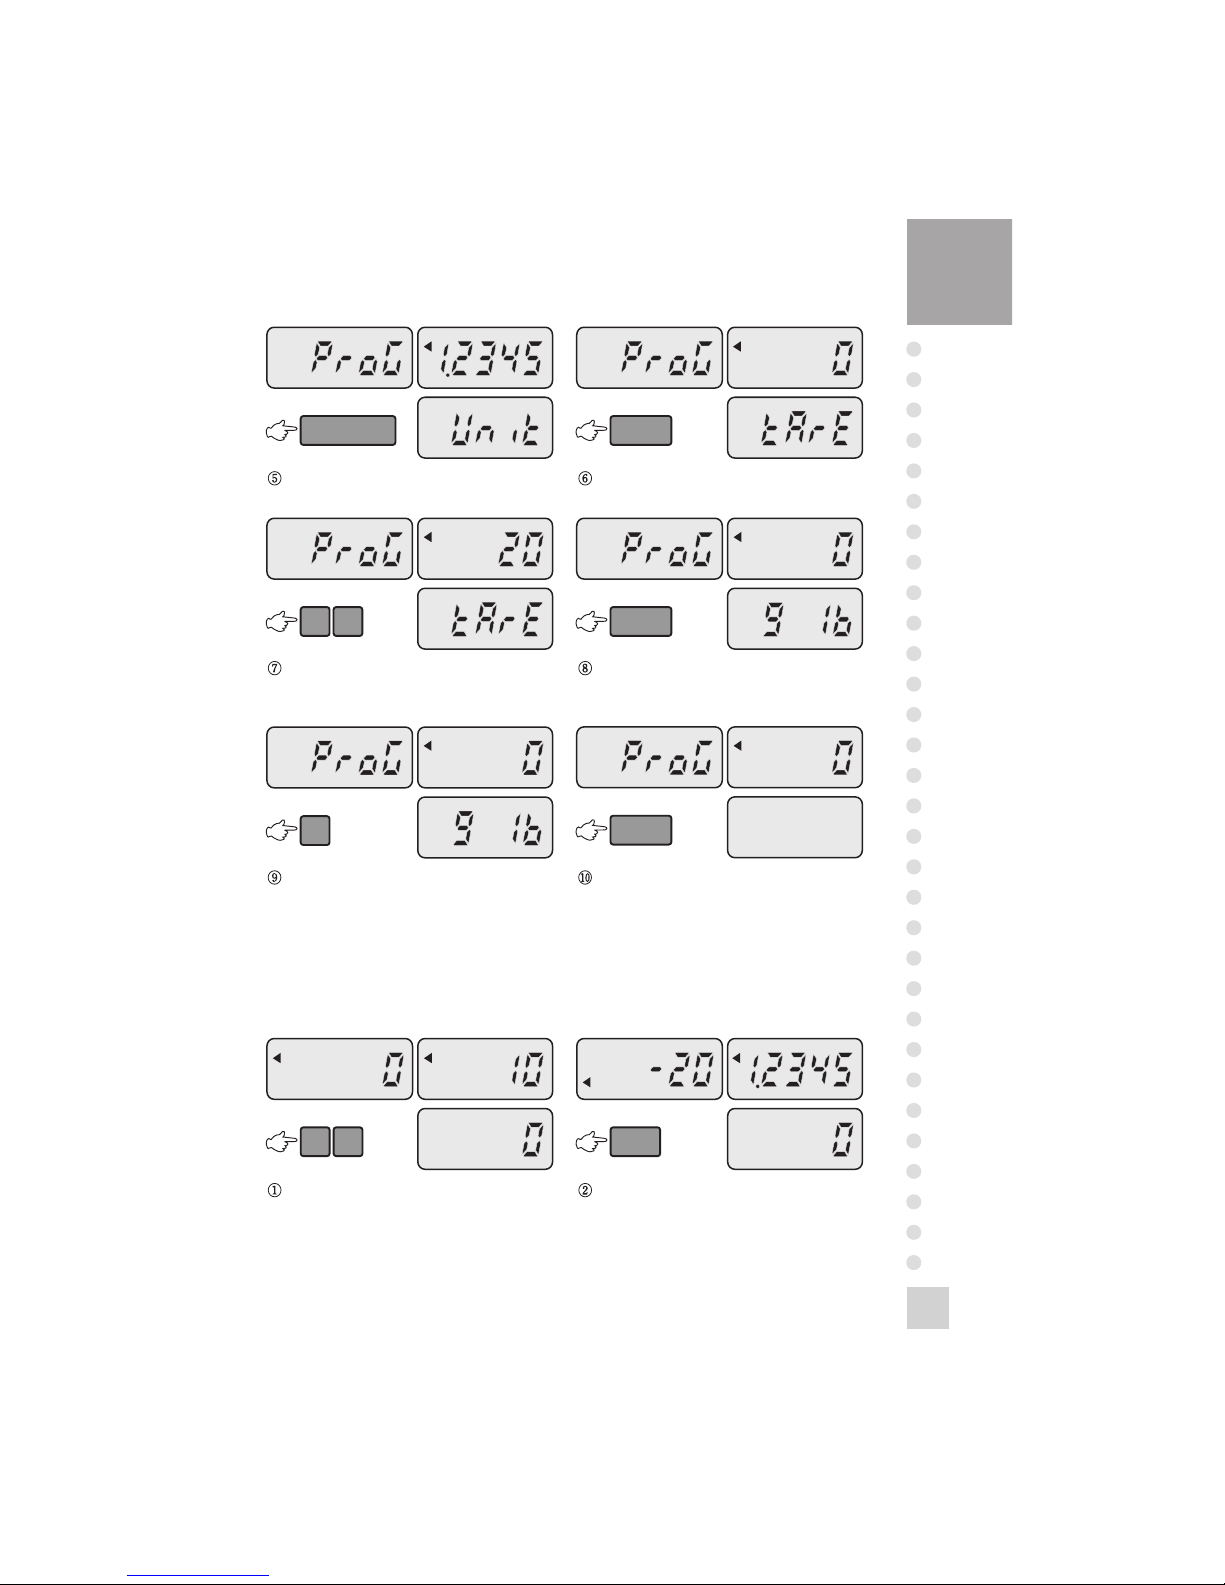
Used to call the unit weight from memory.
Used to save each data in the unit weight mode.
(This key does not work in weighing mode)
Used to add-up samples.
Used to call total number of samples.
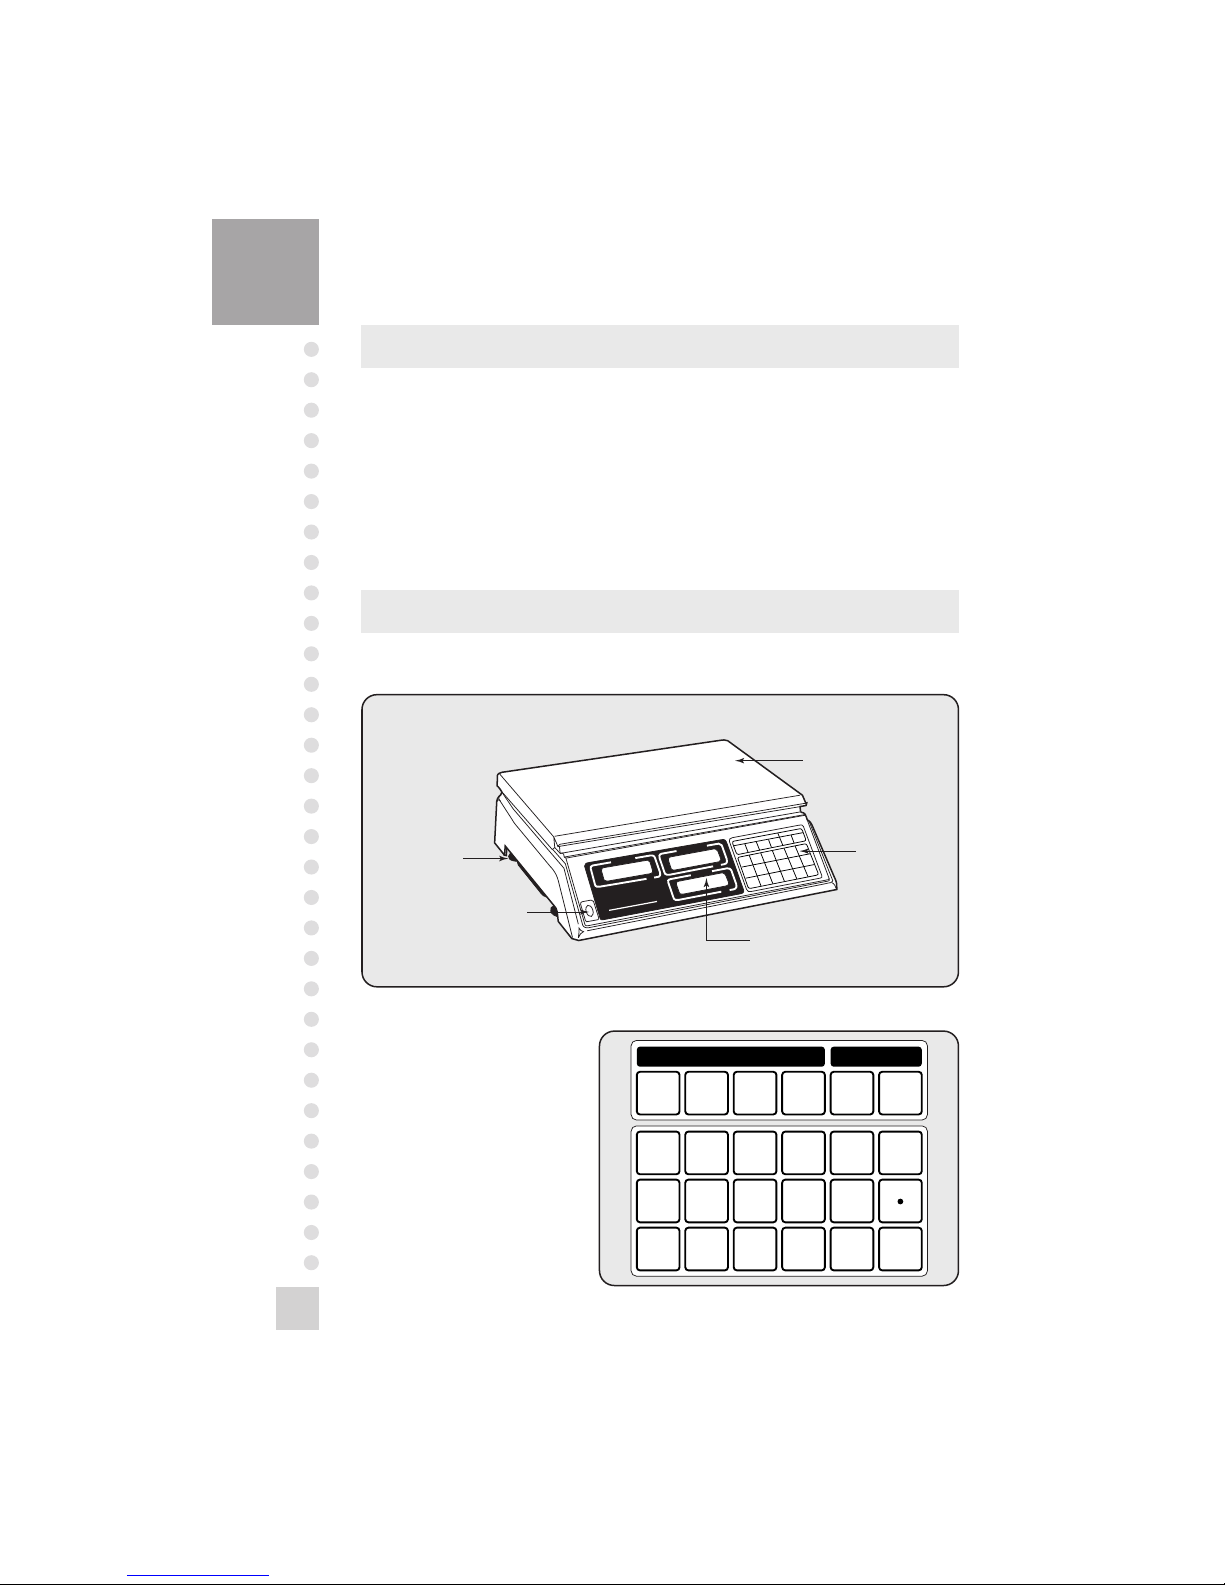
KEYS FUNCTIONS
LAMP DESCRIPTIONS
The symbol represents the lamps on the displays.
ZERO Lamp: If the ZERO lamp is on, it means that weight is zero.
TARE Lamp: If the TARE lamp is on, it means that tare is entered.
Lack of Sample: This lamp blink when samples are lacked.
Lack of U/W: This lamp blink when the unit weight is smaller than set
value.