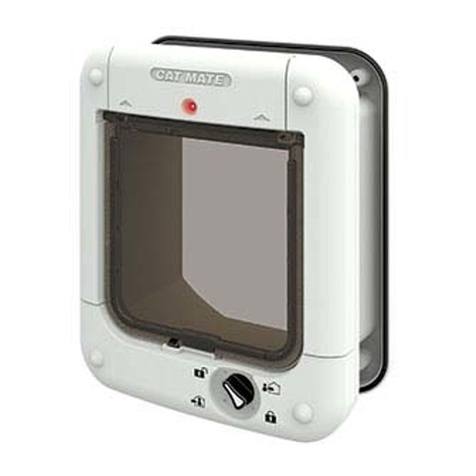
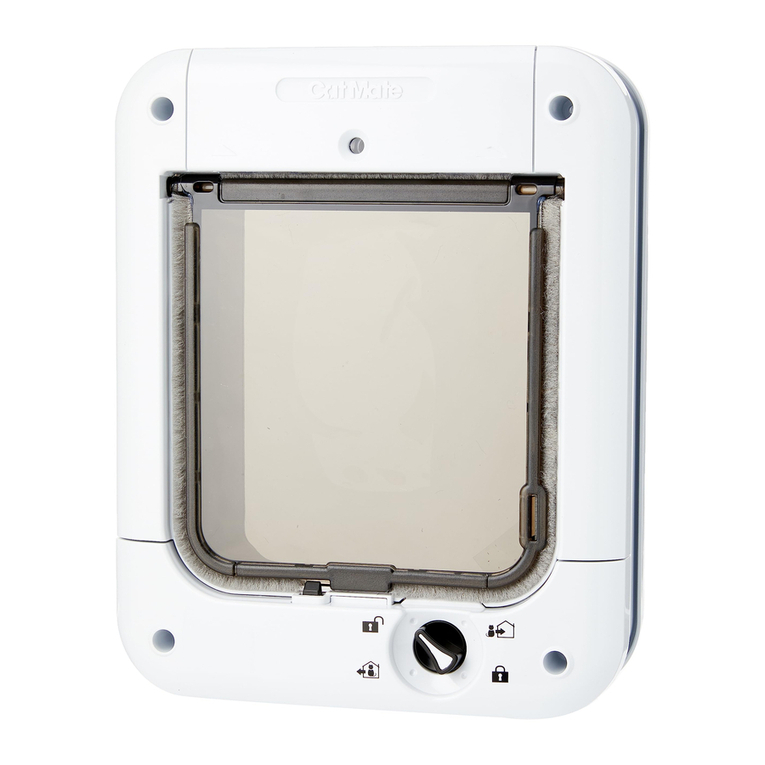
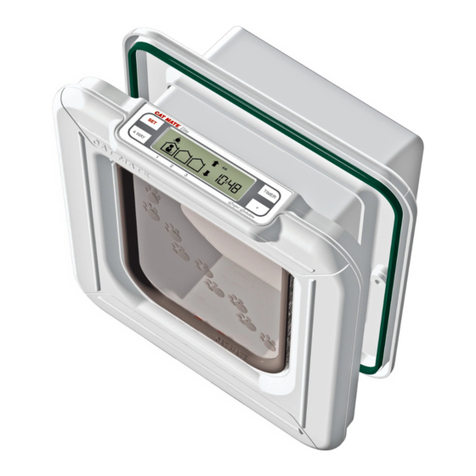
CAT MATE Elite Super Selective User manual

CAT MATE
Elite
®
ENGLISHDEUTSCHFRANÇAISESPAÑOLNEDERLANDS
IMPORTANT - READ BEFORE USE
OPERATION INSTRUCTIONS
WICHTIG - BITTE VOR VERWENDUNG LESEN
BETRIEBSANLEITUNG
IMPORTANT - À LIRE AVANT USAGE
MODE D'EMPLOI
IMPORTANTE - LEA ANTES DE USAR
INSTRUCCIONES DE OPERACIÓN
BELANGRIJK! DIT EERST LEZEN VOOR GEBRUIK
HANDLEIDING
NL
E
F
D
Super Selective
CAT FLAP · KATZENKLAPPE · CHATIÈRE · GATERA · KATTENDEUR
GUARANTEE
Pet Mate Ltd. guarantee your product for a period of 3 years from the
date of purchase, subject to proof of purchase date. The guarantee is
limited to any defect arising due to faulty materials or manufacture. Any
defective item will be repaired or replaced free of charge at the
manufacturer’s discretion, provided that the defect has not been caused
by neglect, misuse or normal wear and tear. Your statutory rights are
not affected.
GARANTIE
Pet Mate Ltd übernimmt die Garantie für diesen Artikel für 3 Jahre ab
Kaufdatum, vorausgesetzt, dass ein Kaufbeleg zur Verfügung steht. Die
Garantie ist auf Mängel beschränkt, die auf fehlerhaftes Material oder
Produktionsfehler zurückzuführen sind. Fehlerhafte Artikel werden
nach Ermessen des Herstellers kostenlos repariert oder ersetzt,
vorausgesetzt, dass der Defekt nicht durch ein Missgeschick,
Vernachlässigung, falsche Bedienung oder normale Abnutzung
verursacht wurde. Ihre gesetzlichen Rechte sind nicht betroffen.
GARANTIE
Pet Mate Ltd. garantit votre achat pour une période de trois ans à partir
de la date d’achat contre tous vices de fabrication ou de construction.
Les articles défectueux seront remplacés ou réparés gratuitement à la
discrétion du fabricant, sous réserve que le mauvais fonctionnement ne
soit pas le résultat d’un usage inadapté ou abusif ou d’une usure
normale. Ces conditions n’affectent pas vos droits statutaires.
GARANTÍA
Pet Mate Ltd. garantiza su producto durante un período de 3 años a
partir de la fecha de compra, siempre y cuando se presente el recibo de
compra. La garantía se limita a aquellos fallos que se produzcan como
consecuencia de materiales o fabricación defectuosos. Todo artículo
defectuoso se reparará o reemplazará a la discreción del fabricante,
siempre y cuando el defecto no haya sido causado por negligencia, uso
indebido o el uso y desgaste normales. Sus derechos estatutarios no
resultarán afectados.
GARANTIE
Pet Mate geeft vanaf de datum van aankoop 3 jaar lang garantie op dit
produkt mits u de aankoopbon overlegt. Deze garantie betreft slechts
defecten ten gevolge van materiaal- of fabrieksfout. Elk defect
onderdeel wordt gratis gerepareerd of vervangen, dit ter beoordeling
van de fabrikant, en op voorwaarde dat het defect niet ontstaan is door
onzorgvuldigheid, onjuist gebruik of door normale slijtage. Dit heeft
geen effect op uw vastgelegde rechten.
NL
E
F
D
©
PET MATE Ltd.
Lyon Road, Hersham, Surrey, KT12 3PU England.
N.America only:
Ani Mate Inc.
104A Longview Drive, Conroe, Texas 77301
www.pet-mate.com 30503/1208
www.pet-mate.com
+44 (0)1932 700 001
N America (936) 760 4333
www.zoosajten.se
http://www.zoosajten.se/kattlucka-elite-super-selective-p-1757-c-190.aspx

In & Out In Only Out Only Locked
Ein und Aus Nur Eingang Nur Ausgang Verriegelt
Entrée & sortie Entrée seulement Sortie seulement Verrouillée
Entrar y Salir Entrada Solamente Salida Solamente Cerrada
In en uit Alleen toegang Alleen uitgang Gesloten
1 2 3 4 5 6 7 8
910 11 12 13 14 15 16
1
2 3 4 5
6 7
1. ‘SET’ button
2. I.D. Disc search indicator
3. ‘INDIVIDUAL’ lock setting
indicator
4. Low battery indicator
5. AM/PM indicators
(12Hr clock mode)
6. ‘TIMER’ function indicator
7. ‘TIMER’ mode ‘Start/Finish’
indicators
8. ‘TIMER’ button
9. ‘4 WAY’ button
10. CAT 1 location symbol
11. CAT 2 location symbol
12. CAT 3 location symbol
13. ‘4 WAY’ lock indicators
14. Alphanumeric display
(normally states time)
15. ‘ADVANCE’ button
16. ‘PROGRAM’ button
(under cover)
1. SET-Taste
2. Suchanzeige für I.D.-Marke
3. Anzeige für INDIVIDUELLE
Verriegelungseinstellung
4. Niedrige Batterieanzeige
5. AM/PM-Anzeigen
(12-Stunden-Uhrzeitmodus)
6. TIMER-Funktionsanzeige
7. TIMER-Modus für
Start/Finish-Anzeigen
8. TIMER-Taste
9. 4-WEGE-Taste
10. KATZE 1 Aufenthaltssymbol
11. KATZE 2 Aufenthaltssymbol
12. KATZE 3 Aufenthaltssymbol
13. 4-WEGE-
Verriegelungsanzeigen
14. Alphanumerisches Display
(normalerweise
Uhrzeitanzeige)
15. VORWÄRTS-Taste
16. ‘PROGRAMMIERTASTE’
(unter dem Deckel)
1. Touche « SET »
2. Témoin de recherche de
disque d'identification
3. Témoin de réglage de
verrouillage « INDIVIDUAL »
4. Symbole de batterie faible
5. Témoins AM/PM (mode
horloge 12h)
6. Témoin de fonction de
temporisation (« TIMER »)
7. Témoins de démarrage/arrêt
du mode « TIMER »
8. Touche « TIMER »
9. Touche « 4 WAY »
10. Symbole de localisation du
CHAT 1
11. Symbole de localisation du
CHAT 2
12. Symbole de localisation du
CHAT 3
13. Témoins de verrouillage à 4
positions (« 4 WAY »)
14. Affichage alphanumérique
(affiche habituellement
l'heure)
15. Touche d'avancement
(« ADVANCE »)
16. Touche « PROGRAM » (sous
le couvercle)
1. Botón ‘SET’
2. Indicador de búsqueda de
disco de I.D.
3. Indicador de ajuste de
cerrojo 'INDIVIDUAL'
4. Indicador de pila baja
5. Indicadores AM/PM
(mañana/tarde) (modo reloj
de 12 horas)
6. Indicador de función 'TIMER'
7. Indicadores de 'Start/Finish'
en el modo 'TIMER'
8. Botón ‘TIMER’
9. Botón ‘4 WAY’
10. Símbolo de ubicación del
GATO 1
11. Símbolo de ubicación del
GATO 2
12. Símbolo de ubicación del
GATO 3
13. Indicadores de cerrojo
'4 WAY'
14. Pantalla alfanumérica
(normalmente indica la hora)
15. Botón 'ADVANCE'
16. Botón PROGRAM (debajo de
la cubierta)
1. ‘SET’ knop
2. I.D.-disc zoekindicator
3. ‘INDIVIDUAL’
vergrendeling(stand)indicator
4. Lage batterijindicator
5. a.m./p.m.-indicator
(12-uurs klok)
6. 'TIMER' functie-indicator
7. 'TIMER'-'Start/Finish'-
indicator
8. ‘TIMER’ knop
9. ‘4 WAY’ knop
10. KAT 1 locatiesymbool
11. KAT 2 locatiesymbool
12. KAT 3 locatiesymbool
13. '4 WAY'
vergrendelingindicator
14. Alfanumeriek displayscherm
(geeft gewoonlijk tijd aan)
15. 'ADVANCE' knop
16. PROGRAMMA knop
(onder afdekplaatje)
ENGLISHDEUTSCHFRANÇAISESPAÑOL
NEDERLANDS
3

ENGLISH
4
ENGLISH
5
1. Introduction
Thank you for choosing the Cat Mate Elite Super Selective Cat Flap.
WE RECOMMEND THAT YOU CAREFULLY READ THESE INSTRUCTIONS TO
BECOME FAMILIAR WITH THE CAT FLAP BEFORE YOU INSTALL IT.
The Cat Mate Elite Super Selective Cat Flap allows you to control up to 8
cats' access to and from your cat flap. Furthermore, it will allow you to
monitor up to 3 individual cats' movements: showing whether your cat(s)
last entered or exited the cat flap, and how many hours since your cat(s) last
used the flap.
To ensure that your chosen settings cannot easily be tampered with, we
have made the control buttons so that they need to be pressed firmly to
operate.
Once you have started the set-up process and you wish to stop a particular
task at any stage, you can 'TIME OUT' of the system after 60 seconds.
Settings will not be saved unless you press the 'SET' button.
2. Fitting the Batteries
2.1 Remove the battery cover by pushing the battery cover upwards (see
Fig. 2). The cover will snap off.
2.2 Insert 4 x AA (R6) Alkaline batteries as shown (Fig. 3), by sliding the 2
end batteries in first.
3. Programming the I.D. Disc(s)
The next step is to program your I.D. Disc(s). Each cat (up to a maximum of
8), will need its own unique I.D. Disc. We recommend that you now choose
a number for your cat(s) and mark it on the I.D. Disc label (i.e. 1,2,3 etc.),
for future reference. There is a table at the end of these instructions to
record this information.
NOTE: the programming sequence is time sensitive and the LCD will revert
to the normal display if each step is not completed within 60 seconds.
In order for the flap to recognise your cat(s) I.D. Disc, you need to do the
following:
3.1 Press and hold the 'PROGRAM' button on the right hand end of the
circuit board for 5 seconds (Fig. 4) until the display flashes.
3.2 'CAT 1' and the 'NUMBER 1' will flash - there will be lines moving
around the first 'TWO ZEROS'.
3.3 Place the front of the I.D. Disc up against the flap (Fig. 5).
3.4 When the cat flap has programmed the I.D. Disc, the 'TWO ZEROS' will
disappear and a 'P' will flash.
Contents Page
Operation Summary . . . . . . . . . . . . . . . . . . . . . . . . . . . . . . . . . . . . . . . .5
1. Introduction . . . . . . . . . . . . . . . . . . . . . . . . . . . . . . . . . . . . . . . . . . 5
2. Fitting the Batteries . . . . . . . . . . . . . . . . . . . . . . . . . . . . . . . . . . . . . 5
3. Programming the I.D. Disc(s) . . . . . . . . . . . . . . . . . . . . . . . . . . . . . . 5
4. Access Options . . . . . . . . . . . . . . . . . . . . . . . . . . . . . . . . . . . . . . . . 6
4.1 Setting access options . . . . . . . . . . . . . . . . . . . . . . . . . . . . . . 7
4.2 Setting INDIVIDUAL access options (2-8 Cats) . . . . . . . . . . . . .7
4.3 Setting timer control/lock for ALL cats . . . . . . . . . . . . . . . . . . .7
5. Testing the 4 Way Lock . . . . . . . . . . . . . . . . . . . . . . . . . . . . . . . . . 9
6. Fitting I.D. Disc(s) to Your Cat(s) . . . . . . . . . . . . . . . . . . . . . . . . . . . 9
7. Viewing your cat(s) location . . . . . . . . . . . . . . . . . . . . . . . . . . . . . . .9
8. To view how many hours since the cat(s)
last used the flap . . . . . . . . . . . . . . . . . . . . . . . . . . . . . . . . . . . . . .10
9. Training Your Cat to Use the Cat Flap
or if Your Cat Has Lost its I.D. Disc . . . . . . . . . . . . . . . . . . . . . . . . 10
10. Battery Replacement . . . . . . . . . . . . . . . . . . . . . . . . . . . . . . . . . . 10
11. Reprogramming a New I.D. Disc . . . . . . . . . . . . . . . . . . . . . . . . . . 11
12. Factory Reset . . . . . . . . . . . . . . . . . . . . . . . . . . . . . . . . . . . . . . . . 11
13. Troubleshooting . . . . . . . . . . . . . . . . . . . . . . . . . . . . . . . . . . . . . . 11

ENGLISH
6
ENGLISH
7
4.2 Setting INDIVIDUAL Access Options (2-8 Cats)
If you wish to assign an individual access option to each of your cats, e.g.
to keep Cat 1 'LOCKED' in but allow Cat 2 'OUT ONLY', proceed as follows:
NOTE: this setting will not prevent a cat that is not allowed out following
'head to tail' another cat that is allowed out.
4.2.1 Press and hold the '4 WAY' button for 5 seconds until the display
flashes.
4.2.2 Repeatedly press the '4 WAY' button until 'IND' appears on the LCD
display.
4.2.3 Press the 'SET' button to save the setting.
4.2.4 Repeatedly press the '4 WAY' button until the required access option
for Cat 1 is obtained. (Fig. 6).
4.2.5 Press the 'SET' button to save the setting.
4.2.6 Repeat 4.2.4 and 4.2.5 above for all of your cats with a programmed
I.D. Disc.
NOTE: To see the individual settings you have made for your cat(s) at any
time, press the '4 WAY' button for 1 second and release repeatedly.
4.3 Setting Timer Control/Clock for ALL Cats
If you wish to set your cat flap to ensure that ALL cats have a particular
access option (See Fig. 6), over a selected timed period, e.g. to keep your
cat in at night between 19:00 and 06:00, you will first need to decide:
a) What lock setting should apply DURING the timed period, (in the above
example 'IN ONLY' will apply). Outside the timed period, the lock setting
made in section 4.1 or 4.2 will apply.
b) When the timed period should 'START' (In the above example 19:00hrs).
c) When the timed period should 'FINISH' (in the above example 06:00hrs).
d) You will also need to know the current time.
Proceed as follows:
(NOTE: if you do not press a button for more than 20 seconds the display
will revert to normal and you will need to start again).
4.3.1 Press the 'TIMER' button for 5 seconds until the display flashes.
4.3.2 Repeatedly press the '4 WAY' button to select the required access
options from: 'IN & OUT', 'IN ONLY', 'OUT ONLY', 'LOCKED' or
'OFF'.
4.3.3 Press the 'SET' button to save the setting.
3.5 Take the I.D. Disc well away from the flap and then press the 'SET'
button to save the setting.
3.6 Now 'CAT 2' and the 'NUMBER 2' will flash - there will be lines moving
around the first 'TWO ZEROS'.
For additional cats, up to a maximum of 8, repeat steps 3.3 to 3.5.
Once completed, do not press any buttons for 60 seconds. (If you have
reached your maximum and programmed 8 Discs, it will automatically exit).
NOTE: in your pack you are provided with 2 I.D. Discs. Additional I.D. Discs
may be purchased.
4. Access Options
The access options available are shown below (Fig. 6).
In & Out Cat(s) can come in and out of the flap
In Only Cat(s) can come in through the flap but cannot leave
through the flap
Out Only Cat(s) can go out through the flap but cannot enter
through the flap
Locked Cat(s) cannot use the flap
You may set your cat flap so that ALL cats have the same access option, e.g.
if you normally want all of your cats to be allowed in and out (See Section
4.1).
If you have 2 or more cats, you may prefer to have individual access options
for each of your cats, e.g. to keep 1 cat in and 1 cat out (See Section 4.2).
Finally, you may also set your cat flap to ensure ALL cats have a particular
access option over a selected time period, e.g. to keep all cats in at night
(See section 4.3).
4.1 Setting Access Options for ALL Cats
If you wish ALL of your cats, (or if you just have 1 cat), to have the same
access option, e.g. you require ALL cats to be able to come in and go out of
the flap, proceed as follows:
4.1.1 Press and hold the '4 WAY' button for 5 seconds until the display
flashes.
4.1.2 Repeatedly press the '4 WAY' button to scroll through the available
access options (Fig. 6), until you come to the one you want.
4.1.3 Press the 'SET' button to save the setting.

ENGLISH
8
ENGLISH
9
To test the cat flap:
5.1 Set the '4 WAY' lock as 'IN & OUT' (See section 4.1).
5.2 Place the programmed I.D. Disc in front of the cat flap door as shown
in Fig. 5 and PUSH the flap. The flap should then unlock.
5.3 Fully open the flap and allow it to close. You will hear it re-lock.
If you repeatedly press the flap without an I.D. Disc being close to the flap,
it will go into 'POWER SAVING' mode. You should wait 60 seconds before
trying again.
(NOTE: Once the flap has been opened, the 'POWER SAVING' mode is
cancelled).
6. Fitting I.D. Disc(s) to your Cat(s)
6.1 If desired, record your cat’s details on the I.D. label by writing on the
label in pen and sticking the clear waterproof cover over the writing.
6.2 IMPORTANT: Attach the Disc directly to the collar, NOT from a ring
attached to the collar) so that it is as high as possible and parallel to
flap (as shown in Fig. 7).
We recommend the use of a fabric collar without large metal attachments,
(other name discs etc.).
7. Viewing Your Cat(s) Location
The LCD shows at a glance, the location of up to three cats (1-3).
The cat last went through the flap, coming into the house;
The cat last went through the flap, going out of the house.
Please note this display is only a guide to your cats' location. The cat flap
determines the location of your cat by recording its last movement through
the cat flap. The results may be misleading if the cat has an alternative
entrance/exit to the house or if the cat has followed another cat through the
cat flap; if it only puts its nose out of the cat flap etc.
8. To View How Many Hours Since the Cat(s) Last Used the Cat Flap
8.1 To view how many hours since cats 1, 2 or 3 last used the cat flap,
press the '+' button for 1 second.
8.2 The display will show the symbol for 'CAT 1' and how many hours ago
'CAT 1' used the flap up to a maximum of 99 hours.
8.3 Press '+' again for similar information on Cats 2 and 3.
8.4 Press '+' a fourth time (or leave for 20 seconds) and the normal display
will be resumed.
4.3.4 The display will show time with the Minute symbol flashing. Press
the '+' button until the current Minutes setting is shown (i.e. 10 if
the current time is 12:10).
4.3.5 Press the 'SET' button to save the setting.
4.3.6 The display will now show the time with the Hour symbol flashing.
If you prefer to use AM/PM setting, press the '4 WAY' button and
the AM or PM icon will show.
4.3.7. Press the '+' until the correct Hour setting is shown (e.g. 12 if the
current time is 12:10).
4.3.8. Press the 'SET' button to save the setting.
4.3.9. The display will show the word 'START' and the minutes will flash.
Press the '+' button until the desired minutes setting is shown, (in
the above example '00'). Press the 'SET' button to save the setting.
4.3.10 Then set the hours in the same way (in the above example 19:00).
4.3.11 The display will show the 'FINISH' time. Set in the same way as the
'START' time. Remember to press 'SET' to save the setting.
When the Timer is set, the 'CLOCK FACE' on the display will be shown.
When the timed lock is active, the access option symbol chosen at 4.3.2 will
flash slowly. (NOTE: the display may not show the chosen lock setting for up
to 1 minute.).
To check the time settings, press the 'TIMER' button for 1 second and
release. The display will show the timed access option selected and the
'START' time. Press the 'TIMER' button again to show 'FINISH' time. The
display will revert to current time after 20 seconds.
To cancel timer control and revert back to the normal access option:
4.3.12 Press the 'TIMER' button for 5 seconds.
4.3.13 Press the '4 WAY' button and go back through the options until you
come to 'OFF'.
4.3.14 Press the 'SET' button to save the setting.
(NOTE: the display may not show the chosen lock setting for up to
1 minute.).
5. Testing the 4 Way Lock
To operate the cat flap, you must push the flap and have a programmed I.D.
Disc.
The cat flap will look for an I.D. Disc for 2-6 seconds. (The I.D. Disc search
indicator flashes to confirm this). If the I.D. Disc is programmed to allow
your cat access, the flap will be unlocked.
Table of contents
Languages:
Other CAT MATE Pet Care Product manuals

CAT MATE
CAT MATE Elite User manual

CAT MATE
CAT MATE C3000 User manual

CAT MATE
CAT MATE C500 User manual

CAT MATE
CAT MATE PET FOUNTAIN User manual

CAT MATE
CAT MATE C500 User manual

CAT MATE
CAT MATE 360 User manual

CAT MATE
CAT MATE C50 User manual

CAT MATE
CAT MATE 210 User manual

CAT MATE
CAT MATE MICROCHIP CAT FLAP User manual

CAT MATE
CAT MATE Elite 355 User manual