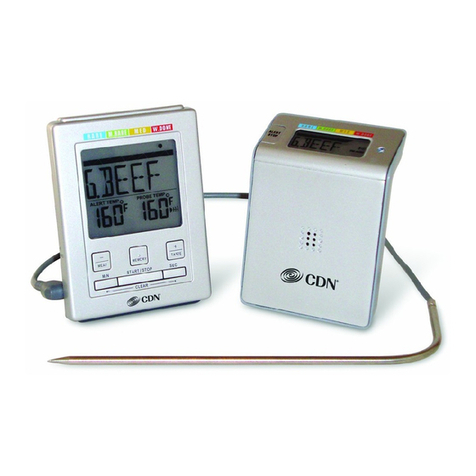
CDN DSP1 User manual

Model: DSP1
DUAL-SENSING
PROBE THERMOMETER/TIMER
32 to 572°F/0 to 300°C; Counts 10 hours by hours, minutes & seconds
FOR ROASTS AND OTHER MEATS
IN OVEN OR BARBECUE
• 6.75"/17,0 cm probe
• 39"/1 m sensor cable (heat resistant up to
600°F/315°C for 3 hours)
• High heat probe
• Programmable settings for both probe
and oven temperatures
• Dual function
• Dual progress display – instant readout of internal
food temperature and ambient oven temperature
during cooking
• Distinct alert sounds when food is done,
and for oven temperature and timer functions
• Overtime alert
• Counts up/down
• Big digit
• Alarm
• Stop & restart
• Counts up after zero
• Food-safe ABS case
• 304 stainless steel probe
• On/off button
• Temperature guide on case
• 2-way mounting: magnet/stand
• 1.5V AAA IEC LR03 alkaline battery, included
GET PROFESSIONAL RESULTS
EVERY TIME!
Food Mode
Perfect for roasting or grilling. Simply insert the probe
into the food. Place the food in the oven or barbecue
and close the oven door (or grill cover) directly over
the sensor cable. Set the temperature alert for USDA
safe cooking temperatures — listed on the back of
the case! Both the set and actual temperatures are
displayed during cooking.
Oven Mode
For oven testing, the DSP1 measures the ambient
temperature of the oven simultaneously and offers
distinct alert sound when the set oven temperature
is reached.
Timer Mode
Count up or down with this big digit timer. Keep track
of overtime and avoid confusion with the distinct
sound of the timer alarm.
Note: Remove label from display before initial use.
Clean the thermometer probe before each use.
Note: In the following instructions, names of the control
buttons are shown in CAPS. Function information that
appears on the display is shown in BOLD CAPS.
BATTERY INSTALLATION
Replace battery when LCD becomes dim and weak
or alarm level declines.
1. Remove battery cover on the back.
2. Install one 1.5V AAA battery observing polarity
shown in compartment. A brief alarm sounds.
3. Replace the battery cover until it clicks shut.
4. Lo ashes on the display when the probe/sensor
cable is disconnected or malfunctions.
OPERATING INSTRUCTIONS
A. On/Off
1. Press and hold the ON/OFF button for
2 seconds to turn on.
2. Press and hold the ON/OFF button for
2 seconds to turn off.
Tel 800 338-5594 Fax 800 879-2364 Web CDNmeasurement.com

B. Temperature Scale
Press the °F/°C button to select temperature
reading in Fahrenheit or Celsius. °F or °C appears
to the right of the digits in both the OVEN and
FOOD ( )portions of display.
C. Select Mode
Press the MODE button to switch the top portion
of the display between Oven and Timer modes.
OVEN or TIMER ( ) appears in the upper left
portion of the display.
D. Timer Mode
Press the MODE button to switch the top portion of
the display to Timer Mode. TIMER ( ) appears in
the upper left portion of the display.
1. Count Down
a. Press the HR and/or MIN buttons to enter the
desired time. Press and hold button for fast
advance.
b. Press the START/STOP button to start
counting down. The COUNT DOWN icon
() ashes under TIMER ( ) on the display.
c. Press the START/STOP button to interrupt the
count. Press the START/STOP button again to
resume the count.
d. When the count reaches 0:0000, the alarm
sounds 3 beeps per second and the display
ashes for 20 seconds or until the START/
STOP button is pressed. The timer counts up
the overtime since reaching 0:0000 and the
COUNT UP icon ( ) ashes above TIMER
( ) on the display. The maximum overtime is
9:5959.
Note: When the count reaches the maximum overtime
of 9:5959, the display automatically resets to 0:0000,
the alarm sounds 4 beeps per second and the display
ashes for 20 seconds.
e.
The alarm and ashing stops automatically
after 20 seconds while the count up continues.
f. Press the START/STOP button to interrupt the
count. Press the START/STOP button again to
resume the count.
g.
Press both HR and MIN buttons simultaneously
when timer is stopped to reset to 0:0000.
2. Count Up
a. When timer is stopped, press both HR and
MIN buttons simultaneously to clear the time
and reset to 0:0000.
b. Press the START/STOP button to begin the
count up. The COUNT UP icon ( ) ashes
above TIMER ( ) on the display.
c. Press the START/STOP button to interrupt the
count. Press the START/STOP button again to
resume the count.
Note: When the count reaches the maximum overtime
of 9:5959, the display automatically resets to 0:0000,
the alarm sounds 4 beeps per second and the display
ashes for 20 seconds.
d.
Press both HR and MIN buttons simultaneously
to clear count up time and reset to 0:0000.
E. Food Mode
1. Insert the probe at least 1" (2.7 cm) into the
meat; making sure that it is not inserted into a
fatty deposit or gristle or near the bone or the
cooking surface.
CAUTION: Probe may be HOT after use. Always wear a
heat resistant glove to touch the stainless steel probe or
sensor cable during or just after cooking. Do not touch
with bare hands.
2. Gently close the oven door on the sensor
cable and insert the plug into the jack on the
left side of the case. Allow approximately 10
to 15 seconds for the probe tip to get accurate
temperature reading. The probe temperature is
displayed in big digits under FOOD ( ) on the
lower portion of the display.
3. Press the FOOD °T button to set the desired
temperature under SET in the FOOD ( )
portion of the display. Press and hold for fast
advance.
Note: Food alert range is 86 to 572°F/30 to 300°C.
4. Press the ALERT button to turn the audio/visual
alert on, the ALERT SYMBOL ( ) appears
on the display.
5. The alert sounds 2 beeps per second when the
food temperature exceeds the set temperature
by one degree. The ALERT SYMBOL ( )
and food temperature ash and a CAUTION
SYMBOL ( )appears on the lower left portion
of the display.
6. Press any button to stop the audio alert.
The ALERT SYMBOL ( ) and food
temperature continue to ash and the
CAUTION SYMBOL ( ) remains as long
as the food temperature reading exceeds
the set temperature.
7. If the food temperature remains higher than the
set temperature for 2 minutes, the audio alert
will activate again. It will continue to reactivate
every 2 minutes until the alert is turned off or
the food temperature reading drops below
the set temperature.
8. Press the ALERT button to turn the alert off.
The ALERT SYMBOL ( ) disappears
from the display
F. Oven Mode
1. Press the MODE button to switch the top
portion of the display to Oven mode. OVEN
appears in the upper left portion of the display.
2. Insert the probe into the meat; making sure that
the oven sensor is free of all contact with the
meat or cooking surfaces.
CAUTION: Probe may be HOT after use. Always wear a
heat resistant glove to touch the stainless steel probe or
sensor cable during or just after cooking. Do not touch
with bare hands.
3. Gently close the oven door on the sensor cable
and insert the plug into the jack on the left
side of the case. Allow approximately 10 to 15
seconds for the oven sensor to get accurate

temperature reading. The oven temperature is
displayed in big digits under OVEN on the upper
portion of the display.
4. Press the OVEN °T button to set the desired
temperature under SET in the OVEN portion of
the display. Press and hold for fast advance.
Note: Oven alert range is 86 to 572°F/30 to 300°C.
5. Press the ALERT button to turn the audio/visual
alert on, the ALERT SYMBOL ( ) appears
on the display.
6. The alert sounds 1 beep per second when the
oven temperature exceeds the set temperature
by one degree. The ALERT SYMBOL ( )
and oven temperature ash and a CAUTION
SYMBOL ( )appears on the lower left portion
of the display.
7. Press any button to stop the audio alert.
The ALERT SYMBOL ( ) and oven
temperature continue to ash and the
CAUTION SYMBOL ( ) remains as long as
the oven temperature reading exceeds the set
temperature.
8. If the oven temperature remains higher than the
set temperature for 2 minutes, the audio alert
will activate again. It will continue to reactivate
every 2 minutes until the alert is turned off or the
oven temperature reading drops below the set
temperature.
9. Press the ALERT button to turn the alert off. The
ALERT SYMBOL ( ) disappears from the
display.
G. Error Messages
The DSP1 incorporates visual diagnostic messages
as follows:
1. HI indicates that the probe temperature is higher
than 572°F/300°C.
2. LO indicates that:
a. the probe temperature is lower than 32°F/0°C,
b. the sensor cable is disconnected, or
c. the probe is malfunctioning.
3. Should the display appear incorrectly, turn off
and on to reset the thermometer.
Note: Clean the thermometer probe before each use.
Important: DO NOT LEAVE THERMOMETER CASE IN
HOT OVEN. IT IS NOT HEAT RESISTANT. DO NOT USE
PROBE IN MICROWAVE OVENS.
Important: ONLY THE PROBE CAN BE SUBMERGED IN
LIQUID. THE PROBE/SENSOR CABLE CONNECTION IS
NOT WATERPROOF.
Note for Induction Cooktops: Sometimes, the induction
cooktop magnetic eld may interfere with digital
thermometers. If there is interference, briey turn off the
induction cooktop to get a digital thermometer reading
or use a dial thermometer.
Tip: Meat should be allowed to “rest” for 10 to 15 minutes
after it is removed from oven. This allows time for the
meat’s internal temperature to stabilize and the juices to
redistribute. This will result in a roast that is both juicier and
easier to carve.
CARE OF YOUR PRODUCT
• Wipe clean with a damp cloth.
• Store the thermometer at room temperature
between -4 to +149°F/ -20 to +65°C.
PRECAUTIONS
• Always wear a heat resistant glove to touch the
stainless steel probe during or just after cooking.
Do not touch with bare hands.
• Dispose of used batteries promptly and keep
the batteries, stainless steel probe and sensor
cable away from children.
• Clean the probe and dry thoroughly after use.
• To avoid deformation, do not place the unit in
extreme temperatures. Never burn the probe
directly over the re. Do not use the probe when the
temperature is above 536°F/280°C. Doing so will
deteriorate the wire.
• Clean the probe and sensor cable with warm soapy
water and dry thoroughly after use. The unit is
not waterproof — do not immerse it into water or
expose to heavy rain.
• Do not expose the sensor cable plug or the jack on
the case to water or any liquid, which will result in a
bad connection and faulty readings.
• Avoid cleaning the unit with an abrasive or corrosive
compound, which may scratch the plastic parts and
corrode the electronic circuits.
• Avoid subjecting the thermometer to excessive
force, shock, dust, temperature, direct sunlight
or humidity. This may result in thermometer
malfunction, shorter electronic life span, battery
damage and/or distort parts.
• Avoid tampering with the thermometer’s internal
components, which may cause battery damage
and distort parts.
• Do not use the thermometer in microwave oven.
• Always read the user manual thoroughly
before operating.
SPECIFICATIONS
Measurement Range 32 to 572°F/0 to 300°C; Timer counts
10 hours by hours, minutes & seconds
Unit of Measure °F/°C selectable
Resolution 0.1°F/0.1°C
Operating Range 32 to 104°F/0 to 40°C/≤90% RH
Temperature Alert 86 to 572°F/30 to 300°C
Power Supply One 1.5V AAA IEC LR03 alkaline
battery, included

© 09 -2020 CDN Made in China CD9999199en - 9/20
CE Note: This device could be sensitive to electrostatic
discharge. If electrostatic discharge or malfunctioning
occurs, please re-install the battery to reset this unit.
USDA SAFE FOOD TEMPERATURES
* Beef, Veal, Lamb – well ......160°F ..71°C
* Beef, Veal, Lamb – medium...145°F ..63°C
* Beef, Veal, Lamb – rare ......140°F ..60°C
Poultry ...................165°F ..74°C
* Pork/Ham – pre-cooked .....145°F ..63°C
Ground Meat ..............160°F ..71°C
* 3 minutes rest time
The information in this document has been reviewed and is believed to
be accurate. However, neither the manufacturer nor its afliates assume
any responsibility for inaccuracies, errors or omissions that may be
contained herein. In no event will the manufacturer or its afliates be
liable for direct, indirect, special, incidental or consequential damages
arisen by using this product or resulting from any defect/omission in
this document, even if advised of the possibility of such damages.
The manufacturer and its afliates reserve the right to make
improvements or changes to this document and the products and
services described at any time, without notice or obligation.
5-Year Limited Warranty: Any instrument that proves to be
defective in material or workmanship (excluding batteries)
within ve years of original purchase will be repaired or
replaced without charge upon receipt of the unit prepaid
at: CDN, PO Box 10947, Portland, OR 97296-0947 USA.
This warranty does not cover damage in shipment or
failure caused by failure to adhere to the accompanying
instructions, inadequate maintenance, normal wear
and tear, tampering, accident, misuse, unauthorized
modication, obvious carelessness or abuse. CDN shall
not be liable for any consequential or incidental damages
whatsoever.
For more detailed information on our products,
please visit CDNmeasurement.com
or call 800-338-5594.
HIGH ALTITUDE ADJUSTMENT
FOR CANDY-MAKING
STAGE 2,000 feet 5,000 feet 7, 500 feet
Soft Ball 230–236°F 224–230°F 219–225°F
Firm Ball 238–244°F 232–238°F 227–233°F
Hard Ball 246–264°F 240–258°F 235–253°F
Soft Crack 266–286°F 260–286°F 255–275°F
Hard Crack 296–306°F 290–300°F 285–295°F
OIL TEMPERATURE GUIDE
325–375°F/163-190°C is the normal desired
temperature for deep fry cooking.
Note: When food is added to hot oil, the temperature of
the oil immediately drops at least 50°F/28°C. You will need
to bring the oil temperature back to the desired cooking
temperature. Frying at lower temperatures results in lighter
color, less avor development and increased oil absorption.
DEEP FRY TEMPERATURE GUIDE
Deep Fry Lo . . . . . . . . . 325-340°F ....163-170°C
Deep Fry Hi .........340-365°F ....170 -185°C
Shrimp .................350°F ....177°C
Chicken ................355°F ....180°C
Onions .................370°F ....188°C
Fish....................375°F ....191°C
Doughnuts/Fritters .......375°F ....191°C
French Fries .............380°F ....193°C
CANDY TEMPERATURE GUIDE
Jelly ...................220°F ....104°C
Thread .............230–234°F ....110 –112°C
Soft Ball ............234–240°F ....112–115°C
Firm Ball ............244–248°F ....118 –120°C
Hard Ball ...........250–266°F ....121–130°C
Soft Crack ..........270–290°F ....132–143°C
Hard Crack..........300–310°F ....149 –154°C
Caramelize ..........316–338°F ....15 8 –170°C
CAUTION: Avoid keeping the thermometer too close
to objects that continuously generate high heat for long
periods (i.e., hot plate). This can cause the thermometer
to overheat.
Other CDN Thermometer manuals

CDN
CDN DBBQ212 User manual

CDN
CDN ProAccurate DTW450L User manual

CDN
CDN DTC450 User manual

CDN
CDN IN482 User manual

CDN
CDN DTTW572 Instruction manual

CDN
CDN ProAccurate DTT450-P User manual

CDN
CDN ProAccurate Insta-Read IRB220-F-6.5 User manual

CDN
CDN ProAccurate INTP662 User manual

CDN
CDN WT2 User manual

CDN
CDN DTL572 User manual
Popular Thermometer manuals by other brands

Hanna Instruments
Hanna Instruments Checktemp1 HI 98510 instruction manual

Maverick Industries
Maverick Industries XR-40 manual

Pure Distilling
Pure Distilling Digital Distilling Thermometer manual

Fieldpiece
Fieldpiece ST4 Operator's manual

Napoleon
Napoleon ACCU-PROBE 70077 instruction manual

SHIKON
SHIKON SK-033 instruction manual