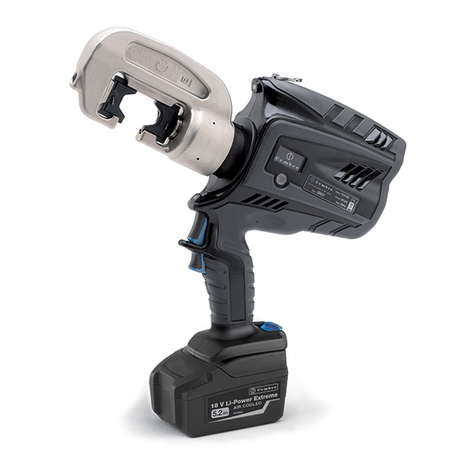
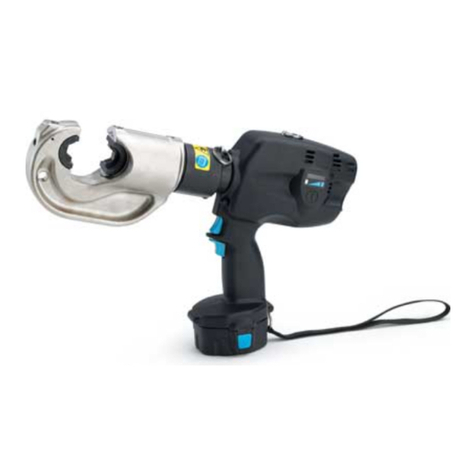
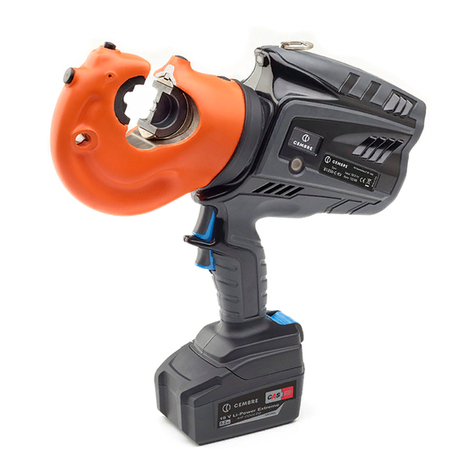
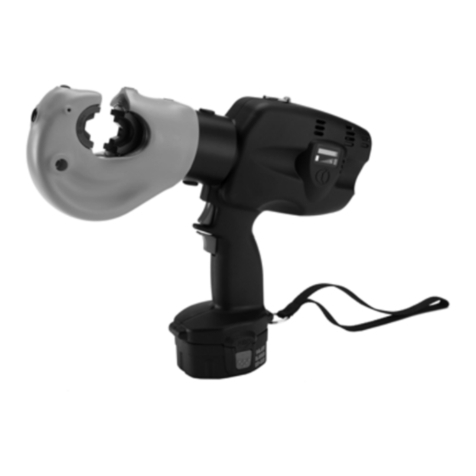
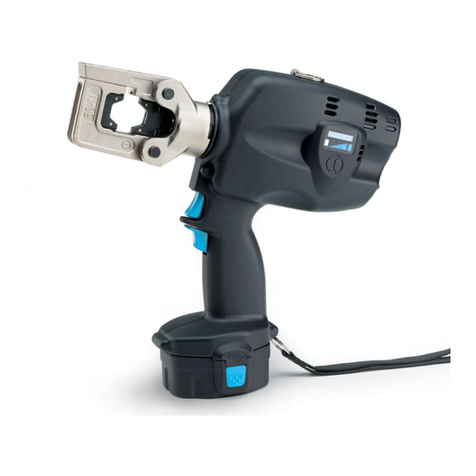
Cembre B-FC470 User manual

1
BATTERY OPERATED HYDRAULIC FRAME TYPE HOLE PUNCHING TOOL
OUTIL HYDRAULIQUE PERCE GOULOTTE SUR BATTERIE
AKKUWERKZEUG ZUM STANZEN VON KLEINEN KANÄLEN
HERRAMIENTA HIDRÁULICA PERFORA CANALETAS DE BATERíA
UTENSILE OLEODINAMICO FORACANALINE A BATTERIA
B-FC470 B-FC470A B-FC470E B-FC470T
ENGLISH
FRANÇAIS
DEUTSCH
ESPAÑOL
ITALIANO
ĞƌƟĮĞĚŶǀŝƌŽŶŵĞŶƚĂů
DĂŶĂŐĞŵĞŶƚ^LJƐƚĞŵ
ĞƌƟĮĞĚKĐĐƵƉĂƟŽŶĂů
,ĞĂůƚŚΘ^ĂĨĞƚLJ
DĂŶĂŐĞŵĞŶƚ^LJƐƚĞŵ
ĞƌƟĮĞĚYƵĂůŝƚLJ
DĂŶĂŐĞŵĞŶƚ^LJƐƚĞŵ
OPERATION AND MAINTENANCE MANUAL................................... 6
NOTICE D’UTILISATION ET ENTRETIEN........................................... 11
BEDIENUNGSANLEITUNG................................................................... 16
MANUAL DE USO Y MANTENIMIENTO........................................... 21
MANUALE D’USO E MANUTENZIONE............................................. 26
15 M 062

2
FIG. / BILD 1
1
2
Punch - Poinçon
Stempel - Punzón
Punzone
Die - Matrice
Matrize - Matriz
Matrice
Ø 15.5 ÷ Ø 30.5 mm
(0.610 ÷ 1.201 in.)
Ø 31.8 ÷ Ø 47,2 mm
(1.252 ÷ 1.858 in.)
Ø 15.5 ÷ Ø 30.5 mm
(0.610 ÷ 1.201 in.)
Ø 31.8 ÷ Ø 47.2 mm
(1.252 ÷ 1.858 in.)
4mm Allen key
Clé Allen de 4mm
Inbusschlüssel 4mm
Llave Allen 4mm
Chiave a brugola 4mm
C
B
C
B
FIG. / BILD 2

3
FIG. / BILD 4
FIG. / BILD 5
FIG. / BILD 3
max.
53.5mm
1
2
3

4
1
LED WORKLIGHT / ECLAIRAGE PAR LED / LED-BELEUCHTUNG / LUCES LED / ILLUMINAZIONE LED
2
HEAD / TETE / KOPF / CABEZA / TESTA
3
OPERATING BUTTON / GACHETTE DE COMMANDE / STARTKNOPF / BOTÓN DE ACCIONAMIENTO
/ PULSANTE DI AZIONAMENTO
4
PRESSURE RELEASE BUTTON / GACHETTE DE DECOMPRESSION / DRUCKABLASSKNOPF / BOTÓN
DESBLOQUEO PRESIÓN / PULSANTE DI RILASCIO
5
BATTERY / BATTERIE / AKKU / BATERÍA / BATTERIA
6
BATTERY CAPACITY INDICATOR / INDICATEUR DE CHARGE / AKKUANZEIGE / INDICADOR DE
CARGA BATERIA / INDICATORI AUTONOMIA BATTERIA
7
BATTERY CHECK BUTTON / BOUTON POUR CONTROL DE LA BATTERIE /TASTE FÜR AKKUÜBERPRÜ-
FUNG / BOTÓN DE CONTROL BATERÍA / PULSANTE DI VERIFICA BATTERIA
8
BATTERY RELEASE / DEBLOCAGE BATTERIE / AKKU ENTRIEGELUNG / DESBLOQUEO BATERÍA /
SBLOCCO BATTERIA
9
RING FOR SHOULDER STRAP / ANNEAU POUR BANDOULIERE / TRAGERIEMENRING / ANILLO PARA
CORREA / ANELLO AGGANCIO TRACOLLA
10
EXTRACTORS / EXTRACTEURS / AUSZIEHER / EXTRACTORES / ESTRATTORI
FIG. / BILD 6
9
4
5
2
1
8
7
6
3
10
LE
D
WO
RK
LI
GH
T
/
EC
LA
IR
AG
E
PA
R
LE
D
/
LE
D-
BE
LE
UC
HT
UN
G
/
LU
CE
S
LE
D
/
IL
LU
MI
H
EAD
/
TETE
/
KOPF
/
CABEZA
/
TEST
A
OPERATING BUTTON / GACHETTE DE COMMANDE / STARTKNOPF / BOTÓN DE ACC
F
4
5
2
1
3
3

5
– Before using the tool, carefully read the instructions in this manual.
– Avant d'utiliser cet outil, lire attentivement les instructions de cette notice.
– Vor Inbetriebnahme unbedingt die Bedienungsanleitung durchlesen.
– Antes de utilizar la herramienta, leer atentamente las instrucciones en este manual.
– Prima di utilizzare l'utensile, leggere attentamente le istruzioni riportate in questo manuale.
–When operating the tool, keep hands away from the danger zone.
–Au cours de l'utilisation, tenir les mains éloignées de la zone de danger.
–Während den Arbeiten mit dem Werkzeug nicht in die Gefahrenzone fassen.
–Durante su utilización, mantenga las manos fuera de la zona de peligro.
–Durante l'utilizzo, mantenere le mani fuori dalla zona di pericolo.
– Always wear safety glasses and gloves when operating this tool.
– Porter toujours les lunettes de protection et les gants de travail.
– Das Werkzeug immer mit Schutzbrille und Handschuhe betätigen.
– Trabajar siempre con las gafas y guantes de seguridad.
– Operare sempre con occhiali di protezione e guanti da lavoro.
WARNING SYMBOLS - SYMBOLES D'AVERTISSEMENT - WARNSYMBOLE -
SÍMBOLOS DE ADVERTENCIA - SIMBOLI DI AVVERTENZA
– Never throw batteries into re or water.
– Jamais jeter les batteries dans le feu ou dans l'eau.
– Werfen Sie Akkus nicht in das Feuer oder Wasser.
– Nunca tire las baterías al fuego o al agua
– Mai gettare le batterie nel fuoco o in acqua.
– Always recycle the batteries.
– Recycler toujours les batteries.
– Verbrauchte Akkus stets dem Recycling zuführen.
– Reutilizar siempre las baterías.
– Riciclare sempre le batterie.
– Do not discard batteries into domestic refuse or waste disposal.
– Ne pas jeter de batteries dans une poubelle ou autre lieu non prévu à cet eet.
– Verbrauchte Akkus nicht der allgemeinen Abfallentsorgung zuführen.
– No tirar las baterías al cubo de basura o lugar parecido.
– Non buttate le batterie fuori uso nei cestini della spazzatura o luoghi simili.
– User information (Directives 2002/95/EC and 2002/96/EC), see page 34.
– Information pour les utilisateurs (Directives 2002/95/CE et 2002/96/CE) voir page 34.
– Information für den Benutzer (Richtlinien 2002/95/EG und 2002/96/EG) siehe Seite 34.
– Informe para los usuarios (Directivas 2002/95/CE y 2002/96/CE) vease página 34.
– Informazione agli utenti (Direttive 2002/95/CE e 2002/96/CE) vedere pagina 34.
Battery - Batterie - Akku - Batería - Batteria
Tool - Outil - Werkzeug - Herramienta - Utensile
TG 0960

6
(*) The tool can also be used to punch holes up to ø 28,5 mm in the base of trunking that is less than 50 mm
(2") dee
p.
(1) Directive 2006/42/EC, annexe 1, point 1.7.4.2 letter u)
LpA = weighted continuous acoustic pressure level equivalent.
LpCPeak = maximum value of the weighted acoustic displacement pressure at the work place.
LWA = acoustic power level emitted by the machine.
(2) (Directive 2006/42/EC, annexe 1, point 2.2.1.1)
Weighted root mean square in frequency of the acceleration the upper limbs are exposed to for each biodynamic
reference axis. Tests carried out in compliance with the indications contained in UNI ENV 25349 and UNI EN 28662
part 1st Standards, and under operating conditions much more severe than those normally found.
1. GENERAL CHARACTERISTICS
B-FC470 B-FC470E
B-FC470T
B-FC470A
Application range suitable for punching holes in
the sidewall* of cable trunking
Hole punching range mm (inches) ø 15,5 ÷47,2 (ø 0.61 ÷ 1.86)
Max. hole centre distance
from the edge of the trunking
(ref. to g. 3)
mm (inches)
53,5 (2.11)
Minimum operating pressure
bar (psi) 370 (5,300)
Dimensions (ref. to Fig. 7) mm (inches) 379 x 346 x 83 (14.9 x 13.6 x 3.3)
Weight with battery kg (lbs) 6,2 (13.6)
Motor V DC 18
Operating temperature °C (°F) -15 to +50 (+5 to +122)
Recommended oil AGIP ARNICA 32 or equivalents
Operating speed twin speed operation and automatic switching from a rapid
advancing speed of the ram to a slower, more powerful speed
Safety maximum pressure valve
Rechargeable battery V / Ah / Wh 18 / 4.0 / 72
Type CB1840L (Li-Ion)
Weight kg (lbs) 0,66 (1.45)
Battery charger
ASC30-36
Input
type EU
27044000
UK
27045000
AUS/NZ
27047000
USA/CAN
27046000
V / Hz 220 - 240 / 50 - 60 115 / 60
W85
Acoustic noise (1)
LpA dB (A)
73
LpCPeak dB (C) 94.5
LWA dB (A) 79
Vibration (2) m/s20.575 max.
ENGLISH

7
ENGLISH
WARNING
Do not use the tool for purposes other than those intended by Cembre.
The operator should concentrate on the work being performed and be careful to maintain a
balanced working position.
Before each use check the punches and dies, replace any that are worn or damaged, particularly
any punches that have damaged cutting surfaces.
Damaged or improperly assembled accessories can break and hit the operator with sucient
force to cause serious injuries.
Before each use, verify the integrity of the tool; replace any worn, possibly damaged or missing
parts with original Cembre spares.
The use of Cembre punching accessories is recommended. Accessories from other suppliers may
not be designed to withstand the force generated by this tool and may be damaged or break with
potential risk of serious injury.
Protect the tool from rain and moisture. Water will damage the tool and battery.
Electro-hydraulic tools should not be operated in pouring rain.
2. INSTRUCTIONS FOR USE
The part reference includes the following:
– Hydraulic hole punching tool.
– Li-Ion rechargeable battery (2 pcs).
– Battery charger (model depends on the tool version).
– Shoulder strap.
– Carrying case.
– Canvas bag "013".
– 4 mm Allen key with handle.
– 3 mm Allen key for extractors.
– USB cable (Ref. to § 4).
2.1) Preparation
The tool can be easily carried using either the handle or the
shoulder strap attached to ring (9) (Ref. to Fig. 6).
Beforestartinganywork,checkthebatterycharge (Ref.
to § 2.7) and recharge if necessary, following the
instructions in the battery charger user manual.
To replace the battery, remove it by pressing the release
button (8), then insert the new battery, sliding it into the
guides until it locks. Battery
8

8
2.2) Head rotation
For ease of operation, the tool head can rotate through 180°, allowing the operator to work in the
most comfortable position.
Do not attempt to turn the head when the hydraulic circuit is pressurised.
2.3) Assembling of the accessories
Consult the table on page 33 to select the RD... Punching Kit suitable for the hole to be made.
2.3.1) Punch sizes ø 15.5 - 30.5 mm have a 7/16"-20 UNF thread (**)
Screw the stud C on the ram (see Point 1 Fig. 1).
Screw the punch onto the stud C. Tighten by hand, do not over-tighten (see Point 2 Fig. 1).
Insert the appropriate locking screw C completely into the die and screw the "die-locking screw"
assembly into the upper die holder (see Fig 2).
Use the 4 mm Allen key, supplied with the tool, to tighten the locking screw.
Turn the locking screw, anticlockwise to secure and clockwise to release.
2.3.2) Punch sizes ø 31.8 - 47.2 mm have a 3/4”-16 UNF thread.
Screw the stud B on the ram (see Point 1 Fig. 1).
Screw the punch onto the stud B. Tighten by hand, do not over-tighten (see Point 2 Fig. 1).
Insert the appropriate locking screw B completely into the die and screw the "die-locking screw"
assembly into the upper die holder (see Fig 2).
Use the 4 mm Allen key, supplied with the tool, to tighten the locking screw.
2.4) Punching
Before punching:
Check the correct match between die and punch.
Keep hands away from the punching zone to avoid serious risk of injury!
Position the tool on the trunking, at the desired hole centre (see Fig. 4).
Firmly hold the tool and operate the push-button (3) to achieve the required hole: the ram will
gradually pull the punch forward until the hole is produced.
When the hole is performed, release the push-button, otherwise after the maximum pressure
relief valve has activated the motor, and will stop automatically.
(**) KIT KAD3/8-FC is available separately for accessories with a 3/8"-24UNF thread.
ENGLISH

9
ENGLISH
When punching holes in the base of trunking (see Fig. 5) with sides 50 mm (2") high, it is
necessary to t the die after positioning the tool on the trunking.
Prior to removing the tool from the trunking, unscrew and remove the die.
2.5) Retracting the punch
By pressing the pressure release button (4) placed on the body of the tool below push-button,
the ram will retract and the punch release; the extractors (10) will then permit the tool to be
disengaged from the trunking.
Ensure that no punch slugs remain in the die.To remove a slug
from the die, insert a small drift through the locking screw (B or
C), on to the slug and tap sharply.
Checkandremovescrapslugand anyresiduefromthe die.
2.6) LED Worklights
Whilst the tool is in operation, the work area is illuminated by two
high luminosity LED Worklights that switch o automatically at
the end of the cycle.
2.7) Battery status
The battery is equipped with LED indicators that indicate the
remaining battery life at any time by pressing the adjacent but-
ton (7):
4 LEDs illuminated: fully charged
2 LEDs illuminated: 50 % capacity
1 LED flashing: minimum charge, replace the battery.
Tool LEDs illuminated combined with an alarm audible
when the operating button (3) is pressed, indicate that the
battery voltage has dropped below a minimum safety threshold;
under these conditions the tool will not start, and it is necessary
to recharge or replace the battery.
The approximate time to fully recharge a battery is about 80
minutes.
After each working cycle, and after the extraction of the battery from the tool, an integrated
battery cut-o device will operate after 70 s approx. Then the LED nearest to button (P) will
ash 5 times each 14 s approx. The battery will be reactivated when it is reintroduced into the tool
and the operating button is pressed.
7
1
3
4

10
2.8) Using the battery charger
Carefully follow the instructions in the battery charger user manual.
3. MAINTENANCE
The tool is robust, completely sealed, and requires very little daily maintenance. Compliance with
the following points, should help to maintain its optimum performance:
3.1) Thorough cleaning
Dust, sand and dirt are a danger for any hydraulic device.
Every day, after use, the tool must be wiped with a clean cloth taking care to remove any residue,
especially close to pivots and moveable parts.
Do not use hydrocarbons to clean the rubber parts.
3.2) Storage case
When not in use, the tool should be stored and transported in the steel case, to prevent damage.
The case, type VAL FC470, is suitable for storing the tool and the accessories.
VAL FCL: Size 559x459x131 mm (22x18.1x5.2 inches), Weight 6,7 kg (14.7 lbs).
4. CONNECTION TO COMPUTER
The memory card integrated in the tool records operating data from 200.000 cycles for transfer via
the USB cable supplied.
To view and manage this data, go to www.cembre.com and register in the dedicated area, then
download the free Cembresoftware CEM_SWBT01.
Keeping the Firmware of the tool updated, via free of charge download from here, will optimise
the tool's performance.
5. RETURN TO Cembre FOR OVERHAUL
In the case of a breakdown, contact your local Agent who will advise you on the problem and give
you the necessary instructions on how to dispatch the tool to our nearest service Centre; if possible,
attach a copy of the CembreTest Certicate supplied with the tool or, if no other references are
available, indicate the approximate purchase date and the tool serial number.
ENGLISH

11
1. CARACTERISTIQUES GENERALES
B-FC470 B-FC470E
B-FC470T
B-FC470A
Domaine d'application: conçue pour percer des trous sur les côtés* des
parties rectilignes des goulottes normalisées
Capacité de percage mm (inches) ø 15,5 ÷47,2 (ø 0.61 ÷ 1.86)
Distance maximales de
perçage du bord de goulotte
(voir Fig. 3)
mm (inches)
53,5 (2.11)
Pression min. de travail bar (psi) 370 (5,300)
Dimensions (voir Fig. 7) mm (inches) 379 x 346 x 83 (14.9 x 13.6 x 3.3)
Poids avec batterie kg (lbs) 6,2 (13.6)
Moteur V DC 18
Température de fonction-
nement:
°C (°F) -15 à +50 (+5 à +122)
Huile recommandée: AGIP ARNICA 32 ou équivalents.
Avance rapide:
l’outil passe automatiquement de la vitesse rapide
à la vitesse lente de perçage.
Sécurité valve de surpression.
Batterie rechargeable V / Ah / Wh 18 / 4.0 / 72
Type CB1840L (LI-Ion)
Poids kg (lbs) 0.66
Chargeur de batterie
ASC30-36
Alimentation
type EU
27044000
UK
27045000
AUS/NZ
27047000
USA/CAN
27046000
V / Hz 220 - 240 / 50 - 60 115 / 60
W85
Bruit aérien sonore (1)
LpA dB (A) 73
LpCPeak dB (C) 94.5
LWA dB (A) 79
Vibrations (2) m/s20.575 maxi.
FRANÇAIS
(*) Selon la géométrie de la goulotte, il est possible d’eectuer sur sa base, des trous jusqu’à ø 28,5 mm pour
des goulottes de 50 mm (2") maxi.
(1) (Directive 2006/42/CE, annexe 1, point 1.7.4.2, lettre u)
LpA = niveau de pression sonore continue équivalente pondérée A sur le poste de travail.
LpCPeak = valeur de pression sonore instantanée pondérée C sur le poste de travail.
LWA = niveau de puissance acoustique dégagée par la machine.
(2) (Directive 2006/42/CE, annexe 1, point 2.2.1.1)
Valeur quadratique moyenne pondérée en fréquence de l'accélération à laquelle sont exposés les membres supérieurs
pour chaque axe biodynamique de référence. Relevés réalisés suivant les indications des Normes UNI ENV 25349 et
UNI EN 28662 partie 1a, dans des conditions de service largement représentatives des conditions d'emploi normales.

12
FRANÇAIS
AVERTISSEMENT
Ne pas utiliser cet outil à des ns diérentes que celles prévues par le constructeur.
Restezbienattentif toutau longdutravail,ne soyezpasdistrait,ne perdezpasl’équilibre pendant
l'utilisation.
Avant chaque utilisation, contrôler les poinçons, les matrices et les remplacer en cas d'usure ou
dommage, remplacer les poinçons qui présenteraient des surfaces de coupe endommagées.
Desaccessoiresendommagésou malmontéspeuventserompreet atteindrel’opérateuravecune
force susante pour provoquer des lésions graves.
Avant chaque utilisation, vérier que la tête est en bon état; remplacer les pièces usagées et
éventuellement endommagées ou manquantes avec des pièces de rechange originales Cembre.
Il est conseillé d’utiliser des accessoires de perçage Cembre. Les accessoires de perçage d’autres
fabricants pourraient s’abîmer ou ne pas résister à la force générée par cet outil ce qui aurait des
conséquences également graves pour la sécurité des personnes.
Protéger l’outil de la pluie et de l’humidité. L’eau pourrait endommager l’outil et la batterie, les
outils hydro-electriques ne devraient pas être utilisés sous la pluie.
2. INSTRUCTIONS D'UTILISATION
L' ensemble comprend:
– Outil hydraulique pour percer.
– Batterie rechargeable Li-Ion (2 pcs).
– Chargeur de batterie (diérent en fonction de la version de l'outil).
– Bandoulière.
– Coret de rangement.
– Sacoche "013".
– Clé 6 pans de 4 mm, munie d'une poignée.
– Clé 6 pans de 3 mm pour extracteurs.
– Câble USB (Voir § 4).
2.1) Mise en service
L’outilpeutêtretransportéfacilementgrâceàsapoignéeetà
la bandoulière accrochée par l'anneau (9) (Voir Fig. 5).
Avantdecommencertouteopération,contrôler l’état
de charge de la batterie (voir § 2.7) et si nécessaire,
la recharger en suivant les instructions contenues dans le
manuel d’utilisation du chargeur de batteries.
Pourremplacer la batterie,laretirerenappuyant surleméca
nismededéblocage(8),puisintroduirelanouvellebatterieen
la faisant coulisser sur les guides jusqu’au blocage complet. Batterie
8

13
FRANÇAIS
2.2) Rotation de la tête
La tête de l'outil pivote de 180° par rapport au corps, permettant à l'utilisateur de travailler dans la
meilleure position.
Ne pas forcer la rotation de la tête, lorsque le circuit hydraulique est sous pression.
2.3) Montage des accessoires
En consultant le tableau de la page 33, choisir le KIT de perforation RD... adapté au trou à eectuer.
2.3.1) Trous de ø 15.5 à 30.5 mm sont letés 7/16’’-20 UNF (**)
Visser le prisonnier C sur le piston (voir But 1 Fig. 1).
Visser le poinçon sur le prisonnier C en serrant sans forcer à la main (voir But 2 Fig. 1).
Inserer à fond la vis de blocage C à l'intérieur de la matrice (voir Fig. 2).
Visser l'ensemble "matrice-vis de blocage" dans son emplacement et serrer à fond par l’extérieur,
par l’intermédiaire de la clé Allen de 4 mm fournie avec l’outil.
Rotation anti-horaire pour xer, et horaire pour desserrer.
2.3.2) Trous de ø 31.8 à 47.2 mm sont letés 3/4’’-16 UNF.
Visser le prisonnier B sur le piston (voir But 1 Fig. 1).
Visser le poinçon sur le prisonnier B en serrant sans forcer à la main (voir But 2 Fig. 1).
Inserer à fond la vis de blocage B à l'intérieur de la matrice (voir Fig. 2).
Visser l'ensemble "matrice-vis de blocage" dans son emplacement et serrer à fond par l’extérieur,
par l’intermédiaire de la clé Allen de 4 mm fournie avec l’outil.
2.4) Perçage
Avant d’eectuer le perçage:
Vérier que le couplage entre la matrice et le poinçon correspondant est correct.
Tenir les mains éloignées de la zone de perçage. Risque de lésions!
Positionner l’outil sur la goulotte (voir Fig. 4) à l’endroit établi.
Tenez l'outil fermement y appuyer sur la gâchette de commande (3) pour mettre en marche le
groupe moteur pompe, le mouvement du piston commencera entraînant ainsi le déplacement
en avant du poinçon et le perçage de la tôle.
Relâchez la gâchette de commande lorsque la coupe est eectuée.
Si l'on maintient le moteur actionné, l’outil s’arrêtera automatiquement avec l'intervention de la
valve de surpression.
(**) Est disponible séparément el KIT KAD3/8-FC pour utiliser les accessoires avec un letage de 3/8 "-24UNF.

14
FRANÇAIS
Pour percer la base d’une goulotte avec hauteur de 50 mm (2"), insérer la matrice après
avoir mis la tête en position (voir Fig. 5), et la démonter avant de retirer l’outil.
2.5) Réouverture du poinçon
En appuyant à fond sur la gâchette de déblocage pression (4) qui se trouve sur le corps de l'outil
sous la gâchette de commande, on provoque le retour du piston et par conséquent le retour du
poinçon; des extracteurs (10) permettent de dégager l’outil de la goulotte.
Faire en sorte que le copeau ferreux de la coupe ne reste pas dans la matrice.
Si besoin est, il doit être retiré en insérant un instrument pointu
dansle trousituésur lehautde latêteet lefairesortiren passant
par la vis de blocage (B ou C), en donnant un coup fort.
Vérier qu’il ne reste aucun résidu de découpage à l’inté-
rieure de la matrice.
2.6) Led
Lors de l’actionnement de l’outil, la zone de travail est éclairée au
moyen de deux LED haute luminosité qui s’éteignent automati-
quement à la n du cycle.
2.7) Autonomie de la batterie
La batterie est équipée d’indicateurs à LED qui permettent de
contrôler, à tout moment, son autonomie résiduelle en appuyant
sur le bouton (7):
4 led allumées: autonomie maximale
2led allumées: autonomie à 50 %
1led clignotante: autonomie minimale, remplacer la batterie.
L'éclairage des deux Led associé à l’avertisseur sonore
lorsque l’on appuie sur le bouton de déclenchement (3)
indiquequelabatterieestdéchargéeetquesatensionestdescen-
dueau-dessousduseuilminimaldesécurité;dans cettesituation,
l’outil ne démarre pas, il est donc nécessaire de recharger ou de
remplacer la batterie.
À titre indicatif, le délai de recharge complète de la batterie cor-
respond à environ 80 min.
A la n de chaque cycle de travail comme à l’extraction de la batterie de l’outil, un dispositif
électronique arrête automatiquement la batterie après environ 70 s.
Pour conrmer cette opération, la led la plus proche du bouton (P) clignotera 5 fois en 14 s (approxi-
mativement). La batterie est réactivée dès sa réintroduction dans l’outil, ou en appuyant sur le
bouton d’actionnement.
7
1
3
4

15
FRANÇAIS
2.8) Utilisation du chargeur de batterie
Suivre attentivement les instructions indiquées sur le manuel.
3. ENTRETIEN
L'outilestrobuste,complètementscelléetnenécessiteaucunepréoccupationouattentionparticulièr.
Lesrecommandationsquisuiventsontnéanmoinssouhaitablespourassurerunelongévitéoptimum:
3.1) Nettoyage élémentaire
Veiller à protéger l'outil de la poussière, du sable et de la boue qui sont un danger à tout système
hydraulique. Chaque jour après utilisation, l'outil doit être nettoyé à l'aide d'un chion propre, tout
particulièrement aux endroits de pièces mobiles.
Ne jamais utiliser d’hydrocarbures pour le nettoyage des parties en caoutchouc.
3.2) Rangement
Au repos, pour protéger l'outil des coups accidentels et de la poussière, il convient de le ranger
dans le coret. Ce coret (type VAL FC470), adapté pour contenir l'outil et ses accessoires a comme
dimensions: 559x459x131 mm (22x18.1x5.2 inches) et un poids de 6,7 kg (14.7 lbs.).
4. CONNEXION À L’ORDINATEUR
Le chier de mémoire intégrée dans l’outil permet d’enregistrer les paramètres relatifs aux cycles
eectués(200.000 évents) etdepouvoirlestransférerversun ordinateurpar l’intermédiairedu câble
USB fourni. Pour visualiser et gérer les données mémorisées, le logiciel Cembre CEM_SWBT01
est disponible gratuitement après enregistrement dans le domaine réservé du site www.cembre.
com. Dans ce domaine réservé, il sera alors possible de trouver les mises à jour éventuelles des
rmwarespermettantàvospropresoutilsunemeilleureecacitéetd’améliorerleursperformances.
5. ENVOI EN REVISION A Cembre
En cas de dysfonctionnement de l'appareil, merci de vous adresser à notre Agent Régional qui
vous conseillera et le cas échéant vous donnera les instructions nécessaires pour envoyer l'outil à
notre Centre de Service le plus proche. Dans ce cas, joindre une copie du Certicat d'Essai livré par
Cembreavec l'outil ou, à défaut d'autres éléments de référence, indiquer la date d'achat approxi-
mative et numéro de série.

16
1. ALLGEMEINE EIGENSCHAFTEN
(*)JenachGeometrie,könnenauchStanzungenanderGrundächedesKanalsbiszueinemDurchmesservon28,5mm,
bei einer Kanalhöhe von 50 mm (2"), ausgeführt werden.
(1) Richtlinie 2006/42/EG, Anhang 1, Nummer 1.7.4.2, Buchstabe u)
LpA = Stufe konstanter Emissionsschalldruckpegel entsprechend Gewichtung A am Arbeitsplatz.
LpCPeak = maximaler Emissionsschalldruckpegel entsprechend Gewichtung C am Arbeitsplatz.
LWA = Emissionsschalldruckpegel durch das Gerät
(2) Richtlinie 2006/42/EG, Anhang 1, Nummer 2.2.1.1)
Der durchschnittlicheSchwingungsgesamtwert dem die oberenKörpergliedmaßen ausgesetzt sind,wurde technisch
vergleichbar nach UNI ENV 25349 und UNI EN 2662 Teil 1 an einer repräsentativen Maschine ermittelt und übersteigt
nicht den vorgeschriebenen Wert.
B-FC470 B-FC470E
B-FC470T
B-FC470A
Anwendungsbereich ist zum Stanzen der seitlichen Wänden von
geraden, genormten Kabelkanälen geeignet *
Stanzabmessungen: mm (inches) ø 15,5 ÷47,2 (ø 0.61 ÷ 1.86)
Max. Stanzabstand vom
Rand des Kanals beträgt
(siehe Bild 3)
mm (inches)
53,5 (2.11)
Arbeitsdruck bar (psi) 370 (5,300)
Abmessungen (siehe Bild 7) mm (inches) 379 x 346 x 83 (14.9 x 13.6 x 3.3)
Gewicht inkl. Akku kg (lbs) 6,2 (13.6)
Motor V DC 18
Betriebstemperatur: °C (°F) -15 bis +50 (+5 bis +122)
Empfohlenes Öl: AGIP ARNICA 32 oder ähnliches
Kolbenvorschub:
Das Werkzeug ist mit einer Doppelkolbenhydraulik
ausgerüstet. Beim Beginn des Arbeitsvorganges wird auto-
matisch auf den langsameren Arbeitshub umgeschaltet.
Sicherheit: Überdruckventil
Wiederauadbarer Akku V / Ah / Wh 18 / 4.0 / 72
Typ CB1840L (Li-Ionen)
Gewicht kg (lbs) 0,66 (1.45)
Akkuladegerät
ASC30-36
Spannung
Typ EU
27044000
UK
27045000
AUS/NZ
27047000
USA/CAN
27046000
V / Hz 220 - 240 / 50 - 60 115 / 60
W85
Lärmschutzbestimmung (1)
LpA dB (A)
73
LpCPeak dB (C) 94.5
LWA dB (A) 79
Vibrationen (2) m/s20.575 max.
DEUTSCH

17
DEUTSCH
HINWEISE
Verwenden Sie das Akkuwerkzeug ausschließlich für den vom Hersteller vorgesehenen Anwen-
dungszweck.
Arbeiten Sie konzentriert und lassen Sie sich während des Einsatzes nicht ablenken. Nehmen Sie
zur Arbeit eine sichere und standfeste Arbeitsposition ein!
Vor jeglicher Benutzung die Stempel und Matrizen überprüfen, und bei Verschleiß oder Beschä-
digung, sowie Stempel mit beschädigten Schnittkanten, ersetzen.
Beschädigte oder falsch montierte Werkzeuge können brechen. Dies kann Personen mit einer
derartigen Kraft treen, dass diese schwere Verletzungen davontragen können.
VorjederBenutzungdie UnversehrtheitdesKopfesüberprüfen.Verschleißteile, beschädigteoder
fehlende Teile, durch Originalersatzteile von Cembre ersetzen.
Es wird die Verwendung des Stanzzubehörs von Cembre empfohlen. Stanzzubehör anderer Her-
steller könnte beschädigt werden oder, der von diesem Werkzeug erzeugten Kraft, nicht stand
halten. Daraus leitet sich eine große Gefahr für die Unversehrtheit des Personals ab.
Das Werkzeug vor Regen und Feuchtigkeit schützen. Wasser könnte das Werkzeug und den Akku
beschädigen. Elektrohydraulische Werkzeuge sollten nicht im Regen eingesetzt werden.
2. BEDIENUNGSHINWEISE
Zum Lieferumfang unter dieser Bezeichnung gehören folgende Teile:
– Hydraulisches Akku-Lochstanzwerkzeug.
– 2 Stück wiederaufladbare Li-Ion Akkus.
– Ladegerät (entsprechend der Länderkonguration).
– Trageriemen.
– Koer.
– Segeltuchtasche "013".
– Inbusschlüssel 4 mm mit Handgri.
– Inbusschlüssel 3 mm für Auszieher.
– USB-Kabel (siehe Punkt 4).
2.1) Vorbereitung
DasWerkzeugkannbequemamGriodermitdemTrageriemen,
deramRing(9)(sieheBild6)befestigtist,transportiertwerden.
ÜberprüfenSievorjedemArbeitsvorgangdenLadezu-
standderAkkus(siehePkt.2.7)undladenSiebeiBedarf
dieAkkus,entsprechenddenAnweisungeninderBedienungs-
anleitung des Akkuladegerätes, auf.
Drücken Sie für den Akkuaustausch auf die Entriegelung
(8) und führen Sie den neuen Akku bis zum Einrasten ein.
Akku
8

18
2.2) Drehbewegung des Kopfes
Das Werkzeug ist mit einem Kopf ausgerüstet, der um 180° drehbar ist und somit ein komfortables
Arbeiten ermöglicht.
Der Kopf darf keinesfalls in eine andere Position gedreht werden, während das Werkzeug
unter Druck steht.
2.3) Montagezubehör
Aus derTabelle auf Seite 33 das für die Stanzung entsprechende KIT RD... auswählen. Für den Bedarf
anderer Stanzgrößen als die hier angezeigten, wenden Sie sich bitte an Cembre.
2.3.1) Löcher ø 15.5 bis 30.5 mm (Gewinde Typ 7/16" -20 UNF)(**)
Die Adapterschraube C auf den Kolben befestigen (siehe Punkt 1, Bild. 1).
Den Stempel auf der Adapterschraube C befestigen, nicht mit übermäßiger Kraft anziehen
(siehe Bild 1).
Die Blockierungsschraube C der Matrize tief bis zum Anschlag anziehen (siehe Bild 2).
Von Hand die Blockierungsschraube für die Matrize in die Nut einschrauben und mit dem mit-
gelieferten Inbusschlüssel fest anziehen.
2.3.2) Löcher ø 31.8 bis 47.2 mm (Gewinde Typ 3/4" -16 UNF)
Die Adapterschraube B auf den Kolben befestigen (siehe Punkt 1, Bild. 1).
Den Stempel auf der Adapterschraube B befestigen, nicht mit übermäßiger Kraft anziehen
(siehe Bild 1).
Die Blockierungsschraube B der Matrize tief bis zum Anschlag anziehen (siehe Bild 2).
Von Hand die Blockierungsschraube für die Matrize in die Nut einschrauben und mit dem mit-
gelieferten Inbusschlüssel fest anziehen.
Zur Arretierung nach links drehen und zum Lösen nach rechts drehen.
2.4) Stanzung
Vor dem Stanzen folgendes beachten:
Die korrekte Montage der Matrize, sowie Positionierung am entsprechenden Stempel kont-
rollieren. Nicht in den Stanzbereich fassen. Verletzungsgefahr!
Das Werkzeug "sichtbar" an der zu stanzenden Stelle positionieren (siehe Bild 4).
Halten Sie das Werkzeug fest. Durch Drücken des Startknopfes (3), beginnen Motor und Pumpe
zu arbeiten und der Kolben beginnt sich zu bewegen; der Stempel bewegt sich und der Kanal
wird gestanzt.
Wenn die Stanzung erfolgt ist, den Startknopf loslassen. Oder es erfolgt ein automatisches Ab-
schalten des Werkzeuges mit Erreichen des Maximaldruckes durch das Überdruckventil.
(**) Auf Anfrage, ist das KIT KAD3/8-FC für Matrizen und Stempel mit einem 3/8" -24UNF Gewinde erhältlich.
DEUTSCH

19
DEUTSCH
Bei Stanzungen an der Grundäche des Kanales mit einer Höhe von 50 mm (2"), muß das
Werkzeug, wie in Bild 5 angezeigt, angesetzt werden.
Die Matrize darf erst nach der Positionierung des Werkzeuges montiert werden und muss vor der
Entfernung des Werkzeuges, vom Kanal demontiert werden.
2.5) Zurückfahren des Stempels
Drücken Sie kräftig den Druckablasshebel (4), der sich unterhalb des Startknopfes bendet.
Dadurch fährt der Stempel zurück. Das Werkzeug kann durch den Niederhalter (10) aus dem
Kanal entfernt werden.
Stellen Sie sicher, dass keine Stanzrückstände in der Matrize
haften bleiben. Sollte dies der Fall sein, können sie durch Ein-
führeneinesWerkzeugesin dasobereMatrizenlochbzw.durch
die Blockierungsschraube (B oder C) und durch einen heftigen
Schlag, entfernt werden.
Stellen Sie sicher, dass keine Stanzrückstände innerhalb
der Matrize zurückbleiben.
2.6) LED
Während des Betätigen des Werkzeugs wird der Stanzbe-
reich von zwei LED-Leuchten mit hoher Helligkeit ausge-
leuchtet, die sich am Zyklusende automatisch abschalten.
2.7) Akkuladung
Die Akku ist mit LED-Anzeigen ausgestattet, die jederzeit über
die verbleibende Akkulaufzeit Auskunft gibt, indem man auf die
Taste für Akkuüberprüfung (7) drückt:
4LED eingeschaltet: Maximale Ladung
2LED eingeschaltet: Ladung zu 50 %
1LEDblinkend:MinimaleLadung,Akkuaustauschenbzw.auaden.
Ist der Akku nicht mehr ausreichend geladen, wird mit
Betätigen des Startknopfes (3) über die LED-Anzeige,
zusammen mit einem akustischen Signal, das Erreichen des Min-
destsicherheitsniveaus signalisiert. Unter diesen Bedingungen
kann das Werkzeug nicht in Betrieb genommen werden.
Laden Sie den Akku auf, oder tauschen Sie ihn aus.
Ein vollständiger Ladevorgang eines leeren Akkus, dauert etwa
80 Minuten.
Nachjedem Arbeitszyklus, wieauch nachEntfernen desAkkus, schaltet dasWerkzeugdurch
die eingebaute Elektronik nach ca. 70s automatisch ab.
AlsBestätigungdesVorganges,wirddieLED-AnzeigebeiderTaste(P),5-malhintereinanderinnerhalb
von ca. 14s blinken. Durch Einführen des Akkus in das Werkzeug, wird der Akku wieder aktiviert,
oder durch Betätigen des Startknopfes.
7
1
3
4

20
2.8) Verwendung des Ladegerätes
Die in der Bedienungsanleitung aufgeführten Hinweise sind zu beachten.
3. WARTUNG
Das Werkzeug ist robust und benötigt keine spezielle Pege.
Zur Erhaltung der Garantieansprüche beachten Sie folgende Hinweise:
3.1) Pege
DieseshydraulischeWerkzeugsolltevorstarkerVerschmutzungwieStaub,Sand,Schmutz geschützt
werden, da dies für ein hydraulisches System gefährlich ist.
Nach jeder täglichen Anwendung sollte das Werkzeug mit einem Tuch von Schmutz und Staub
gereinigt werden, besonders die beweglichen Teile. Verwenden Sie keine Kohlenwasserstoe (z.B.
Teilereiniger, Bremsenreiniger) zum Reinigen der Gummiteile.
3.2) Lagerung
Wird das Werkzeug nicht benötigt, sollte es in dem Metallkoer gelagert werden, um es so gegen
Beschädigungen wie Stöße und Staub zu schützen.
Der MetallkoerTypVAL FC470 hat folgende Abmessungen: 559x459x131 mm (22x18.1x5.2 inches)
und ein Gewicht von 6,7 kg (14.7 lbs). Er ist geeignet zum Lagern vom Werkzeug und Zubehör.
4. ANSCHLUSS AN EINEN COMPUTER
DerimWerkzeugintegrierteSpeicher,ermöglichtdieParameterderdurchgeführtenZyklen(200.000
Zyklen) zu speichern, und mit dem mitgelieferten USB-Kabel auf einen Computer zu übertragen.
Um die Daten vom Werkzeug zu übertragen und zu verwalten, müssen Sie unter www.cembre.
com die Cembre Software CEM_SWBT01 nach einer Registrieung downloaden.
Hier nden Sie auch mögliche Firmware Updates für die Platine des Werkzeuges, um eine best-
mögliche Leistung und Ezienz des Werkzeuges zu ermöglichen.
5. EINSENDUNG AN Cembre ZUR ÜBERPRÜFUNG
Sollten an dem Gerät Fehler auftreten, wenden Sie sich bitte an unsere Gebietsvertretung, die
Sie gerne beraten und Ihnen alle nötigen Informationen, zum Einsenden des Gerätes an unseren
Hauptsitz, geben wird. Wenn vorhanden, legen Sie dem Gerät bitte eine Kopie des von Cembre
mitgelieferten Zertikates bei. Bei fehlenden Informationen geben Sie bitte an, wann Sie das Gerät
erworben haben.
DEUTSCH
This manual suits for next models
3
Table of contents
Languages:
Other Cembre Power Tools manuals

Cembre
Cembre HT120-KV User manual

Cembre
Cembre B1350-C-KV Installation guide

Cembre
Cembre B1300-UC User manual

Cembre
Cembre RHU81-D User manual

Cembre
Cembre NR-25B User manual

Cembre
Cembre RHU 1000 Owner's manual

Cembre
Cembre B135-UC User manual

Cembre
Cembre B54MD-D6 User manual

Cembre
Cembre B600 User manual

Cembre
Cembre RHU520 User manual

Cembre
Cembre EPB-1N User manual

Cembre
Cembre B131-UC User manual

Cembre
Cembre B35-45MD User manual

Cembre
Cembre RHU600 User manual

Cembre
Cembre LD-2EN User manual

Cembre
Cembre MTE1-S User manual

Cembre
Cembre BTEPE2.DET10 User manual

Cembre
Cembre RH50 User manual

Cembre
Cembre B35-50D User manual

Cembre
Cembre TND6-70 User manual