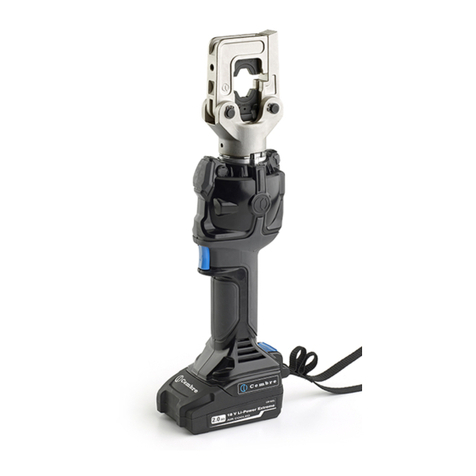
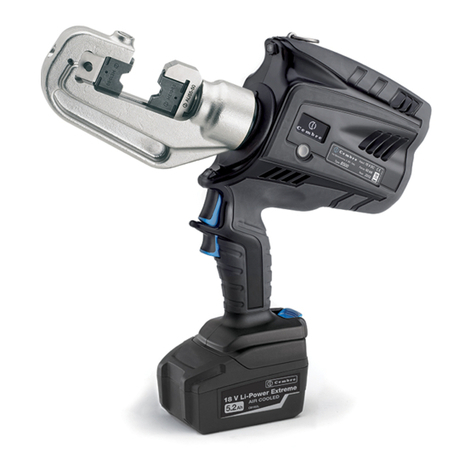
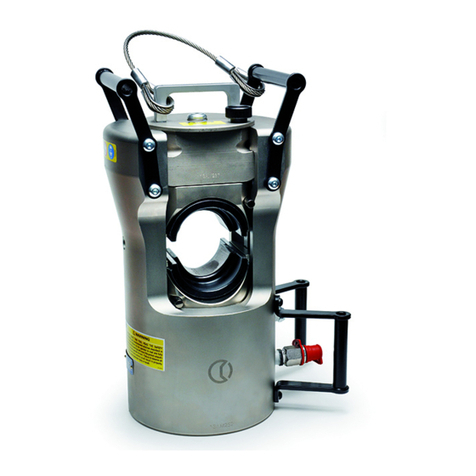
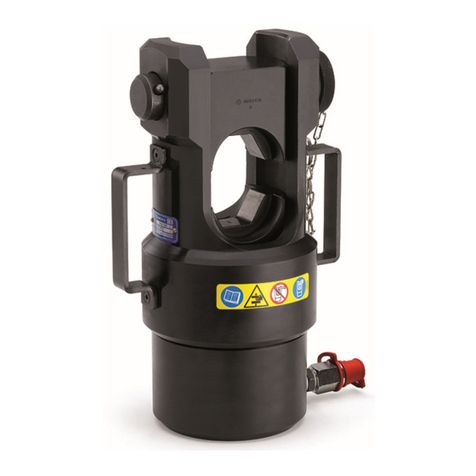
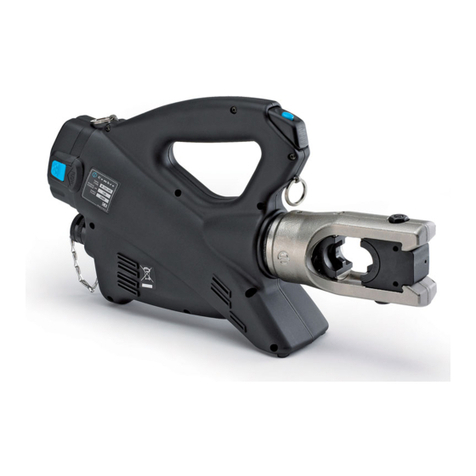
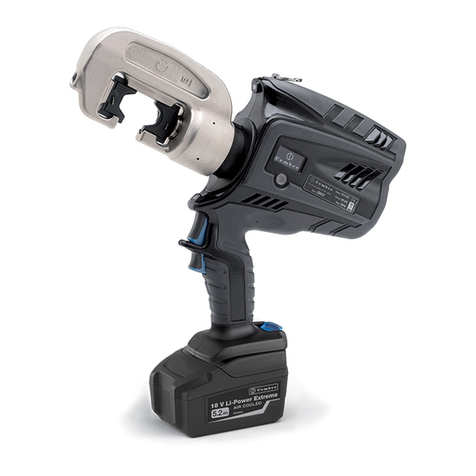
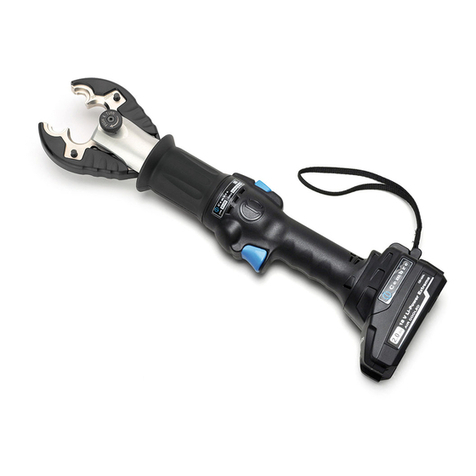
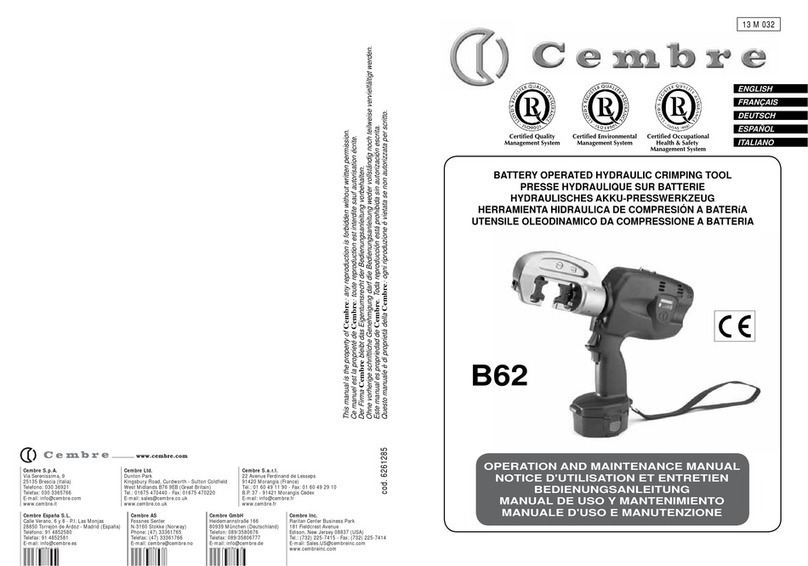
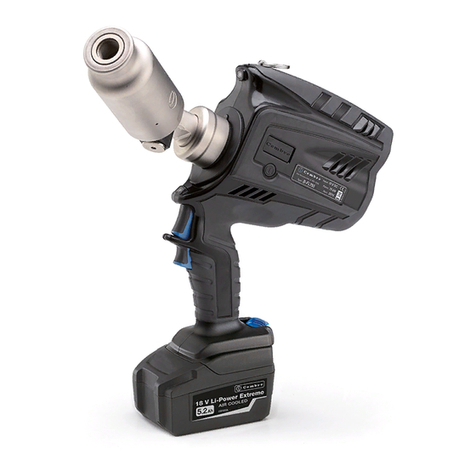
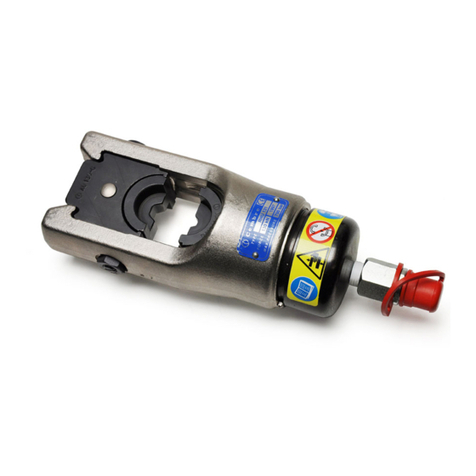
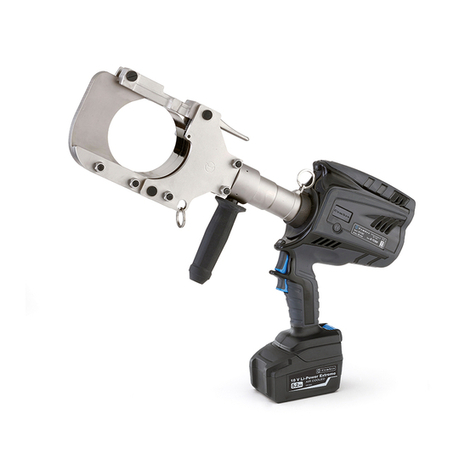
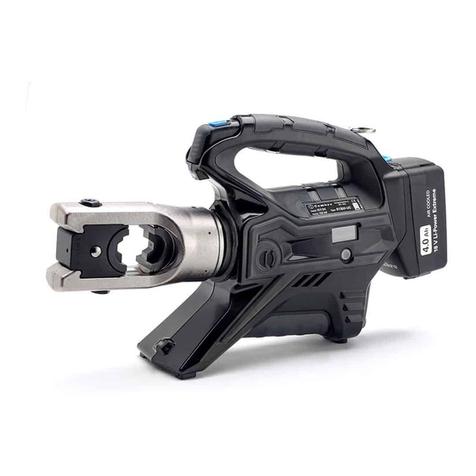
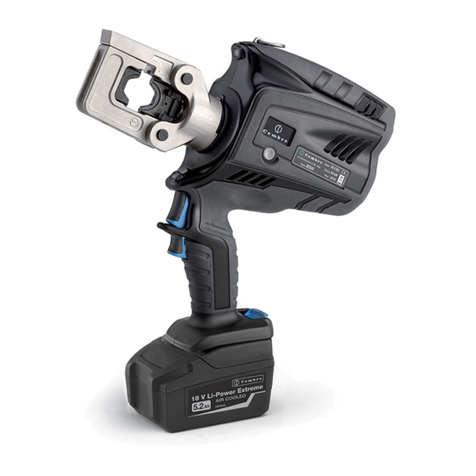
Cembre B1300-C-KV User manual

1
BATTERY OPERATED HYDRAULIC CRIMPING TOOL
OUTIL HYDRAULIQUE DE SERTISSAGE SUR BATTERIE
HYDRAULISCHES AKKU-PRESSWERKZEUG
HERRAMIENTA HIDRÁULICA DE CRIMPADO A BATERÍA
UTENSILE OLEODINAMICO DA COMPRESSIONE A BATTERIA
B1300-C-KV B1300-CA-KV B1300-CE-KV B1300-CT-KV
B1300L-C-KV B1300L-CA-KV B1300L-CE-KV B1300L-CT-KV
ENGLISH
FRANÇAIS
DEUTSCH
ESPAÑOL
ITALIANO
Cerfied Environmental
Management System
Cerfied Occupaonal
Health & Safety
Management System
Cerfied Quality
Management System
OPERATION AND MAINTENANCE MANUAL....................................5
NOTICE D’UTILISATION ET ENTRETIEN........................................... 13
BEDIENUNGSANLEITUNG................................................................... 21
MANUAL DE USO Y MANTENIMIENTO........................................... 29
MANUALE D’USO E MANUTENZIONE............................................. 37
15 M 086

2
FIG. / BILD 1 FIG. / BILD 2
FIG. / BILD 4FIG. / BILD 3 1
2
10
14
Connector
Connecteur
Kabelschuh
Terminal
Connettore
Battery
Batterie
Akku
Batería
Batteria
Die set - Matrices - Presseinsätze - Matrici
12
13
16
~ 8 - 10 mm
(0.3 - 0.4 in.)
15
5
11

3
FIG. / BILD 5
3
7
4
35
10
8
9
2
1
6
7
11
1
OPERATING BUTTON / GACHETTE DE COMMANDE / STARTKNOPF / BOTÓN DE ACCIONAMIENTO
/ PULSANTE DI AZIONAMENTO
2
PRESSURE RELEASE BUTTON / GACHETTE DE DECOMPRESSION / DRUCKABLASSKNOPF /
BOTÓN DESBLOQUEO PRESIÓN / PULSANTE SBLOCCO PRESSIONE
3
LEDWORKLIGHT / ECLAIRAGE PAR LED / LED-BELEUCHTUNG / LUCES LED / ILLUMINAZIONE LED
4
INSULATED C-HEAD / TETE C ISOLEE / ISOLIERTER C-KOPF / CABEZA C AISLADA /TESTA A C ISOLATA
5
HANDLE / POIGNEE / GRIFF / EMPUÑADURA / IMPUGNATURA
6
TOUCH BUTTON FOR MENU SELECTION / TOUCHE POUR SELECTIONNER LE MENU / TOUCH-
TASTE FÜR AUSWAHLMENÜ / TECLA PARA SELECCIONAR EL MENÚ / TASTO A SFIORAMENTO
PER SELEZIONE MENU
7
RING FOR SHOULDER STRAP / ANNEAU POUR BANDOULIERE / TRAGERIEMENRING /
ANILLO PARA CORREA / ANELLO AGGANCIO TRACOLLA
8
DISPLAY / ECRAN / DISPLAYANZEIGE / PANTALLA / DISPLAY
9
BATTERY / BATTERIE / AKKU / BATERÍA / BATTERIA
10
BATTERY RELEASE /
DEBLOCAGE BATTERIE / AKKU ENTRIEGELUNG / DESBLOQUEO
BATERÍA /
SBLOCCO BATTERIA
11
HANDLE / POIGNEE / GRIFF / EMPUÑADURA / IMPUGNATURA

4
– Before using the tool, carefully read the instructions in this manual.
– Avant d'utiliser cet outil, lire attentivement les instructions de cette notice.
– Vor Inbetriebnahme unbedingt die Bedienungsanleitung durchlesen.
– Antes de utilizar la herramienta, leer atentamente las instrucciones en este manual.
– Prima di utilizzare l'utensile, leggere attentamente le istruzioni riportate in questo manuale.
– When operating the tool, keep hands away from the danger zone.
– Au cours du sertissage, tenir les mains éloignées de la zone de travail.
– Während der Arbeiten, nicht mit den Händen in den Gefahrenbereich gelangen.
– Durante su utilización, mantenga las manos fuera de la zona de peligro.
– Durante l'utilizzo, mantenere le mani fuori dalla zona di pericolo.
– Do not operate when dies are not in place.
– Insérer les matrices avant d'actionner l'outil.
– Nicht ohne Presseinsatzpaar betätigen.
– No poner en presión sin matrices.
– Non mandare in pressione l'utensile senza le matrici inserite.
WARNING SYMBOLS - SYMBOLES D'AVERTISSEMENT - WARNSYMBOLE -
SÍMBOLOS DE ADVERTENCIA - SIMBOLI DI AVVERTENZA
TG.0932
TG.0932
– Never throw batteries into re or water.
– Jamais jeter les batteries dans le feu ou dans l'eau.
– Werfen Sie Akkus nicht ins Feuer oder Wasser.
– Nunca tire las baterías al fuego o al agua
– Mai gettare le batterie nel fuoco o in acqua.
– Always recycle the batteries.
– Recycler toujours les batteries.
– Verbrauchte Akkus stets dem Recycling zuführen.
– Reutilizar siempre las baterías.
– Riciclare sempre le batterie.
– Do not discard batteries into domestic refuse or waste disposal.
– Ne pas jeter de batteries dans une poubelle ou autre lieu non prévu à cet eet.
– Verbrauchte Akkus nicht der allgemeinen Abfallentsorgung zuführen.
– No tirar las baterías al cubo de basura o lugar parecido.
– Non buttate le batterie fuori uso nei cestini della spazzatura o luoghi simili.
– User information (Directives 2002/95/EC and 2002/96/EC), see page 12.
– Information pour les utilisateurs (Directives 2002/95/CE et 2002/96/CE) voir page 20.
– Information für den Benutzer (Richtlinien 2002/95/EG und 2002/96/EG) siehe Seite 28.
– Informe para los usuarios (Directivas 2002/95/CE y 2002/96/CE) vease página 36.
– Informazione agli utenti (Direttive 2002/95/CE e 2002/96/CE) vedere pagina 42.
TG.0932
TG.0932
Battery - Batterie - Akku - Batería - Batteria
Tool - Outil - Werkzeug - Herramienta - Utensile
5
B1300-C-KV B1300L-C-KV
Application range suitableforinstallingelectricalcompressionconnectors
on conductors up to 400 mm2 (800 MCM)
Rated crimping force
kN (US sh. ton)
132 (14.84)
Minimum crimping force
kN (US sh. ton)
125,2 (14.07)
Minimum operating pressure
bar (psi) 692 (10,037)
Dimensions
(Fig. 7 and 8 page 46)
mm (inches) 410 x 239 x102.5
(16.1 x 9.4 x 4)
474 x 239 x102.5
(18.7 x 9.4 x 4)
Jaw opening mm (inches) 26 (1.02) 42 (1.65)
Weight with battery kg (lbs) 6,8 (15) 8,5 (18.7)
Motor V DC 18
Operating temperature °C (°F) -15 to +50 (+5 to +122)
Recommended oil TOTAL DIEKAN 1640 or equivalents
Operating speed twin speed operation and automatic switching from
a rapid advancing speed of the ram to a slower,
more powerful crimping speed
Safety maximum pressure valve
Rechargeable battery type CB1840L Li-Ion
V / Ah ( Wh) 18 / 4.0 (72)
Weight kg (lbs) 0,66 (1.45)
Acoustic noise (1) dB LpA 66,9 (A) LpCPeak 86,9 (C) LWA 74,9 (A)
Vibrations (2) m/s20,398
(1) Directive 2006/42/EC, annexe 1, point 1.7.4.2 letter u)
LpA
= weighted continuous acoustic pressure level equivalent.
LpCPeak
= maximum value of the weighted acoustic displacement pressure at the work place.
LWA
= acoustic power level emitted by the machine.
(2) (Directive 2006/42/EC, annexe 1, point 2.2.1.1)
Weighted root mean square in frequency of the acceleration the upper limbs are exposed to for each biodynamic
reference axis. Tests carried out in compliance with the indications contained in UNI ENV 25349 and UNI EN 28662
part 1st Standards, and under operating conditions much more severe than those normally found.
1. GENERAL CHARACTERISTICS
ENGLISH
B1300-C-KV
B1300L-C-KV
B1300-CE-KV
B1300L-CE-KV
B1300-CT-KV
B1300L-CT-KV
B1300-CA-KV
B1300L-CA-KV
Battery charger ASC30-36
Input
type EU
27044000
UK
27045000
AUS/NZ
27047000
USA/CAN
27046000
V / Hz (W) 220 - 240 / 50 - 60 (85) 115 / 60 (85)

6
ENGLISH
WARNING
Do not use the tool for purposes other than those intended by Cembre.
The operator should concentrate on the work being performed and be careful to maintain
a balanced working position.
The tool is provided with additional external coatings to protect the operator and tool
against accidental brush contact with energised conductors.
Propertrainingtechniquesandpracticesshouldalwaysbeadhered towhenworkingaround
energised conductors.
Always consult your company’s work rules and methods to select suitable tooling, rubber
insulated gloves, shrouding and other protective equipment.
Under no circumstances should operatives rely solely on the insulating properties of the
tools alone when working around energised conductors.
Prior to use please ensure the tool and specically the insulating protection are not
damaged.
The tool is unsuitable for continuous use and should be allowed to cool down following
uninterrupted, successive crimping operations; for instance, having exhausted a fully
charged battery in one session, delay battery replacement for a few minutes.
Protect the tool from rain and moisture. Water will damage the tool and battery.
Electro-hydraulic tools should not be operated in pouring rain.
2. INSTRUCTIONS FOR USE
IMPORTANT: Never pressurise the tool without inserting the dies, this could
cause damage to the head and the ram.
The part reference includes the following (Ref. to Fig. 6 page 45):
– Hydraulic crimping tool
– Li-Ion rechargeable battery (2 pcs)
– Battery charger (model depends on the tool version)
– Shoulder strap
– Plastic carrying case
– USB cable (Ref. to § 5)
2.1) Preparation
The tool can be easily carried using either the main handle (11) or the shoulder strap attached to
the two rings (7) (Ref. to Fig. 5).
The main operating positions are : horizontal standing on its feet and vertical standing on its bat-
tery. In addition to the main handle (11) the lower handle (5) allows a safer and more balanced
grip when using two hands to hold the tool (Ref. to Fig. 3).
Before starting any work, check the battery charge (Ref. to § 2.8) and recharge
if necessary, following the instructions in the battery charger user manual.

7
ENGLISH
12
12
21
terminal
connector
conductor
conductor
To replace the battery, grip the tool as illustrated in Figure 1; press the release button (10) and
push the battery downward unlocking it.
Insert a charged battery from the bottom by sliding it into the guides until it locks.
The display shows the operational parameters of the tool; to customise them proceed
as described in § 2.7.
Select the appropriate die set for the connector.
When introducing or changing dies, the battery must rst be removed from the tool.
Insert one die into the upper seat of the tool head (Ref. to Fig. 2) until it is locked by retaining
pin (13). To ease the die insertion keep release pin (12) depressed.
Insert one die into the seat on the ram until it is locked by retaining pin (15).
To ease this operation, operate the tool (see § 2.2) to advance the ram (16) 8-10 mm (0.3 - 0.4 in.)
and keep release pin (14) depressed.
Insert the conductor into the connector (Ref. to Fig. 4).
Position the connector between the dies and ensure the correct location of the crimp (Ref. to
Fig. 4).
NOTE: when more compression is
required, proceed according to the
sequence and direction indicated
in the gure, uniformly spacing the
compressions.
2.2) Die advancement
Press operating button (1) (Ref. to Fig. 4) to activate the
motor-pump and advance the lower die.
To halt advancement, release the operating button and
the motor will cut out.
Makesurethediesareexactlypositionedonthe desiredcrimp
point otherwise re-open dies following instructions as per
§ 2.4 and reposition the connector.
2.3) Compression
By keeping operating button (1) pressed, the motor continues to operate: the ram will gradually
move forward until the two dies touch.
The motor will stop automatically when the set pressure has been reached.
To perform proper compression, press and hold the operating button (1) until the motor
stops automatically.
1

8
ENGLISH
NOTE: Todisplaythemomentaryforceorpressureduring
the work cycle, select the appropriate display from the
menu (Ref. to § 4). When the operating button is released
beforethemotorstopsautomatically,thedisplaywillshow
the peak force (Fp) or the peak pressure (Pp) reached at
that instant.
To complete the work,press the operatingbutton again until the motor stops automatically; thedis-
playwillshow themaximumforceorpressurereachedfollowedby ‘OK’toconrm correct operation.
The display ‘ERROR’, combined with a beep and the LEDs ashing,
indicates an incorrect crimping procedure caused by the work cycle
being interrupted before the control parameters (force/pressure) of the tool
are reached. This error appears when the pressure release button has been operated and the
tool has already reached a pressure > 100 bar. In this case, repeat the compression by pressing
and holding the operat ing button until the motor stops automatically.
2.4) Release of dies
By operating the pressure release button (2),
the ram will retract and open the dies.
To take the dies o their guide, slide them while pushing the
release pins (12 and 14) (Ref. to Fig. 2).
2.5) LED Worklights
Whilst the tool is in operation, the compression area is illumi-
nated by two high luminosity LED Worklights that switch o
automatically at the end of the cycle.
The LED Worklights can be disabled by following the procedure described in § 4.2.
2.6) Head rotation
For ease of operation, the tool head can rotate through 180°, allowing the operator to work in the
most comfortable position.
Do not attempt to rotate the head when the hydraulic circuit is pressurised.
2.7) Capacitive touch button for menu selection
This button is located under the display and allows selection of
various screens (Ref. to § 4); it only works when the display is on.
Wearing gloves or using other objects may inhibit the operation of the
button, therefore use a bare nger to apply only a light touch.
B1300
NR 14AF035
RESET
SW:S1J41AH
LED
OFF
Fm= 125.2 kN
Fp = 94.5 kN
Fm= 14.07 ton
Fp = 10.61 ton
1000
-12000
BATTERY
3 SEC.
ERROR
001
13001
BATTERY
Fm= 125.2 kN
Fp= 102.3 kN
Pm= 692 bar
Pp = 565 bar
Fm= 125.2 kN
OK
Pm= 692 bar
OK
Pm= 10037 psi
Pp = 7575 psi
002
003
BATTERY
004
LED
ON
LED
OFF
3 SEC. LED
ON
max.
BATTERY BATTERY
min.
Pm= 692 bar
Pp = 522.3 bar
2

9
ENGLISH
B1300
NR 14AF035
RESET
SW:S1J41AH
LED
OFF
Fm= 125.2 kN
Fp = 94.5 kN
Fm= 14.07 ton
Fp = 10.61 ton
1000
-12000
BATTERY
3 SEC.
ERROR
001
13001
BATTERY
Fm= 125.2 kN
Fp= 102.3 kN
Pm= 692 bar
Pp = 565 bar
Fm= 125.2 kN
OK
Pm= 692 bar
OK
Pm= 10037 psi
Pp = 7575 psi
002
003
BATTERY
004
LED
ON
LED
OFF
3 SEC. LED
ON
max.
BATTERY BATTERY
min.
Pm= 692 bar
Pp = 522.3 bar
Do not apply pressure to or stab at the touch button, a light touch using a bare
nger is sucient. The command pulse is sent when the nger releases the button.
2.8) Battery status
The battery is equipped with LED indicators that indicate the
remaining battery life at any time by pressing the adjacent
button (P):
4 LEDs illuminated: fully charged
2 LEDs illuminated: 50 % capacity
1 LED flashing: minimum charge, replace the battery.
With the battery inserted into the tool, the remai-
ning battery life can also be checked on the display,
via touch button selection (Ref. to § 7).
The screen shown alongside indicates that the battery voltage has
dropped below a minimum safety threshold; under these conditions
the tool will not start, and it is necessary to recharge or replace the battery.
The approximate time to fully recharge a battery is about 80 minutes.
Aftereachworking cycle,andafter theextraction ofthebatteryfromthetool,an integrated
battery cut-o device will operate after 70 s approx.
Thenthe LED nearest tobutton (P)will ash 5times each 14s approx. Thebatterywill be reactivated
when it is reintroduced into the tool and the operating button is pressed.
2.9) Using the battery charger
Carefully follow the instructions in the battery charger user manual.
3. MAINTENANCE
The tool is robust, completely sealed, and requires very little daily maintenance. Compliance with
the following points, should help to maintain its optimum performance:
3.1) Thorough cleaning
Dust, sand and dirt are a danger for any hydraulic device.
Every day, after use, the tool must be wiped with a clean cloth taking care to remove any residue,
especially close to pivots and moveable parts.
Do not use Hydrocarbons to clean the rubber parts.
3.2) Storage case
When not in use, the tool should be stored and transported in the plastic case, to prevent damage.
The case, type VAL P41, is suitable for storing the tool, the accessories and up to 12 die sets and
pre-prepared compression connectors.
VAL P41: Size 691x456x176 mm (27.2x17.9x6.9 inches). Weight 4 kg (8.8 lbs).
B1300
NR 14AF035
RESET
SW:S1J41AH
LED
OFF
Fm= 125.2 kN
Fp = 94.5 kN
Fm= 14.07 ton
Fp = 10.61 ton
1000
-12000
BATTERY
3 SEC.
ERROR
001
13001
BATTERY
Fm= 125.2 kN
Fp= 102.3 kN
Pm= 692 bar
Pp = 565 bar
Fm= 125.2 kN
OK
Pm= 692 bar
OK
Pm= 10037 psi
Pp = 7575 psi
002
003
BATTERY
004
LED
ON
LED
OFF
3 SEC. LED
ON
max.
BATTERY BATTERY
min.
Pm= 692 bar
Pp = 522.3 bar
P

10
ENGLISH
4. DISPLAY
The OLED display switches on automatically when the operating or pressure release buttons are
pressed, and o after 60 seconds of non-operation.
The display shows:
- The main operational parameters of the tool processed by the circuit board, such as peak pres-
sure or force reached.
- Information on the condition of the tool, such as the charge level, the battery temperature and
maintenance requirements.
- Any operational or procedural ERRORS.
Use the touch button (6) to navigate through the menu
screens to manage INFORMATION AND SELECTION:
4.1) INFORMATION SCREENS: display a pre determined parameter which will then
appear each time the tool is started and during the entire work cycle.
B1300
NR 14AF035
RESET
SW:S1J41AH
LED
OFF
Fm= 125.2 kN
Fp = 94.5 kN
Fm= 14.07 ton
Fp = 10.61 ton
1000
-12000
BATTERY
3 SEC.
ERROR
001
13001
BATTERY
Fm= 125.2 kN
Fp= 102.3 kN
Pm= 692 bar
Pp = 565 bar
Fm= 125.2 kN
OK
Pm= 692 bar
OK
Pm= 10037 psi
Pp = 7575 psi
002
003
BATTERY
004
LED
ON
LED
OFF
3 SEC. LED
ON
max.
BATTERY BATTERY
min.
Pm= 692 bar
Pp = 522.3 bar
Fm: Minimum set force, expressed in kN.
Fp: Peak force reached, expressed in kN,
(screen as factory setting)
Fm: Minimum set force, expressed in USA sh. tons.
Fp: Peak force reached, expressed in USA sh. tons.
Pm: Minimum set pressure, expressed in bar.
Pp: Peak pressure reached, expressed in bar.
Pm: Minimum set pressure, expressed in psi.
Pp: Peak pressure reached, expressed in in psi.
Battery charge level.
No. of cycles performed.
No. of cycles before scheduled recommended maintenance.
Cembre logo, tool model.
Tool serial no
86

11
ENGLISH
To make a selected screen operational and appear at each start-up of the
tool, operate the touch button for at least 3 seconds; a continuous beep
will conrm the setting.
The capacitive menu selection button may not work if touched using
objects or when wearing gloves, therefore always operate it using a bare nger.
4.2) SELECTION SCREENS: control parameters that cannot be set as automatic upon start-up
of the tool, can be changed by operating the touch button:
Enabling/disabling the LED Worklights (factory setting LED ON)
When the screen is dis-
played, touch the button
for at least 3 seconds to
deactivate for reactivate op-
eration of the LED Worklights
during tool use;
a continuous beep will conrm
the setting.
Return to original factory settings / rmware version
When the‘RESET’screen is displayed, return the tool to its factory setting by operating the touch
button for at least 3 seconds; a beep will conrm the setting.
The RESET screen also shows the rmware version of the circuit board.
4.3) WARNINGS: these appear during operation and notify the operator of the status
of the tool:
B1300
NR 14AF035
RESET
SW:S1J41AH
LED
OFF
Fm= 125.2 kN
Fp = 94.5 kN
Fm= 14.07 ton
Fp = 10.61 ton
1000
-12000
BATTERY
3 SEC.
ERROR
001
13001
BATTERY
Fm= 125.2 kN
Fp= 102.3 kN
Pm= 692 bar
Pp = 565 bar
Fm= 125.2 kN
OK
Pm= 692 bar
OK
Pm= 10037 psi
Pp = 7575 psi
002
003
BATTERY
004
LED
ON
LED
OFF
3 SEC. LED
ON
max.
BATTERY BATTERY
min.
Pm= 692 bar
Pp = 522.3 bar
LOW BATTERY: replace the battery.
NOTE: when the battery Vage falls below a minimum safety threshold, the tool
will not start; although it is still possible to end the work cycle in progress.
BATTERY TEMPERATURE HIGH: remove the battery and wait until it cools
down.
NO. OF CYCLES TO MAINTENANCE REACHED:
the tool continues to work however, it is recommended that it is sent to Cembre
for a complete overhaul (see § 6).
NOTE: this message, together with a beep, will reappear when the tool has been
idle for 30 seconds.
B1300
NR 14AF035
RESET
SW:S1J41AH
LED
OFF
Fm= 125.2 kN
Fp = 94.5 kN
Fm= 14.07 ton
Fp = 10.61 ton
1000
-12000
BATTERY
3 SEC.
ERROR
001
13001
BATTERY
Fm= 125.2 kN
Fp= 102.3 kN
Pm= 692 bar
Pp = 565 bar
Fm= 125.2 kN
OK
Pm= 692 bar
OK
Pm= 10037 psi
Pp = 7575 psi
002
003
BATTERY
004
LED
ON
LED
OFF
3 SEC. LED
ON
max.
BATTERY BATTERY
min.
Pm= 692 bar
Pp = 522.3 bar

12
ENGLISH
4.4) ERRORS: these appear during operation, combined with a beep and flashing
LED Worklights, to notify the operator of procedural or operational errors.
Message Error description Solution
B1300
NR 14AF035
RESET
SW:S1J41AH
LED
OFF
Fm= 125.2 kN
Fp = 94.5 kN
Fm= 14.07 ton
Fp = 10.61 ton
1000
-12000
BATTERY
3 SEC.
ERROR
001
13001
BATTERY
Fm= 125.2 kN
Fp= 102.3 kN
Pm= 692 bar
Pp = 565 bar
Fm= 125.2 kN
OK
Pm= 692 bar
OK
Pm= 10037 psi
Pp = 7575 psi
002
003
BATTERY
004
LED
ON
LED
OFF
3 SEC. LED
ON
max.
BATTERY BATTERY
min.
Pm= 692 bar
Pp = 522.3 bar
The pressure release button (2)
was pressed before the control
parameters were reached (Force/
Pressure).
Repeat the work cycle and wait for the
motor to stop automatically.
B1300
NR 14AF035
RESET
SW:S1J41AH
LED
OFF
Fm= 125.2 kN
Fp = 94.5 kN
Fm= 14.07 ton
Fp = 10.61 ton
1000
-12000
BATTERY
3 SEC.
ERROR
001
13001
BATTERY
Fm= 125.2 kN
Fp= 102.3 kN
Pm= 692 bar
Pp = 565 bar
Fm= 125.2 kN
OK
Pm= 692 bar
OK
Pm= 10037 psi
Pp = 7575 psi
002
003
BATTERY
004
LED
ON
LED
OFF
3 SEC. LED
ON
max.
BATTERY BATTERY
min.
Pm= 692 bar
Pp = 522.3 bar
Abnormal power consumption
of the motor for more than 3
seconds.
The tool stops.
Wait for the display to turn o (60 sec.)
or remove and re-insert the battery,
then re-start the tool.
If the error occurs frequently, contact
Cembre.
B1300
NR 14AF035
RESET
SW:S1J41AH
LED
OFF
Fm= 125.2 kN
Fp = 94.5 kN
Fm= 14.07 ton
Fp = 10.61 ton
1000
-12000
BATTERY
3 SEC.
ERROR
001
13001
BATTERY
Fm= 125.2 kN
Fp= 102.3 kN
Pm= 692 bar
Pp = 565 bar
Fm= 125.2 kN
OK
Pm= 692 bar
OK
Pm= 10037 psi
Pp = 7575 psi
002
003
BATTERY
004
LED
ON
LED
OFF
3 SEC. LED
ON
max.
BATTERY BATTERY
min.
Pm= 692 bar
Pp = 522.3 bar
Output voltage of the pressure
transmitter is out of the pre-set
range.
Repeat the work cycle; if the error
occurs frequently, contact Cembre.
B1300
NR 14AF035
RESET
SW:S1J41AH
LED
OFF
Fm= 125.2 kN
Fp = 94.5 kN
Fm= 14.07 ton
Fp = 10.61 ton
1000
-12000
BATTERY
3 SEC.
ERROR
001
13001
BATTERY
Fm= 125.2 kN
Fp= 102.3 kN
Pm= 692 bar
Pp = 565 bar
Fm= 125.2 kN
OK
Pm= 692 bar
OK
Pm= 10037 psi
Pp = 7575 psi
002
003
BATTERY
004
LED
ON
LED
OFF
3 SEC. LED
ON
max.
BATTERY BATTERY
min.
Pm= 692 bar
Pp = 522.3 bar
Failure to reach the set pressure
within 30 seconds of continuous
operation of the machine.
Repeat the work cycle; if the error
occurs frequently, contact Cembre.
B1300
NR 14AF035
RESET
SW:S1J41AH
LED
OFF
Fm= 125.2 kN
Fp = 94.5 kN
Fm= 14.07 ton
Fp = 10.61 ton
1000
-12000
BATTERY
3 SEC.
ERROR
001
13001
BATTERY
Fm= 125.2 kN
Fp= 102.3 kN
Pm= 692 bar
Pp = 565 bar
Fm= 125.2 kN
OK
Pm= 692 bar
OK
Pm= 10037 psi
Pp = 7575 psi
002
003
BATTERY
004
LED
ON
LED
OFF
3 SEC. LED
ON
max.
BATTERY BATTERY
min.
Pm= 692 bar
Pp = 522.3 bar
Overcharging of the battery with
protection tripping.
The tool stops.
Wait for the display to turn o (60 sec.)
or remove and re-insert the battery,
then re-start the tool.
If the error occurs frequently, contact
Cembre.
Errors are displayed for about 30 seconds before being reset, but will display repeatedly in
the event of permanent anomalies.
5. CONNECTION TO COMPUTER
The memory card integrated in the tool records operating data from 200.000 cycles for transfer via
the USB cable supplied.
To view and manage this data, go to www.cembre.com and register in the dedicated area, then
download the free Cembre software CEM_SWBT01.
Keeping the Firmware of the tool updated, via free of charge download from here, will optimise
the tool's performance.
– Following information applies in member states of the European Union:
USER INFORMATION in accordance with“Directives 2002/95/EC and 2002/96/EC.
The ‘Not in the bin’ symbol above when shown on equipment or packaging means that the equipment
must, at the end of its life, be disposed of separately from other waste.
The separate waste collection of such equipment is organised and managed by the manufacturer.
Users wishing to dispose of such equipment must contact the manufacturer and follow the prescribed
guidelines for its separate collection. Appropriate waste separation, collection, environmentally compat-
ible treatment and disposal is intended to reduce harmful environmental eects and promote the reuse
and recycling of materials contained in the equipment. Unlawful disposal of such equipment will be sub-
ject to the application of administrative sanctions provided by current legislation.

13
B1300-C-KV B1300L-C-KV
Domaine d'application: conçu pour le sertissage des connecteurs électriques
jusqu' à 400 mm2(800 MCM)
Force nom. de sertissage
kN (US sh. ton)
132 (14.84)
Force min. de sertissage
développée
kN (US sh. ton)
125,2 (14.07)
Pression min. de travail bar (psi) 692 (10,037)
Dimensions
(Fig. 7 et 8 pag. 46)
mm (inches) 410 x 239 x102.5
(16.1 x 9.4 x 4)
474 x 239 x102.5
(18.7 x 9.4 x 4)
Ouverture de la chape mm (inches) 26 (1.02) 42 (1.65)
Poids avec batterie kg (lbs) 6,8 (15) 8,5 (18.7)
Moteur V DC 18
Température de fonction-
nement:
°C (°F) -15 à +50 (+5 à +122)
Huile recommandée: TOTAL DIEKAN 1640 ou équivalents
Avance rapide:
l’outil passe automatiquement de la vitesse rapide
d’approche des matrices à la vitesse lente de sertissage
Sécurité valve de surpression
Batterie rechargeable type CB1840L Li-Ion
V / Ah ( Wh) 18 / 4.0 (72)
Poids kg (lbs) 0,66 (1.45)
Bruit aérien sonore (1) dB LpA 66,9 (A) LpCPeak 86,9 (C) LWA 74,9 (A)
Vibrations (2) m/s20,398
1. CARACTERISTIQUES GENERALES
FRANÇAIS
B1300-C-KV
B1300L-C-KV
B1300-CE-KV
B1300L-CE-KV
B1300-CT-KV
B1300L-CT-KV
B1300-CA-KV
B1300L-CA-KV
Chargeur de batterie
ASC30-36
Alimentation
type EU
27044000
UK
27045000
AUS/NZ
27047000
USA/CAN
27046000
V / Hz (W) 220 - 240 / 50 - 60 (85) 115 / 60 (85)
(1) (Directive 2006/42/CE, annexe 1, point 1.7.4.2, lettre u)
LpA
= niveau de pression sonore continue équivalente pondérée A sur le poste de travail.
LpCPeak
= valeur de pression sonore instantanée pondérée C sur le poste de travail.
LWA
= niveau de puissance acoustique dégagée par la machine.
(2) (Directive 2006/42/CE, annexe 1, point 2.2.1.1)
Valeurquadratiquemoyennepondéréeenfréquencedel'accélérationà laquellesontexposéslesmembressupérieurs
pour chaque axe biodynamique de référence. Relevés réalisés suivant les indications des Normes UNI ENV 25349 et
UNI EN 28662 partie 1a, dans des conditions de service largement représentatives des conditions d'emploi normales.

14
FRANÇAIS
AVERTISSEMENT
Ne pas utiliser cet outil à des ns diérentes que celles prévues par le constructeur.
Restez bien attentif tout au long du travail, ne soyez pas distrait, ne perdez pas l’équilibre
pendant l'utilisation.
L’outil est équipé d’un revêtement supplémentaire an de protéger l’utilisateur contre tout
contact accidentel avec un câble sous tension.
Les techniques appropriées et les règles de sécurité doivent toujours être strictement appli-
quées lors d’une opération sous tension.
Consulter systématiquement les procédures de travail de votre société an de choisir l’ou-
tillage approprié, gants isolés ou tout autre matériel de protection.
Les utilisateurs ne doivent en aucun cas compter uniquement sur les propriétés isolantes
de l’outil lorsqu’ils travaillent près des conducteurs sous tension.
Avant chaque utilisation assurez-vous que l’isolant de l’outil n’est pas endommagé.
L’outil n’est pas conçu pour une utilisation en continu; après avoir eectué une quantité de
sertissages consécutifs à partir d’une batterie complètement chargée, au moment du
remplacementdelabatterie,noussuggéronsd’observer unepérioded’arrêtpourpermettre
le refroidissement de l’outil.
Protéger l’outil de la pluie et de l’humidité. L’eau pourrait endommager l’outil et la batterie,
les outils hydro-électriques ne devraient pas être utilisés sous la pluie.
2. INSTRUCTIONS D'UTILISATION
IMPORTANT: Ne jamais mettre l’outil sous pression sans les matrices insérées,
cela pourrait endommager les sièges de la tête et du piston.
L' ensemble comprend (Voir Fig. 6 page 45):
– Outil hydraulique le sertissage
– Batterie rechargeable Li-Ion (2 pcs)
– Chargeur de batterie (diérent en fonction de la version de l'outil)
– Bandoulière
– Coret de rangement
– Câble USB ( Voir § 5)
2.1) Mise en service
L’outil peut être transporté facilement grâce à sa poignée principale (11) et à la bandoulière
accrochée par deux anneaux (7) (Voir Fig. 5).
Les positions de travail principales sont: horizontale appuyé sur les pieds et verticale appuyé
sur la batterie. Au-delà de la poignée principale (11) dans la partie inférieure est disponible une
poignée supplémentaire (5) qui permet une prise sûre et équilibrée de façon de soutenir l’outil
à 2 mains (Voir Fig. 3).
Avant de commencer toute opération, contrôler l’état de charge de la batterie
(voir § 2.8) et, si nécessaire, la recharger en suivant les instructions contenues
dans le manuel d’utilisation du chargeur de batteries.

15
FRANÇAIS
Pour remplacer la batterie, il est plus facile de tenir l'outil comme indiqué sur la gure 1; appuyez
sur le mécanisme de déblocage (10) et enfoncez vers le bas la batterie en la décrochant. Insérez
la batterie chargée à partir du bas en la faisant coulisser sur les guides jusqu’au blocage complet.
L’écran permet d’acher les paramètres opérationnels de l’outil. Pour personnaliser ces derniers,
suivre les instructions décrites au § 2.7.
Choisir le couple de matrices approprié pour le type de connexion à réaliser; pour
cela, consulter le catalogue.
Les opérations d’introduction ou de remplacement des matrices doivent être eectuées
avec l’outil dépourvu de batterie.
Insérer la matrice dans le guide supérieur de la tête de l’outil (Voir Fig. 2) jusqu’à son verrouillage
par l’axe (13). Cette opération n’est possible qu’en appuyant sur l’axe de déblocage (12).
Actionner l'outil (voir § 2.2) pour faire avancer de 8-10 mm (0.3 - 0.4 in.) le piston (16) et insérer
la matrice dans le guide du piston jusqu’à son verrouillage par l’axe (15).
Cette opération n’est possible qu’en appuyant sur l’axe de déblocage (14).
Insérer la matrice dans le guide du piston jusqu’à son verrouillage par l’axe (15), cette opération
n’est possible qu’en appuyant sur l’axe de déblocage (14).
Insérer le conducteur dans le connecteur (Voir Fig. 4).
Positionner ce dernier entre les deux matrices en alignant la zone à sertir avec l'empreinte des
matrices (Voir Fig. 4).
REMARQUE: s’il est nécessaire de
procéder à plusieurs sertissages de
cosses ou de manchons, suivre la
séquence et la direction reportée
sur l’illustration, en espaçant les
empreintes de façon uniforme.
2.2) Avance des matrices
Appuyer sur la gâchette de commande (1) (Voir Fig. 4) pour mettre
en marche le groupe moteur pompe; les matrices commencent
alors à se rapprocher du connecteur.
La gâchette de commande relâchée, le moteur et l'avance des
matrices cessent immédiatement.
S
S'assurer que les matrices sont bien positionées sur la zone à
sertir, sinon desserer les matrices en suivant les instructions
du § 2.4 et repositioner le connecteur.
2.3) Sertissage
En maintenant pressée la gâchette de commande (1), on maintient la rotation du moteur; le
piston avance progressivement jusqu'à ce que les matrices arrivent en butée l'une contre l'autre.
L’outil s’arrêtera automatiquement dès qu’il aura atteint la pression de tarage.
Pour effectuer un bon sertissage, maintenir la gâchette de commande (1)
pressée jusqu’à l’arrêt automatique du moteur.
12
12
21
cosse
manchon
conducteur
conducteur
1

16
FRANÇAIS
REMARQUE: Pour acher la force ou la pression en
temps réel, lors du cycle de travail, congurer les écrans
correspondants (voir § 4). En relâchant le bouton de
démarrage avant l’arrêt automatique du moteur, l’écran
achera les valeurs de pic de la force (Fp) et de la pression
(Pp) atteintes à ce moment.
Pour terminer l’opération, ré-appuyer sur la gâchette de commande jusqu’à l’arrêt automatique
du moteur; l’écran achera la force ou la pression maximale atteinte, suivie de l’inscription «OK»
indiquant que l’opération a été correctement eectuée.
Le message « ERROR » associé à l’avertisseur sonore ainsi que le
clignotement des LED indiquent que la procédure de sertissage n’a pas
été correctement eectuée en raison d’un arrêt anticipé du cycle de travail avant
d’avoir atteint les paramètres réglés (force/pression) de l’outil.
Cemessaged’erreurs’achelorsquel’opérateurappuiesur la gâchettededéblocagepressionaprès
que l’outil ait atteint une pression >100bar. Dans ce cas, eectuer à nouveau le sertissage en main-
tenant la gâchette de commande appuyée jusqu’à l’arrêt automatique du moteur. Pour terminer
l’opération,ré-appuyersurlagâchettedecommandejusqu’àl’arrêtautomatiquedumoteur;l’écran
achera la force ou la pression maximale atteinte, suivie de «OK» indiquant que l’opération a été
correctement eectuée.
2.4) Réouverture des matrices
En appuyant à fond sur la gâchette de déblocage pression (2),
on provoque le retour du piston et par conséquent l'ouverture
des matrices.
Pour retirer les matrices, poussez l’axe de déblocage matrice
(12 et 14) (voir Fig. 2).
2.5) Led
Lors de l’actionnement de l’outil, la zone de sertissage est éclairée
au moyen de deux LED haute luminosité qui s’éteignent automa-
tiquement à la n du cycle.
Pour désactiver les LED, suivre la procédure décrite au § 4.2.
2.6) Rotation de la tête
La tête de l'outil pivote de 180° par rapport au corps, permettant à l'utilisateur de travailler dans
la meilleure position.
Ne pas forcer la rotation de la tête, lorsque le circuit hydraulique est sous pression.
2.7) Touche tactile de type capacitif
Cettetoucheestsituéesousl’écranetpermetdesélectionnerlesdiérents
écrans (voir § 4); elle fonctionne uniquement lorsque l’écran est allumé
et il sut de l’eeurer à mains nues. L’utilisation de gants ou d’autres
objets risquerait de compromettre son activation.
B1300
NR 14AF035
RESET
SW:S1J41AH
LED
OFF
Fm= 125.2 kN
Fp = 94.5 kN
Fm= 14.07 ton
Fp = 10.61 ton
1000
-12000
BATTERY
3 SEC.
ERROR
001
13001
BATTERY
Fm= 125.2 kN
Fp= 102.3 kN
Pm= 692 bar
Pp = 565 bar
Fm= 125.2 kN
OK
Pm= 692 bar
OK
Pm= 10037 psi
Pp = 7575 psi
002
003
BATTERY
004
LED
ON
LED
OFF
3 SEC. LED
ON
max.
BATTERY BATTERY
min.
Pm= 692 bar
Pp = 522.3 bar
2

17
FRANÇAIS
Ne jamais appuyer avec force sur la touche tactile, il sut de l’eeurer avec un doigt, à
mains nues. La commande envoie l’impulsion dès le retrait du doigt.
2.8) Autonomie de la batterie
La batterie est équipée d’indicateurs à LED qui permettent
de contrôler, à tout moment, son autonomie résiduelle en
appuyant sur la touche (P):
4 led allumées: autonomie maximale
2 led allumées: autonomie à 50 %
1 led clignotante: autonomie minimale, remplacer la batterie.
Lorsque la batterie est insérée dans l’outil, il est
possible de vérier l’autonomie résiduelle à partir
de l’écran, en appuyant sur la touche tactile (voir § 4).
L’écran ci-contre indique que la batterie est déchargée et que sa
tension est descendue au-dessous du seuil minimal de sécurité ;
dans cette situation, l’outil ne démarre pas, il est donc nécessaire
de recharger ou de remplacer la batterie.
À titre indicatif, le délai de recharge complète de la batterie correspond à environ 80 min.
A la fin de chaque cycle de travail comme à l’extraction de la batterie de l’outil,
un dispositif électronique arrête automatiquement la batterie après environ 70 s.
Pour conrmer cette opération, la led la plus proche du bouton (P) clignotera 5 fois en 14 s
(approximativement). La batterie est réactivée dès sa réintroduction dans l’outil, ou en appuyant
sur le bouton d’actionnement.
2.9) Utilisation du chargeur de batterie
Suivre attentivement les instructions indiquées sur le manuel.
3. ENTRETIEN
L'outil est robuste, complètement scellé et ne nécessite aucune préoccupation ou attention particu-
lière. Les recommandations qui suivent sont néanmoins souhaitables pour assurer une longévité
optimum:
3.1) Nettoyage élémentaire
Veiller à protéger l'outil de la poussière, du sable et de la boue qui sont un danger à tout système
hydraulique. Chaque jour après utilisation, l'outil doit être nettoyé à l'aide d'un chion propre, tout
particulièrement aux endroits de pièces mobiles.
Ne jamais utiliser d’hydrocarbures pour le nettoyage des parties en caoutchouc.
3.2) Rangement
Au repos, pour protéger l'outil des coups accidentels et de la poussière, il convient de le ranger
dans le coret. Ce coret (typeVAL P41), adapté pour contenir l'outil, ses accessoires et 12 paires de
matricesa commedimensions: 691x456x176 mm (27.2x17.9x6.9 inches)et un poids de 4kg (8.8 lbs).
B1300
NR 14AF035
RESET
SW:S1J41AH
LED
OFF
Fm= 125.2 kN
Fp = 94.5 kN
Fm= 14.07 ton
Fp = 10.61 ton
1000
-12000
BATTERY
3 SEC.
ERROR
001
13001
BATTERY
Fm= 125.2 kN
Fp= 102.3 kN
Pm= 692 bar
Pp = 565 bar
Fm= 125.2 kN
OK
Pm= 692 bar
OK
Pm= 10037 psi
Pp = 7575 psi
002
003
BATTERY
004
LED
ON
LED
OFF
3 SEC. LED
ON
max.
BATTERY BATTERY
min.
Pm= 692 bar
Pp = 522.3 bar
P

18
FRANÇAIS
4. ECRAN
L’écran OLED s’active lors du démarrage de l’outil et se désactive automatiquement au bout de 60
secondes d’inutilisation de l’outil.
L’écran permet d’acher:
- Les principaux paramètres opérationnels de fonctionnement de l’outil, configurés
par la carte électronique, tels que la pression ou la force développée.
- Informations sur l’état de l’outil telles que le niveau de charge, la température
de la batterie et besoin éventuel d’entretien.
- ERREURS éventuelles de fonctionnement ou de procédure.
Il est possible de se déplacer dans le menu à l’aide de la touche
tactile (6) et de gérer les ÉCRANS D’INFORMATION ET DE SÉLECTION:
4.1) ECRANS D’INFORMATION affichent à l’écran un paramètre donné qui s’affichera
ensuite à chaque démarrage de l’outil et tout au long du cycle de travail.
B1300
NR 14AF035
RESET
SW:S1J41AH
LED
OFF
Fm= 125.2 kN
Fp = 94.5 kN
Fm= 14.07 ton
Fp = 10.61 ton
1000
-12000
BATTERY
3 SEC.
ERROR
001
13001
BATTERY
Fm= 125.2 kN
Fp= 102.3 kN
Pm= 692 bar
Pp = 565 bar
Fm= 125.2 kN
OK
Pm= 692 bar
OK
Pm= 10037 psi
Pp = 7575 psi
002
003
BATTERY
004
LED
ON
LED
OFF
3 SEC. LED
ON
max.
BATTERY BATTERY
min.
Pm= 692 bar
Pp = 522.3 bar
Fm : Force minimale de réglage, exprimée en kN
Fp: Force atteinte en temps réel, exprimée en kN
(écran tel que conguré par les paramètres standards d’usine)
Fm: Force minimale développée, exprimée en tonnes courtes (USA)
Fp: Force atteinte en temps réel, exprimée en tonnes courtes (USA)
Pm: Pression minimale de réglage, exprimée en bar.
Pp: Pression atteinte en temps réel, exprimée en bar.
Pm: Pression minimale de réglage, exprimée en psi
Pp: Pression atteinte en temps réel, exprimée en psi
Niveau de charge de la batterie
Nbr de cycles eectués.
Nbr de cycles restant à eectuer lors de l’entretien ordinaire.
logo Cembre, série outil
Nr° de série de l’outil
86

19
FRANÇAIS
Une fois que l’écran présélectionné s’est aché, pour le rendre opé-
rationnel et xe à chaque démarrage de l’outil, maintenir la touche
tactile appuyée pendant une période prolongée (au moins 3 sec-
ondes). Un signal sonore continu conrmera la conguration eective.
La touche capacitive risque de ne pas fonctionner si celle-ci est effleurée avec
des objets ou des gants, appuyer sur cette touche uniquement à mains nues.
4.2) ECRANS DE SELECTION: permettent de modier certains paramètres de réglage,
ils ne peuvent être congurés de manière automatique au démarrage de l’outil ; pour
les activer, il est toujours nécessaire d’appuyer sur la touche tactile.
Activation/désactivation des LED (paramètre standard d’usine: LED ACTIVÉE)
Une fois l’écran affiché et
lors de l’utilisation de l’outil,
pour le désactiver ou réac-
tiver le démarrage des LED,
maintenir la touche tactile
appuyée pendant une pé-
riode prolongée (au moins
3 secondes). Un signal so-
nore continu confirmera
la configuration effective.
Retour au paramètres d’usine de départ / Version du rmware.
Une fois l’écran « RESET » affiché, maintenir la touche tactile appuyée pendant une
période prolongée (au moins 3 secondes). Un signal sonore continu confirmera la con-
figuration effective. L’écran RESET affiche également la version du
rmware de la carte électronique.
4.3) AVERTISSEMENT s’achent lors du fonctionnement et fournissent des informations
à l’opérateur sur l’état de l’outil:
B1300
NR 14AF035
RESET
SW:S1J41AH
LED
OFF
Fm= 125.2 kN
Fp = 94.5 kN
Fm= 14.07 ton
Fp = 10.61 ton
1000
-12000
BATTERY
3 SEC.
ERROR
001
13001
BATTERY
Fm= 125.2 kN
Fp= 102.3 kN
Pm= 692 bar
Pp = 565 bar
Fm= 125.2 kN
OK
Pm= 692 bar
OK
Pm= 10037 psi
Pp = 7575 psi
002
003
BATTERY
004
LED
ON
LED
OFF
3 SEC. LED
ON
max.
BATTERY BATTERY
min.
Pm= 692 bar
Pp = 522.3 bar
BATTERIE DÉCHARGÉE: procéder à son remplacement.
REMARQUE: lorsque la tension de la batterie est inférieure au seuil minimal de
sécurité, l’outil ne démarre pas mais l’opérateur peut, quoiqu’il en soit, terminer
le cycle de travail en cours.
TEMPÉRATURE ÉLEVÉE DE LA BATTERIE: retirer la batterie et patienter jusqu’à
ce qu’elle se refroidisse.
UNE FOIS LE NBR DE CYCLES PREVU POUR L’ENTRETIEN ORDINAIRE
EFFECTUE: l'outil continue à fonctionner, il est recommandé d’envoyer
l’outil à Cembre afin de procéder à une révision complète (voir § 6).
REMARQUE: ce message, associé à un signal sonore, apparaît à nouveau
au bout de 30 secondes d’inutilisation de l’outil.
B1300
NR 14AF035
RESET
SW:S1J41AH
LED
OFF
Fm= 125.2 kN
Fp = 94.5 kN
Fm= 14.07 ton
Fp = 10.61 ton
1000
-12000
BATTERY
3 SEC.
ERROR
001
13001
BATTERY
Fm= 125.2 kN
Fp= 102.3 kN
Pm= 692 bar
Pp = 565 bar
Fm= 125.2 kN
OK
Pm= 692 bar
OK
Pm= 10037 psi
Pp = 7575 psi
002
003
BATTERY
004
LED
ON
LED
OFF
3 SEC. LED
ON
max.
BATTERY BATTERY
min.
Pm= 692 bar
Pp = 522.3 bar

20
FRANÇAIS
4.4) ERREURS: s’achent lors du fonctionnement. Associé à un signal sonore et lumineux ce mes-
sage indique à l’opérateur d’éventuelles erreurs de procédure ou de fonctionnement.
Message Description erreur Solution
B1300
NR 14AF035
RESET
SW:S1J41AH
LED
OFF
Fm= 125.2 kN
Fp = 94.5 kN
Fm= 14.07 ton
Fp = 10.61 ton
1000
-12000
BATTERY
3 SEC.
ERROR
001
13001
BATTERY
Fm= 125.2 kN
Fp= 102.3 kN
Pm= 692 bar
Pp = 565 bar
Fm= 125.2 kN
OK
Pm= 692 bar
OK
Pm= 10037 psi
Pp = 7575 psi
002
003
BATTERY
004
LED
ON
LED
OFF
3 SEC. LED
ON
max.
BATTERY BATTERY
min.
Pm= 692 bar
Pp = 522.3 bar
Actionnement de la gâchette de
déblocage pression (2) avant que
l’outil n’ait atteint les paramètres
de réglage (Force/Pression).
Procéder à nouveau au cycle de travail
et attendre l’arrêt automatique du
moteur.
B1300
NR 14AF035
RESET
SW:S1J41AH
LED
OFF
Fm= 125.2 kN
Fp = 94.5 kN
Fm= 14.07 ton
Fp = 10.61 ton
1000
-12000
BATTERY
3 SEC.
ERROR
001
13001
BATTERY
Fm= 125.2 kN
Fp= 102.3 kN
Pm= 692 bar
Pp = 565 bar
Fm= 125.2 kN
OK
Pm= 692 bar
OK
Pm= 10037 psi
Pp = 7575 psi
002
003
BATTERY
004
LED
ON
LED
OFF
3 SEC. LED
ON
max.
BATTERY BATTERY
min.
Pm= 692 bar
Pp = 522.3 bar
Absorption anormale de courant
dela part dumoteur pendantplus
de 3 secondes.
L'outil s’arrête.
Patienter jusqu’à l’arrêt de l’écran (60
secondes) ou retirer, puis réinsérer la
batterie. Redémarrer l’outil.
Si ce signal d’erreur apparaît souvent,
contacter Cembre.
B1300
NR 14AF035
RESET
SW:S1J41AH
LED
OFF
Fm= 125.2 kN
Fp = 94.5 kN
Fm= 14.07 ton
Fp = 10.61 ton
1000
-12000
BATTERY
3 SEC.
ERROR
001
13001
BATTERY
Fm= 125.2 kN
Fp= 102.3 kN
Pm= 692 bar
Pp = 565 bar
Fm= 125.2 kN
OK
Pm= 692 bar
OK
Pm= 10037 psi
Pp = 7575 psi
002
003
BATTERY
004
LED
ON
LED
OFF
3 SEC. LED
ON
max.
BATTERY BATTERY
min.
Pm= 692 bar
Pp = 522.3 bar
Tension de sortie de l’émetteur de
pression en dehors de l’intervalle
conguré.
Procéder à nouveau au cycle de travail.
Si ce signal d’erreur apparaît souvent,
contacter Cembre.
B1300
NR 14AF035
RESET
SW:S1J41AH
LED
OFF
Fm= 125.2 kN
Fp = 94.5 kN
Fm= 14.07 ton
Fp = 10.61 ton
1000
-12000
BATTERY
3 SEC.
ERROR
001
13001
BATTERY
Fm= 125.2 kN
Fp= 102.3 kN
Pm= 692 bar
Pp = 565 bar
Fm= 125.2 kN
OK
Pm= 692 bar
OK
Pm= 10037 psi
Pp = 7575 psi
002
003
BATTERY
004
LED
ON
LED
OFF
3 SEC. LED
ON
max.
BATTERY BATTERY
min.
Pm= 692 bar
Pp = 522.3 bar
Impossible d’atteindre la pression
de tarage dans les 30 secondes à
compter de l’actionnement con-
tinu de l’outil.
Procéder à nouveau au cycle de travail.
Si ce signal d’erreur apparaît souvent,
contacter Cembre.
B1300
NR 14AF035
RESET
SW:S1J41AH
LED
OFF
Fm= 125.2 kN
Fp = 94.5 kN
Fm= 14.07 ton
Fp = 10.61 ton
1000
-12000
BATTERY
3 SEC.
ERROR
001
13001
BATTERY
Fm= 125.2 kN
Fp= 102.3 kN
Pm= 692 bar
Pp = 565 bar
Fm= 125.2 kN
OK
Pm= 692 bar
OK
Pm= 10037 psi
Pp = 7575 psi
002
003
BATTERY
004
LED
ON
LED
OFF
3 SEC. LED
ON
max.
BATTERY BATTERY
min.
Pm= 692 bar
Pp = 522.3 bar
Surcharge de la batterie avec ac-
tionnement de la protection.
L'outil s’arrête.
Patienter jusqu’à l’arrêt de l’écran (60
secondes) ou retirer, puis réinsérer la
batterie. Redémarrer l’outil.
Si ce signal d’erreur apparaît souvent,
contacter Cembre.
Les erreurs restent achés à l’écran pendant environ 30 secondes, puis l’erreur est réinitiali-
sée. Ils se présentent à nouveau en cas d’anomalie permanente.
5. CONNEXION À L’ORDINATEUR
Le chier de mémoire intégrée dans l’outil permet d’enregistrer les paramètres relatifs aux cycles
eectués(200.000 évents)etdepouvoir lestransférerversunordinateurpar l’intermédiaireducâble
USB fourni. Pour visualiser et gérer les données mémorisées, le logiciel Cembre CEM_SWBT01 est
disponible gratuitement après enregistrement dans le domaine réservé du site www.cembre.com.
Dans ce domaine réservé, il sera alors possible de trouver les mises à jour éventuelles des rmwares
permettant à vos propres outils une meilleure ecacité et d’améliorer leurs performances.
– Les informations suivantes sont destinées aux pays membres del'Union Européenne:
INFORMATION POUR LES UTILISATEURS aux termes des“Directives 2002/95/CE et 2002/96/CE.
Le symbole“poubelle barrée”apposé sur l’appareil ou sur son emballage indique que le produit, à la n de
sa vie utile, doit être recueilli séparément des autres déchets.
La collecte sélective du présent appareil en n de vie est organisée et gérée par le producteur. L’utilisa-
teur qui voudra se défaire du présent appareil devra par conséquent contacter le producteur et suivre
le système que celui-ci a adopté pour consentir la collecte séparée de l’appareil en n de vie. La collecte
sélective adéquate pour l’envoi successif de l’appareil destiné au recyclage, au traitement et à l’élimination
compatible avec l’environnement contribue à éviter les eets négatifs possibles sur l’environnement et sur
la santé et favorise la réutilisation ou le recyclage des matériaux dont l’appareil est composé. L’élimination
abusive du produit par le détenteur comporte l’application des sanctions administratives prévues par les
lois en vigueur.
This manual suits for next models
7
Table of contents
Languages:
Other Cembre Power Tools manuals

Cembre
Cembre ECW-H3D User manual

Cembre
Cembre CMB2 Parts list manual

Cembre
Cembre BTEPE2.DET12 User manual

Cembre
Cembre B54D-D6 User manual

Cembre
Cembre B131-UC User manual

Cembre
Cembre B550 User manual

Cembre
Cembre B54M-D6A User manual

Cembre
Cembre EPB-1N User manual

Cembre
Cembre TW-18B User manual

Cembre
Cembre B15MD User manual

Cembre
Cembre HT120 User manual

Cembre
Cembre B35-TC025 User manual

Cembre
Cembre RHU520 User manual

Cembre
Cembre B-TC950A User manual

Cembre
Cembre B125LN-C User manual

Cembre
Cembre HT120-KV User manual

Cembre
Cembre B54MD-D6 User manual

Cembre
Cembre B-TD270 User manual

Cembre
Cembre MTE1-S User manual

Cembre
Cembre B600CND User manual