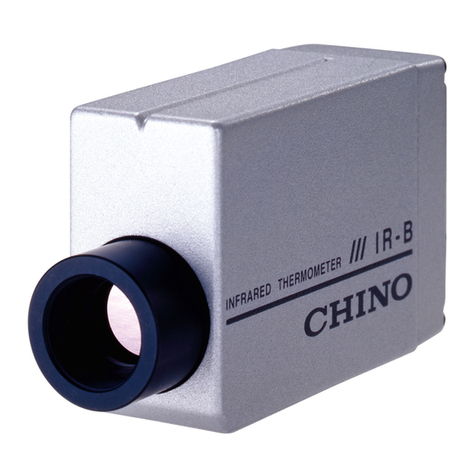
Chino IR-CA series User manual

INST.No.INE-454-P2 Software Ver.1.2
IR-CAQ Series
HIGH FUNCTION TYPE INFRARED
R
ADIATION THERMOMETER
[Software volume]
Model: IR-CAQ
Always keep these instruction with the unit.
Please be sure to deliver these instructions
with the unit to the end user.

INST.No.INE-454-P2 Software Ver.1.2
-C1-
IR
-
CA
RANGE
NO
.
400‑3100
℃
Q2TN / 1.2 □
IA04ZQ001
Request to the operator of the thermometer
This instruction manual describes the maintenance of the thermometer, too.
Keep this instruction manual with the thermometer.
If you have unclear points or need technical assistance, please contact your sales agent of
CHINO Corporation.
Notices
1. The information in this manual is subject to change without notice and does not
represent a commitment on the part of CHINO Corporation.
2. No part of this manual may be reproduced or transmitted in any form or by any means,
electronic or mechanical, including photocopying and recording, for any purpose other
than the purchaser's personal use without permission of CHINO Corporation.
3. CHINO Corporation shall not be liable for any operation results.
To use high function type infrared radiation thermometer for Model IR-CAQ correctly and
safely, please keep the following safety measures for the operation and storage of the
thermometer.
♦Symbols in this instruction manual
The symbols shown below are used depending on important degrees for using the thermometer safely
and avoiding unexpected situations.
Important
degree Symbols Contents
1This symbol is attached to a title for the sentence with .
2For avoiding dangerous accidents (may cause death or serious injury)
like as electrical shock, fires, or troubles/damages of the thermometer.
3For avoiding injury or in physical damage to the thermometer.
4Information that we suggest to read carefully.
5Information that you can use as a reference.
Request and notices
This instruction manual is explaining only "soft volume" for using high function type
infrared radiation thermometer for Model IR-CAQ.
To use high function type infrared radiation thermometer for Model IR-CAQ correctly and
safel
y,
read the se
p
arate inst
r
uction manual
[
IR-CA
Q
series Har
d
ware volume
]
!
Preface
This instruction manual is for the
thermometer with the software
version 1 .2.
The software version of your
thermometer is indicated in the
label on the rear side.
(Ref to [3.1 Overview] in separate
instruction manual [IR-CAQ
series Hardware volume
]
)
!
Warning
Warning
Caution
Remarks
Reference
Serial No. plate
【
Serial No. Label
for thermometer】
Model Software
version No.
Serial No. Measuring
range

INST.No.INE-454-P2 Software Ver.1.2
-C2 -
1. Operation·········································································· 1
1.1 Digital display···································································· 1
2. Operation mode and engineering mode····················1
2.1 Parameter programming /selection (Operating mode)···· 1
2.2 Parameter programming /selection (Engineering mode) 2
3. Operating mode······························································· 3
3. Details of the operator mode··············································· 3
3.1 Emissivity (ratio) programming······································· 3
3.1.1 Emissivity (ratio) programming 1································· 3
3.1.2 Emissivity (ratio) programming 2································· 4
3.2 Automatic emissivity calculation····································· 4
3.2.1 Automatic emissivity calculation
(Internal):Input of reference temperature·················· 4
3.2.2 Automatic emissivity calculation
(External):Model IR-CAQ5only : Selection
of external programing················································ 5
3.3 Signal modulation mode selection ··································· 5
3.4 Modulation degree programming····································· 6
3.4.1 Modulation time constant programming
(Effective when the “dELy” is selected in the signal
modulation mode.)······················································ 6
3.4.2 Damping degree selection
(Effective when the “PEAk” is selected in the signal
modulation mode.)······················································ 6
3.5 Alarm programming
(Model IR-CAQJonly constant output
possible : As for other models “AL”,”AH” of the
status marker are lighted)············································ 7
3.5.1 Alarm type selection
(High alarm, low alarm or alarm disable)················· 7
3.5.2 Alarm set-point (1 point only in high alarm in
[3.5.1Alarm type selection])··································· 7
4. Engineering mode··························································· 8
4.1 Analog output scaling programming································ 8
4.1.1 Analog output minimum value programming…”OutL”· 8
4.1.2 Analog output maximum value programming…”OutH”·· 8
4.2 Analog dummy output programming······························ 9
4.3 Holdfunctions(Holddisable,SampleholdPeakhold)selection ····10
4.3.1 Hold functions type selection ········································ 10
4.3.2 Peak hold reset type selection (Selection of he outside
reset… Model IR-CAQJonly)··············· 11
4.3.3 Peak hold reset time programming ······························· 12
4.4 Measurement unit selection·············································· 12
4.5 Modulation time constant unit selection ·························· 13
4.6 Contact output item selection
(Model IR-CAQKonly)····································· 13
4.7 Automatic emissivity calculation type selection
(External setting: Model IR-CAQ5only)··········· 14
4.8 Measuring wavelength selection······································ 15
4.9 Zero/span adjustments ······················································ 16
4.9.0 Procedure for Zero/span adjustments···························· 16
4.9.1 Zero/span adjustments (1)·············································· 16
4.9.1-1) Zero/span adjustments execution selection················· 16
4.9.1-2) “Zero” side adjustments···Adjustment by furnace
temperature at zero side························· 16
4.9.1-3) “Span” side adjustment···Adjustment by furnace
temperature at span side························· 16
4.9.2 Zero/span adjustments (2)·············································· 17
4.9.2-1) Zero/span adjustments execution: For “2coL”············ 17
4.9.2-2) Zero/span adjustments execution: For “1coL”············ 17
4.9.3 Correction after the Zero/span adjustments.
(measured value became abnormal)··········· 17
4.9.3-1) Zero/span adjustments execution selection ················· 17
4.9.3-2)Zero side data display/setting by IR-CAseries············18
4.9.3-3) Zero side data display/setting by furnace
temperature by a reference radiation thermometer······· 18
4.9.3-4) Span side data display/setting by IR-CAseries
radiation thermometer·································· 19
4.9.3-5) Zero side data display/setting by furnace
temperature by a reference radiation thermometer······· 19
4.9.4 Selection of correction after the zero/span
adjustments programming item·······················20
4.10 Temperature display/Analog output
correction programming································ 21
4.10.1 Programming of number of temperature display
and analog output correction data
(number of knee-point)·············· 21
4.10.2 Programming of temperature display and analog
output correction data No.···························21
4.10.3 Entering of data before temperature display and
analog output correction···························· 22
4.10.4 Entering of data after temperature display and
analog output correction···························· 22
4.10.5 Selection of temperature display and
analog output correction for programming item········· 23
4.11 Analog input programming
(Model IR-CAQ5only) ································24
4.11.1 Selection ofanalog input items···································· 24
4.11.2 Emissivity scaling for
remote emissivity programming············· 25
4.11.3 Temperature scaling for
automatic emissivity calcuiation························ 26
4.12 Communications programming
(Model IR-CAQSonly)··································27
4.12.1 Address programming·················································27
4.12.2 Communication speed selection·································· 27
4.12.3 Communication protocol mode selection··················· 28
4.13 Key lock··········································································· 28
5. Self-diagnostic function and Overflow/underflow ··29
5.1 Self-diagnostic function ····················································29
5.2 Overflow/underflow··························································29
5.3 Under flow display for two-color type radiation
thermometer only : “CLP” ······································ 29
6. List of starting up modes···············································30
6.1 Starting up modes······························································ 30
6.2 Screens················································································30
7. Parameter programming/selection·····························30
7.1 Parameter programming/selection (operating mode)·······30
7.2 Parameter programming/selection (engineering mode)·· 31
Software Version Ver.1.2
CONTENTS

INST.No.INE-454-P2 Software Ver.1.2
- 1 -
1.1 Digital display
After the installation, the connections and the
wirings are completed, turn all mains power on.
Measurement starts and the measured value is
displayed in the main display.
When the low alarm or the high alarm activates, the
status marker “AL” or “AH” will light.
(on the condition that the low alarm or the high
alarm has been programmed)
(1) Main display :7-segment LCD 4 digits ..
Displays measured value or parameters
(2) Sub display : 7-segment LCD 4 digits ..
Displays parameter menus.
(3) Sub marker : ε… Emissivity
(4) Status marker : AL … Low alarm
: AH … High alarm
(5) Temperature unit : C … ºC (Celsius)
F …ºF (Fahrenheit)
(6) Measuring wavelength display : Nothing is indicated
…1.55/1.35um at “2col”
…1.55um at “1col” “2c2” “2c1” “inG2” inG1” and “Si”
: 1 Indicated (*) …1.35/0.9um at “2col”, …0.9um at “1col”
(*) is indicated at [3.1.2 Emissivity (ratio) programming 2]
2.1 Parameter programming/selection
(Operating mode)
In the measurement mode, program or select a
parameter by using SEL key.
The operator mode covers programming or
selection of emissivity, automatic emissivity
calculation, signal modulation mode, modulation
degree, and alarms. For each program menu,
refer to [3. Operating mode].
The right figure shows the flow chart of the
parameter menus by pressing SEL key in the
measurement mode.
Tb CONT MEM PEAK
AL AH C
F
ε
(1)
(3)
(2)
(4)
(5)
[Measurement mode]
The measured value is displayed
in the main display.
Nothing is displayed in the sub display
and in the sub marker.
1. Operation
2. Operating mode and engineering mode
Measurement mode
Modulation
Time constant
Alarm mode
Emissivity (ratio) programmming 1.55/1.35um
Emissivity programmming 1.55um
Alarm temperature
Automatic emissivity calculation
Operating mode
Automatic emissivity
calculation enable
Y
Damping degree
Delay
Y
SEL
SEL
SEL
SEL
SEL
SEL
SEL
disable
Peak
N
Emissivity (ratio) programmming 1.35/0.9um
Emissivity programmming 0.9um
SEL

INST.No.INE-454-P2 Software Ver.1.2
- 2 -
[
Measurement mode
]
2.2 Parameter programming/selection (Engineering mode)
In the measurement mode, press SEL key and ENT key
simultaneously to display the engineering mode shown
in the right figure for programming or selecting a
parameter.
The engineering mode covers programming or selection
of analog output scaling, analog dummy output, hold
function (without hold function, peak hold or sample
hold), temperature unit, contact output, automatic
emissivity calculation (internal or external), zero/span
adjustment, analog output correction, analog input (for
the thermometer with the option of analog input), and
communications (for the thermometer with the option of
communications interface). For each program menu,
refer to [4. Engineering mode] .
The lower figure shows the flow chart of the parameter
menus by pressing SEL key in the engineering mode.
Measurement mode
Peak hold/
Samplehold
Reset type
Analog output
(Low
temperature)
Analog output
(High
temperature)
In programming of parameters, the screenwill move to the measurement
mode unless anykeyis pushed for 1minute.
Reset time
Analog dummy
output
Contact
output type
Temperature
unit
Automatic
emissivity
calculation
enable/
disable(Int/Ext)
Analog output
correction
(Number of data)
Temperature before
correction
Temperature after
correction
Zero/Span
adjustment
(Lower side)
Zero/Span
adjustment
(Higher side)
Engneering mode
Peak hold?
Y
SEL
SEL
SEL
Hold time
reset?
Y
N
N
SEL
SEL
SEL
SEL
SEL
SEL
Number of
data=0
SEL
SEL
All data input
N
SEL
SEL
N
Analog
input usage
Analog input
scaling
(Lower limit
value)
Analog input
scaling
(Higher limit
value)
SEL
SEL
SEL
Communications
address
Communications
speed
SEL
SEL
Analog
input enable
Y
N
SEL
SEL
Data number
SEL
ENT
+
SEL
N
Zero/Span
adjustment
operating
Correction calculation orer
(No,Yes,cancel)
Zero/Span
adjustment
correction
(Measured
value
abnormal)
SEL
Y
N
Tb CONT MEM PEAK
AL AH C
F
ε
Tb CONT MEM PEAK
AL AH C
F
ε
[ Engineering mode ]
2. Operating mode and engineering mode

INST.No.INE-454-P2 Software Ver.1.2
- 3 -
1) Confirm the wavelength selection display under the main
marker is turning off.
To program the emissivity value, press SEL key in the
measurement mode screen until “ ε” appears in the sub
marker as shown in the right figure.
2) By pressing key, the most significant digit of the sub
display will blink.
3) Use or key to program the desired value.
4) To shift to the next lower digit, press key. The next
lower digit will blink.
5) Repeat the above procedure of (3) and (4) up to the least
significant digit for programming (4 digits).
6) To activate this programming, press ENT key.
3. Details of the operator mode
3.1 Emissivity(ratio) programming
If the emissivity (ratio) of object measured is low, the temperature displayed becomes lower than the
exact temperature and the emissivity (ratio) is to be compensated.
But programming differs by the selected measurement wavelength. (Refer to [4.8 Measuring
wavelength selection]
Program the emissivity ratio in the case of 2 color measurement (“2col”, “1col”, “2c1”) and the
emissivity in the case of single color measurement (“1col”, “inG2”, “inG1”, “Si”.
In case of automatic emissivity calculation, the emissivity (ratio) can be set up separately at low
temperature side range and high temperature side range
Emissivity (ratio)
programming 1 Emissivity (ratio)
programming 2Measurement wavelength Wavelength display: goes off Wavelength display: 1ligths
2col 2 color measurement automatic
range switching 1.55/1.35µm: emissivity (ratio) 1.35/0.9µm: emissivity (ratio)
1col Single color measurement
automatic range switching 1.55µm: emissivity 0.9µm: emissivity
2c2 1.55/1.35µm:
emissivity (ratio) Not using (*)
2c1 2 color measurement 1.35/0.9µm:
emissivity (ratio) Not using (*)
inG2 1.55µm: emissivity Not using (*)
inG1 1.35µm: emissivity Not using (*)
Si Single color measurement 0.9µm: emissivity Not using (*)
(*) Even if it sets up it is not related to measurement.
3.1.1 Emissivity (ratio) programming 1: Program the emissivity (ratio) of 1.55/1.35µm
in “2col”, 1.55/1.35µm in “2c2”and 1.35/0.9µm
in “2c1”.
Program the emissivity of 1.55µm in “1col”, 1.55µm
in “inG2”, 1.35µm in “inG1”and 10.9µm in “Si”.
Program the emissivity (ratio). In case of automatic emissivity calculation, program the emissivity
ratio at low temperature side range.
3. Operating mode
The programmable range is 1.999 to 0.050.
The default value is 1.000.
Remarks
Tb CONT MEM PEAK
AL AH C
F
ε
Sub dis
p
la
y
Sub marke
r
Main display
Nothing is indicated
The programmable range is 1.999 to 0.050
The default value is 1.000.
Remarks

INST.No.INE-454-P2 Software Ver.1.2
- 4 -
1) To program the reference temperature value, press SEL
key in the measurement mode screen until “Auto”
appears in the sub display as shown in the right figure.
2) By pressing key, the most significant digit of the main
display will blink.
3) Use or key to program the desired value.
4) To shift to the next lower digit, press key.
The next lower digit will blink.
5) Repeat the above procedure of (3) and (4) up to the least
significant digit for programming (4 digits).
6) To activate this programming, press ENT key.
1) To program the emissivity value, press SEL key in the
measurement mode screen until “ ε” appears in the sub
marker as shown in the right figure.
By pressing SEL key Indicate the 1 wavelength selection
display under the main marker.
2) By pressing key, the most significant digit of the sub
display will blink.
3) Use or key to program the desired value.
4) To shift to the next lower digit, press key. The next
lower digit will blink.
5) Repeat the above procedure of (3) and (4) up to the least
significant digit for programming (4 digits).
6) To activate this programming, press ENT key.
3.1.2 Emissivity (ratio) programming 2: Program the emissivity (ratio) of 1.35/0.9µm in
“2col” and 0.9µm in “1col” in case of automatic
emissivity calculation.
In case of automatic emissivity calculation, program the emissivity ratio at high temperature side range.
Even if it sets up in case of 2 color measurement and single color measurement it is not related to
measurement.
3.2 Automatic emissivity calculation
The emissivity is automatically calculated when you coincident the measured value to the reference
temperature value entered by function keys or by an analog input (option).
3.2.1 Automatic emissivity calculation(Internal ):Input of reference temperature
In the measurement mode, the emissivity is automatically calculated by entering the reference
temperature value measured by a thermocouple or other sensor in advance.
This function is effective when “ In ” (internal) or “ Ext ” (external) is selected in
[4.7 Automatic emissivity calculation type selection.].
Remarks
•The programmable range is 0to 6280ºC.
•The default is the minimum temperature value of the measuring range.
Remarks
3. Operating mode
Tb CONT MEM PEAK
AL AH C
F
ε
Sub dis
p
la
y
Sub marke
r
Main display
1 indicated
The programmable range is 1.999 to 0.050.
The default value is 1.000.
Remarks
AL AH C
F
ε
Tb CONT MEM PEAK
Sub dis
p
la
y
Main display

INST.No.INE-454-P2 Software Ver.1.2
- 5 -
3.2.2 Automatic emissivity calculation (External …Model IR- CAQ5only)
: Selection of external programming
In the measurement mode, the emissivity is automatically calculated by entering the reference
temperature value by the analog input (option).
3.3 Signal modulation mode selection
Two kinds of the signal modulation mode are available, one is “dELy” (displays the measured
value smoothly for fluctuating original signal) or the other is “PEAk” (displays the measured value
by modulating the original signal after the tracing of peak value).
To display the measured value based on the original signal, select “dELy” and program the
modulation degree to “0.0”. (Ref. [6.4.4-1 Modulation time constant programming])
dELy
The measured value is displayed by the
first-order lag signal based on the
modulation time constant programmed in
[3.4.1 Modulation time constant programming].
PEAk
When the measured temperature is rising up,
the measured value is displayed by the
original signal. When the measured value is
falling down, the measured value is displayed
by the damping degree programmed in
[3.4.2 Damping degree selection].
Tb CONT MEM PEAK
AL AH C
F
ε
Sub display
Main displa
y
Necessary to program the scaling of the analog input in [4.11 Analog input
programming])
Reference
1) To select the external programming, press SEL key in the
measurement mode screen until “Auto” appears in the sub
display as shown in the right figure.
2) By pressing key, “ok” will blink in the main display.
3) Confirm that the analog input is connected to the input/ output
terminals (9 and 10).
(Ref. [5.1 Connections/Wirings])
4) To activate this selection, press ENT key.
AL AH C
F
ε
Tb CONT MEM PEAK
Main dis
p
la
y
For the correct measurement, confirm the connections of the analog input.
Caution
1) To select the signal modulation mode, press SEL key in the
measurement mode screen until “Modu” appears in the sub
display as shown in the right figure.
2) By pressing key, “dELy” or “PEAk” will blink in the
main display.
3) Use or key to select the desired mode.
4) To activate this selection, press ENT key.
Tb CONT MEM PEAK
AL AH C
F
ε
Sub display
3. Operating mode
Sub display
Main displa
y

INST.No.INE-454-P2 Software Ver.1.2
- 6 -
3.4 Modulation degree programming
When the "dELy" is selected in the signal modulation mode, the first-order lag degree can be
adjusted.
Further, when the “PEAk” is selected, the damping degree of signal after tracking the value can be
adjusted.
3.4.1 Modulation time constant programmming
(Effective when the “dELy” is selected in the signal modulation mode.)
When the input signal is fluctuated, the measured value is
displayed smoothly.
3.4.2 Damping degree selection
(Effective when the "PEAk" is selected in the signal modulation mode.)
Execute the programming of the modulation degree together with [3.3 Signal
modulation mode selection].
Caution
1) To program the modulation time constant, press SEL key in
the measurement mode screen until “tAu” appears in the sub
display as shown in the right figure.
2) By pressing key, the most significant digit of the main
display will blink.
3) Use or key to program the desired value.
4) To shift to the next lower digit, press key.
The next lower digit will blink.
5) Repeat the above procedure of (3) and (4) up to the least
significant digit for programming (4 digits).
6) To activate this programming, press ENT key.
AL AH C
F
ε
Tb CONT MEM PEAK
Sub dis
p
la
y
Main display
• By selecting “dEL
y
” and programming to
“0.0”, the measured value based on the
original signal is displayed.
Reference
1) To select the damping degree, press SEL key in the
measurement mode screen until “dEc” appears in the sub
display as shown in the right figure.
2) By pressing key, “0” at the least significant digit in the
main display will blink.
3) Use or key to select the desired damping degree [0, 2,
5 or 10(ºC/second)].
4) To activate this selection, press ENT key.
•The default value is 0ºC (ºC/second).
Remarks
・The programmable range is 0.0 to
99.9(second) or 0.00 to 9.99(second).
・The default value is 0.0 second (original
signal).
Remarks
Tb CONT MEM PEAK
AL AH C
F
ε
Sub display
Main display
[Decimal point 1 column]
3. Operating mode
[Decimal point 2 column]
Tb CONT MEM PEAK
AL AH C
F
ε
Sub display
Main display

INST.No.INE-454-P2 Software Ver.1.2
- 7 -
(1) To program the alarm set-point, press SEL key in the
measurement mode screen until “ALM” appears in the
sub display as shown in the right figure.
(2) By pressing key, the most significant digit of the main
display will blink.
(3) Use or key to program the desired value.
(4) To shift to the next lower digit, press key.
The next lower digit will blink.
(5) Repeat the above procedure of (3) and (4) up to the least
significant digit for programming (4 digits).
(6) To activate this programming, press ENT key.
• The programmable range is 0to 6280ºC.
• The defaults are: Hi (High alarm) … Maximum value of the measuring range
Lo (Low alarm) … Minimum value of the measuring range
3.5 Alarm programming (Model IR-CAQJonly contact output possible:
As for other modelsAL,AHof the status marker are lighted.)
This programming is for the selection of the alarm type (high alarm, low alarm or alarm disable)
and the programming an alarm set-point (1 point only in the high alarm or the low alarm).
3.5.1 Alarm type selection (High alarm, low alarm
or alarm disable)
[Alarm type]
No: Alarm disable
Hi: High alarm (The open collector of the contact output is ON when the measured value
exceeds the alarm set-point)
Lo: Low temperature alarm (The open collector of the contact output is OFF when the
measured value exceeds the alarm set-point)
3.5.2 Alarm set-point (1 point only in high alarm or low alarm
in [3.5.1Alarm type selection]
1) To select the alarm type, press SEL key in the measurement
mode screen until “A.Mod” appears in the sub display as
shown in the right figure.
2) By pressing key, “no”, “Hi” or “Lo” will blink in the
main display.
3) Use or key to select the desired type.
4) To activate this selection, press ENT key.
Tb CONT MEM PEAK
AL AH C
F
ε
[High alarm]
Sub display
Main display
Tb CONT MEM PEAK
AL AH C
F
ε
[Low alarm]
Sub display
Main display
Tb CONT MEM PEAK
AL AH C
F
ε
[
Alarm disable
]
Main dis
p
la
y
Remarks
Tb CONT MEM PEAK
AL AH C
F
ε
Sub display
Main display
Sub display
3. Operating mode

INST.No.INE-454-P2 Software Ver.1.2
- 8 -
1) To program the analog output minimum value, press SEL
key in the engineering mode screen until “OutL” appears in
the sub display as shown in the right figure.
2) By pressing key, the most significant digit of the main
display will blink.
3) Use or key to program the desired value.
4) To shift to the next lower digit, press key.
The next lower digit will blink.
5) Repeat the above procedure of (3) and (4) up to the least
significant digit for programming (4 digits).
6) To activate this programming, press ENT key.
1) To program the analog output maximum value, press SEL
key in the engineering mode screen until “OutH” appears in
the sub display as shown in the right figure.
2) By pressing key, the most significant digit of the main
display will blink.
3) Use or key to program the desired value.
4) To shift to the next lower digit, press key. The next lower
digit will blink.
5) Repeat the above procedure of (3) and (4) up to the least
significant digit for programming (4 digits).
6) To activate this programming, press ENT key.
4. Engineering mode
In the measurement mode, press SEL and ENT keys simultaneously to display the engineering
mode screen. Refer to the engineering mode screen in [6.3 Parameter programming/selection
(Engineering mode)]
4.1 Analog output scaling programming
4.1.1 Analog output minimum value programming…"OutL"
This programming is for the minimum value of the temperature scaling when the measured value is
outputted by analog signal.
4.1.2 Analog output maximum value programming…"OutH"
This programming is for the minimum value of the temperature scaling when the measured value is
outputted by analog signal.
Tb CONT MEM PEAK
AL AH C
F
ε
[Minimum value]
Caution
To return to the measurement mode screen from the engineering mode screen
• The screen will be automatically returned to the measurement mode screen if
any key is not pressed for 1 second in the programming of each parameter.
• The screen will return to the measurement mode screen when the
programming from [4.1 Analog output scaling programming] to [4.10 Analog
output correction programming] is completed.
Note: Up to [4.11 Analog input programming] in case of IR-CAQ5
U
p
to
[
4.12 Communications
p
ro
g
rammin
g
]
in case of I
R
-CA
Q
S
Main dis
p
la
y
Sub display
Tb CONT MEM PEAK
AL AH C
F
ε
[Maximum value]
Main dis
p
la
y
Sub display
• The programmable range is 0to 6280ºC.
• The defaults is OutL (Minimum value)… Minimum value of the measuring range
Reference
• The programmable range is 0to 6280ºC.
• The defaults is: OutH (Maximum value)… Maximum value of the measuring
Reference
4. Engineering mode

INST.No.INE-454-P2 Software Ver.1.2
- 9 -
4.2 Analog dummy output programming
This programming is for analog dummy output based on programmed ratio. The output of 0 to
100% is corresponding to 4 to 20mA. Note that this screen will not move to the measurement
mode even if any key is not pushed for 1 minute.
.
When “OutC” is displayed, “0” is displayed in the main display. However, the
dummy output corresponding to “0” is not outputted even if ENT key is pressed
on this condition.
Take the above procedure to program to “0”. If the dummy output is not required,
press SEL key with “0” displayed to move to the next programming mode.
Caution
1) To program the dummy analog output, press SEL key in the
engineering mode screen until “OutC” appears in the sub
display as shown in the right figure.
2) By pressing key, the most significant digit of the main
display will blink.
3) Use or key to program the desired value.
4) To shift to the next lower digit, press key.
The next lower digit will blink.
5) Repeat the above procedure of (3) and (4) up to the least
significant digit for programming (4 digits).
6) To activate this programming, press ENT key.
Then, the programmed value is outputted as a dummy
output.
Tb CONT MEM PEAK
AL AH C
F
ε
Main dis
p
la
y
Sub display
4. Engineering mode
•Programmable range is 0to 100 (%).
Example) 0(%) = 4mA DC
50 (%) = 12mA DC,
100 (%) = 20mA DC
•The default value is 0(%)= 4mA DC.
Remarks

INST.No.INE-454-P2 Software Ver.1.2
- 10 -
4.3 Hold functions (Hold disable, sample hold, peak hold) selection
This mode is for the selection of the hold function (hold function disable, sample hold or peak hold).
When the peak hold is selected, [4.3.2 Peak hold reset type (time reset or remote contact reset)
selection] is necessary. Furthermore, when the internal time reset is selected, [4.3.3 Peak hold reset
time programming] is necessary.
For the sample hold, only the selection of the hold mode is required
4.3.1 Hold function type selection
[Hold function types]
no : Hold function disable
PEAk : Peak hold
SAMP : Sample hold
(Model IR-CAQJonly)
[Hold function disable]
Tb CONT MEM PEAK
AL AH C
F
ε
Main dis
p
la
y
Sub display
[Peak hold]
Tb CONT MEM PEAK
AL AH C
F
ε
Sub display
Main dis
p
la
y
[Sample hold]
Tb CONT MEM PEAK
AL AH C
F
ε
Main dis
p
la
y
Sub display
4. Engineering mode
1) To select the hold function type, press SEL key in the
engineering mode screen until “HoLd” appears in the sub
display as shown in the right figure.
2) By pressing key, “no”, “PEAk” or “SAMP” will blink
in the main display.
3) Use or key to select the desired type.
4) To activate this selection, press ENT key.
In
p
ut for
m
【Sample hold 】
Out
p
ut form
Remote contact input reset
•The default is no (hold function disable).
Remarks
For the sample hold, the measured value is hold by the remote contact.
(
The
p
ulse width more than 55m/sec is re
q
uired for the remote contact.
)
Caution
For the temperature display and analog output on the sample hold mode, the
programmed value is hold by to going down point in remote contact input.
Caution

INST.No.INE-454-P2 Software Ver.1.2
- 11 -
4.3.2 Peak hold reset type selection
(Selection of the outside reset・・・Model IR-CAQJonly)
(It is necessary to select when the peak hold is selected in [4.3.1 Hold function type selection].)
4. Engineering mode
【Peak hold (Reset disable)】
Input
Out
p
ut TRTR
【Peak hold internal (Time reset)】
Input
Out
p
ut
【Peak hold external (Remote contact reset)】
Input
Output
External contact out
p
ut
[Reset types]
no : Reset disable
in : Internal (time reset)
Et : External (remote
contactreset
)
Tb CONT MEM PEAK
AL AH C
F
ε
[Reset disable]
Main dis
p
la
y
Sub display
1) After the selection of “PEAk” in [4.3.1 Hold function type
selection], press SEL key until “HrSt” (selection screen of
peak hold reset type) appears in the sub display as shown in the
right figure.
2) By pressing key, “no”, “in” or “Et” will blink in the main
display.
3) Use or key to select the desired type.
4) To activate this selection, press ENT key.
Tb CONT MEM PEAK
AL AH C
F
ε
[External reset]
Main dis
p
la
y
Sub display
Tb CONT MEM PEAK
AL AH C
F
ε
[Internal reset]
Main dis
p
la
y
Sub display
•
The default is no
(reset disable).
Remarks
Caution
TR: Reset time (0.0 to 99.9 sec)
Hold time is less than 0.0 to
0.1 in 0.0
p
ro
g
rammed.
Caution
For the remote contact reset is
reset by the remote contact
input. (The pulse width is
required more than 55msec for
the remote contact in
p
ut
)

INST.No.INE-454-P2 Software Ver.1.2
- 12 -
4.3.3 Peak hold reset time programming
(It is necessary to program the reset time when the peak hold is selected in [4.3.1 Hold function type
selection] and then “in” (internal reset) is selected in [4.3.2 Peak hold reset type selection].)
4.4 Measurement unit selection
This mode is for the selection of the measurement unit for measured temperature.
Tb CONT MEM PEAK
AL AH C
F
ε
•The programmable range is 0.0 to 99.9 (second).
•The default value is 0.0 second.
Remarks
Main dis
p
la
y
Sub display
Tb CONT MEM PEAK
AL AH C
F
ε
[ ºC ]
Main display Sub display
[Measurement units]
C : ºC
F : ºF
The default is C(ºC)
Remarks
Tb CONT MEM PEAK
AL AH C
F
ε
[ ºF ]
Main displaySub display
4. Engineering mode
1) After the selection of “in” (time reset), press SEL key until
“r.tim” (programming screen of peak hold reset time) appears
in the sub display as shown in the right figure.
2) By pressing key, the most significant digit of the main
display will blink.
3) Use or key to program the desired value.
4) To shift to the next lower digit, press key.
The next lower digit will blink.
5) Repeat the above procedure of (3) and (4) up to the least
significant digit for programming (4 digits).
6) To activate this programming, press ENT key.
Then, the programmed value is outputted as a dummy output.
1) To select the measurement unit, press SEL key in the
engineering mode screen until “unit” appears in the sub
display as shown in the right figure.
2) By pressing key, “C” or “F” will blink in the main display.
3) Use or key to select the desired unit.
4) To activate this selection, press ENT key.

INST.No.INE-454-P2 Software Ver.1.2
- 13 -
4.5 Modulation time constant unit selection
[3.4.1 Modulation time constant programming] to the cipher below the decimal point of when that
sets up the fixed number is selected when it puts it.
4.6 Contact output item selection (*: Model IR-CAQKonly)
This mode is for the selection of the contacts output item type.
Tb CONT MEM PEAK
AL AH C
F
ε
Main display Sub display
4. Engineering mode
1) To select the measurement unit, press SEL key in the
engineering mode screen until “tau.d” appears in the sub
display as shown in the right figure.
2) By pressing key, “1” or “2” will blink in the main display.
3) Use or key to select the decimal point.
4) To activate this selection, press ENT key.
The default is 2(decimal point 2 Column)
Remarks
1) To select the contacts output item type, press SEL key in the
engineering mode screen until “dout” appears in the sub
display as shown in the right figure.
2) By pressing key, “no”, “ALM” or “Err” will blink in the
main display.
3) Use or key to select the desired type.
4) To activate this selection, press ENT key.
[Contact output items]
no : No contacts output
ALM : High/low temperature alarm
Err* : Self-diagnostic abnormal
*Note
)
Model I
R
-CA
Q
K
onl
y
Tb CONT MEM PEAK
AL AH C
F
ε
[No contacts output]
Main dis
p
la
y
Sub dis
p
la
y
Tb CONT MEM PEAK
AL AH C
F
ε
[Self-diagnosis abnormal]
Main dis
p
la
y
Sub display
•The default is ALM (high/low temperature alarm).
Remarks
Main dis
p
la
y
Sub display
Tb CONT MEM PEAK
AL AH C
F
ε
[High/low temperature alarm]

INST.No.INE-454-P2 Software Ver.1.2
- 14 -
4.7 Automatic emissivity calculation type selection
(External setting :Model IR-CAQ5only)
This mode is for the selection of the automatic emissivity calculation function (disable or enable).
In case of using the automatic emissivity calculation functions, select the internal or external setting.
4. Engineering mode
1) To select the automatic emissivity calculation type, press
SEL key in the engineering mode screen until “E.Aut”
appears in the sub display as shown in the right figure.
2) By pressing key, “no”, “in” or “Et” will blink in the
main display.
3) Use or key to select the desired type.
4) To activate this selection, press ENT key.
Tb CONT MEM PEAK
AL AH C
F
ε
[Calculation disable]
Main display Sub display
Tb CONT MEM PEAK
AL AH C
F
ε
[External automatic Emissivity
calculation(by analog input)]
Main display Sub display
Tb CONT MEM PEAK
AL AH C
F
ε
[Internal automatic Emissivity
calculation(by keys)]
Main display Sub display
[Automatic emissivity
calculation types]
no: Calculation disable
in : Internal setting (by key)
Et: External setting (by analog input)
•The default is no
(
automatic emissivit
y
calculation disable
)
.
Remarks

INST.No.INE-454-P2 Software Ver.1.2
-15-
4.8 Measuring wavelength selection
This mode is the function that selects measurement wavelength.
[Measurement wavelength table]
Measurement temperature range or Measurement wavelengthMain
display Distance
coefficient 200,300 200, 300with
field diaphragm ø10 Distance coefficient 50
2col 400 to 3100ºC
2-color type measurement
(Automatic range switching)
400 to 900C:1.55/1.35µm
900 to 3100ºC:1.35/0.9µm
500 to 3500ºC
2-color type measurement
(Automatic range switching)
500 to1150ºC:1.55/1.35µm
1150 to3500ºC:1.35/0.9µm
350 to 2000ºC
2-color type measurement
(Automatic range switching)
350 to 750ºC:1.55/1.35µm
750 to 2000ºC:1.35/0.9µm
1col 400 to 3100ºC
Single color type
measurement (Automatic
range switching)
400 to 900ºC:1.55µm
900 to 1300ºC:0.9µm
500 to 3500ºC
Single color type
measurement (Automatic
range switching)
500 to 1150ºC:1.55µm
1150 to 3500ºC:0.9µm
350 to 2000ºC
Single color type
measurement (Automatic
range switching)
350 to 750ºC:1.55µm
750 to 2000ºC:0.9µm
2c2 400 to 1200ºC
2-color type measurement
: 1.55/1.35µm
500 to 1400ºC
2-color type measurement
: 1.55/1.35µm
350 to 900ºC
2-color type measurement
: 1.55/1.35µm
2c1 800 to 3100ºC
2-color type measurement:
: 1.35/0.9µm
1000 to 3500ºC
2-color type measurement
: 1.35/0.9µm
700 to 2000ºC
2-color type measurement
: 1.35/0.9µm
InG2 400 to 1200ºC
Single color type
measurement: 1.55µm
500 to 1400ºC
Single color type
measurement: 1.55µm
350 to 900ºC
Single color type
measurement: 1.55µm
InG1 400 to 3100ºC
Single color type
measurement: 1.35µm
500 to 3500ºC
Single color type
measurement: 1.35µm
350 to 2000ºC
Single color type
measurement: 1.35µm
Si 800 to 3100ºC
Single color type
measurement: 0.9µm
1000 to 3500ºC
Single color type
measurement: 0.9µm
700 to 2000ºC
Single color type
measurement: 0.9µm
4. Engineering mode
Tb CONT MEM PEAK
AL AH C
F
ε
1) To enter the Wavelength selection, press SEL key in the
engineering mode screen until “dEtc” appears in the sub display
as shown in the right figure. The present measurement wavelength
“2col” ETC is displayed in the main display. By pressing SEL key
here, it enters into [4.9.1 of zero/span adjustments (1)] screen in
measurement wavelength at present displayed.
2) To select the measuring wavelength other than the measuring
wavelength that is displayed, operate the following from 3) to 6).
3) By pressing key in the measuring wavelength selection screen,
“2col“etc will blink in the main display
4) Use or key to program the measuring wavelength.
5) To activate this programming, press ENT key.
6) By pressing the SEL key it enters into the setting of the next.
•The default value is 2col.
Remarks
It is the switching temperature of measurement wavelength in, the automatic
range switching of 2col, 1col and the difference in level may happen to
measu
r
ement temperature.
Caution
Main dis
p
la
y
Sub display

INST.No.INE-454-P2 Software Ver.1.2
-16-
4.9 Zero/span adjustments
This mode is for the zero and span adjustments of your thermometer by entering the black body
temperature at the minimum temperature range (zero side) and the maximum temperature range
(span side) by using your block body furnace.
4.9.0 Procedure for Zero/span adjustments
1) It is necessary to measure the furnace temperature at the zero side and the span side by a
reference radiation thermometer in advance.
4.9.1 Zero/span adjustments (1): For “2c2”, “2c1”, “inG2”, “inG1” or “Si” selected
4.91-1) Zero/span adjustments execution selection
4.9.1-2) “Zero” side adjustments …Adjustment by furnace temperature at zero side
4.9.1-3) “Span” side adjustment …Adjustment by furnace temperature at span side
1) To enter the zero side adjustments, “ZEro” appears in the sub
display as shown in the right figure.
2) By pressing key, the most significant digit of the main
display will blink.
3) Use or key to program the desired value.
4) To shift to the next lower digit, press key.
The next lower digit will blink.
5) Repeat the above procedure of (3) and (4) up to the least
significant digit for programming (4 digits).
6) To activate this programming, press ENT key.
Tb CONT MEM PEAK
AL AH C
F
ε
[Zero side]
Sub display
Main display
•The programmable range is 0to 6280ºC.
•The default is the minimum temperature value of the measuring range.
Remarks
1) Press SEL key in the zero side adjustments screen to enter span
side adjustments.
“SPan” appears in the sub display as shown in the right figure.
2) By pressing key, the most significant digit of the main
display will blink.
3) Use or key to program the desired value.
4) To shift to the next lower digit, press key.
The next lower digit will blink.
5) Repeat the above procedure of 3) and 4) up to the least
significant digit for programming (4 digits).
6) To activate this programming, press ENT key.
•The programmable range is 0to 6280ºC.
•The default is the maximum temperature value of the measuring range.
Remarks
4. Engineering mode
1) To enter the Ze
r
o/span adjustments execution selection, press
SEL key in the engineering mode screen until “CAL” appears
in the sub display as shown in the right figure and “no” is
displayed in the main display.
By pressing SEL key here, the zero/span adjustments skips
and it enters into [4.10 Temperature display/Analog output
correction programming] screen.
To execute the zero/span adjustments, operate the following
from 2) to 5).
2) By pressing key, "no" will blink in the main display
3) Use or key to select "yES" .
4) To activate this programming, press ENT key.
5) By pressing the SEL key it enters into the setting of the next.
Tb CONT MEM PEAK
AL AH C
F
ε
Tb CONT MEM PEAK
AL AH C
F
ε
Tb CONT MEM PEAK
AL AH C
F
ε
[Span side]
Sub display
Main display

INST.No.INE-454-P2 Software Ver.1.2
-17-
4.9.2 Zero/span adjustments (2): For “2coL”or “1coL” selected
4.9.2-1) Zero/span adjustments execution: For “2col”
4.9.2-2) Zero/span adjustments execution: For “1col”
4.9.3 Correction after the zero/span adjustments. (measured value became abnormal)
The IR-CA series measured value at the time of zero/span adjustments and also the furnace
temperature at the zero side/span side by a reference radiation thermometer [4.9.0 Procedure for
Zero/span adjustments] are able to confirm and correct. Refer from [4.9.3-1)] to [4.9.3-5)]
4.9.3-1) Zero/span adjustments execution selection
4. Engineering mode
Zero/span adjustments is not executed in case that “2coL” or “1coL” selected in
the [4.8 wavelength selection].
Execute zero
/
s
p
an ad
j
ustment.
(R
efe
r
to afte
r
the next column
)
.
Caution
1) Select measuring wavelength “2c2” in the [4.8 Measuring wavelength selection]
2) Execute zero/span adjustment on the side of the 1.55/1.35µm after [4.9.1-1) Zero/span
adjustments execution selection], [4.9.1-2) “Zero” side adjustments] and [4.9.1-3) “Span” side
adjustments].
3) Next, select measuring wavelength “2c1” in the [4.8 Measuring wavelength selection]
4) Execute zero/span adjustment on the side of the 1.35/0.9µm after [4.9.1-1) Zero/span
adjustments execution selection], [4.9.1-2) “Zero” side adjustments] and [4.9.1-3) “Span” side
adjustments].
1) Select measuring wavelength “inG2” in the [4.8 Measuring wavelength selection]
2) Execute the zero/span adjustments on the side of the 1.55µm after [4.9.1-1) Zero/span
adjustments execution selection], [4.9.1-2) “Zero” side adjustments] and [4.9.1-3) “Span” side
adjustments].
3) Next, select measuring wavelength “2c1” in the [4.8 Measuring wavelength selection]
4) Execute the zero/span adjustments on the side of the 0.9µm after [4.9.1-1) Zero/span
adjustments execution selection], [4.9.1-2) “Zero” side adjustments] and [4.9.1-3) “Span” side
ad
j
ustments
]
.
1) To enter the Zero/span adjustments execution selection, press
SEL key in the engineering mode screen until “CAL” appears
in the sub display as shown in the right figure and “no” is
displayed in the main display.
By pressing SEL key here, the zero/span adjustments skips
and it enters into [4.10 Temperature display/Analog output
correction programming] screen.
To execute the zero/span adjustments, operate the following
from 2) to 5).
2) By pressing key, "no" will blink in the main display
3) Use or key to select "yES" .
4) To activate this programming, press ENT key.
5) By pressing key and SEL key simultaneously it enters into
the setting of the next.
Tb CONT MEM PEAK
AL AH C
F
ε
Tb CONT MEM PEAK
AL AH C
F
ε
Sub display
Main display
Table of contents
Other Chino Thermometer manuals

Chino
Chino IR-FA Series User manual

Chino
Chino IR-SA Series User manual

Chino
Chino IR-H Series User manual

Chino
Chino IR-CAK User manual

Chino
Chino IR-BZ Series User manual

Chino
Chino TP-S Easy Thermo User manual

Chino
Chino IR-BAT Series User manual

Chino
Chino IR-AH Series User manual

Chino
Chino IR-CZ Series User manual

Chino
Chino IR-E Series User manual
Popular Thermometer manuals by other brands

Timex
Timex TX3000 Specification sheet

miniland baby
miniland baby thermotalk plus instruction manual

VOLTCRAFT
VOLTCRAFT IR 1000-30D operating instructions

Chauvin Arnoux
Chauvin Arnoux C.A 1860 user manual

Hanna Instruments
Hanna Instruments HI 935005 instruction manual

Brookstone
Brookstone Grill Alert manual