manuals.online logo
Brands
  1. Home
  2. •
  3. Brands
  4. •
  5. Cisco
  6. •
  7. Conference System
  8. •
  9. Cisco TelePresence SX10 User manual

Cisco TelePresence SX10 User manual

Other manuals for TelePresence SX10

21

This manual suits for next models

1

Other Cisco Conference System manuals

Cisco 7750 User manual

Cisco

Cisco 7750 User manual

Cisco Webex Room Kit Pro User manual

Cisco

Cisco Webex Room Kit Pro User manual

Cisco 7937G - Unified IP Conference Station VoIP... Instruction Manual

Cisco

Cisco 7937G - Unified IP Conference Station VoIP... Instruction Manual

Cisco 3200 Series User manual

Cisco

Cisco 3200 Series User manual

Cisco TelePresence SX20 Assembly instructions

Cisco

Cisco TelePresence SX20 Assembly instructions

Cisco TelePresence DX70 User manual

Cisco

Cisco TelePresence DX70 User manual

Cisco EX90 User manual

Cisco

Cisco EX90 User manual

Cisco DX600 series User manual

Cisco

Cisco DX600 series User manual

Cisco TelePresence System Codec C90 Instruction Manual

Cisco

Cisco TelePresence System Codec C90 Instruction Manual

Cisco TelePresence DX70 Service manual

Cisco

Cisco TelePresence DX70 Service manual

Cisco TelePresence IX5200 User manual

Cisco

Cisco TelePresence IX5200 User manual

Cisco TelePresence SX20 User manual

Cisco

Cisco TelePresence SX20 User manual
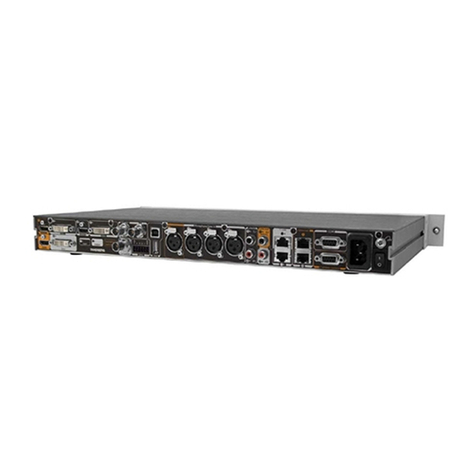
Cisco SX80 Service manual

Cisco

Cisco SX80 Service manual

Cisco GW 3340 User manual

Cisco

Cisco GW 3340 User manual

Cisco TelePresence System Codec C90 Service manual

Cisco

Cisco TelePresence System Codec C90 Service manual

Cisco Aironet 3500 Series Reference guide

Cisco

Cisco Aironet 3500 Series Reference guide

Cisco 8865 User manual

Cisco

Cisco 8865 User manual

Cisco SX80 User manual

Cisco

Cisco SX80 User manual

Cisco TelePresence Touch for MX Series User manual

Cisco

Cisco TelePresence Touch for MX Series User manual

Cisco MX300 G2 User manual

Cisco

Cisco MX300 G2 User manual

Cisco ?mi telepresence User manual

Cisco

Cisco ?mi telepresence User manual

Cisco TelePresence CE9.12 User manual

Cisco

Cisco TelePresence CE9.12 User manual

Cisco CTS-3010 Instruction Manual

Cisco

Cisco CTS-3010 Instruction Manual

Cisco Spark Room 70 Single User manual

Cisco

Cisco Spark Room 70 Single User manual

Popular Conference System manuals by other brands

Jabbla Tellus 6 operating instructions

Jabbla

Jabbla Tellus 6 operating instructions

LY International Electronics H-9500 Series Installation and operating manual

LY International Electronics

LY International Electronics H-9500 Series Installation and operating manual

RADVision Scopia XT1000 user guide

RADVision

RADVision Scopia XT1000 user guide

AT&T MERLIN LEGEND Reference

AT&T

AT&T MERLIN LEGEND Reference

Polycom RealPresence Group Series setup sheet

Polycom

Polycom RealPresence Group Series setup sheet

ProSoft Technology AN-X4-AB-DHRIO user manual

ProSoft Technology

ProSoft Technology AN-X4-AB-DHRIO user manual

Sony PCS-I150 Operation guide

Sony

Sony PCS-I150 Operation guide

Middle Atlantic Products VTC Series instruction sheet

Middle Atlantic Products

Middle Atlantic Products VTC Series instruction sheet

AVT MAGIC AC1 Go Configuration guide

AVT

AVT MAGIC AC1 Go Configuration guide

Prentke Romich Company Vanguard Plus Setting up and using
Prentke Romich Company

Prentke Romich Company Vanguard Plus Setting up and using
Speakerbus iD 712 user guide

Speakerbus

Speakerbus iD 712 user guide

Trelleborg SafePilot CAT PRO user guide

Trelleborg

Trelleborg SafePilot CAT PRO user guide

Sennheiser ADN instruction manual

Sennheiser

Sennheiser ADN instruction manual

ADTRAN NetVanta 7100 Configuration guide

ADTRAN

ADTRAN NetVanta 7100 Configuration guide

AINA PTT Voice Responder quick guide

AINA

AINA PTT Voice Responder quick guide

Yamaha ProjectPhone PJP-100H owner's manual

Yamaha

Yamaha ProjectPhone PJP-100H owner's manual

vissonic VLI Series user manual

vissonic

vissonic VLI Series user manual

Panasonic KX-VC500 user manual

Panasonic

Panasonic KX-VC500 user manual

manuals.online logo
manuals.online logoBrands
  • About & Mission
  • Contact us
  • Privacy Policy
  • Terms and Conditions

Copyright 2025 Manuals.Online. All Rights Reserved.

August 2019
Search Method
Cisco SX10, SX20
User
Guide
To turn on the system, press the ‘Power’ button on the remote control.
Ensure Cisco system white light is on.
To wake up the Telehealth system, press any button on the remote.
If the systems does not turn on/wake, ensure the TV is on the
appropriate input.
If you see the system name appear at the top of the screen the system is
online.
If you see ‘No Network Connection’ at the top of the screen the system
is offline. Please contact your regional technical support to resolve any
connectivity issues.
Turning On/Waking up theTelehealthSystem
1. Decrease/Increase volume.
2. Parameter keys which move the cursor 
left/right/up/down.
3. OK/Enter.
4. Go back one step.
5. Microphone mute/unmute.
6. Go back/Call button/Accept incoming call.
7. Reject incoming call/End call/Cancel/Go back
to Home screen.
8. Keypad: used to dial.
1. The ‘Settings’ icon provides access to Standby mode,
System Information and the Do Not Disturb feature. When
set to ‘Do Not Disturb,' ringtones and call attempts made
by others to reach you will appear as missed calls. You
may, however, place a call. While in ‘Do Not Disturb,’ the
system will return to normal operation after 60 minutes.
2. The ‘Call’ icon is located to the left in the lower part of
the display.
3. The ‘Share Content’ icon is located to the right in the
lower part of the display.
4. The ‘Camera Control’ menu is located in the upper right
corner of the display.
If someone calls you, you may accept or decline the call. If you
decline the call, a message stating that the unit is busy will be
sent to the caller.You may also use the call keys located
below the circular buttons on the remote control to
accept/decline a call (green=accept, red=decline).
The Remote
The Home Screen
Receiving a Call
     August 2019
Placing a Call
A.Select ‘Call’ and press ‘OK’ on the remote
control or press the green ‘Call’ button on the
remote control.
1. Placing a call using ‘Search or Dial’
C.To enter the dialing address, press the
corresponding keys on the remote control. To
invoke the virtual keyboard, use the left arrow
cursor key on the remote control. You may now
move about the virtual keyboard and select
characters. Press ‘OK’ to select a character. To
access numbers click ‘123’ and then ‘OK.’
D.Once your dialing address has been
entered, press the green ‘Call’ button to
place the call.
B. Use the up Cursor key to select the
‘Search or Dial’ field at the top of the
menu. Press ‘OK.’
2.Placing a call from ‘Contacts,’ ‘Favorites’ or the ‘Directory’
A.Select ‘Call’ and press ‘OK’ on the remote control or
press the green ‘Call’ button on the remote control.
B.When the contact list appears, use the
horizontal cursorkeys on the remote control
to go between 'Favorites', 'Recents' and
‘Directory’ (horizontally) and then down in
one of the lists.
C.Once an entry has been
located, press ‘OK’ on the
remote control to invoke the
‘Call’ menu.
D.Narrow down your search by typing the
part or all of the system name or location in
the ‘Search or Call’ bar.
E.Then press ‘OK’ or the green ‘Call’ button
on the remote control to place the call.
Favorites: contacts that have been saved by you. This list includes contacts you call frequently.
Directory: contacts from all Regional Health Authorities and NLCHI.
Recents: list of calls you have previously placed, received or missed.
     August 2019
Changing Call Display Options
A.Go to the camera icon in the top right
corner of the screen and press ‘OK.’
A.Navigate to ‘Layout’ in the upper right
corner and press ‘OK’ on the remote control.
The icon below will appear only when relevant.
1.Self View
B.Select the push pin icon and press ‘OK.’To
turn off self-view press ‘OK’ on the push pin
again.
C.To change the position of the self-view
window, go to the ‘Layout’ icon in the top
left corner of the screen and press ‘OK.’
D.The layout menu will now appear. Press the
down arrow on the remote control to navigate to
the self-view image.
E.The self-view image will now turn blue to
show that it has been selected. Click ‘OK’ on
the remote control. Arrows will now appear to
indicate that the self-view image can be
moved. Possible new locations are indicated.
F.Use the arrow keys on the remote control to
move the image and press ‘OK’ when finished.
2.Change Call Layout
B.Use the horizontal arrow keys on the remote
control to move horizontally to the new layout
you would like to use and press ‘OK’ to select a
layout.
     August 2019
i.While on a call or not on a call (as shown here),
move the cursor up to the upper right corner to the
‘Camera’ icon. Press ‘OK’ on the remote control.
3. Camera Control
iii.You may now adjust the pan, zoom and tilt of the
camera. Use ‘Increase’/ ‘Decrease’ controls on the remote
control to adjust the zoom and the cursor controls to
adjust the pan and tilt. Press ‘Back’ to exit the menu.
While on a call, there may be capability to control the camera on both sides of the call. Camera control
on your side of the call is called ‘Near End’ and on the other side of the call is called ‘Far End.’
A. Near End Camera Control
ii.The ‘Camera’ icon will now appear. Press ‘OK’
again on the remote control.
B. Far End Camera Control
i.Navigate to ‘Participants’ in the upper right
corner and press ‘OK’ on the remote control. A
list of the participants will then appear.
ii.A menu showing a list of the participants on
the call will now appear. Navigate to the
participant whose camera you want to control
and press ‘OK’ on the remote control.
A submenu will now appear.
Note: if you select ‘Drop’ that participant will
be disconnected from the call.
iii.To control the far end camera, navigate to
‘Camera’ and click ‘OK’ on the remote control.
iv.Adjust the pan, tilt and zoom and use ‘OK’
or ‘Back’ on the remote control to exit.
     August 2019
Changing Call Audio Options
A.To adjust the volume, use the ‘+/-‘ button at the top of
the remote control.Ensure the TV volume is appropriate
using the TV remote control.
Note: You cannot adjust the volume while adjusting
camera control.
B.To mute the microphone so that others cannot hear you,
press the mute button on the remote control or microphone
itself. The button on the microphone will be red when
muted.
Press either button again to unmute. The microphone
button will be green when unmuted.
Note: Other participants cannot hear you while you are
muted, they are still able to see you.
Sharing Content
A.During a Telehealth call you may want to share a
document or presentation. To do this, make sure your
presentation/documentation source is connected and on.
You may need to select ‘Share’ (located in the center
bottom of the screen, if it appears) and press ‘OK’ on the
top remote control.
B.Your source will now be shared.
C. The size of the shared images is controlled by means
of the ‘Minimize/Maximize’ field which appears along the
bottom of the display (number two from the left). Select
this and press ‘OK’ on the remote control, if needed.
D.To stop sharing content, select ‘Stop sharing’
(which appears along the bottom of the display,
number one from the left) and press ‘OK’ on the
remote control.
Ending The Call
To leave or end the call, press the red ‘End Call’ button on the
remote control or use the cursor keys to select ‘End’ and then press
‘OK’ to end the call.
If you have technical difficulties with your call, please contact your regional help desk.