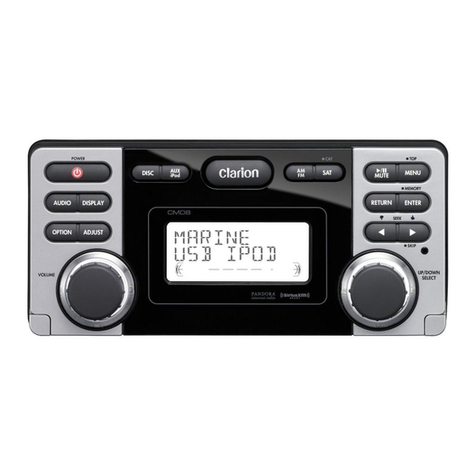
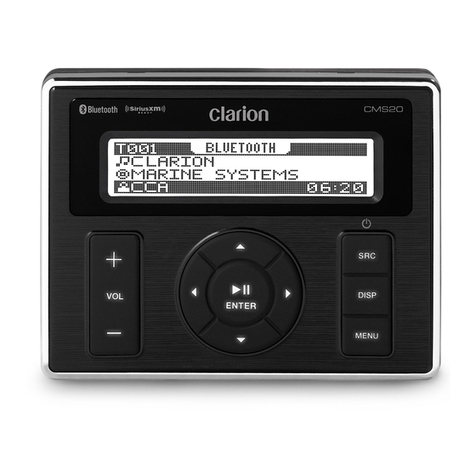
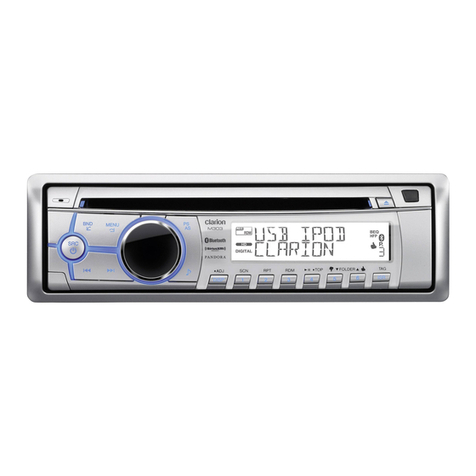
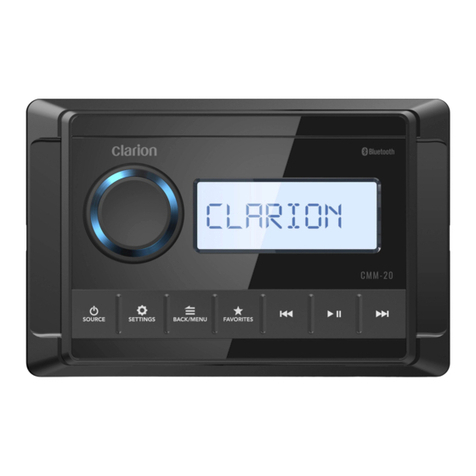
Clarion GR10BT Repair manual

Owner’s manual & Installation manual
Mode d'emploi et manuel d'installation
Manual de usuario y Manual de instalación
MARINE USB/MP3/WMA RECEIVER
WITH BUILT-IN BLUETOOTH®
RÉCEPTEUR MARINE USB/MP3/WMA
AVEC BLUETOOTH®INTÉGRÉ
RECEPTOR USB/MP3/WMA MARINE
CON BLUETOOTH®INTEGRADO
GR10BT

English Owner’s Manual
2
Contents
1. FEATURES ........................................................................................................3
2. EXPANDING SYSTEM OPTIONS .....................................................................3
3. PRECAUTIONS .................................................................................................4
4. CAUTIONS ON HANDLING ..............................................................................4
5. CONTROLS .......................................................................................................5
Operational Panel...............................................................................................5
Name of Buttons and their Functions.................................................................5
6. OPERATIONS....................................................................................................6
Basic Operation..................................................................................................6
Radio Operation .................................................................................................7
Weather Band Operation....................................................................................7
USB Mode Operation .........................................................................................8
AUX Mode Operation .........................................................................................8
Bluetooth Operation ...........................................................................................9
7. TROUBLESHOOTING.....................................................................................10
8. SPECIFICATIONS ...........................................................................................11
9. INSTALLATION ...............................................................................................12
10. WIRE CONNECTION.....................................................................................13

English Owner’s Manual
3
1. FEATURES
2. EXPANDING SYSTEM OPTIONS
• Global AM/FM/Weather Band Tuner
• MP3/WMA/USB File Playback
• IPX5 Rated Water Resistant Front
Panel
• Meet or Exceeds:
ASTM D4329 (UV Exposure) and
ASTM B117(Salt Fog Exposure).
• 3” Gauge Hole Cut-Out Mounting
• Built-In Bluetooth
• 45Wx4 Built-In Amplifer
• Smart Phone Charging via USB
• Auxiliary RCA Input
• 4-CH/2V Preamp Output
Note:
* The items listed only show connectivity options and are not included with the unit.
Expanding Audio Features
4 Channel Amplier
USB Storage
Portable Music Player
(Connect via AUX IN Jack)
Bluetooth®
Smart Phone

English Owner’s Manual
4
1. This unit uses precision parts and components for its
operation. In the event of any operating issues, never
open the case, disassemble the unit, or lubricate the
rotating parts. Contact your Clarion dealer or service
center.
2. FCC STATEMENT
2.1 This device complies with Part 15 of the FCC Rules.
Operation is subject to the following two conditions:
(1) This device may not cause harmful interference.
(2) This device must accept any interference received,
including interference that may cause undesired
operation.
2.2 Changes or modications not expressly approved by
the party responsible for compliance could void the
user’s authority to operate the equipment.
NOTE:
This equipment has been tested and found to comply with
the limits for a Class B digital device, pursuant to Part 15
of the FCC Rules. These limits are designed to provide
reasonable protection against harmful interference in
a residential installation. This equipment uses and can
radiate radio frequencies and, if not installed and used
in accordance with the instructions, may cause harmful
interference to radio communications. However, there
is no guarantee that interference will not occur in a
particular installation. If this equipment does cause harmful
interference to radio or television reception, which can be
determined by turning the equipment off and on, the user is
encouraged to try to correct the interference by one or more
of the following measures:
- Reorient or relocate the receiving antenna.
- Increase the separation between the equipment and
receiver.
- Connect the equipment into an outlet on a circuit different
from that to which the receiver is connected.
- Consult the dealer or an experienced radio/TV technician
for help.
FCC Radiation Exposure Statement
This equipment complies with FCC radiation exposure limits
set forth for an uncontrolled environment. This equipment
should be installed and operated with minimum distance
20cm between the unit & your body.
3. The Bluetooth word mark and logos are registered
trademarks owned by the Bluetooth SIG, Inc. and any
use of such marks by Clarion Co., Ltd is under license.
Other trademarks and trade names are those of their
respective owners.
4. IC warning
This device complies with Industry Canada’s license-
exempt RSSs.
Operation is subject to the following two conditions:
(1) This device may not cause interference
(2) This device must accept any interference, including
interference that may cause undesired operation of
the device.
Front Panel / General Information
For a longer service life, be sure to read the following
cautions.
- Do not allow any liquids or fluids to enter the unit. Doing
so may damage the internal circuitry.
- Do not disassemble or modify the unit in any way. Doing
so may result in damage.
- Do not let any materials burn the display. Doing so may
damage or deform the body.
- If a problem should occur, have the unit inspected at your
store of purchase.
Cleaning the Body
- Use a soft, dry cloth and gently wipe off any dirt or dust.
- For tough dirt, apply some neutral detergent diluted in
water to a soft cloth, wipe off the dirt gently, then wipe
again with a dry cloth.
- Do not use benzene, thinner, boat cleaner, etc., as these
substances may damage the body or cause the paint to
peel. Also, leaving rubber or plastic products in contact
with the body for long periods of time may cause stains.
USB Port
- The USB memory sticks must be recognized as “USB” to
work properly. Some models may not operate correctly.
In the event data is lost or damaged under any
condition, Clarion shall not be liable for any damage.
When using the USB memory stick, we recommend that
you backup your data (music) to a personal computer
before using.
- Data (music) les may be damaged when using USB
memory sticks in the following situations:
- Removing the USB memory stick or turning the power off
while reading data. Static electricity and/or an electrical
surge can damage the contents on the USB memory
device.
- Connect/disconnect the USB memory stick when it is not
accessed.
- Disconnect the USB memory device when not in use.
Protect from high Temperatures. Exposure to direct sunlight for an extended period of time can
produce very high temperature in your vessel. Cool down the interior before starting playback.
3. PRECAUTIONS
4. CAUTIONS ON HANDLING
WARNING
For your safety, while boating, keep the volume to a level at which external sounds can be heard.

English Owner’s Manual
5
Operational Panel
Name of Buttons and their Functions
1. /SRC button
- Toggle the audio source.
- Power On / Power Off
(Press and Hold).
2.VOL +/- button
- Adjust volume level.
3. SCAN/RPT button
- Tuner mode - Preset scan.
- Tuner mode - Auto memory store
(Press and Hold).
- USB mode - Repeat Folder, Repeat Track,
Repeat all.
- USB mode - Enter Track Search.
4. /Button
- Tuner mode - Manual tune.
- Tuner mode - Auto tune (Press and Hold).
- USB/BT Music mode - Previous / Next track.
- USB mode - Fast Forward / Backward
(Press and Hold).
5. Button
- Tuner mode - Mute or Unmute audio output.
- USB/BT Music mode - Pause or Play playback.
6. BAND button
- Tuner mode - Select tuner band.
- Sound effect setting (Press and Hold).
5. CONTROLS
VOL
GR10BT
VOL
SRC
SCAN
RPT BAND

English Owner’s Manual
6
CAUTION
When the unit is turned on, starting and
stopping the engine with its volume raised to
the maximum level may cause hearing damage.
Be careful about adjusting the volume.
Power On/Off
Note:
- Start the engine before using this unit.
- Be careful about using this unit for a long time
without running the engine. If you drain the
vessel battery too far, you may not be able to
start the engine and this can reduce the service
life of the battery.
1. Start the engine.
Engine ON
position
2. Press the [ /SRC] button to turn on the power
under standby mode. Press and hold to turn off
the power.
At power on mode, press to toggle source
among Tuner, USB, BT Music, AUX.
* External equipment not connected to this unit
is not displayed.
Adjusting the volume
Press [ VOL + / VOL- ] button to increase or
decrease the volume.
The adjustable range of volume is 0 to 40.
CAUTION
While boating, keep the volume at a level at which
external sounds can still be heard.
Please be aware of the volume levels in residential,
family areas and local volume level ordinances.
Adjusting the volume
Press and hold [BAND] button to enter
sound effect setting mode. Press [ ]or
[ ] button to select options, press [VOL +]
or [VOL -] to adjust a value / option.
* EQ (Preset Equalizer Setting)
Press [VOL +]or [VOL -] to change EQ:
Flat -> Pop -> Classic -> Rock -> Techno ->
Vocal -> Jazz.
*Bass
Press [VOL +]or [VOL -] to adjust the desired
Bass level range from -7 to +7.
* Mid
Press [VOL +]or [VOL -] to adjust the desired
Mid level range from -7 to +7.
* Treble
Press [VOL +]or [VOL -] to adjust the desired
Treble level range from -7 to +7.
* Balance
Press [VOL +]or [VOL -] to adjust the Balance
between the right and left speakers from R12
(full right) to L12 (full left).
* Fader
Press [VOL +]or [VOL -] to adjust the Fader
between the front and rear speakers from
R12(full rear) to F12 (full front).
* Tone
Press [VOL +]or [VOL -] to select tone on/off.
* Area
Press [VOL +]or [VOL -] to select between
USA, Europe, Asia, Australia.
* Rear out
Press [VOL +]or [VOL -] to select Line out or
Subwoofer out.
(Note: with Line out selected, following option
will not be displayed.)
* Subw LPF
Press [VOL +]or [VOL -] to adjust
the sub-woofer Low Pass Filter range:
80HZ/120HZ/180HZ.
* Subw On/Off
Press [VOL +]or [VOL -] to select subwoofer
on or off.
* Subw Gain
Press [VOL +]or [VOL -] to adjust subwoofer
gain range: 0 to 20.
Basic Operation
6. OPERATIONS

English Owner’s Manual
7
Select Tuner as Playing Source
Press [ /SRC] button to select the Tuner
mode.
Global Tuner
This unit is initially set to USA frequency
intervals of 10KHz for AM and 200KHz for FM.
When using it outside the USA, the frequency
reception range can be switched to the intervals
below.
U.S. A
standard Europe
standard Asia
standard Australia
standard
AM
Frequency
spacing 10KHz 9KHz 9KHz 9KHz
Frequency
range 530-1710
KHz 531-1602
KHz 531-1620
KHz 531-1620
KHz
FM
Frequency
spacing 200KHz 50KHz 50KHz 100KHz
Frequency
range 87.9-107.9
MHz 87.5-108
MHz 87.5-108
MHz 87.5-108
MHz
Select the Radio Band
Press [BAND] button to select one radio band
from FM1, FM2, FM3, AM, WB.
[ ] Tuning Up / [ ] Tuning Down
1. Press the [ ]/[ ] button change
intervals step by step.
2. Press and hold the [ ]/[ ] button to
seek the next strongest station.
Preset Scan
Preset scan receives the stations stored in the
preset memory in order. This function is useful
when searching for a desired station in the
memory.
1. Press the [SCAN] button.
2. When a desired station is tuned in, press the
[SCAN] button again to continue receiving
that station.
Auto Store
Only stations with sufcient signal strength will
be detected and stored in the memory. Press
and hold the [SCAN] button to automatically
select six strong stations and store them into
presets. The new stations replace any stations
already stored in the band.
MUTE
Press the [ ] button to mute sound output;
press again to resume sound output.
[ ] Tuning Up / [ ] Tuning Down
1. Press the [ ]/[ ] button change
intervals step by step.
2. Press and hold the [ ]/[ ] button to
seek the next strongest station.
Preset Scan
Preset scan receives the stations stored in the
preset memory in order. This function is useful
when searching for a desired station in the
memory.
1. Press the [SCAN] button.
2. When a desired station is tuned in, press the
[SCAN] button again to continue receiving
that station.
MUTE
Press the [ ] button to mute sound output;
press again to resume sound output.
Radio Operation
Weather Band Operation

English Owner’s Manual
8
Connect
1. Insert a USB device into the USB pigtail.
2. To remove the USB device, you should
select another source or turn off the power,
in order to avoid damaging the USB device.
Then take off the USB device.
VOL
GR10BT
VOL
SRC
SCAN
RPT BAN D
Select a Track
1. Press the [ ] button to advance to the
next track/song. Press the [ ]button to
go to the previous track/song.
2. Press and hold the [ ] button to fast
forward through the track/song. Press and
hold the [ ]button to fast backward
through the track/song.
Play / Pause
Press the [ ] button to pause the track/song
that is currently playing.
Press the [ ] button to resume playing the
track/song that has been paused.
Repeat Feature
This function allows you to Repeat All tracks/
songs in current folder, Repeat the currently
playing track/song, or to turn the Repeat feature
OFF.
1. Press [RPT] button once, it will display
REPEAT FOLDER on top of display panel.
2. Press [RPT] button twice, it will display
REPEAT TRACK on the top of display panel.
3. Press [RPT] button for the 3rd time will turn
Repeat feature OFF.
Search Function
Press and hold [SCAN] button to access
MP3 / MWA track search mode. Press [VOL +]
or [VOL -] button to select the desired track.
The AUX RCA inputs in this system are provided
to allow playback of sounds and music from
external devices connected to this unit.
Press the [SRC] button to select “AUX IN”
USB Mode Operation
AUX Mode Operation
VOL
GR10BT
VOL
SRC
SCAN
RPT BAN D
RED (RIGHT)
WHITE (LEFT)

English Owner’s Manual
9
Pair the Bluetooth Device
1. Press and hold [SCAN] button on the front
panel to start Pairing.
2. From your Bluetooth enabled device, turn
Bluetooth ON and search for Bluetooth
device.
3. When a list of available Bluetooth devices
appears on your Bluetooth device, select
“GR10BT”
4. “BT CONNECTED” will appear on the
display.
5. The unit will automatically enter the BT Music
source and you can now start streaming
audio from your Bluetooth enabled device.
Note: If the Bluetooth device doesn’t support
the SSP (Simple Secure Pairing) Profile, please
enter the passcode “000”
DISCONNECT / CONNECT
1. With a Bluetooth device connected, press
and hold [SCAN] button to disconnect it.
2. With a Bluetooth device paired but
disconnected, press [SCAN] button to
establish the Bluetooth connection.
Audio Streaming Operations
What is Audio Streaming?
Audio streaming is a technique for transferring
audio data so that it can be processed as a
steady and continuous stream. Users can
stream music from their audio system wirelessly
and listen to the tracks through the boat’
speakers. Please consult your nearest Clarion
dealer for more information on available wireless
audio streaming transmitter products.
CAUTION
Please avoid operating your connected mobile
phone while audio streaming as this may cause
noise or stuttering on the song playback.
Audio streaming may or may not resume after
telephone interruption as this is dependent on
the mobile phone.
Play / Pause
Press the [ ] button to pause the track/song
that is currently playing.
Press the [ ] button to resume playing the
track/song that has been paused.
Select a Track
1. Press the [ ] button to advance to the
next track/song.
2. Press the [ ]button to go to the previous
track/song.
Note:
Playing order will depend on Bluetooth audio
player. When the [] button is pressed,
some A2DP devices will restart the current track
depending on the duration of the playback.
Some Bluetooth audio players may not allow
play / pause synchronization with this unit.
Please make sure both the device and the
main unit are in the same play / pause status in
BT Music mode.
Bluetooth Operation

English Owner’s Manual
10
GENERAL
Problem Cause Remedy
Unit cannot power on. Unit fuse blown. Replace with new fuse of correct rating.
Vessel battery fuse blown. Replace with new fuse of correct rating.
No/low audio output. Incorrect audio output connection. Check wiring and correct.
Volume set too low. Increase volume level.
Speakers damaged. Replace speakers.
Heavily biased volume balance. Adjust the channel balance to center position.
Speaker wiring is in contact with
metal part of vessel. Insulate all speaker wiring connections.
Poor sound quality or
distortion. Speaker power rating does not
match unit. Replace speakers.
Wrong connections. Check wiring and correct.
Speaker is shorted. Check wiring and correct.
Unit resets itself when
engine is off. Incorrect connection between
ACC and Battery. Check wiring and correct.
Auto seek function can
not nd any stations.
The antenna cable is not
connected. Insert the antenna cable securely.
The signals are too weak. Select a station manually.
USB
Problem Cause Remedy
USB device cannot be
inserted. The USB device has been
inserted incorrectly. Reverse the connection direction of the USB
device and try again.
The USB connector is broken. Replace with a new USB device.
USB device is not
recognized. The USB device is damaged. Disconnect the USB device and reconnect. If
the device is still not recognized, try replacing
it with a different USB device.
Connectors are loose.
No sound heard with
the display “No File”
shown.
No MP3/WMA le is stored in the
USB device. Store these les properly in the USB device.
Sound skips or is
noisy. MP3/WMA les are not encoded
properly. Use properly encoded MP3/WMA les.
Bluetooth
Problem Cause Remedy
Cannot pair the
Bluetooth enabled
device with the audio
system.
The device does not support the
proles required for the system.
Reverse the connection direction of the USB
device and try again.
The Bluetooth function of the
device is not enabled. Refer to the user manual of the device for how
to enable the function.
Audio quality is poor
after connection with
a Bluetooth enabled
device.
The Bluetooth reception is poor. Move the device closer to the audio system or
remove any obstacle between the device and
the system.
7. TROUBLESHOOTING

English Owner’s Manual
11
FM Tuner
Frequency Range: USA 87.9 - 107.9MHz
Europe 87.5 - 108.0MHz
Asia 87.5 - 108.0MHz
Australia 87.5 - 108.0MHz
Usable Sensitivity: 2V (S/N=30dB)
Image Rejection: >45dB
Stereo Separation: >25dB
AM Tuner
Frequency Range: USA 530 - 1710KHz
Europe 531 - 1602KHz
Asia 531 - 1629KHz
Australia 531 - 1629KHz
Usable Sensitivity: 40dB (S/N=20dB)
Weather Band Selection
CH.1 162.400MHz CH.2 162.425MHz
CH.3 162.450MHz CH.4 162.475MHz
CH.5 162.500MHz CH.6 162.525MHz
CH.7 162.550MHz
Audio
Maximum Power Output: 45W x 4
Bass Control (60Hz): ±12dB
Treble Control (10kHz): ±12dB
Middle Control: (1kHz): ±12dB
USB
USB: 2.0 Full Speed
USB Port: 1.1A
USB Voltage: 5.0V
Maximum MP3/WMA Songs: 9999
USB Flash Drive and Hard
Drive Compatible Format: FAT/FAT32
Bluetooth
Specication: Bluetooth Version. 2.1
Supported Proles: A2DP (Advanced Audio
Distribution Prole)
AVRCP1.5 (Audio/Video
Remote Control Prole)
SSP (Simple Secure Pairing)
General
Power Supply Voltage:14.4V DC (10.8 to
15.6V allowable)
Grounding System: Negative Ground
Speaker Impedance: 4-8 ohms per channel
Note: Specifications and design are subject to
change without notice for further improvement.
Power Output:
16W x 4 RMS (4 ohm @14.4V
<=1% THD+N)
8. SPECIFICATIONS

English Owner’s Manual
12
1. This set is exclusively for use in vessels with a negative ground
12 V power supply.
2. Read these instructions carefully.
3. Be sure to disconnect the battery “–” terminal before starting.
This is to prevent short circuits during installation. (Figure 1)
1. In order to avoid any interference, do not install the tuner module or control unit in the
proximity of the engine compartment.
2. The use of unauthorized parts can cause permanent damage to the unit.
3. Always check your wire connections to ensure proper installation before turning on the unit.
4. Consult with your nearest dealer for proper installation or if common parts need to be used.
Seek assistance if modications or drilling holes to your vessel is needed.
5. Do not install the unit where it will be subjected to excessive moisture, dust, dirt, foreign
particles or vibration. Areas of high temperature from the engine, direct sunlight, heater or hot
air should also be avoided.
6. Do not install the unit in a location where it will interfere with the vessel operation, or it will
injure the passengers if there is a sudden or emergency stop.
Instructions:
1. Install jamb nuts (4) loosely on mounting
studs (3), so they will not touch mounting
brackets (5) when installed.
2. Slip mounting bracket (5) on and make
flush with mounting surface (2).
3. DO NOT TIGHTEN
4. Snug spring washer (6) and outer nuts (7)
against mounting plate (2).
5. DO NOT TIGHTEN
6. Position jamb nuts approximately 1/16”
from mounting bracket.
7. Tighten outer nuts completely.
1. Before Starting
3. Head Unit Installation
2. Installation Cautions
Battery
Figure 1
9. INSTALLATION
NO. PART DESCRIPTION
1 MAIN DEVICE
2 MOUNTING SURFACE
3 MOUNTING STUDS
4 JAM NUTS
5 MOUNTING BRACKET
6 SPRING WASHER
7 OUTER NUTS
2.96”

English Owner’s Manual
13
10. WIRE CONNECTION
DEVICE SIDE HARNESS
VEHICLE SIDE HARNESS
USB
RED
10A FUSE
AUX IN
FRONT LINE OUT
REAR LINE OUT
or SUB OUT
GRAY
BLACK
BLACK
ANTENNA
12 PIN HARNESS
Water Seal (Blue)
WHITE FRONT LEFT +BLACK GROUND
ORANGE/WIHTE DIMMER+
GREEN REAR LEFT +
GREEN/BLACK REAR LEFT -
GRAY FRONT RIGHT +
GRAY/BLACK FRONT RIGHT -
WHITE/BLACK FRONT LEFT -
BLUE/WHITE REM (+12V)
VIOLET REAR RIGHT +
VIOLET/BLACK REAR RIGHT -
RED ACC
PIN
#
12 PIN HARNESS PIN OUT AWG
COLOR FUNCTION
1 BLACK GROUND 16
2 ORANGE/WHITE DIMMER (+12V) 20
3 GREEN REAR LEFT + 20
4 GREEN/BLACK REAR LEFT - 20
5 GRAY FRONT RIGHT + 20
6 GRAY/BLACK FRONT RIGHT - 20
7 VIOLET REAR RIGHT + 20
8 VIOLET/BLACK REAR RIGHT - 20
9 RED ACCESSORY/IGNITION
SWITCHED (+12V) 16
10 WHITE FRONT LEFT + 20
11 WHITE/BLACK FRONT LEFT - 20
12 BLUE/WHITE AMPLIFIER REMOTE
TURN ON (+12V) 20

Français Mode d'emploi
14
Table des matières
1. CARACTÉRISTIQUES.....................................................................................15
2. OPTIONS D'ÉVOLUTION DU SYSTÈME .......................................................15
3. PRÉCAUTIONS ...............................................................................................16
4. PRÉCAUTIONS DE MANIPULATION.............................................................16
5. COMMANDES..................................................................................................17
Panneau de commande ...................................................................................17
Noms et fonctions des boutons........................................................................17
6. FONCTIONNEMENT........................................................................................18
Fonctionnement de base..................................................................................18
Fonctionnement de la radio..............................................................................19
Fonctionnement de la bande radio-météo........................................................19
Fonctionnement en mode USB ........................................................................20
Fonctionnement en mode AUX ........................................................................20
Fonctionnement en mode Bluetooth ................................................................21
7. DÉPANNAGE...................................................................................................22
8. CARACTÉRISTIQUES TECHNIQUES............................................................23
9. INSTALLATION ...............................................................................................24
10. CONNEXION DES CÂBLES..........................................................................25

Français Mode d'emploi
15
1. CARACTÉRISTIQUES
2. OPTIONS D'ÉVOLUTION DU SYSTÈME
• Syntoniseur radio-météo/FM/AM mondial.
• Lecture de chiers MP3/WMA/USB.
• Panneau avant étanche conforme à la
norme IPX5.
• Conforme à ou dépasse la norme :
ASTM D4329 (Exposition aux rayons UV)
et ASTM B117 (Exposition au brouillard
salin).
• Montage de l'indicateur sur orice de
76,2 mm (3 po).
• Bluetooth intégré.
• Amplicateur intégré 45 Wx4
• Recharge de téléphones intelligents par USB.
• Entrée RCA auxiliaire.
• Sortie de préampli à 4 canaux / 2 V.
Remarque :
* Les éléments énumérés illustrent uniquement les options de connectivité et ne sont pas
fournis avec l'appareil.
Évolution des fonctions audio
Amplicateur à 4 canaux
Stockage USB
Lecteur de musique portable
(Se connecte par le biais de
la prise AUX IN)
Téléphone intelligent
Bluetooth®

Français Mode d'emploi
16
1. Cet appareil est muni de pièces et de composants de
précision pour son fonctionnement. En cas de problèmes
de fonctionnement, n'ouvrez jamais le boîtier, ne
désassemblez jamais l'appareil, et ne lubriez pas ses
pièces mobiles. Consultez votre représentant Clarion ou
un centre de service Clarion.
2. AVIS DE LA FCC
2.1 Ce matériel est conforme à la section 15 du règlement
de la FCC. Le fonctionnement est soumis aux deux
conditions suivantes :
(1) Cet appareil ne doit pas causer d'interférences
nuisibles.
(2) Cet appareil doit accepter toute interférence reçue,
y compris celles qui peuvent nuire à son bon
fonctionnement.
2.2 Toutes transformations ou modications non
expressément approuvées par la partie responsable de
la conformité pourraient annuler l'autorité de l'utilisateur à
utiliser l'appareil.
REMARQUE :
Cet appareil a été testé et est déclaré conforme aux
exigences en matière de limitations qui s'appliquent
aux appareils numériques de classe B, aux termes de
la section 15 de règlement de la FCC. Ces conditions
restrictives sont conçues pour fournir une protection
raisonnable contre les interférences nuisibles dans le
cadre d'une installation résidentielle. Cet appareil utilise
et peut émettre des radiofréquences susceptibles, faute
d'une installation adéquate et d'une utilisation conforme
aux instructions, de causer des interférences nuisibles aux
communications radio. Il n'existe toutefois aucune garantie
que ce brouillage ne se produira pas dans une installation
donnée. S'il s'avère que cet appareil cause des interférences
nuisibles à la réception de radio ou de télévision, dont il est
possible de déterminer l'effet sur simple mise sous tension
et hors tension de l'appareil; l'utilisateur est invité à tenter
de résoudre l'interférence en prenant une ou plusieurs des
mesures suivantes :
- Réorientez ou déplacez l'antenne réceptrice.
- Augmentez la distance entre l'appareil et le récepteur.
- Branchez l'appareil sur une prise reliée à un autre circuit
que celui utilisé par le récepteur.
- Demandez conseil auprès du détaillant ou d'un technicien
radio/TV expérimenté.
Déclaration de la FCC relative à l'exposition aux radiations
Cet appareil est conforme aux limitations de la FCC relatives
à l'exposition aux radiations dans un environnement non
contrôlé. N'installez pas et ne faites pas fonctionner ce
dispositif à une distance de moins de 20 cm entre l'appareil
et votre corps.
3. Le terme Bluetooth et les logos sont des marques
déposées de Bluetooth SIG, Inc. Ces marques sont
utilisées par Clarion Co., Ltd sous licence. Les autres
marques et noms de commerce sont la propriété de leurs
détenteurs respectifs.
4. Mise en garde de IC
Cet appareil est conforme aux normes relatives aux
appareils radio RSS exempts de licence d'Industrie
Canada.
Le fonctionnement est soumis aux deux conditions
suivantes :
(1) Cet appareil ne doit pas causer d'interférences.
(2) Cet appareil doit accepter toute interférence y compris
celles pouvant occasionner un fonctionnement
indésirable.
Panneau avant / Informations générales
Pour assurer une plus longue durée de vie de l'appareil,
veuillez lire les mesures de précaution suivantes :
- Évitez que tout liquide ne tombe sur l'appareil. Cela pourrait
endommager les circuits internes.
- Ne désassemblez pas et ne modiez pas l'appareil de
quelque façon que ce soit. Cela risque de l'endommager.
- Ne laissez aucun matériau brûler l'écran. Cela pourrait
endommager ou déformer le boîtier.
- Si un problème survient, faites inspecter l'appareil par votre
revendeur.
Nettoyage du boîtier
- Utilisez un chiffon sec et doux pour essuyer délicatement la
saleté et la poussière.
- Pour la saleté plus tenace, humectez un chiffon doux
avec du détergent neutre dilué dans de l'eau, essuyez
délicatement la saleté, puis essuyez de nouveau avec un
chiffon sec.
- N'utilisez pas de benzène, de diluant, de nettoyant pour
bateau, etc., car ces produits peuvent endommager le
boîtier ou faire peler la peinture. De plus, laisser des
produits en caoutchouc ou en plastique en contact avec
le boîtier pendant de longues périodes peut provoquer
l'apparition de taches.
Port USB
- Les clés USB doivent être reconnues comme des
périphériques « USB » pour fonctionner correctement.
Certains modèles peuvent ne pas fonctionner correctement.
Clarion ne peut être tenue responsable de toute donnée
mémorisée perdue ou endommagée.
Lorsque vous utilisez une clé USB, nous vous recommandons
de faire une copie de sauvegarde des données stockées sur
celle-ci sur un ordinateur personnel avant de l'utiliser.
- Les chiers de données (musique) peuvent être
endommagés lors de l'utilisation de clés USB dans les
situations suivantes :
- Lorsque vous retirez la clé USB ou mettez l'appareil hors
tension pendant la lecture de données. L'électricité statique
et/ou une surtension électrique peut endommager le
contenu du périphérique de stockage USB.
- Connectez/déconnectez la clé USB uniquement lorsque la
lecture est terminée.
- Déconnectez le périphérique de stockage USB lorsque
celui-ci n'est pas utilisé.
Protégez l'appareil contre les températures excessives. L'exposition directe au soleil pendant
une période prolongée peut produire des températures élevées dans votre embarcation. Laissez
l'intérieur refroidir avant de commencer la lecture.
3. PRÉCAUTIONS
4. PRÉCAUTIONS DE MANIPULATION
AVERTISSEMENT
Aux ns de sécurité, lorsque vous naviguez, prenez soin de régler le volume de l'appareil de
manière à ce que vous puissiez entendre les sons extérieurs.

Français Mode d'emploi
17
Panneau de commande
Noms et fonctions des boutons
1. Bouton /SRC
- Changement de source audio.
- Mise sous / hors tension (Appuyez et
maintenez le bouton enfoncé).
2. Bouton VOL +/-
- Réglage du volume.
3. Bouton SCAN/RPT
- Mode syntoniseur - Balayage des canaux
préréglés.
- Mode syntoniseur - Stockage automatique
de la mémoire (Appuyez
et maintenez le bouton
enfoncé).
- Mode USB - Répéter le dossier, Répéter la
piste, Répéter tout.
- Mode USB - Accès à la recherche de piste.
4. Bouton /
- Mode syntoniseur - Syntonisation manuelle.
- Mode syntoniseur - Stockage automatique
(Appuyez et maintenez le
bouton enfoncé).
- Mode musique USB/BT - Piste précédente /
suivante.
- Mode USB - Avance / retour rapide (Appuyez et
maintenez le bouton enfoncé).
5. Bouton
- Mode syntoniseur - Mise en sourdine ou
rétablissement de la sortie
audio.
- Mode musique USB/BT - Pause ou lecture de la
piste.
6. Bouton BAND
- Mode syntoniseur – Sélection de la bande de
fréquence.
- Réglage des effets sonores (Appuyez et
maintenez le bouton enfoncé).
5. COMMANDES
VOL
GR10BT
VOL
SRC
SCAN
RPT BAND

Français Mode d'emploi
18
ATTENTION
Lorsque l'appareil est sous tension, le
démarrage et l'arrêt du moteur lorsque le
volume est réglé au maximum peut causer du
dommage auditif. Réglez le volume avec soin.
Mise sous/hors tension
Remarque :
- Démarrez le moteur avant d'utiliser cet
appareil.
- Évitez d'utiliser cet appareil pendant
de longues périodes sans que le moteur
tourne. Si vous déchargez trop la batterie de
l'embarcation, vous pourriez ne pas pouvoir
faire démarrer le moteur ; de plus, cela réduit la
durée de vie de la batterie.
1. Démarrer le moteur.
Position moteur
en marche
2. Appuyez sur le bouton [ /SRC ] pour le
mettre sous tension en mode veille. Appuyez et
maintenez le bouton enfoncé pour le mettre hors
tension.
En mode sous tension, appuyez sur le bouton
pour changer la source (Syntoniseur, USB,
Musique BT ou AUX).
* Les appareils externes non raccordés à cet
appareil ne sont pas afchés.
Réglage du volume
Appuyez sur le bouton [VOL + / VOL - ] pour
augmenter ou réduire le volume.
La plage d'ajustement du volume est de 0 à 40.
ATTENTION
Pendant la navigation, gardez le volume à un niveau
permettant d'entendre les bruits extérieurs.
Veuillez respecter la réglementation locale
concernant le volume sonore toléré dans les zones
résidentielles et familiales.
Réglage du volume
Appuyez et maintenez le bouton [BAND]
enfoncé pour accéder au mode de conguration
des effets sonores. Appuyez sur le bouton
[ ] ou [ ] pour sélectionner les options;
appuyez sur le bouton [VOL +] ou [VOL -] pour
régler une valeur / option.
* EQ (Réglage d'égaliseur prédéni)
Appuyez sur [VOL +]ou [VOL -] pour changer
l'EQ :
Plat -> Pop -> Classique -> Rock -> Techno ->
Vocal -> Jazz.
* Bass
Appuyez sur [VOL +]ou [VOL -] pour régler
le niveau souhaité des basses entre « -7 »
et « +7 ».
* Mid
Appuyez sur [VOL +]ou [VOL -] pour régler le
niveau souhaité des intermédiaires entre « -7 »
et « +7 ».
* Treble
Appuyez sur [VOL +]ou [VOL -] pour régler le
niveau souhaité des aigus entre « -7 » et « +7 ».
* Balance
Appuyez sur [VOL +]ou [VOL-] pour équilibrer
les haut-parleurs droit et gauche, de R12
(complètement à droite) à L12 (complètement à
gauche).
* Fader
Appuyez sur [VOL +]ou [VOL-] pour régler
l'atténuateur entre les haut-parleurs arrière
et avant, de R12 (extrême arrière) à F12
(extrême avant).
* Tone
Appuyez sur [VOL +]ou [VOL -] pour activer ou
désactiver le ton.
* Area
Appuyez sur [VOL +]ou [VOL -] pour sélectionner
États-Unis, Europe, Asie ou Australie.
* Rear out
Appuyez sur [VOL +]ou [VOL -] pour
sélectionner la sortie de ligne ou la sortie de
caisson de graves.
(Remarque : lorsque la sortie « Line out » est
sélectionnée, l'option suivante ne s'afchera pas.)
* Subw LPF
Appuyez sur [VOL +]ou [VOL -] pour régler la
plage du ltre passe-bas du caisson de graves) :
80 Hz / 120 Hz / 180 Hz.
* Subw On/Off
Appuyez sur [VOL +]ou [VOL -] pour activer ou
désactiver le caisson de graves.
* Subw Gain
Appuyez sur [VOL +]ou [VOL -] pour régler la
plage de gain du caisson de graves : 0 à 20.
Fonctionnement de base
6. FONCTIONNEMENT

Français Mode d'emploi
19
Sélection du syntoniseur comme source de
lecture
Appuyez sur le bouton [ /SRC ] pour
sélectionner le mode syntoniseur.
Syntoniseur mondial
Cet appareil est réglé sur les intervalles de
fréquence des États-Unis de 10 KHz pour les
stations AM et de 200 KHz pour les stations
FM. Pour l'utiliser en dehors des États-Unis, la
réception peut être modiée pour les intervalles
ci-dessous.
Norme aux
États-Unis Norme en
Europe Norme en
Asie Norme en
Australie
AM
Espacement
entre les
fréquences 10 KHz 9 KHz 9 KHz 9 KHz
Plage de
fréquences 530-1710
KHz 531-1602
KHz 531-1620
KHz 531-1620
KHz
FM
Espacement
entre les
fréquences 200 KHz 50 KHz 50 KHz 100 KHz
Plage de
fréquences 87,9-107,9
MHz 87,5-108
MHz 87,5-108
MHz 87,5-108
MHz
Sélection de la bande radio
Appuyez sur le bouton [BAND] pour
sélectionner une bande radio sur les fréquences
FM1, FM2, FM3, AM ou WB.
Syntonisation vers le haut [ ] / vers le
bas [ ]
1. Appuyez sur le bouton [ ] / [ ] pour
changer les intervalles étape par étape.
2. Appuyez et maintenez le bouton [ ] /
[ ] enfoncé pour rechercher la prochaine
station ayant une bonne réception.
Balayage des canaux préréglés
Le balayage des canaux préréglés permet de
capter les stations dans l'ordre où elles ont été
mémorisées dans la mémoire de présélection.
Cette fonction est utile lorsque vous recherchez
une station donnée dans la mémoire.
1. Appuyez sur le bouton [SCAN].
2. Lorsque la station désirée est syntonisée,
appuyez à nouveau sur le bouton [SCAN]
pour continuer à recevoir cette station.
Mémorisation auto
Seules les stations dont le signal est
sufsamment fort seront détectées et
mémorisées. Appuyez et maintenez le
bouton [SCAN] enfoncé an de sélectionner
automatiquement six stations avec une bonne
réception et de les mémoriser en tant que
stations présélectionnées. Les nouvelles
stations remplaceront toutes les stations déjà
enregistrées dans la bande.
[MUTE]
Appuyez sur le bouton [ ] pour mettre le son
en sourdine ; appuyez à nouveau sur le bouton
pour rétablir le son.
Syntonisation vers le haut [ ] / vers le
bas [ ]
1. Appuyez sur le bouton [ ] / [ ] pour
changer les intervalles étape par étape.
2. Appuyez et maintenez le bouton [ ] /
[ ] enfoncé pour rechercher la prochaine
station ayant une bonne réception.
Balayage des canaux préréglés
Le balayage des canaux préréglés permet de
capter les stations dans l'ordre où elles ont été
mémorisées dans la mémoire de présélection.
Cette fonction est utile lorsque vous recherchez
une station donnée dans la mémoire.
1. Appuyez sur le bouton [SCAN].
2. Lorsque la station souhaitée est syntonisée,
appuyez à nouveau sur le bouton [SCAN]
pour continuer à recevoir cette station.
[MUTE]
Appuyez sur le bouton [ ] pour mettre le son
en sourdine ; appuyez à nouveau sur le bouton
pour rétablir le son.
Fonctionnement de la radio
Fonctionnement de la bande radio-météo

Français Mode d'emploi
20
Raccordement
1. Insérez un périphérique USB dans le cordon
de raccordement USB.
2. Pour retirer le périphérique USB, vous devez
sélectionner une autre source ou éteindre
l'appareil an d'éviter de l'endommager.
Ensuite, débranchez le périphérique USB.
VOL
GR10BT
VOL
SRC
SCAN
RPT BAN D
Sélection d'une piste
1. Appuyez sur le bouton [ ] pour avancer
vers la prochaine piste/chanson. Appuyez
sur le bouton [ ] pour aller à la piste/
chanson précédente.
2. Appuyez et maintenez le bouton [ ]
enfoncé pour faire avancer rapidement la
piste/chanson en cours de lecture. Appuyez
et maintenez le bouton [ ] enfoncé pour
faire un retour rapide de la piste/chanson en
cours de lecture.
Lecture / Pause
Appuyez sur le bouton [ ] pour mettre en
pause la piste/chanson en cours de lecture.
Appuyez sur le bouton [ ] pour reprendre la
lecture de la piste/chanson mise en pause.
Fonction répétition
Cette fonction vous permet de répéter toutes
les pistes/chansons contenues dans le dossier,
de répéter la piste actuelle ou de désactiver la
fonction répétition.
1. Appuyez une fois sur le bouton [RPT] et
REPEAT FOLDER (Répéter le dossier)
s'afchera en haut de l'écran.
2. Appuyez deux fois sur le bouton [RPT]
et REPEAT TRACK (Répéter la piste)
s'afchera en haut de l'écran.
3. Appuyez sur le bouton [RPT] une troisième
fois et la fonction de répétition sera
désactivée.
Fonction de recherche
Appuyez et maintenez le bouton [SCAN]
enfoncé pour accéder au mode de recherche
de pistes MP3/MWA. Appuyez sur le bouton
[VOL +]ou [VOL -] pour sélectionner la piste
souhaitée.
Les entrées AUX RCA de ce système sont
fournies pour permettre la lecture de pistes
audio et musicales des périphériques externes
connectés à cet appareil.
Appuyez sur le bouton [SRC] pour sélectionner
« AUX IN ».
Fonctionnement en mode USB
Fonctionnement en mode AUX
VOL
GR10BT
VOL
SRC
SCAN
RPT BAN D
ROUGE (DROITE)
BLANC (GAUCHE)
Table of contents
Languages:
Other Clarion Marine Equipment manuals

Clarion
Clarion M502 Repair manual

Clarion
Clarion M508 User manual

Clarion
Clarion M309 User manual

Clarion
Clarion CMM-20 User manual

Clarion
Clarion XMD3 User manual

Clarion
Clarion CMM-30BB User manual

Clarion
Clarion CMM-30 User manual

Clarion
Clarion M505 User manual

Clarion
Clarion CMV1 User manual

Clarion
Clarion CMD7 User manual

Clarion
Clarion CMD6 Instruction Manual

Clarion
Clarion CMD8 Repair manual

Clarion
Clarion M275 User manual

Clarion
Clarion CMS20 Repair manual

Clarion
Clarion CMS1 Repair manual

Clarion
Clarion M606 Repair manual

Clarion
Clarion CMD5 User manual

Clarion
Clarion M606 User manual

Clarion
Clarion M475 User manual

Clarion
Clarion CMD4 User manual