Clarion CMS5 User manual

Owner’s Manual
Mode d’ emploi et manuel
Manual de instrucciones
CMS5
MARINE BLACK BOX SOURCE UNIT WITH J1939

2 CMS5 CMS5 3
Owner’s Manual
English
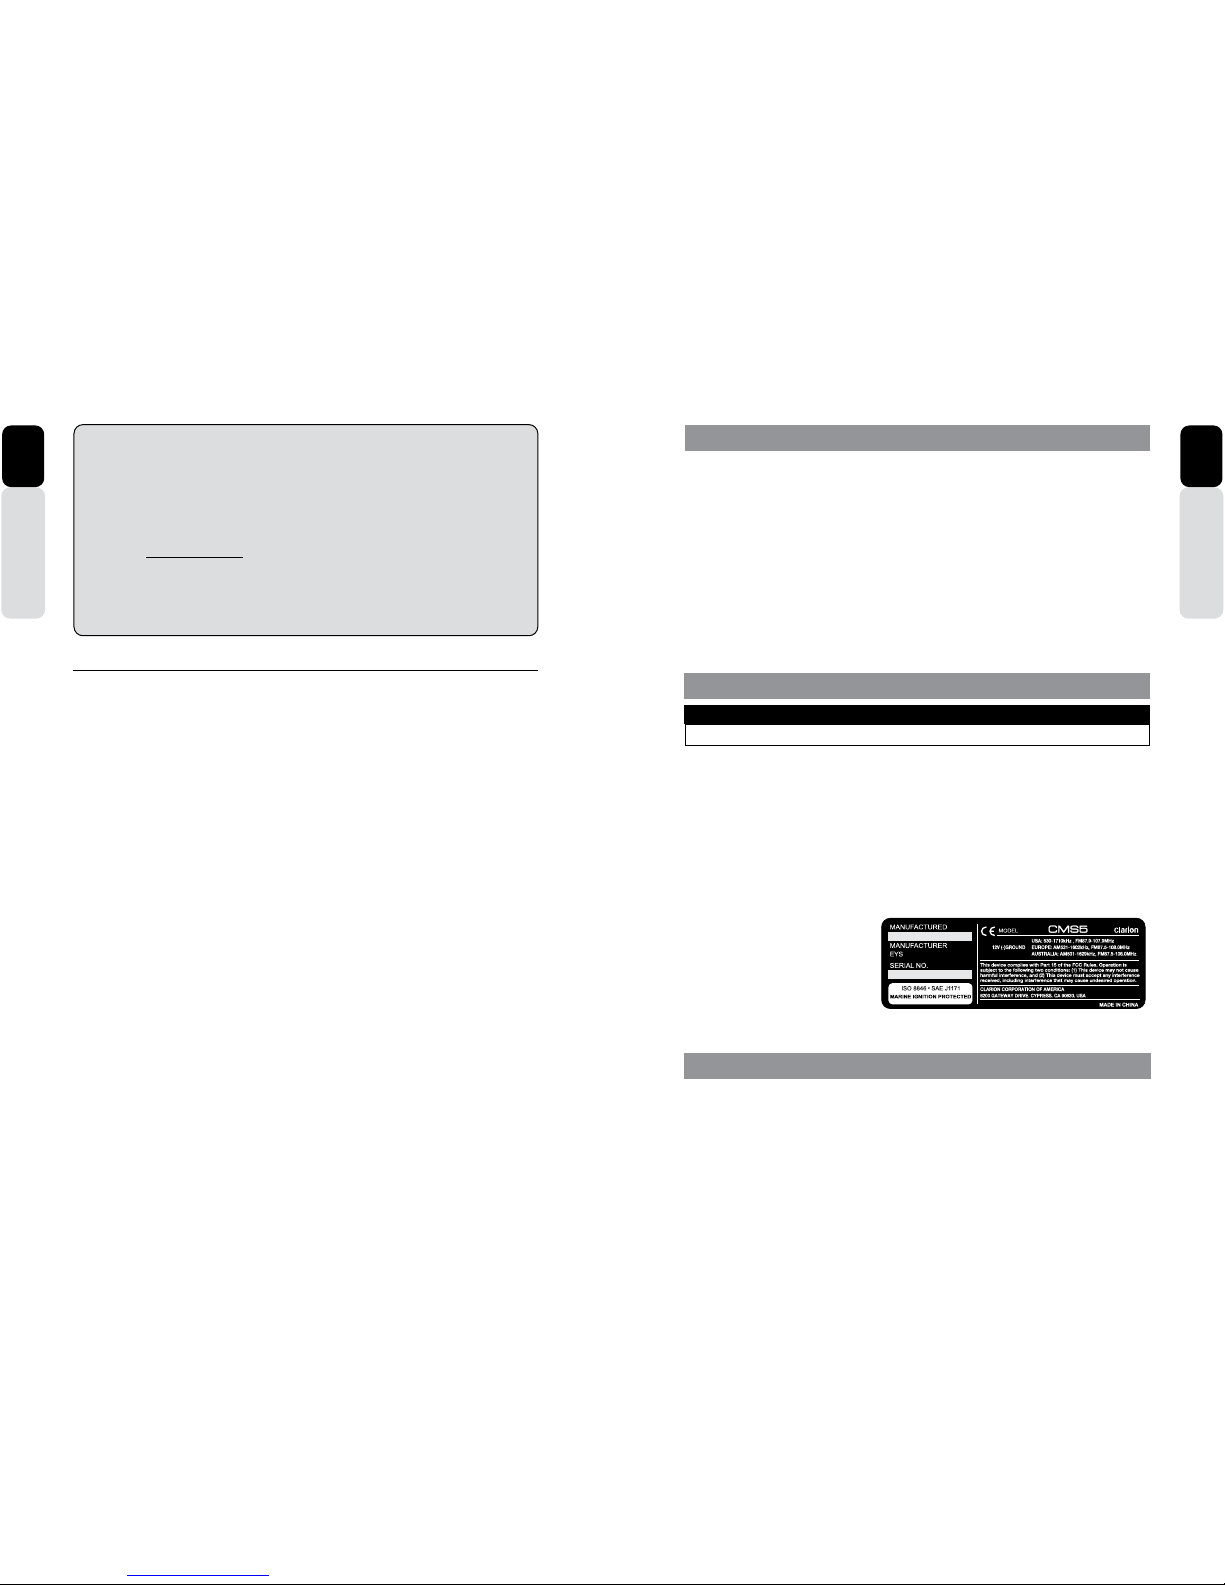
CLARION PRODUCT REGISTRATION INFORMATION
For USA and Canada only
www.clarion.com
Dear Customer:
Congratulations on your purchase of a Clarion Marine Electronic Product. We are
Confident that you will enjoy your Clarion experience.
There are many benefits to registering your product. We invite you to visit our
website at www.clarion.com to register your Clarion product.
We have made product registration simple with our easy to use website.
The registration form is short and easy to complete. Once you are registered,
We can keep you informed of important product information.
Register at www.clarion.com - It is easy to keep your Clarion product up to date.
Contents
1. FEATURES.......................................................................................................................................3
2. PRECAUTIONS................................................................................................................................3
3. CAUTIONS ON HANDLING.............................................................................................................3
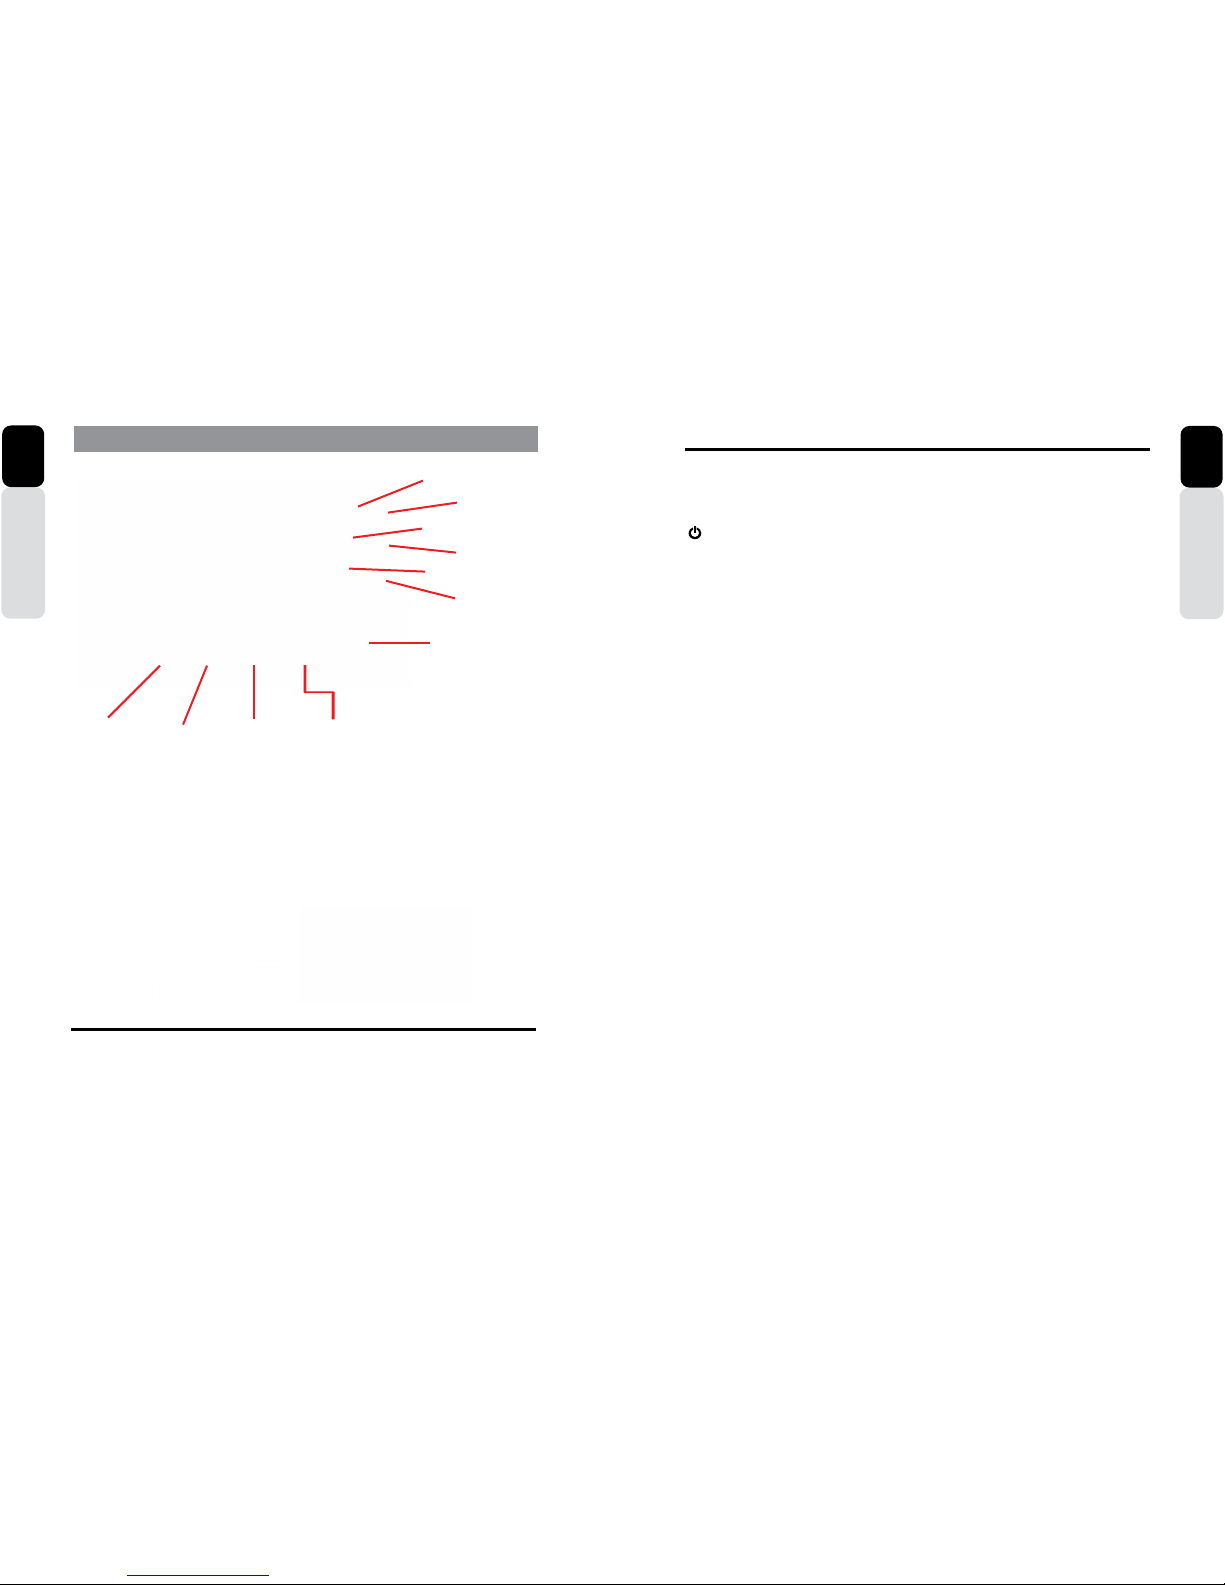
4. DISPLAY CONTROLLER BUTTONS ..............................................................................................4
About the Registered Marks, etc. ....................................................................................................4
Name of Buttons and their Functions ...............................................................................................5
5. OPERATIONS ..................................................................................................................................7
Radio (AM/FM/Weather Band) Operation ........................................................................................8
SiriusXM Satellite Radio Operation ..................................................................................................9
iPod Audio Operation......................................................................................................................15
iPod Video Operation......................................................................................................................24
USB 1 and USB 2 Operation..........................................................................................................31
Pandora Operation .........................................................................................................................35
Settings...........................................................................................................................................38
CMS5 Information ....................................................................................................................38
System Reset............................................................................................................................39
Clock ........................................................................................................................................39
Date .........................................................................................................................................40
Bluetooth..................................................................................................................................41
2-Zone Operation ...........................................................................................................................47
AUX 1 and AUX 2 Operation.............................................................................................................49
Camera Operation ..........................................................................................................................50
Bluetooth Audio Operation .............................................................................................................51
Phone Operation ............................................................................................................................56
Audio Settings (Button)...................................................................................................................66
Display Settings (Button) ................................................................................................................70
Favorites (Button) ...........................................................................................................................73
Understanding the Graphical User Interface (GUI) ........................................................................74
6. TROUBLESHOOTING ...................................................................................................................77
7. SPECIFICATIONS..........................................................................................................................80
8. INSTALLATION AND WIRE CONNECTIONS DIAGRAM.............................................................81
Owner’s Manual
English
1. FEATURES
2. PRECAUTIONS
* For your safet
y
, while boating, keep the volume to a level at which exte
r
nal sounds can be heard.
WARNING
1. This unit has precision pa
r
ts inside. Even in the event that trouble arises, never open the case,
disassemble the unit, or lubricate the pa
r
ts.
2. This equipment has been tested and found to comply with the limits for a Class B digital device,
pursuant to Pa
r
t 15 of the FCC Rules.
These limits are designed to provide reasonable protection against harmful interference in a
residential installation. This equipment generates, used, and can radiate radio frequency energy
and, if not installed and used in accordance with the instructions, may cause harmful interference to
radio communications. However, there is no guarantee that interference will not occur in a pa
r
ticular
installation. If this equipment does cause harmful interference to radio or television reception, which
can be determined by turning the equipment off and on, the user is encouraged to consult the
dealer or a experienced radio/TV technician for help.
3. CAUTIONS ON HANDLING
- Protect product from water. Do not submerge or expose the product directly to water, as this can cause
electrical sho
r
ts, fire or other damages.
- Protect from high temperature. Exposure to direct sunlight for an extended period of time can produce
ve
r
y high temperature in your vessel. Cool down the interior before use.
INFORMATION FOR USERS:
CHANGES OR MODIFICATIONS TO
THIS PRODUCT NOT APPROVED BY
THE MANUFACTURER WILL VOID THE
WARRANTY AND MAY VIOLATE FCC
REGULATIONS.
- SiriusXM-Ready™ (SiriusXM Connect Tuner and Subscription sold separately)
- Bluetooth (HFP, A2DP, Aptx, AVRCP 1.4, PBAP, SSP, SPP)
- Made for iPod®Made for iPhone®
USB iPod/iPhone Audio and Video Compatible (CCA750 Required for iPod Video)
- 2-Zone (Independent Zone Source Control)
- SVC (Source Volume Control), Independent Volume Control for each source
-
T
wo Audio/Video RCA Inputs
- Video
Output
- Dedicated Rear Camera RCA Input
- Global AM/FM
T
uner with RDS
-Weather Band Radio
-Water Resistant Chassis and Display Controller
- Dual 2.1A USB Po
r
ts
- OEM Steering Wheel Interface Ready
- Clarion Wired Remote Ready (MW1/MW2/MW4)
- 50W x 4 Built-In MOSFET Amplifier

4 CMS5 CMS5 5
Owner’s Manual
English
4. DISPLAY CONTROLLER BUTTONS
About the registered marks, etc.
“Made for iPod” means that an electronic accesso
r
y has been designed to connect specifically to iPod and has been ce
r
tified by the
developer to meet Apple performance standards.
Apple is not responsible for the operation of this device or its compliance with safety and regulato
r
y standards.
iPod is a trademark of Apple Inc., registered in the U.S. and other countries.
Sirius, XM and all related marks and logos are registered trademarks of Sirius XM Radio Inc. All Rights reserved.
Volume Knob
Functions:
Rotate Volume Knob = Adjust Volume Level (Play Screens).
Press in on Volume Knob = Mute (Play Screens).
Rotate Volume Knob = Scroll Through Options (Menus).
Press in on Volume Knob = Select/Enter (Menu Options).
Options Arrow
This double sided arrow will only appear when additional options are available.
Owner’s Manual
English
Name of Buttons and their Functions
[ ] Power Button
- Press and release button to turn ON.
- Press and Hold for Three Seconds to turn OFF.
Volume Knob
- Rotate Volume Knob Clockwise to increase
Volume.
- Rotate Volume Knob Counter Clockwise to
Decrease volume.
Mute
- Press In and Release Volume Knob to Mute
and Rotate the Volume Knob to Un-Mute the
Audio.
[SRC] Source Button
- Press SRC button to display the Main Menu.
- Use Volume Knob to Scroll through Source
Options, then Press In and Release Volume
Knob to Select Source.
[MENU] Menu Button
- Press to access additional options.
- Radio (AM/FM/WB/LO/DX).
- SiriusXM (Search Functions, Direct, etc.).
- iPod (Audio, Video Menu options, Search,
Playlists, A
r
tists, Songs, Genre, etc.).
- USB (Folder, Song, Repeat, etc,).
- Bluetooth (HFP-ON/OFF, Pairing, etc.).
[AUDIO] Audio Button
- Press to access Audio adjustment settings.
Use Volume Knob to adjust by rotating
Clockwise or Counter-Clockwise, then Press
in and release Volume Knob to save Adjusted
setting.
-
T
reble/Mid/Bass
(12kHz/1k/50Hz).
Adjust Levels from “-10” to “+10”.
- EQ
Adjust Frequency for each of the 5-Bands.
- Balance/Fader
Adjust sound balance for Left and Right.
Adjust sound fader for Front and Rear.
- Subwoofer
Subwoofer Volume from “-10” to “+10).
Subwoofer Frequency (50/75/100/THROUGH).
Subwoofer Phase (Normal and Reverse).
Note:
Be sure to read this chapter while referring to the diagram in chapter “4. DISPLAY CONTROLLER BUTTONS”
[AUDIO ] Audio Button
- 2-Zone
Adjust volume level for Zone 1, Zone 2 and Both
Zones.
- SVC (Source Volume Control)
Adjust volume level for each source independently
- Radio
- iPod
- Phone
- SiriusXM
- Bluetooth Audio
- USB
- AUX
[DISP] Display Button
- Press to access Display adjustment settings
- Clock
- ON = Large Clock will appear After 25 seconds
of no action
- Change Clock Font Color (White,
Yellow, Red
and Reverse)
- OFF = Large Clock will Not appear after 25
Seconds of no action
- Default = ON
- Status Bar
- Change Status Bar to appear at
T
op or Bottom
of Screen
- Default =
T
op
- Mode
Change Display preset color settings from:
- Day Mode = Brighter Colors
Night Mode = Darker Colors
Default = Day Mode
- Brightness
Adjust display brightness from “-10” to “+10”
[FAV] Favorites Button
- Press to access saved stations/channels
- Save up to 50 favorites
- SiriusXM
- Radio (AM/FM/Weather Band)
- Pandora
- Phone Contact
- Paired and Connected Phone
- Contacts have been synced
-
You can now save contact as a favorite
Example: Home, Work, etc.
Previous Song
Seek Back Play / Pause Back
Previous Screen
Next Song
Seek Forward
Favorites
Volume
Option Scroll
Enter Selection
Menu Options
Audio Settings
Display Options
Power
ON / OFF
Source
Main Menu

6 CMS5 CMS5 7
Note:
Be sure to read this chapter while referring to the diagram in chapter 4 “DISPLAY CONTROLLER BUTTONS”
Owner’s Manual
English
[ SEEK] Seek Back Button
- Press and release button to go back to previous song.
- Press and Hold for Three Seconds to scan back through song, release and song will continue playing.
[SEEK ] Seek Forward Button
- Press and release button to advance to next song.
- Press and Hold for Three Seconds to scan through song, release and song will continue playing.
[ ] Play / Pause Button
- Press to PAUSE current song.
- When track is PAUSED, press again to continue playing current song (iPod, Bluetooth Audio, USB,
and Pandora).
[BACK] Back Button
- Press to go back to previous Menu or Settings Screen.
- Press to backwards in multiple Menu Screens.
- Press to return to current source play screen from Menu or Settings Screen.
Owner’s Manual
English
5. OPERATIONS
CAUTION
Note:
- Start the engine before using this unit.
- Be careful about using this unit without the engine running. If used for long periods of time without the
engine running to charge the batteries, you may not be able to start the engine and this can reduce the
life and performance of the batteries. A Warning will appear when voltage is 10V or below.
When the unit is turned ON, and the volume has been increased to the maximum level
May cause damage to your hearing.
Please be aware and cautious of the volume level at all times.
Basic Operations
Turning ON and OFF the System
Selecting a Source
1. Rotate the Volume Knob Clockwise to increase the volume level.
2. Rotate the Volume Knob Counter-Clockwise to decrease the volume level.
Adjusting the volume
1. Press the [SRC] button to display the Main Menu Screen.
* External add-on accessories will be required in order to use that source.
- SiriusXM requires a SiriusXM Connect Tuner and Subscription (sold separately).
- Pandora requires a iPod or iPhone to be connected to the CMS5.
- CCA750 is required for iPod Video Playback.
- OEM Steering Wheel Interface Module is required for the steering wheel buttons to operate
the CMS5 audio features.
2. Use the Volume Knob to scroll through the source carousel.
3. Press in on the Volume Knob to select the source displayed in the middle of the source
Carousel.
* For your safet
y
, while boating, keep the volume to a level at which external sounds can be heard.
CAUTION
ON
1. Sta
r
t the engine.
2. Press and Release the Power Button. [ ]
3. The Blue LED trim around the Volume Knob
will light up and the CMS5 Display Controller.
- Clarion Splash Screen (10 Seconds).
- Viewing Video Disclaimer (5 Seconds).
OFF
1. Press and Hold the Power Button for 3 sec. [ ]
2. The Blue LED trim ring around the Volume Knob
will turn OFF.
- System in Powering Down Screen (5 Seconds).
- Clarion Splash Screen (10 Seconds).
Name of Buttons and their Functions

8 CMS5 CMS5 9
Radio (AM/FM/Weather Band) Operation
Owner’s Manual
English
[ SEEK] Seek Back Button
- Press and release button to tune down in frequency step by step.
- Press and Hold for Three Seconds to scan back to the previous strongest station frequency.
[SEEK ] Seek Forward Button
- Press and release button to tune up in the frequency step by step.
- Press and Hold for Three Seconds to scan to the next strongest station frequency.
[MENU] Menu Button
- Press to select AM, FM, Weather Band, Local (LO) or Distance (DX).
- Use the volume knob to scroll through options.
- Press in on the volume knob to select option in the middle of the carousel.
- AM (Amplitude Modulation).
- FM (Frequency Modulation).
- Weather Band (NOAA - National Oceanic and Atmospheric Administration).
- Local (LO).
- Distance (DX).
- Press the Region Setting option to select the Region.
- Now a pop up window will appear providing 4 options.
- Other Countries
- USA
- Europe
- Australia
*Default=USA
- Use the volume knob to toggle between region options.
- Press in on the volume knob to select your choice.
- Press the BACK button to return to the previous Screen.
Note: Sirius XM will be available in source screen when the Tuner region is set to USA. Pandora will be
available when Region is set to USA/Australia. Else those options will be greyed out in Source list.
[BACK] Back Button
- Press to go back to previous Menu or Settings Screen.
- Press to backwards in multiple Menu Screens.
- Press to return to current source play screen from Menu or Settings Screen.
Owner’s Manual
English
SiriusXM Satellite Radio Operation
Only SiriusXM®brings you more of what you love to listen to, all in one place. Get over 140 channels,
including commercial-free music plus the best sports, news, talk, comedy and entertainment. Welcome
to the world of satellite radio. A SiriusXM Vehicle Tuner and Subscription are required. For more
information, visit www.siriusxm.com.
Activating your SiriusXM Subscription
After installing your SiriusXM Connect Vehicle Tuner and antenna, power on your Clarion CMS5 Marine
Source Unit and select SiriusXM mode. You should be able to hear the SiriusXM preview channel on
Channel 1. If you cannot hear the preview channels, please check the installation instructions to make
sure your SiriusXM Connect tuner is properly installed.
After you can hear the Preview channel, tune to Channel 0 to find the Radio ID of your tuner. In addition,
the Radio ID is located on the bottom of the SiriusXM Connect Vehicle Tuner and its’ packaging. You will
need this number to activate your subscription. Write the number down for reference.
Note: the SiriusXM Radio ID does not include the letters I, O, S or F.
In the USA, you can activate online or by calling SiriusXM Listener care:
•Visitwww.siriusxm.com/activatenow
•CallSiriusXMListenerCareat1-866-635-2349
For Canadian Subscriptions, please contact:
•Visitwww.siriusxm.ca/activatexm
•CallXMcustomerCareat1-877-438-9677
As part of the activation process, the SiriusXM satellites will send an activation message to your tuner.
When your radio detects that the tuner has received the activation message, your radio will display:
“<<Subscription Updated>>”. Once subscribed, you can tune to channels in your subscription plan. Note,
the activation process usually takes 10 to 15 minutes, but may take up to an hour. Your radio will need to
be powered on and receiving the SiriusXM signal to receive the activation message.

10 CMS5 CMS5 11
SiriusXM Satellite Radio Operation
Owner’s Manual
English
Owner’s Manual
English
SiriusXM Satellite Radio Operation
Direct Channel Tuning
1. From the SiriusXM Play Screen, Press the MENU Button.
2. Use the volume knob to scroll through options until the Direct Icon is in the middle of the carousel.
3. Press in on the volume knob to select Direct.
4. Now a pop-up window will appear with a numbers for you to enter to directly tune to a SiriusXM
Channel.
5. Use the volume knob to scroll through the numbers until the halo is around the number you want
t
o
select.
6. Press in on the volume knob to select that number.
7. If the channel you would like to tune to is a single digit number, then you can proceed to the bottom
of the pop-up window and select OK. If you would like to tune to a two or three digit channel, then
proceed by selecting the additional numbers needed.
8. Once all the channel numbers are displayed in the window, scroll down to the bottom of the pop-up
window and select OK.
9. Now you will return to the SiriusXM Play Screen and tuned to the channel entered.
[ SEEK] Seek Back Button
- Press and release button to tune to the previous channel.
[SEEK ] Seek Forward Button
- Press and release button to tune to the next channel.
[MENU] Menu Button
- Press to select Direct Channel, Parental Controls, Channel Search, Category Search and Tag.
- Use the volume knob to scroll through options.
- Press in on the volume knob to select option in the middle of the carousel.
- Direct (Tune directly to channel by entering channel number).
- Parental Controls (Lock Mature Content Channels, Manage Password).
- Channel Search (Search by Number or Letters).
- Category Search (Seach by Number or Letter).
- Tag (Tag song to iPod/iPhone to purchase from iTunes when device is connected to iTunes).
- Settings.
[BACK] Back Button
- Press to go back to previous Menu or Settings Screen
- Press to backwards in multiple Menu Screens
- Press to return to current source play screen from Menu or Settings Screen
iTunes® Song Tagging
1.From the SiriusXM Play Screen, Press the MENU Button.
2.Use the volume knob to scroll through options until the Tag Icon is in the middle of the carousel.
3.Press in on the volume knob to select Tag.
4.Now a pop-up window will appear asking you to confirm to Tag the current song to your iPod/iPhone.
5.You will also see how many songs you can Tag are left (50 total).
6.Select “YES” to Tag the song or “CANCEL” and the song will not be Tagged.
7. When Tag limit is reached, a pop-up showing “Memory Full, Connect iPod” will be displayed.
8.You will also see “Already Tagged” pop up on selecting YES option if the song is already tagged.
9.Once the song is Tagged, you will return to SiriusXM Play Screen.
*You will need to connect your iPod/iPhone to your home PC or MAC, launch iTunes to purchase the
Tagged Songs that have been saved to your iPod/iPhone.
** Tag icon will be greyed out when the song is not taggable or when the song has already been tagged.
*** Tag ID’s will remain on the CMS5 until the iPod/iPhone is connected. They will automatically be
deleted after they are transferred.

12 CMS5 CMS5 13
SiriusXM Satellite Radio Operation
Owner’s Manual
English
Owner’s Manual
English
SiriusXM Satellite Radio Operation
Channel List Tuning
1. From the SiriusXM Play Screen, Press the MENU Button.
2. Use the volume knob to scroll through options until the Channels Icon is in the middle of the
carousel.
3. Press in on the volume knob to select Channels.
4. The list of SiriusXM Channels will now appear.
5. You can use the volume knob to scroll up or down the list of SiriusXM Channels.
6. Once the Channel you would like to listen to is in the center middle of the screen,
7. Press in on the volume knob to tune to that Channel.
8. If you select a Channel with a “Lock”, then this Channel can not be selected until the correct
password is entered.
* See Parental Controls for instructions to Set a Password, Change Password or to Lock Channels.
9. CMS5 DC shall display SiriusXM Category list on Single press of BACK Button when it is displaying
selected category channel
Find a Channel by Category
1. From the SiriusXM Play Screen, Press the MENU Button.
2. Use the volume knob to scroll through options until the Categories Icon is in the middle of the carousel.
3. Press in on the volume knob to select Categories.
4. The list of SiriusXM Categories will now appear.
5. You can use the volume knob to scroll up or down the list of SiriusXM Categories.
6. Once the Category you would like is in the center middle of the screen,
7. Press in on the volume knob to select to that Category.
8. CMS5 DC shall display SiriusXM Menu Options on Single press of BACK Button when it is displaying
category list.
9. Once a Category is selected, list of channels from the selected Category will appear. Browse through
the list of channels and select a Channel. Then it starts playing the selected Channel.
10. Press the BACK Button to go back to SiriusX category list when it is displaying selected category
channel.
Channel and Category Sort by ABC or 123
1. From the SiriusXM Play Screen, Press the MENU Button.
2. Use the volume knob to scroll through options until the Channels/Categories Icon is in the middle of
the carousel.
3. Press in on the volume knob to select Channels/Categories.
4. The list of SiriusXM Channels/Categories will now appear.
5. Press the MENU Button.
6. Now a pop-up window will appear with two options to choose from: “ABC” or “123”.
- “ABC” is sorted alphabetically
- “123” is sorted by channel number.
7. Use the volume knob to toggle between the two options by moving the halo around the ABC icon.
8. Press in on the volume knob to select “ABC”.
9. Now a pop-up window will appear with Letters in icons.
10. Use the volume knob to scroll through the Letters until the Letter you want is in the middle of the
carousel.
11. Press in on the volume knob to select that Letter.
12.
You will now see a list of Channels/Catego
r
y appear based on your letter or number selection.
Browse through the list of channels/catego
r
y and select a channel. Then it sta
r
ts playing the channel.
If there is no match found for the selected alphabet/number, then pop up saying the same will be
displayed.
13. Use the volume knob to scroll through the list of Channels.
14. When the Channel you would like to tune to is in the middle of the screen.
15. Press in on the volume knob to select that channel.
16. Now you will return to the SiriusXM Play Screen and tuned to the channel entered.
Note: In all search option (for all source option) , Searching is restricted to sta
r
ting Alphabet/Number only.

14 CMS5 CMS5 15
SiriusXM Satellite Radio Operation
Owner’s Manual
English
[ SEEK] Seek Back Button
- Press and release button to go back to previous song.
- Press and Hold for Three Seconds to scan back through song, release and song will continue playing.
[SEEK ] Seek Forward Button
- Press and release button to advance to next song.
- Press and Hold for Three Seconds to scan through song, release and song will continue playing.
[ ] Play / Pause Button
- Press to PAUSE current song.
- When track is PAUSED, press again to continue playing current song(iPod, Bluetooth Audio, USB, and
Pandora).
[BACK] Back Button
- Press to go back to previous Menu or Settings Screen.
- Press to backwards in multiple Menu Screens.
- Press to return to current source play screen from Menu or Settings Screen.
[MENU] Menu Button
Press to access additional options.
- Playlists (Search by “ABC” or “123”).
- Songs (Search by “ABC” or “123”).
- Artists (Search by “ABC” or “123”).
- Genre (Search by “ABC” or “123”).
- Composers (Search by “ABC” or “123”).
- Podcasts (Search by “ABC” or “123”).
- Simple Mode (ON or OFF) = Operation and Control directly from iPod/iPhone.
- Tag (Tag song to iPod/iPhone for purchase through iTunes).
- Repeat (Song, Playlist, All, Off).
- Shuffle (ON or OFF).
iPod Audio Operation
Owner’s Manual
English
Parental Controls
1.From the SiriusXM Play Screen, Press the MENU Button.
2.Use the volume knob to scroll through options until the Parental Controls Icon is in the middle of the
carousel.
3.Press in on the volume knob to select Parental Controls.
4.Now a pop-up window will appear with two options to choose from: “Lock Mature Content Channels”
or “Manage Password”.
- “Lock Mature Content Channels” locks the ability to tune to the “Mature Content” Channels.
- “Manage Password” Provides the ability to Set a Password or to Change the Password to lock the
Mature Content Channels.
- The default passcode set for the Parental lock is 1111. This can be changed with the help of
Manage Password.
Lock Mature Content Channels
1.Press in on the volume knob to select “Lock Mature Content Channels”.
2.A pop-up window will now appear asking you if you want to turn Lock the Mature Content Channels
feature “ON” or “OFF”.
3.Select “ON” by pressing in on the volume knob, to turn this feature “ON”.
4.Now you will be asked to enter in a 4-digit Lock Code to Lock the Mature Content Channels.
5.Using the volume knob, scroll through the numbers and Press in on the volume knob to select a
4-digit Lock Code.
* Write down the 4-digit Lock Code for future reference.
6.Now the SiriusXM Mature Content Channels are Lock and can not be listened to.
Unlock Mature Content Channels
1.Press in on the volume knob to select “Lock Mature Content Channels”.
2.A pop-up window will now appear asking you if you want to turn Lock the Mature Content Channels
feature “ON” or “OFF”.
3.Select “OFF” by pressing in on the volume knob, to turn this feature “OFF”.
4.Now you will be asked to enter in a 4-digit Lock Code to Unlock the Mature Content Channels.
5.Using the volume knob, scroll through the numbers and Press in on the volume knob to select your
4-digit Code.
Use the default passcode unless it is changed using Manage passcode.If the default passcode is
changed using Manage passcode, then enter the new chnaged passcode.
6.Now the SiriusXM Mature Content Channels are Unlocked and can be listened to.
Manage Password
This setting will allow you to change your existing password to Lock Mature Content Channels.
1. From the SiriusXM Play Screen, Press the MENU Button.
2. Use the volume knob to scroll through options until the Parental Controls Icon is in the middle of the
carousel.
3. Press in on the volume knob to select Parental Controls
4. Now a pop-up window will appear with two options to choose from: “Lock Mature Content Channels”
or “Manage Password”.
- “Lock Mature Content Channels” locks the ability to tune to the “Mature Content” Channels.
- “Manage Password” Provides the ability to Set a Password or to Change the Password to lock the
Mature Content Channels.
5. Select “Manage Password”.
6. Enter in your Current Lock Code. For the first time, current lock code is same as default passcode.
7. Select Done when finished.
8. Enter in a New Lock Code.
9. Select Done when finished.
10.
You will now see a confi
r
mation window appear displaying the new lock code.
* Please remember this code.
You will need it to listen to locked channels or to turn Off the Lock Mature
Content Features.

16 CMS5 CMS5 17
iPod Audio Operation
Owner’s Manual
English
Songs
1. From the iPod Play Screen, Press the MENU Button.
2. Use the volume knob to scroll through options until the Songs Icon is in the middle of the
carousel.
3. Press in on the volume knob to select Songs.
4. The list of your Songs will now appear.
5. Use the volume knob to scroll through your Songs.
6. Press in on the volume knob to select the Song that is in the middle of the screen.
7. You will now return to the iPod Play Screen and the song will start playing.
Songs Search by ABC or 123
1. From the iPod Play Screen, Press the MENU Button.
2. Use the volume knob to scroll through options until the Songs Icon is in the middle of the
carousel.
3. Press in on the volume knob to select Songs.
4. The list of your Songs will now appear.
5. Press the MENU Button.
6. Now a pop-up window will appear with two options to choose from: “ABC” or “123”.
- “ABC” is search by Letter.
- “123” is search by Number.
7.Use the volume knob to toggle between the two options by moving the halo around the ABC icon.
8. Press in on the volume knob to select “ABC” or “123”.
9. Now a pop-up window will appear with Letters/Numbers in icons.
10. Use the volume knob to scroll through the Letters/Numbers until the Letter/Number you want is in
the middle of the carousel.
11. Press in on the volume knob to select that Letter/Number.
12. You will now see a list of Songs.
13. Use the volume knob to scroll through the list of Songs.
14. When the Song you would like is in the middle of the screen.
15. Press in on the volume knob to select that Song.
16. Now you will return to the iPod Play Screen and the song will start playing
iPod Audio Operation
Owner’s Manual
English
Playlists
1. From the iPod Play Screen, Press the MENU Button.
2. Use the volume knob to scroll through options until the Playlists Icon is in the middle of the carousel.
3. Press in on the volume knob to select Playlists.
4. The list of your Playlists will now appear.
5. Use the volume knob to scroll through your Playlists.
6. Press in on the volume knob to select the Playlist that is in the middle of the screen.
7. You will now return to the iPod Play Screen and the first song in the Playlist will start playing.
Playlists Search by ABC or 123
1. From the iPod Play Screen, Press the MENU Button.
2. Use the volume knob to scroll through options until the Playlists Icon is in the middle of the carousel.
3. Press in on the volume knob to select Playlists.
4. The list of your Playlists will now appear.
5. Press the MENU Button.
6. Now a pop-up window will appear with two options to choose from: “ABC” or “123”.
- “ABC” is search by Letter.
- “123” is search by Number.
7. Use the volume knob to toggle between the two options by moving the halo around the ABC icon.
8. Press in on the volume knob to select “ABC” or “123”.
9. Now a pop-up window will appear with Letters/Numbers in icons.
10. Use the volume knob to scroll through the Letters/Numbers until the Letter/Number you want is in the
middle of the carousel.
11. Press in on the volume knob to select that Letter/Number.
12. You will now see a list of Playlists.
13. Use the volume knob to scroll through the list of Playlists.
14. When the Playlists you would like is in the middle of the screen.
15. Press in on the volume knob to select that Playlist.
16. Once selected, you will see the list of tracks corresponding to selected Playlist. Track Starts playing
when selected on a particular track. Browsing sequence should go as Playlist->Tracks. Search can
be done in each level.
17. Now you will return to the iPod Play Screen and the first song in the Playlist will start playing.

18 CMS5 CMS5 19
Owner’s Manual
English
iPod Audio Operation
Genre
1. From the iPod Play Screen, Press the MENU Button.
2. Use the volume knob to scroll through options until the Genre Icon is in the middle of the carousel.
3. Press in on the volume knob to select Genre.
4. The list of music Genre will now appear.
5. Use the volume knob to scroll through the music Genre.
6. Press in on the volume knob to select the Genre that is in the middle of the screen.
7. You will now return to the iPod Play Screen and the first song from the Genre will sta
r
t playing.
Genre Search by ABC or 123
1. From the iPod Play Screen, Press the MENU Button.
2. Use the volume knob to scroll through options until the Genre Icon is in the middle of the carousel.
3. Press in on the volume knob to select Genre.
4. The list of your music Genre will now appear.
5. Press the MENU Button.
6. Now a pop-up window will appear with two options to choose from: “ABC” or “123”.
- “ABC” is search by Letter.
- “123” is search by Number.
7. Use the volume knob to toggle between the two options by moving the halo around the ABC icon.
8. Press in on the volume knob to select “ABC” or “123”.
9. Now a pop-up window will appear with Letters/Numbers in icons.
10. Use the volume knob to scroll through the Letters/Numbers until the Letter/Number you want is in the
middle of the carousel.
11. Press in on the volume knob to select that Letter/Number.
12.
You will now see a list of Genre.
13. Use the volume knob to scroll through the list of Genre.
14. When the Genre you would like is in the middle of the screen.
15. Press in on the volume knob to select that Genre.
16. Once selected,
You will see the list of A
r
tist corresponding to the selected Genre. Then, When an
a
r
tist is selected, corresponding Albums will be displayed.
T
racks will be shown when an album is
selected and track sta
r
ts playing when selected on a pa
r
ticular track. Browsing sequence should go
through the different levels like Genre->A
r
tist->Album->
T
racks.
T
racks are the last levels. Search can
be done in each level.
17. Now you will return to the iPod Play Screen and the first song from the Genre will sta
r
t playing.
iPod Audio Operation
Owner’s Manual
English
Artists
1. From the iPod Play Screen, Press the MENU Button.
2. Use the volume knob to scroll through options until the Artists Icon is in the middle of the carousel.
3. Press in on the volume knob to select Artists.
4. The list of Artists will now appear.
5. Use the volume knob to scroll through your Artists.
6. Press in on the volume knob to select the Artist that is in the middle of the screen.
7. You will now return to the iPod Play Screen and the first song from the Artist will start playing.
Artists Search by ABC or 123
1. From the iPod Play Screen, Press the MENU Button.
2. Use the volume knob to scroll through options until the Artists Icon is in the middle of the carousel.
3. Press in on the volume knob to select Artists.
4. The list of your Artists will now appear.
5. Press the MENU Button.
6. Now a pop-up window will appear with two options to choose from: “ABC” or “123”.
- “ABC” is search by Letter.
- “123” is search by Number.
7. Use the volume knob to toggle between the two options by moving the halo around the ABC icon.
8. Press in on the volume knob to select “ABC” or “123”.
9. Now a pop-up window will appear with Letters/Numbers in icons.
10. Use the volume knob to scroll through the Letters/Numbers until the Letter/Number you want is in the
middle of the carousel.
11. Press in on the volume knob to select that Letter/Number.
12. You will now see a list of Artists.
13. Use the volume knob to scroll through the list of Artists.
14. When the Artist you would like is in the middle of the screen.
15. Press in on the volume knob to select that Artist.
16. Once Selected, You will see the list of Album corresponding to selected Artist. Tracks will be shown
when an Album is selected and track starts playing when selected on a particular track. Browsing
sequence should go through the different levels like Artist->Album->Tracks. Search can be done in
each level.
17. Now you will return to the iPod Play Screen and the first song from the Artist will start playing.

20 CMS5 CMS5 21
Owner’s Manual
English
iPod Audio Operation iPod Audio Operation
Owner’s Manual
English
Composers
1. From the iPod Play Screen, Press the MENU Button.
2. Use the volume knob to scroll through options until the Composers Icon is in the middle of the
carousel.
3. Press in on the volume knob to select Composers.
4. The list of Composers will now appear.
5. Use the volume knob to scroll through your Composers.
6. Press in on the volume knob to select the Composer that is in the middle of the screen.
7. You will now return to the iPod Play Screen and the first song from the Composer will start playing.
Composers Search by ABC or 123
1. From the iPod Play Screen, Press the MENU Button.
2. Use the volume knob to scroll through options until the Composers Icon is in the middle of the
carousel.
3. Press in on the volume knob to select Composers.
4. The list of your Composers will now appear.
5. Press the MENU Button.
6. Now a pop-up window will appear with two options to choose from: “ABC” or “123”.
- “ABC” is search by Letter.
- “123” is search by Number.
7. Use the volume knob to toggle between the two options by moving the halo around the ABC icon.
8. Press in on the volume knob to select “ABC” or “123”.
9. Now a pop-up window will appear with Letters/Numbers in icons.
10. Use the volume knob to scroll through the Letters/Numbers until the Letter/Number you want is in the
middle of the carousel.
11. Press in on the volume knob to select that Letter/Number.
12. You will now see a list of Composers.
13. Use the volume knob to scroll through the list of Composers.
14. When the Composer you would like is in the middle of the screen.
15. Press in on the volume knob to select that Composer.
16. Once Selected, you will see the list of Album corresponding to selected composer. Tracks will be
shown when an Album is selected and track starts playing when selected on a particular track.
Browsing sequence should go through the different levels like Composer->Album->Tracks. Search can
be done in each level.
17. Now you will return to the iPod Play Screen and the first song from the Composer will start playing.
Podcasts
1. From the iPod Play Screen, Press the MENU Button
2. Use the volume knob to scroll through options until the Podcasts Icon is in the middle of the carousel
3. Press in on the volume knob to select Podcasts
4. The list of downloaded Podcasts will now appear
5. Use the volume knob to scroll through the Podcasts
6. Press in on the volume knob to select the Podcast that is in the middle of the screen
7. You will now return to the iPod Play Screen and the Podcast will start playing
Podcasts Search by ABC or 123
1. From the iPod Play Screen, Press the MENU Button
2. Use the volume knob to scroll through options until the Podcasts Icon is in the middle of the carousel
3. Press in on the volume knob to select Podcasts
4. The list of your downloaded Podcasts will now appear
5. Press the MENU Button
6. Now a pop-up window will appear with two options to choose from: “ABC” or “123”
- “ABC” is search by Letter
- “123” is search by Number
7. Use the volume knob to toggle between the two options by moving the halo around the ABC icon
8. Press in on the volume knob to select “ABC” or “123”
9. Now a pop-up window will appear with Letters/Numbers in icons
10. Use the volume knob to scroll through the Letters/Numbers until the Letter/Number you want
is in the middle of the carousel.
11. You will now see a list of Podcasts starting with Alphabet/Letter
12. When the Podcast you would like is in the middle of the screen
13. Press in on the volume knob to select that Podcast
14. Once selected, You will see the list of tracks corresponding to selected Episode. Tracks start playing
when selected on a particular track. Browsing sequence should go through the different levels like
Episode->Tracks. Search can be done in each level.
15. Now you will return to the iPod Play Screen and the Podcast will start playing

22 CMS5 CMS5 23
Owner’s Manual
English
iPod Audio Operation
Repeat
1. From the iPod Play Screen, Press the MENU Button.
2. Use the volume knob to scroll through options until the Repeat Icon is in the middle of the carousel.
3. Press in on the volume knob to select Repeat.
4. Now a pop-up window will appear with Repeat options:
- Song (Repeats current song).
- Playlist (Repeats songs in Playlist).
- All (Repeats All songs).
- Off (Turns OFF the Repeat Feature).
5. After your choice has been made, you will see the Repeat Icon appear on the iPod Play Screen.
Shuffle
1. From the iPod Play Screen, Press the MENU Button.
2. Use the volume knob to scroll through options until the Shuffle Icon is in the middle of the carousel.
3. Press in on the volume knob to select Shuffle.
4. Now a pop-up window will appear with Shuffle options:
- ON (Turns the Shuffle Feature ON).
- OFF (Turns the Shuffle Feature OFF).
5. After your choice has been made, you will see the Shuffle Icon appear on the iPod Play Screen.
Owner’s Manual
English
Simple Mode
When this feature is turned ON, you will now be able to control the iPod/iPhone features directly from the
iPod/iPhone.
Simple Mode ON
1.From the iPod Play Screen, Press the MENU Button.
2.Use the volume knob to scroll through options until the Simple Mode Icon is in the middle of the
carousel.
3.Press in on the volume knob to select Simple Mode.
4.You can now select the option to turn Simple Mode “ON”.
5.After you select “ON” you will now return to the iPod Play Screen.
* If you change your mind, and do not want to use the Simple Mode feature, press the Back Button to
return to the iPod Menu Options.
Simple Mode OFF
Follow these steps to turn Simple Mode OFF if Simple Mode has been ON.
1.From the iPod Play Screen, Press the MENU Button.
2.Use the volume knob to scroll through options until the Simple Mode Icon is in the middle of the
carousel.
3.Press in on the volume knob to select Simple Mode.
4.You can now select the option to turn Simple Mode “OFF”.
5.After you select “OFF” you will now return to the iPod Play Screen.
iPod Audio Operation

24 CMS5 CMS5 25
Owner’s Manual
English
iPod Video
1. From the iPod Audio Play Screen, Press the MENU Button.
2. Use the volume knob to scroll through options until the Video Icon is in the middle of the
carousel.
3. Press in on the volume knob to select Video.
4. You will now switch to the iPod Video Play Screen.
Select Video
1. From the iPod Video Play Screen, Press the MENU Button.
2. You will now see the following options:
- Music (Returns you back to the iPod Audio Play Screen and Leaves iPod
Video).
- Movies (Search by “ABC” or “123”).
- TV Shows (Search by “ABC” or “123”).
- Podcasts (Search by “ABC” or “123”).
3. Use the volume knob to scroll through options
VIEWING A VIDEO SIGNAL ON ANY DASH MOUNTED MONITOR WHILE IN MOTION
IS PROHIBITED BY LAW.
WARNING
IF YOU SEE A “AUDIO ONLY” SCREEN WHILE TRYING TOWATCH A MOVIE, PLEASE CHECK
THE “VIDEO INTERLOCK” WIRE AND MAKE SURE IT IS CONNECTED.
VIDEO INTERLOCK
ON (GROUND), OFF (NO GROUND), ON (GROUND)
NOTE
iPodVideo Operation
Owner’s Manual
English
[ SEEK] Seek Back Button
- Press and release button to go back to previous chapter.
- Press and Hold for Three Seconds to scan back through chapter, release and video will continue playing.
[SEEK ] Seek Forward Button
- Press and release button to advance to next chapter.
- Press and Hold for Three Seconds to scan through chapter, release and video will continue playing.
[ ] Play / Pause Button
- Press to PAUSE the video.
- When track is PAUSED, press again to continue playing the video.
[BACK] Back Button
- Press to go back to previous Menu or Settings Screen.
- Press to backwards in multiple Menu Screens.
- Press to return to current source play screen from Menu or Settings Screen.
[MENU] Menu Button (While Video is Playing)
Press to access additional options.
- Menu (Subtitles ON and OFF).
- Top (Plays video from the beginning of the current chapter).
- Chapters (Search Chapters by “123”).
- Repeat (Chapter, All and OFF).
[MENU] Menu Button (From iPod Video Play Screen)
Press to access additional options.
- Movies (Search by “ABC” or “123”).
- TV Shows (Search by “ABC” or “123”).
- Podcasts (Search by “ABC” or “123”).
iPodVideo Operation

26 CMS5 CMS5 27
iPodVideo Operation
Owner’s Manual
English
TV Shows
1. Select TV Shows from the list of Menu Options from the iPod Video Play Screen.
2. You will now see the list of TV Shows that are on your iPod/iPhone.
3. Use the volume knob to scroll through the list of TV Shows.
4. When the TV Shows you want to watch is in the middle of the screen.
5. Press in on the volume knob to select that TV Show.
6. The TV Show will start playing.
TV Shows Search by ABC or 123
1. From the iPod Video Play Screen, Press the MENU Button.
2. Use the volume knob to scroll through options until the TV Shows Icon is in the middle of the carousel.
3. Press in on the volume knob to select TV Shows.
4. The list of your TV Shows will now appear.
5. Press the MENU Button.
6. Now a pop-up window will appear with two options to choose from: “ABC” or “123”.
- “ABC” is search by Letter.
- “123” is search by Number.
7. Use the volume knob to toggle between the two options by moving the halo around the ABC icon.
8. Press in on the volume knob to select “ABC” or “123”.
9. Now a pop-up window will appear with Letters/Numbers in icons.
10. Use the volume knob to scroll through the Letters/Numbers until the Letter/Number you want is in the
middle of the carousel.
11. Press in on the volume knob to select that Letter/Number.
12. Continue selecting Letters/Numbers until you have entered the Name of the TV Show.
13. Once the Name of the TV Show is complete, scroll to the bottom of the pop-up window and select OK.
14. You will now see a list of TV Shows.
15. Use the volume knob to scroll through the list of TV Shows.
16. When the TV Show you would like is in the middle of the screen.
17. Press in on the volume knob to select that TV Show.
18. Now you will return to the iPod Video Play Screen and the TV Show will start playing.
iPodVideo Operation
Owner’s ManualEnglish
Movies
1. Select Movies from the list of Menu Options from the iPod Video Play Screen.
2. You will now see the list of Movies that are on your iPod/iPhone.
3. Use the volume knob to scroll through the list of Movies.
4. When the movie you want to watch is in the middle of the screen.
5. Press in on the volume knob to select that movie.
6. The Movie will start playing.
Movies Search by ABC or 123
1. From the iPod Video Play Screen, Press the MENU Button.
2. Use the volume knob to scroll through options until the Movies Icon is in the middle of the carousel.
3. Press in on the volume knob to select Movies.
4. The list of your Movies will now appear.
5. Press the MENU Button.
6. Now a pop-up window will appear with two options to choose from: “ABC” or “123”.
- “ABC” is search by Letter.
- “123” is search by Number.
7. Use the volume knob to toggle between the two options by moving the halo around the ABC icon.
8. Press in on the volume knob to select “ABC” or “123”.
9. Now a pop-up window will appear with Letters/Numbers in icons.
10. Use the volume knob to scroll through the Letters/Numbers until the Letter/Number you want is in the
middle of the carousel.
11. Press in on the volume knob to select that Letter/Number.
12. Continue selecting Letters/Numbers until you have entered the Name of the Movie.
13. Once the Name of the Movie is complete, scroll to the bottom of the pop-up window and select OK.
14. You will now see a list of Movies.
15. Use the volume knob to scroll through the list of Movies.
16. When the Movie you would like is in the middle of the screen.
17. Press in on the volume knob to select that Movie.
18. Now you will return to the iPod Video Play Screen and the Movie will start playing.

28 CMS5 CMS5 29
iPodVideo Operation
Owner’s Manual
English
Menu
1. While the video is playing, Press the MENU Button.
2. Use the volume knob to scroll through options until the halo is around the Menu Icon.
3. Press in on the volume knob to select Menu.
4. Now a pop-up window will appear with Menu option:
- Subtitles (ON and OFF).
5. Press in on the volume knob to select the Menu Option.
** Note: Not All Video Files Will Contain These Features. **
Subtitles (ON and OFF)
1. If you select Subtitles you will see the subtitles on the screen while the video is playing.
2. Use the volume knob to select your Subtitle options.
3. You can press the Back Button to return back to the iPod Video Play Screen.
Top
This feature will take you to the beginning of the current chapter.
1. While the video is playing, Press the MENU Button.
2. Use the volume knob to scroll through options until the halo is around the Top Icon.
3. Press in on the volume knob to select Top.
4. You will be taken back to the iPod Video Play Screen and the video will begin playing from the start of
the current chapter.
iPodVideo Operation
Owner’s Manual
English
Podcasts
1. From the iPod Play Screen, Press the MENU Button
2. Use the volume knob to scroll through options until the Podcasts Icon is in the middle of the carousel
3. Press in on the volume knob to select Podcasts
4. The list of downloaded Podcasts will now appear
5. Use the volume knob to scroll through the Podcasts
6. Press in on the volume knob to select the Podcast that is in the middle of the screen
7. You will now return to the iPod Play Screen and the Podcast will start playing
Podcasts Search by ABC or 123
1. From the iPod Play Screen, Press the MENU Button
2. Use the volume knob to scroll through options until the Podcasts Icon is in the middle of the carousel
3. Press in on the volume knob to select Podcasts
4. The list of your downloaded Podcasts will now appear
5. Press the MENU Button
6. Now a pop-up window will appear with two options to choose from: “ABC” or “123”
- “ABC” is search by Letter
- “123” is search by Number
7. Use the volume knob to toggle between the two options by moving the halo around the ABC icon
8. Press in on the volume knob to select “ABC” or “123”
9. Now a pop-up window will appear with Letters/Numbers in icons
10. Use the volume knob to scroll through the Letters/Numbers until the Letter/Number you want is in the
middle of the carousel.
11. You will now see a list of Podcasts starting with Alphabet/Letter
12. When the Podcast you would like is in the middle of the screen
13. Press in on the volume knob to select that Podcast
14. Once selected, You will see the list of tracks corresponding to selected Episode. Tracks start playing
when selected on a particular track. Browsing sequence should go through the different levels like
Episode->Tracks. Search can be done in each level.
15. Now you will return to the iPod Play Screen and the Podcast will start playing

30 CMS5 CMS5 31
iPod Video Operation
Owner’s Manual
English
[ SEEK] Seek Back Button
- Press and release button to go back to previous song
- Press and Hold for Three Seconds to scan back through song, release and song will continue playing
[SEEK ] Seek Forward Button
- Press and release button to advance to next song
- Press and Hold for Three Seconds to scan through song, release and song will continue playing
[ ] Play / Pause Button
- Press to PAUSE the song
- When track is PAUSED, press again to continue playing the song
[BACK] Back Button
- Press to go back to previous Menu or Settings Screen
- Press to backwards in multiple Menu Screens
- Press to return to current source play screen from Menu or Settings Screen
[MENU] Menu Button
Press to access additional options
- Repeat (Song, Folder, All or OFF)
- Random (ON or OFF)
- Shuffle (ON or OFF)
- Folders (Access Music Folders)
- Songs (Access Songs)
- SCAN option for Intro Music SCAN
USB 1 and USB 2 Operation
Owner’s Manual
English
Repeat
1. While the video is playing, Press the MENU Button.
2. Use the volume knob to scroll through options until the halo is around the Repeat Icon.
3. Press in on the volume knob to select Repeat.
4. Now a pop-up window will appear with Repeat options:
- Chapter (Repeats current Chapter).
- All (Repeats All Chapters).
- Off (Turns OFF the Repeat Feature).
5. Press in on the volume knob to select your Repeat function.
* If you change your mind and do not want to use the Repeat function, press the Back Button and you
will return to the iPod Video Play Screen.
Chapter
1. While the video is playing, Press the MENU Button.
2. Use the volume knob to scroll through options until the halo is around the Chapters Icon.
3. Press in on the volume knob to select Chapters.
4. Now a pop-up window will appear with a number pad for you to enter in the chapter number..
5. Use the volume knob to scroll through the numbers.
6. Press in on the volume knob to select the chapter number(s).
7. When you have finished your chapter selection.
8. Scroll to the bottom of the pop-up screen and select “OK”.
9. You will now return to the iPod Video Play Screen and the video will start playing from the selected
Chapter.

32 CMS5 CMS5 33
USB 1 and USB 2 Operation
Owner’s Manual
English
Folders
1.From the USB Play Screen, Press the MENU Button
2.Use the volume knob to scroll through options until the Folders Icon is in the middle of the carousel
3.Press in on the volume knob to select Folders
4.The list of your Folders will now appear
5.Use the volume knob to scroll through your Folders
6.Press in on the volume knob to select the Folder that is in the middle of the screen
7.It will display the list of songs present in that folder. Then press in on the volume knob to select the
song from the list. Now you will return to the play screen and songstarts playing.
Folders Search by ABC or 123
1. From the USB Play Screen, Press the MENU Button
2. Use the volume knob to scroll through options until the Folders Icon is in the middle of the carousel
3. Press in on the volume knob to select Folders
4. The list of your Folders will now appear
5. Press the MENU Button
6. Now a pop-up window will appear with two options to choose from: “ABC” or “123”
- “ABC” is search by Letter
- “123” is search by Number
7. Use the volume knob to toggle between the two options by moving the halo around the ABC icon
8. Press in on the volume knob to select “ABC” or “123”
9. Now a pop-up window will appear with Letters/Numbers in icons
10. Use the volume knob to scroll through the Letters/Numbers until the Letter/Number you want is in the
middle of the carousel.
11. Press in on the volume knob to select that Letter/Number
12. you will now see a list of folder starting with the selected Alphabet/Number.
13. If there is no match found for the selected alphabet/number, then pop up saying the same will be
displayed,
14. Use the volume knob to scroll through the list of Folder
15. When the Folder you would like is in the middle of the screen
16. Press in on the volume knob to select that Folder
17. It will display the list of songs present in that folder. Then press in on the volume knob to select the song
from the list. Now you will return to the play screen and songstarts playing
USB 1 and USB 2 Operation
English Owner’s Manual
Shuffle
1. From the USB Play Screen, Press the MENU Button
2. Use the volume knob to scroll through options until the Shuffle Icon is in the middle of the carousel
3. Press in on the volume knob to select Shuffle
4. Now a pop-up window will appear with Shuffle options:
- ON (Turns the Shuffle Feature ON)
- OFF (Turns the Shuffle Feature OFF)
5. After your choice has been made, you will see the Shuffle Icon appear on the USB Play Screen
Repeat
1. From the USB Play Screen, Press the MENU Button
2. Use the volume knob to scroll through options until the Repeat Icon is in the middle of the carousel
3. Press in on the volume knob to select Repeat
4. Now a pop-up window will appear with Repeat options:
- Song (Repeats current Song)
- Folder (Repeats songs in Folder)
- All (Repeats All songs)
- Off (Turns OFF the Repeat Feature)
5. After your choice has been made, you will see the Repeat Icon appear on the USB Play Screen
Random
1. From the USB Play Screen, Press the MENU Button
2. Use the volume knob to scroll through options until the Random Icon is in the middle of the carousel
3. Press in on the volume knob to select Random
4. Now a pop-up window will appear with Random options:
- ON (Turns the Random Feature ON)
- OFF (Turns the Random Feature OFF)
5. After your choice has been made, you will see the Random Icon appear on the USB Play Screen
SCAN
1. From the USB Play Screen, Press the MENU Button
2. Use the volume knob to scroll through options until the SCAN Icon is in the middle of the carousel
3. Press in on the volume knob to select SCAN
4. In play screen, Scan indicator will appear, indicating that it is in Scan mode and the first 10 seconds of
each song in the folder will play

34 CMS5 CMS5 35
USB 1 and USB 2 Operation
Owner’s Manual
English
[ SEEK] Seek Back Button
- No function
[SEEK ] Seek Forward Button
- Press and release button to advance to next song
-[ ] Play / Pause Button
- Press to PAUSE the song
- When track is PAUSED, press again to continue playing the song
[BACK] Back Button
- Press to go back to previous Menu or Settings Screen
- Press to go backwards in multiple Menu Screens
- Press to return to current source play screen from Menu or Settings Screen
Pandora Operation
Owner’s Manual
English
Songs
1.From the USB Play Screen, Press the MENU Button
2.Use the volume knob to scroll through options until the Songs Icon is in the middle of the carousel
3.Press in on the volume knob to select Songs
4.The list of your Songs will now appear
5.Use the volume knob to scroll through your Songs
6.Press in on the volume knob to select the Song that is in the middle of the screen
7.You will now return to the iPod Play Screen and the song will start playing
Songs Search by ABC or 123
1. From the USB Play Screen, Press the MENU Button
2. Use the volume knob to scroll through options until the Songs Icon is in the middle of the carousel
3. Press in on the volume knob to select Songs
4. The list of your Songs will now appear
5. Press the MENU Button
6. Now a pop-up window will appear with two options to choose from: “ABC” or “123”
- “ABC” is search by Letter
- “123” is search by Number
7. Use the volume knob to toggle between the two options by moving the halo around the ABC icon
8. Press in on the volume knob to select “ABC” or “123”
9. Now a pop-up window will appear with Letters/Numbers in icons
10. Use the volume knob to scroll through the Letters/Numbers until the Letter/Number you want is in the
middle of the carousel.
11. Press in on the volume knob to select that Letter/Number
12. You will now see a list of folder starting with the selected Alphabet/Number.
13. You will now see a list of Songs. If there is no match found for the selected alphabet/number, then pop
up saying the same will be displayed.
14. Use the volume knob to scroll through the list of Songs
15. When the Song you would like is in the middle of the screen
16. Press in on the volume knob to select that Song
17. Now you will return to the USB Play Screen and the song will start playing
Note: In all search option (for all source option), Searching is restricted to starting Alphabet/Number only
[MENU] Menu Button
Press to access additional options
- Stations (Music Stations from your Pandora Account)
- Bookmark (ON or OFF)
- Thumbs Up
- Thumbs Down
Note:
The following Pandora connection status may appear:
- Please login to Pandora on device - Unable to play due to music listening restrictions
- Device disconnected - Pandora server under maintainace
- Pandora not responding - Check the mobile app on device
- Skip limit reached - Skip not allowed
- Station does not exist - Select a station from station list
- Limited connectivity - Track rating failed
- Fetching stations information

36 CMS5 CMS5 37
Pandora Operation
Owner’s Manual
English
Bookmark
1. From the Pandora Play Screen, press the MENU Button
2. Use the volume knob to scroll through options until the Bookmark Icon is in the middle of the carousel
3. Press in on the volume knob to select Bookmark
4. Now a pop-up window will appear with Bookmark options:
- YES (Bookmarks the current song to your Pandora Account)
- CANCEL (Returns you back to the Pandora Play Screen)
5. If YES is selected, A pop up will appear with “Bookmark saved” screen for 2 seconds and then
displayagain the Pandora Play screen
6. If Bookmark failure occurs, Pop up window will appear with “Bookmark not saved” for 2 seconds
7. After your choice has been made, you will return to the Pandora Play Screen
Thumb Up
1. From the Pandora Play Screen, Press the MENU Button
2. Use the volume knob to scroll through options until the Thumb Up Icon is in the middle of the carousel
3. Press in on the volume knob to select Thumbs Up
4. After your choice has been made, you will return to the Pandora Play Screen
Thumb Down
1. From the Pandora Play Screen, Press the MENU Button
2. Use the volume knob to scroll through options until the Thumb Down Icon is in the middle of the
carousel
3. Press in on the volume knob to select Thumb Down
4. After your choice has been made, you will return to the Pandora Play Screen
General pop ups for Pandora:
1. Device disconnected
2. Pandora server under maintainance
3. Pandora not repsonding
4. Check the mobile app on the device
5. Skip limit reached
6. Limited connectivity etc
Pandora Operation
Owner’s Manual
English
Stations
1. From the Pandora Play Screen, press the MENU Button
2. Use the volume knob to scroll through options until the Stations Icon is in the middle of the carousel
3. Press in on the volume knob to select Stations
4. The list of your Stations will now appear
5. Use the volume knob to scroll through your Stations
6. Press in on the volume knob to select the Station that is in the middle of the screen
7. You will now return to the Pandora Play Screen and the song will start playing
Stations Search by ABC or 123
1. From the Pandora Play Screen, press the MENU Button
2. Use the volume knob to scroll through options until the Stations Icon is in the middle of the carousel
3. Press in on the volume knob to select Stations
4. The list of your Stations will now appear
5. Press the MENU Button
6. Now a pop-up window will appear with two options to choose from: “ABC” or “123”
- “ABC” is search by Letter
- “123” is search by Number
7. Use the volume knob to toggle between the two options by moving the halo around the ABC icon
8. Press in on the volume knob to select “ABC” or “123”
9. Now a pop-up window will appear with Letters/Numbers in icons
10. Use the volume knob to scroll through the Letters/Numbers until the Letter/Number you want is in the
middle of the carousel.
11. Press in on the volume knob to select that Letter/Number
12. You will now see a list of Stations starting with the same alphabet/number.
If there is no match found for the selected alphabet/number, then pop up saying the same will be
displayed,
13. Use the volume knob to scroll through the list of Stations
14. When the Station you would like is in the middle of the screen
15. Press in on the volume knob to select that Station
16. Now you will return to the Pandora Play Screen and the Station will start playing
17. Station Art is display for each station, if available else generic station Art will be displayed.
Note: In all search option (for all source option), Searching is restricted to starting Alphabet/Number only

38 CMS5 CMS5 39
Settings
Owner’s Manual
English
Clock
1. Press the Source Button (SRC)
2. Use the volume knob to scroll through the sources
3. When the Settings Icon is in the middle of the carousel, Press in on the volume knob to select
Settings
4. Once in Settings, rotate the volume knob to Clock
5. Press in on the volume knob to enter the Clock Settings
- Hour
- Minutes
- AM/PM
- 12 / 24 Hour Mode
** The halo will always default to Hour adjustment first, then minutes, AM/PM, and 12/24
6. With the halo around Hour, rotate the volume knob to adjust to the correct Hour
7. Press in on the volume knob to set the Hour
8. The halo will automatically shift to Minutes
9. With the halo around the Minutes, rotate the volume knob to adjust to the correct Minutes
10. Press in on the volume knob to set the Minutes
11. The halo will automatically shift to AM/PM
12. With the halo around the AM/PM, rotate the volume knob to change from AM to PM
13. Press in on the volume knob to set AM or PM
14. The halo will automatically shift to 12/24
15. With the halo around the 12/24, rotate the volume knob to change from 12 to 24 Hour Mode
16. Press in on the volume knob to set 12 or 24 Hour Mode
17. After the Clock has been set, you will return to the Settings Menu
System Reset
1.Press in Volume knob when System Reset option is focussed
2.Pop up window will appear with YES and CANCEL options
3.If selected YES by pressing on volume knob, then option to enter parental lock code will appear if
Parental Lock is set to ON. If code is not entered properly, then a confirmation screen saying “ Need
to proceed without resetting lock code ” will apeear
4.If Parental Lock is entered correctly (if applicable) or if LOCK is OFF, then a confirmation will appear
as below with the ACCEPT and CANCEL option
**THIS ACTION WILL RESET THE SYSTEM AND RESTORE BACK TO ALL FACTORY DEFAULT
SETTINGS**
** YOU WILL LOSE ANY SAVED FAVORITES AND SETTINGS**
5.If ACCEPT is selected, then System will reset by powering down and then it will automatically restart
6.if CANCEL is selected, then it will return back to the current source in use
Settings
Owner’s Manual
English
Settings
1. Press the Source Button (SRC)
2. Use the volume knob to scroll through the sources
3. When the Settings Icon is in the middle of the carousel, Press in on the volume knob to select
Settings
4. Once in Settings, the following features will be accessible:
- CMS5 Information
- Clock
- Date
- Bluetooth
5. Press in on the volume knob to select the Settings Option you would like to enter
CMS5 Information
1. Press the Source Button (SRC)
2. Use the volume knob to scroll through the sources
3. When the Settings Icon is in the middle of the carousel, Press in on the volume knob to select Settings
4. Once in Settings, use the volume knob to scroll to CMS5 Information
5. When the CMS5 Information Icon is in the middle of the screen, Press in on the volume knob to enter
the CMS5 Information Screen
6. After you have finished reviewing the CMS5 Information, Press the Back Button to return to the
previous Settings Screen
This section contains information for the
following CMS5 Features and Functions:
CMS5 Information
- Hardware Information
- Operating System Information (OS)
- Software Version Information
- Bluetooth Software Version Information
- Application Firmware Information
- System Reset
Other manuals for CMS5
4
Table of contents
Other Clarion Marine Equipment manuals

Clarion
Clarion CMD5 User manual

Clarion
Clarion M606 User manual

Clarion
Clarion M508 Repair manual

Clarion
Clarion M508 User manual

Clarion
Clarion CMD7 User manual

Clarion
Clarion CMD8 Repair manual

Clarion
Clarion M502 Repair manual

Clarion
Clarion M475 User manual

Clarion
Clarion CMM-30 User manual

Clarion
Clarion CMS1 Repair manual

Clarion
Clarion CMM-30BB User manual

Clarion
Clarion XMD3 User manual

Clarion
Clarion CMS3 Repair manual

Clarion
Clarion M303 Repair manual

Clarion
Clarion M275 User manual

Clarion
Clarion CMV1 User manual

Clarion
Clarion M4SSA User manual

Clarion
Clarion MF2 User manual

Clarion
Clarion M109 User manual

Clarion
Clarion CMS2 Repair manual