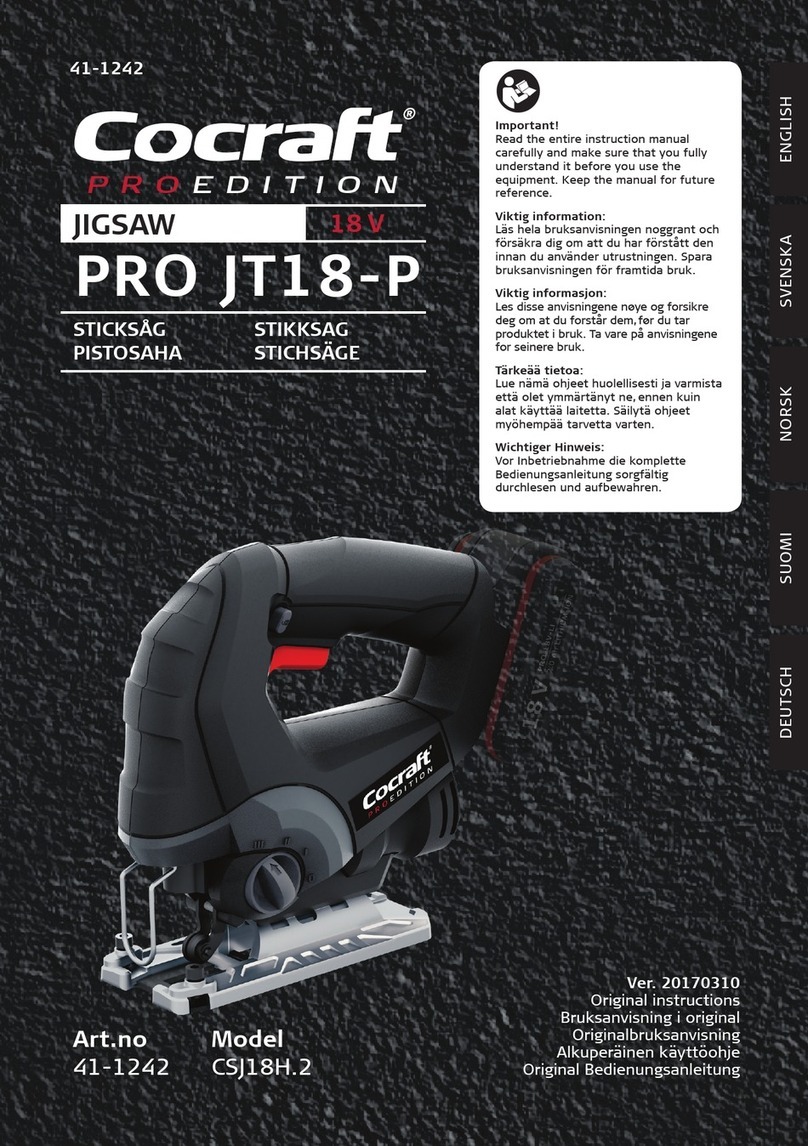
Cocraft PSJ750GH.1 User manual

ENGLISHSVENSKANORSKSUOMIDEUTSCH
Important!
Read the entire instruction manual
carefully and make sure that you fully
understand it before you use the
equipment. Keep the manual for future
reference.
Viktig information:
Läs hela bruksanvisningen noggrant och
försäkra dig om att du har förstått den
innan du använder utrustningen. Spara
bruksanvisningen för framtida bruk.
Viktig informasjon:
Les disse anvisningene nøye og forsikre
deg om at du forstår dem, før du tar
produktet i bruk. Ta vare på anvisningene
for seinere bruk.
Tärkeää tietoa:
Lue nämä ohjeet huolellisesti ja varmista
että olet ymmärtänyt ne, ennen kuin
alat käyttää laitetta. Säilytä ohjeet
myöhempää tarvetta varten.
Wichtiger Hinweis:
Vor Inbetriebnahme die komplette
Bedienungsanleitung sorgfältig
durchlesen und aufbewahren.
PROEDITION
Ver. 20151223
Original instructions
Bruksanvisning i original
Originalbruksanvisning
Alkuperäinen käyttöohje
Original Bedienungsanleitung
Art.no Model
40-9925 PSJ750GH.1
PRO JL750-P
JIGSAW 750 W
40-9925
STICKSÅG STIKKSAG
PISTOSAHA STICHSÄGE


ENGLISH
3
Jigsaw
Art.no 40-9925 Model PSJ750GH.1
Please read theentire instruction manual before using theproduct and then save
it for future reference. Wereserve theright for any errors in text or images and any
necessary changes made to technicaldata. Intheevent of technical problems or other
queries, please contact our Customer Services (see address details on theback).
Safety
General Safety Requirements – EN 60745-1
Warning: Readall theinstructions. Failure to comply with thefollowing instructions
can lead to electric shocks, fires and/or serious injury. Theterm “power tool” in
thewarning text below refers to your handheld mains operated or battery operatedtool.
SAVE THESE INSTRUCTIONS.
1) Work area
a) Keep thework area clean and well illuminated. Cluttered and poorly lit areas
inviteaccidents.
b) Do not use power tools in explosive environments,e.g. near to flammable
liquids, gases ordust. Powertools generate sparks that can easily ignite dust
orfumes.
c) Keep children and bystanders away from thearea where you are using
thepowertool. Distractions can cause you to lose your concentration and control.
2) Electrical safety
a) Theplug of thepower tool must fit correctly into thewall socket.
Nevermodify theplug in anyway. Neveruse anadaptor together with
earthed powertools. Unmodified plugs and suitable wall sockets minimize
therisk of electric shocks.
b) Avoid physical contact with earthed objects, such as pipes, radiators, ovens
or refrigerators. Thereis anincreased risk of receiving anelectrical shock if your
body is earthed.
c) Do not expose thepower tool to rain or other wet conditions. Waterentering
apower tool will increase therisk of electricshock.
d) Do not abuse themainslead. Neveruse thelead to carry thetool or pull
theplug from awall socket. Keepthelead away from heat, oil, sharp edges
and movingparts. Damaged or tangled leads increase therisk of electricshock.
e) When using power tools outdoors, use anextension lead that is suitable for
this purpose. Theuse of anextension lead designed for outdoor use decreases
therisk of electric shocks.

ENGLISH
4
3) Personal safety
a) Pay attention to what you are doing and use common sense when using
powertools. Neveruse power tools if you are tired or under theinfluence of
drugs, alcohol or medication. Onemoment of inattention while using apower
tool may result in serious injury.
b) Wear protective clothing. Alwayswear safety glasses. Usingprotective
clothing such as dust masks, non-slip safety shoes, helmets and ear defenders
when needed decreases therisk of injury.
c) Avoid accidental starts. Makesure that thepower switch is set to OFF before
plugging thetool into awall socket. Nevercarry apower tool with your finger on
thetrigger and never connect thepower tool to awall socket when theswitch is
set to ON, since it may result in injury.
d) Remove all service tools/keys before switching on thepowertool. Aservice
tool left on arotating part of thepower tool may result in personal injury.
e) Do not overreach. Makesure you stand steady and well balanced at
alltimes. Thiswill allow you to have more control in unexpected situations.
f) Wear suitable clothing. Donot wear loose-fitting clothing or jewellery.
Keephair, clothes and gloves away from movingparts. Loose-fitting clothes,
jewellery or long hair could potentially become caught in any movingparts.
g) If equipment for dust extraction or collecting is available make sure it is
connected and used properly. Useof dust collection equipment can reduce dust
related hazards.
4) Use and maintenance of the power tool
a) Do not force thepowertool. Usethecorrect power tool for your application.
Thecorrect power tool will perform thetask better and safer if used at thecorrect
feedrate.
b) Never use thepower tool if thepower switch does not switch thetool
on andoff. Anypower tool that cannot be controlled by thepower switch is
dangerous and must be repaired.
c) Unplug thelead from thewall socket before making any adjustments,
changing accessories or storing thepowertool. Theseprecautions reduce
therisk of thepower tool starting unexpectedly.
d) Storepower tools that are not being used out of children’sreach. Donot
allow people who are unfamiliar with thetool or its functions to operateit.
Powertools can be dangerous if they fall into thehands of inexperiencedusers.
e) Maintain powertools. Checkfor any incorrect settings, parts that
catch, broken parts or anything else which may cause thepower tool
to malfunction. Ifsomething is damaged it must be repaired beforeuse.
Accidents are frequently caused by poorly maintained powertools.

ENGLISH
5
f) Keep tools sharp andclean. Properly maintained cutting tools with sharp cutting
edges are less likely to bind and are easier to control.
g) Use thepower tool, accessories and similar according to theinstructions
and in anappropriate way suitable for thetype of power toolused. Alsotake
into consideration your work environment and thetype of work to bedone.
Usingthepower tool for apurpose other than that for which it is intended could
result in adangerous situation.
5) Service
a) Repairs and service should only be performed by qualified tradesmen, and only
with original spareparts. Thisguarantees that thesafety of thepower tool is maintained.
Safety Instructions – Jigsaw EN 60745-2-11
Warning: Alwaysdisconnect theplug from themains before adjusting, servicing or
performing maintenance on themachine.
• Hold thepower tool by its insulated gripping surfaces when performing
anoperation where thecutting accessory may contact hidden wiring or
thepower tool’s own mainslead. Cutting accessories which contact “live” wires
may make exposed metal parts of thepower tool “live” and could give theoperator
anelectricshock.
• If themains lead is damaged in any way it must be replaced by aqualified
electrician.
• Keepyour hands away from theblade and other movingparts.
• Donot reach under theworkpiece beingsawed. Beextra careful if theblade or
your hand is out ofsight. Makesure that theunderside of theworkpiece is free
ofobstacles.
• Donot use blunt or damaged saw blades. Bentsaw blades can easily break or
cause kickback.
• Startthesaw and let it run up to speed before starting tocut.
• Makesure that thesoleplate is in constant contact with theworkpiece during
sawing. Beextra careful when cutting with atilted soleplate as it is easy to exert
too much lateral force on thesawblade.
• Securetheworkpiece with aclamp, vice,etc.
• Makesure that thesettings are correct and that theblade is securely fastened in
theblade holder before beginning tosaw.
• Makesure that thesaw blade has come to acomplete stop before removing
thesaw from thecut. Thesaw blade should not be stopped by applying lateral
force to theside of theblade.

ENGLISH
6
Vibration
• Themeasurement of thevibration emission level declared in this instruction manual
has been carried out in accordance with astandardised test method described in
EN60745 and can be used for comparing one power tool with another.
• Themeasurement method may also be used for apreliminary assessment of
vibration exposure.
• Thedeclared vibration emission level applies when thepower tool is used in
accordance with this instruction manual. Ifhowever, thepower tool is used for
other purposes and with other accessories or has not been properly maintained,
thevibration emission level could increase significantly over thetotal working period.
• For anexact assessment of thevibration exposure, thetimes when thetool is
switched off or running idle should also be taken into account. Thissignificantly
reduces thevibration exposure over thetotal working period. Decideupon safety
measures to protect theoperator from theeffects of vibration during all types ofuse.
Product safety symbols
Read theinstruction manual beforeuse.
Always wear eye protection. Always wear ear protection.
Alwayswear adustmask.

ENGLISH
7
1111
1212
1313
1414
1515 11 22 33
55667788991010 104
16
Product description
1. Power trigger
2. Trigger lock button
3. Handle
4. Locking knob
5. Dust extractorport
6. Footplate tilt angle lockinglever
7. Footplate
8. Footplate bracket with anglescale
9. Pendulum action selector
10. Blade guide roller
11. Sawblade
12. Bladeguard
13. Toolless blade clamp (T-shank)
14. Worklight
15. Speed selector
16. Parallelguide

ENGLISH
8
13
10
4 4
Assembly and setup
Warning: Unplug thejigsaw before any service or adjustment.
Fitting the saw blade (T-shank)
1. Turn thejigsaw upside down and turn theblade
clamp ring (13) anticlockwise as far as it willgo.
Holdthering inplace.
2. Fully insert theblade into theblade clamp, teeth
facing forward.
3. Release theclamp ring and let it rotate back and lock
theblade inplace.
4. Push theblade into theclamp again and pull it down
to check that it is securely locked into position.
5. Make sure that theback edge of theblade is slotted
into thegroove in theguide roller (10).
Removing/Replacing the saw blade
1. Turn thejigsaw upside down and turn theblade
clamp ring (13) anticlockwise as far as it willgo.
Holdthering inplace.
2. Pull theblade out of theclamp.
3. Fit anew blade as describedabove.
Fitting the parallel guide
Slide theparallel guide into its clamps and tighten thelocking knob (4). Theparallel
guide can be fitted on either theright or theleftside.

ENGLISH
9
6
8
9
Footplate angle adjustment
Thefootplate (7) can be tilted up to 45° to theright orleft.
1. Turn thefootplate locking lever (6) through 90 degrees.
0Thin materials of sheet metal, wood
or plastic. Finecuts, tight curves.
lHard materials such as non-ferrous
metals and chipboard.
ll Thick materials of wood or plastic.
lll Wood, provides thehighest
removalrate.
2. Use thescale on
thefootplate bracket (8) to
set thedesired bevelangle.
Thereare several preset
angle markings but
thefootplate can be set to
any angle between 0and 45
degrees. Note: Thepreset
angle markings are accurate
enough for most general
purposes. Ifextra precision
is required, theangles should be checked using aprotractor.
3. Hold thefootplate in place and turn thelocking lever back
through 90 degrees so that it is in line with thebody of
thejigsaw to lock thefootplate in position.
4. Always make atest cut on apiece of waste material to
check theangle setting before starting to cut thereal
workpiece. Note: Remove or make sure that the parallel
guide’s locking knob, located at the side of the footplate,
is angled away from the saw.
Pendulum action selection
Thependulum action can be set to different levels to vary thecutting angle of theblade
for increased cutting efficiency. Select thependulum action setting which provides
theoptimum stock removal for thematerial that you are cutting. Forthefinest possible
cut, thependulum action should be set to position 0.
1. Thependulum action selector (9) sets thedegree of pendulumswing.
2. There are 4 fixed settings, turn theselector carefully until it clicks into asetting. Never
use excessive force when pushing thejigsaw forwards. Whenthependulum action is
used, theblade cuts only on theupward stroke. Referto thechart below as aguide.

ENGLISH
10
Dust extractor port
1. Attach thedust extractor port to thefootplate bracket as shown in thefigure.
2. Connect thehose of thevacuum cleaner (industrial vac, ash cleaner or dust
extractor) to thedust extractorport.
Cut line blower
Thesaw has ablower function which keeps thecut line free ofdust. Theaperture is
located just behind thebladeguide. Makesure that this aperture is kept free of debris
to ensure optimum blower performance.
LED work light
Thesaw has anLED work light (14) to help in poor lighting conditions. Thelight should
be kept clean to ensure optimum effect.
Operating instructions
Setting the speed
Thestroke rate is controlled using thespeed selector (15). Referto thetable below as
aguide.
• Note: Donot run thesaw for long periods at very lowspeed. Doingso can cause
themotor to overheat.
• When you have used thesaw at low speed and have finished work, let themotor
run at max speed under no load for aminute to cool itdown.
Material Speed setting
Wood 5–6
Metal 3–4
Aluminium 3–5
PVC 3–4
Ceramic 3–5

ENGLISH
11
Switching on/off
• Switchingon: Startthejigsaw by squeezing thetrigger (1).
• Switchingoff: Release thetrigger to switch thejigsawoff.
Thejigsaw is equipped with alock button to lock thetrigger on for longercuts.
Thisiswhat youdo:
Press thetrigger lock button (2) and trigger (1) simultaneously and then release
thetrigger before releasing thetrigger lock button. Todisengage thetrigger lock,
squeeze thetrigger and then releaseit.
Operating tips
Preparations
• Measure and mark out thesawing line carefully before starting tocut.
• Small workpieces should be securely clamped. Makesure that thepower supply cable
does not impede working operations or come into contact with theblade duringuse.
• Check that thesoleplate is locked at therequired angle before you begin sawing.
• If you are unsure about thechoice of blade speed or type of blade, test-cut apiece
of scrap of thesame material as theworkpiece.
Sawing
• Hold thejigsaw in afirmgrip. Makesure that thesaw blade is not in contact with
theworkpiece and then pull thetrigger to start thesaw. Letthemotor come up to
speed before starting tocut.
• Never apply excessive forward pressure to thetool – always let theblade do thework.
• Keep hands in sight, do not hold hands under theworkpiece where theblade
cannot beseen.
Internal cuts
This operation should be undertaken with great care and should only be performed by
experienced operators. Internal cutting is only possible in soft materials such aswood.
1. Restthefront of thesoleplate on
theworkpiece and tilt thesaw forwards.
Makesure that thesaw blade is not in
contactwith theworkpiece.
2. Runtheblade up to full speed and slowly
pivot thesaw so theblade starts to cut into
thematerial, then slowly lower theentire
soleplate onto theworkpiece.
(Alternatively, ahole can be drilled in thematerial
to provide astarting point for theblade.)

ENGLISH
12
Sawing metal
• Be careful, thesaw blade can easilybend.
• Use afiner toothed blade if thejigsaw vibrates alot during operation.
• Lower thespeed if thesaw blade becomes veryhot.
• Theuse of some kind of lubrication/coolant is recommended,e.g. alcohol for
aluminium and cutting oil forsteel.
• When cutting thin sheet metal, it is advisable to clamp thesheet to asheet of thin
plywood or similar on either side of themetal. Thensaw through all thelayers.
Troubleshooting guide
Thesaw does
notstart.
• Make sure that themains lead is undamaged and securely
plugged into awall socket.
• Make sure that thewall socket islive.
Thesaw runs
slowly.
• Adjust thespeed setting. Referto theSpeed setting
sectionabove.
• Remember not to use too much force on theblade when
cutting. Letit work at its ownpace.
• Is thebladeworn? Replace if necessary.
Heavy
vibrations.
• Make sure that thefootplate is held against theworkpiece.
• Check that theblade is in good condition and is correctly fitted.
Care and maintenance
• Warning: Unplug thejigsaw and remove theblade before any service or adjustment.
• If themains lead is damaged it should only be replaced by aqualified electrician.
• Clean thejigsaw by wiping it with adampcloth. Useonly mild cleaning agents,
never solvents or corrosive chemicals.
• Keep themotor ventilation openings free from contaminants.
• If thejigsaw is not to be used for anextended period, it should be unplugged and
stored in adry and dust-free location out of reach of children.
Responsible disposal
This symbol indicates that this product should not be disposed of with
general householdwaste. Thisapplies throughout theentire EU. Inorder
to prevent any harm to theenvironment or health hazards caused by
incorrect waste disposal, theproduct must be handed in for recycling
so that thematerial can be disposed of in aresponsible manner.
Whenrecycling your product, take it to your local collection facility or
contact theplace of purchase. Theywill ensure that theproduct is
disposed of in anenvironmentally sound manner.

ENGLISH
13
Specications
Rated voltage 220–240V AC, 50/60Hz
Mainslead 4m
Power 750W
Blade holder T
Variablespeed 800–3000spm
Stroke length 26mm
Tiltable footplate ±45°
Sawing capacity Wood 100mm, aluminium 25mm and steel 10mm.
Noise emission data LpA: 80dB(A), uncertainty KpA: 3dB(A)
LwA: 91dB(A), uncertainty KwA: 3dB(A)
Ear protection must be worn when
thesound level exceeds: 80dB(A)
Vibrationvalue ah,B 6.851m/s², K: 1.5m/s²
ah,M 6.766m/s², K: 1.5m/s²
Weight 3.1kg

SVENSKA
14
Sticksåg
Art.nr 40-9925 Modell PSJ750GH.1
Läs igenom hela bruksanvisningen före användning och spara den sedan för fram-
tidabruk. Vireserverar oss förev. text- och bildfel samt ändringar av tekniskadata.
Vid tekniska problem eller andra frågor, kontakta vår kundtjänst (se adressuppgifter
påbaksidan).
Säkerhet
Generella säkerhetsföreskrifter – EN 60745-1
Varning! Läsalla instruktioner. Omnedanstående instruktioner inte följs kandetta
leda till elektrisk stöt, brand eller allvarligskada. Termen”elektriskt handverktyg”
ivarningstexten nedan refererar till ditt nätanslutna eller batteridrivna handverktyg.
SPARA DESSA INSTRUKTIONER.
1) Arbetsutrymmet
a) Håll arbetsutrymmet rent och väl upplyst. Belamrade och mörka utrymmen ökar
risken för olyckor.
b) Använd inte elektriska handverktyg iexplosiva miljöer, som inärheten av lättan-
tändliga vätskor, gaser ellerdamm. Elektriska handverktyg genererar gnistor som
kan antända damm ellerångor.
c) Håll undan barn och åskådare medan du använder det elektriska handverktyget.
Störningsmoment kan göra att du förlorar kontrollen över verktyget.
2) Elektrisk säkerhet
a) Det elektriska handverktygets stickpropp måste passa ivägguttaget.
Modifiera aldrig stickproppen på någotvis. Användaldrig adapter
tillsammans med jordade elektriska handverktyg. Omodifierade stickproppar
och passande vägguttag minskar risken för elektriskstöt.
b) Undvik kroppskontakt med jordade föremål som rör, element, köksspis eller
kylskåp. Detinnebär ökad risk för elektrisk stöt om din kropp är jordad.
c) Utsätt inte det elektriska handverktyget för regn eller våta förhållanden.
Omvatten tränger in iettelektriskt handverktyg ökar det risken för elektriskstöt.
d) Se till att nätsladden inte skadas. Användaldrig nätsladden för att rycka
stickproppen ur vägguttaget eller bära eller dra handverktyget. Hållundan
nätsladden från värme, olja, vassa kanter och rörligadelar. Skadade eller
trassliga nätsladdar ökar risken för elektriskstöt.
e) När du använder ettelektriskt handverktyg utomhus, använd enskarvsladd
anpassad för detta ändamål. Användning av enskarvsladd för utomhusbruk
minskar risken för elektriskstöt.

SVENSKA
15
3) Personlig säkerhet
a) Var uppmärksam på vad du gör och bruka sunt förnuft när du använder
ettelektriskt handverktyg. Användinte ettelektriskt handverktyg om du
är trött eller påverkad av droger, alkohol eller medicinering. Ettögonblicks
ouppmärksamhet när du använder ettelektriskt handverktyg kan resultera iallvarlig
personskada.
b) Använd skyddsutrustning. Bäralltid skyddsglasögon. Användning av skydds-
utrustning som andningsskydd, halksäkra skyddsskor, hjälm och hörselskydd vid
behov minskar risken för personskada.
c) Undvik oavsiktligstart. Setill att strömbrytaren är iavstängt läge innan du
ansluter stickproppen till vägguttaget. Attbära ettelektriskt handverktyg med
ettfinger på strömbrytaren/avtryckaren eller att ansluta ettelektriskt handverktyg till
elnätet när strömbrytaren är ipåslaget läge ökar risken för olyckor.
d) Ta bort alla serviceverktyg/nycklar innan du slår på det elektriska handverk-
tyget. Ettkvarglömt serviceverktyg på enroterande del av det elektriska handverk-
tyget kan resultera ipersonskada.
e) Sträck dig inte förlångt. Setill att du står stadigt med god balans helatiden.
Dettamöjliggör bättre kontroll ioväntade situationer.
f) Bär lämplig klädsel. Bärinte löst sittande kläder eller smycken. Hållundan
hår, kläder och handskar från rörligadelar. Lösakläder, smycken eller långt hår
kan fastna irörligadelar.
g) Om utrustning för utsugning och uppsamling av damm finns tillgänglig, se till
att denna är ansluten och används ordentligt. Användning av dessa hjälpmedel
kan minska risken för dammrelaterade olyckor.
4) Användning och underhåll av det elektriska handverktyget
a) Pressa inte det elektriska handverktyget. Användettelektriskt handverktyg
som är avsett för det arbetsmoment duutför. Korrekt elektriskt handverktyg gör
jobbet bättre och säkrare med avsedd matningshastighet.
b) Använd inte det elektriska handverktyget om strömbrytaren inte slår på och
stänger av verktyget. Allaelektriska handverktyg som inte kan kontrolleras med
strömbrytaren är farliga och måste repareras.
c) Ta stickproppen ur vägguttaget innan du utför några justeringar, byter
tillbehör eller lägger undan det elektriska handverktyget för förvaring.
Dessaåtgärder iförebyggande syfte minskar risken för att starta det elektriska
handverktyget oavsiktligt.
d) Förvara elektriska handverktyg som inte används utom räckhåll för barn och
låt inte personer som inte är förtrogna med det elektriska handverktyget eller
dessa instruktioner användadet. Elektriska handverktyg är farliga om de kommer
ihänderna på ovana användare.

SVENSKA
16
e) Underhåll elektriska handverktyg. Kontrollera om något är felinställt, om
rörliga delar kärvar, om delar har gått sönder eller om något annat har
inträffat som kan påverka funktionen hos det elektriska handverktyget.
Omnågot är skadat måste det repareras före användning. Mångaolyckor
beror på dåligt underhållna elektriska handverktyg.
f) Håll verktygen vassa ochrena. Ordentligt underhållna skärverktyg med vassa eggar
är mindre benägna att kärva och lättare att kontrollera.
g) Använd det elektriska handverktyget, tillbehör och liknande enligt instruktionerna
och på det sätt som är ämnat för just den typen av elektriskt handverktyg,
och ta även hänsyn till arbetsförhållandena och den typ av arbete som ska
utföras. Användning av det elektriska handverktyget för andra arbeten än vad det
är ämnat för kan resultera ienfarlig situation.
5) Service
a) Låt behörig personal utföra service och reparationer, och endast med
originalreservdelar. Dettagaranterar att säkerheten hos det elektriska
handverktyget behålls.
Säkerhetsinstruktioner – sticksåg EN 60745-2-11
Varning: Draalltid nätsladdens stickpropp ur vägguttaget före justering, service eller
underhåll av maskinen.
• Håll ielhandverktygets isolerade handtag när du använder det där skär-
verktyget kan komma ikontakt med dolda ledningar eller elhandverktygets
egensladd. Omskärverktyget kommer ikontakt med strömförande ledningar kan
oisolerade delar av elhandverktyget bli strömförande och användaren riskerar att
utsättas för elektriskstöt.
• Om nätkabeln på något sätt skadas ska den bytas av behörig elektriker.
• Håll undan händerna från bladet och andra rörligadelar.
• Sträck dig inte under materialet somsågas. Varextra försiktig om bladet eller handen
är skymda vid sågning. Setill att det är fritt på undersidan av materialet som
skasågas.
• Använd inte slöa eller skadade sågblad. Böjdasågblad kan lätt brytas av eller
orsakakast.
• Starta motorn och låt den gå upp ifullt varv innan sågen förs mot arbetsstycket.
• Se till att fotplattan ligger anmot arbetsstycket under hela arbetsmomentet, var
extra försiktig vid snedställd fotplatta då det är lätt att felbelasta sågbladet isidled.
• Säkra arbetsstycket med tving, skruvstyckeetc.
• Kontrollera att inställningarna är rätt och att bladet sitter fast ifästet innan
sågningen påbörjas.
• Se till att sågbladet har stannat helt innan maskinen tas ifrån sågsnittet, sågbladet
får inte bromsas genom att man trycker på desssida.

SVENSKA
17
Vibration
• Mätningen av den vibrationsnivå som anges idenna bruksanvisning har utförts
enligt enmätmetod som är standardiserad iEN60745 och kan användas vid jäm-
förelse av olika elektriska handverktyg.
• Mätmetoden är även lämplig för preliminär bedömning av vibrationsbelastningen.
• Den angivna vibrationsnivån gäller när det elektriska handverktyget används på
det sätt som beskrivs iden här bruksanvisningen. Omdäremot det elektriska
handverktyget används för andra ändamål och med andra tillbehör eller inte har
underhållits ordentligt kan vibrationsnivån under arbetsperioden öka betydligt.
• För enexakt bedömning av vibrationsbelastningen bör även de tider beaktas när
det elektriska handverktyget är frånkopplat eller är igång utan att det används.
Dettareducerar vibrationsbelastningen betydligt för den totala arbetsperioden.
Bestäm säkerhetsåtgärder för att skydda operatören mot vibrationernas inverkan
vid alla typer av användning.
Produktmärkning med säkerhetssymboler
Läs hela bruksanvisningen!
Använd alltid skyddsglasögon. Använd alltid hörselskydd.
Användalltid munskydd.

SVENSKA
18
16
1111
1212
1313
1414
1515 11 22 33
55667788991010 104
Produktbeskrivning
1. Strömbrytare
2. Spärr för strömbrytare
3. Handtag
4. Låsskruv
5. Stos för dammsugare
6. Reglage för inställning av fotplattans vinkel
7. Fotplatta
8. Fotplattans fäste med skala för sidolutning
9. Reglage för inställning av pendelrörelse
10. Bladstyrning
11. Sågblad
12. Fingerskydd
13. Verktygslöst sågbladsfäste (T-fäste)
14. Belysning
15. Reglage för inställning av varvtal
16. Sidoanslag

SVENSKA
19
13
10
4 4
Montering och justering
Varning! Draut stickproppen ur vägguttaget före all justering och service av sticksågen.
Montering av sågblad (T-fäste)
1. Vänd sågen upp och ner och vrid bladhållarens spärr
(13) moturs så lång detgår. Hållkvar spärren.
2. Tryck ner bladet helt ihålet ihållaren, sågtänderna
ska peka framåt.
3. Släpp spärren, den roterar tillbaka automatiskt och
låser fast sågbladet.
4. Tryck ner bladet ihållaren igen och dra det sedan
utåt för att kontrollera att det har låst fast ordentligt.
5. Se till att bladets bakkant ligger ibladstyrningen (10).
Ta bort/byta sågblad
1. Vänd sågen upp och ner och vrid bladhållarens spärr
(13) moturs så lång detgår. Hållkvar spärren.
2. Dra ut bladet ur hållaren.
3. Sätt iettnytt blad enligtovan.
Montering av sidoanslag
Skjut in sidoanslaget isina fästen och dra fast det med låsskruven (4).
Sidoanslagetkan skjutas in från vänster eller högersida.

SVENSKA
20
6
8
9
Inställning av fotplattans lutning
Fotplattan (7) kan vinklas till max 45° åt höger eller vänster.
1. Vrid ut reglaget (6) så att det står i90° vinkel frånsågen.
3. Håll fast plattan och vrid tillbaka reglaget för att låsa plattan
idet nyaläget.
4. Provsåga alltid ienprovbit för att försäkra dig om att vinkeln
är rätt innan du sågar iarbetsstycket. Obs! Ta bort eller se till
att montera låsskruven för sidoanslaget på den sida fotplattan
som vinklas från sågen.
0Tunna arbetsstycken iplåt, trä
ellerplast. Finasnitt, snäva svängar.
lHårda material,t.ex. ickejärnhaltiga
metaller och spånskivor.
ll Tjocka arbetsstycken iträ ellerplast.
lll Trä, ger högst avverkning.
2. Använd skalan på fästet (8)
för att ställa in vinkeln så att
linjen vid skalan står mot
någon av de vinklar som
finns utsatta (du kan också
ställa plattan ivalfri vinkel).
Obs! Deutsatta vinklarna
fungerar utmärkt vid normal
användning. Vidextra
noggrann sågning, ställ in
vinklarna med engradskiva
för ökad precision.
Inställning av pendelrörelse
Pendelrörelsen kan öka avverkningen och du bör prova dig fram till optimal
avverkning för aktuellt material. Villdu ha ettså fint snitt som möjligt ska du ställa
pendelfunktionen iläge 0.
1. Vrid reglaget (9) för reglering av pendelrörelse.
2. Reglaget har 4 fasta lägen, vrid reglaget försiktigt tills det ”klickar” fast iönskatläge.
Pressa aldrig sågen hårt framåt. Närpendelrörelse används sågar bladet endast
på uppåtgående rörelse. Använd tabellen nedan som referens.
Table of contents
Languages:
Other Cocraft Power Tools manuals

Cocraft
Cocraft Pro Edition JT18-P User manual

Cocraft
Cocraft LXC MTG18 User manual

Cocraft
Cocraft 18-3282 User manual

Cocraft
Cocraft GSW14T User manual

Cocraft
Cocraft ASYPHT04180 User manual

Cocraft
Cocraft HH 2000 User manual

Cocraft
Cocraft HMT300 User manual

Cocraft
Cocraft LXC JS18 User manual

Cocraft
Cocraft KK-015P User manual

Cocraft
Cocraft TY-MT300C-UK User manual
Popular Power Tools manuals by other brands

Festool
Festool Carvex PSC 400 EB Original operating manual

Alpha tools
Alpha tools ASE 24 S operating instructions

Lyman
Lyman 7777758 operating instructions

EINHELL
EINHELL TE-CD 18/1 Li Original operating instructions

Raider
Raider Pro RDP-SST20 SOLO user manual

Precision instruments
Precision instruments C2FR600H user manual