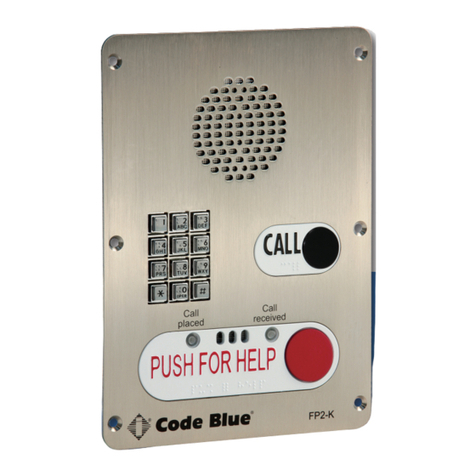
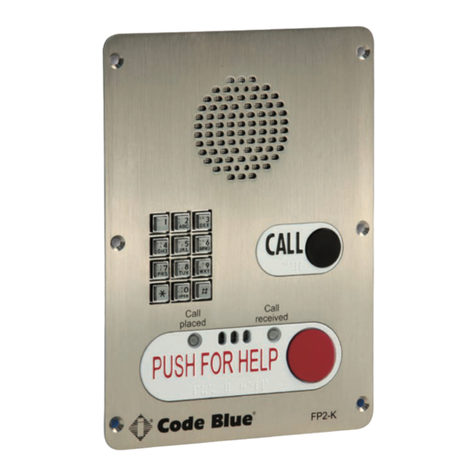
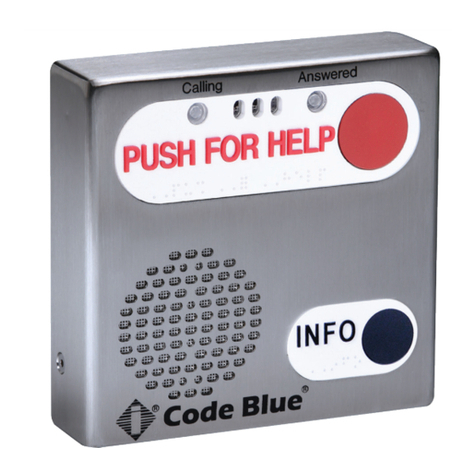
Code Blue IA3100 Service manual

Administrator Guide
800.205.7186 •www.codeblue.com
IA3100
Legacy Speakerphone
Installation, Configuration, Operation & Troubleshooting

Code Blue •259 Hedcor Street •Holland, MI 49423 USA •800.205.7186 •www.codeblue.com GU-145-Epage 2 of 23
IA3100
Administrator Guide
Table of Contents
Section Page
2 Introduction................................................................................... 3
3 Getting Started.............................................................................. 4
4 Installation..................................................................................... 5
5 Basic Programming...................................................................... 7
6 Initial Calling In Commands......................................................... 8
7 Important Initial Programming Information................................ 9
8 First Time Programming Instructions....................................... 10
9 Advanced Programming............................................................. 12
10 Troubleshooting.......................................................................... 18
11 Warranty....................................................................................... 23

Code Blue •259 Hedcor Street •Holland, MI 49423 USA •800.205.7186 •www.codeblue.com GU-145-Epage 3 of 23
IA3100
Administrator Guide
2 Introduction
Thank you for choosing the Code Blue IA3100 analog speakerphone, intercom and paging device(s)
for indoor and outdoor applications. These speakerphones are part of our Emergency Signaling
group of products that are built to meet the latest regulations, withstand the harshest elements and
be proactive solutions for when you need them most. This guide provides installation and setup
information for obtaining the best performance with the IA3100 speakerphone. For programming
and troubleshooting, please refer to the IA3100 User Guide.
Note: The IA3100 has been discontinued, or “end of life,” in production and repair. However, if you
need to replace the microphone, speaker or button(s), you may still order replacements through our
customer service department.
Code Blue is pleased to announce the availability of the Interact 4100 auxiliary powered analog
speakerphone. Expanded programming capabilities, enhanced speaker and microphone sensitivity,
extended battery backup hours and increased phone number and message storage make the
IA4100 the most advanced hands-free speakerphone available.
IA3100 Legacy Speakerphone

Code Blue •259 Hedcor Street •Holland, MI 49423 USA •800.205.7186 •www.codeblue.com GU-145-Epage 4 of 23
IA3100
Administrator Guide
3 Getting Started
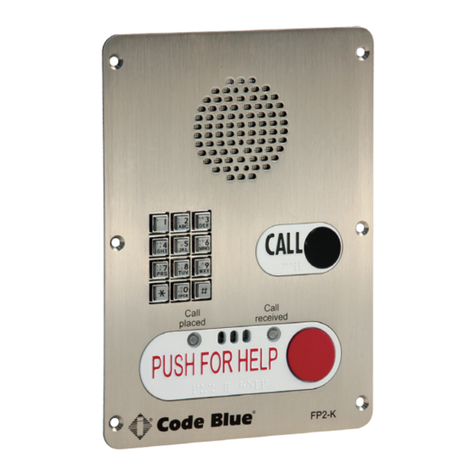
The IA3100 is a hands-free, ADA compliant emergency speakerphone designed for outdoor or
indoor use. It is a highly vandal resistant unit incorporating both a .125” stainless steel faceplate and
a self-healing, aluminum 1½” piezoelectric button.
When a user touches the button, IA3100 will automatically dial one of the three programmed num-
bers (determined by priority programming), or ring down to a PBX, and illuminate a 3/8” diameter
vivid red LED indicating “Call placed.” Upon receipt of the call, the IA3100 identies itself with either
a digital voice message and/or digital location identier (if programmed to do so), and illuminates a
separate 3/8” diameter green LED indicating “Call received.” The IA3100 is also capable of activat-
ing peripheral devices, such as CCTV or strobe lights via its two auxiliary dry contact outputs. All
functions of the IA3100 are remotely programmable via any touch-tone phone, and are protected by
a user-dened security code.
NOTE: Programming via a cell phone is subject to the quality of the call’s DTMF tone transmission.
Throughout this guide you will see the following two references:
Caller: This is the person activating the IA3100 speakerphone by pressing a button or activating the
auxiliary input.
Called Party: This is the person receiving the call from the IA3100; typically guards, 911 operators,
dispatch ofcers, etc.

Code Blue •259 Hedcor Street •Holland, MI 49423 USA •800.205.7186 •www.codeblue.com GU-145-Epage 5 of 23
IA3100
Administrator Guide
4 Installation
The IA3100 speakerphone comes with your choice of single button, dual button or dual button with
keypad faceplate. The internal components consist of a speaker, microphone, PCB and mounting
hardware.
Attach the Electronics Clip
1. Align the two holes in the steel clip with the two threaded holes on the back of the faceplate.
2. Attach the clip to the faceplate using two #6 screws (supplied).
Connect the IA3100 to the Faceplate
1. Plug the gray 20-pin ribbon cable into the faceplate.
2. Clip the IA3100 to the faceplate, tucking the excess ribbon cable under the IA3100.
4 Installation
Attach the Electronics Clip
1. Align the two holes in the steel clip with the two threaded holes on the back of the
faceplate.
2. Attach the clip to the faceplate using two (2) #6 screws (supplied).
Connect the IA3100 to the Faceplate
1. Plug the gray 20-pin ribbon cable from the IA3100 into the faceplate.
2. Clip the IA3100 to the faceplate, tucking the excess ribbon cable under the
IA3100.
(Continued on next page)

Code Blue •259 Hedcor Street •Holland, MI 49423 USA •800.205.7186 •www.codeblue.com GU-145-Epage 6 of 23
IA3100
Administrator Guide
Connect Wiring Harness
The green, 14-pin Phoenix connector will plug into the IA3100. This connector is where all wiring
connections are made.
Pin# Function
1
2
Power input (12-30 volts DC or 12-24 volts AC)
3 Tip (Telephone Line)
4 Ring (Telephone Line)
5
6
Auxiliary Output #1 (100mA)
7
8
Auxiliary Output #2 (100mA)
9
10
Auxiliary Input #1
11
12
Auxiliary Input #2
13
14
Auxiliary Input #3
Install the IA3100 Faceplate into Unit
1. The phone/faceplate assembly is installed in the unit using six counter-sunk security
screws.
Installation (continued)
Connect Wiring Harness
The green, 14-pin Phoenix connector will plug into the IA3100 (this connector is where
all wiring connections are made).
Pin #
Function
1
2
Power input (12-30 volts DC or 12-24 volts AC)
3
Tip (Telephone Line)
4
Ring (Telephone Line)
5
6
Auxiliary Output #1 (100mA)
7
8
Auxiliary Output #2 (100mA)
9
10
Auxiliary Input #1
11
12
Auxiliary Input #2
13
14
Auxiliary Input #3
Install the IA3100 Faceplate into Unit
1. The phone/faceplate assembly is installed in the unit using six (6) counter-sunk
security screws.

Code Blue •259 Hedcor Street •Holland, MI 49423 USA •800.205.7186 •www.codeblue.com GU-145-Epage 7 of 23
IA3100
Administrator Guide
5 Basic Programming
This Fast Start instruction sheet covers the most commonly utilized features of the IA3100
1. PROGRAMMING A PHONE NUMBER TO DIAL
Call the extension or phone number of the CB unit.
After the RFA tone:
22258# Programming Mode
90# Defaults the Phone
50 <phone number> # 1st Phone, Button #1 Dials
51 <phone number> #
2nd Phone, Button #1 Dials
52 <phone number> #
3rd Phone, Button #1 Dials
53 <phone number> # 1st Phone, Button #2 Dials
54 <phone number> #
2nd Phone, Button #2 Dials
55 <phone number> #
3rd Phone, Button #2 Dials
# Hold for 2 seconds to exit pro-
gramming
2. PROGRAMMING RING DOWN/HOTLINE
Call the extension or the phone number of the CB
unit. After the RFA tone:
22258# Programming Mode
90# Defaults the Phone
354# Set phone for ring down
# Hold for 2 seconds to exit pro-
gramming
3. Recording Messages
Call the extension of the phone number of the CB
unit, after the RFA tone:
22258# Programming Mode
30#
31#
32#
33#
Choose where the messages will play:
30 plays to operator when call answered
31 plays at the unit upon red button touch -
default
32 message 10 plays at the unit, message,
11 plays to operator when call answered
33 messages 10 & 11 plays to both parties
when call answered
10 10 <Record 1st message>, hit # to end your
recording
11
11 <Record 2nd message>, hit # to end your
recording, only usable in modes 32 & 33
721#
Message Repetition; 0, 1, 2, 3, 4
# Hold for 2 seconds to exit programming
Programming
IA3100 14 PIN PLUG DIAGRAM
The following commands can be used by the called
party after the IA3100 places a call. These commands
cannot be used in programming mode.
0 Play 1st message
1 Extend off hook timer
2 Microphone gain toggle, (2 beeps = normal) (1 beep =
high)
3
Stop playing voice message
4
Turn on auxiliary output #1
5 Speaker toggle, (2 beeps = off) (1 beep = on)
6
Turn auxiliary output #2 on (invalid when slaved)
7Transmit ANI (Automatic Number Identier)
8 Speaker volume up
9 Speaker volume down
*0 Mic on-off (2 beeps = off) (1 beep = on)
*1 Auxiliary output stays on for 10 mins
*2 Auxiliary output stays on for 20 mins
*3 Auxiliary output stays on for 30 mins
*4 Turns off auxiliary output #1
*5 Turns off auxiliary output #2 (invalid when slaved)
*6 Disable auxiliary input #1 (valid when cmd 85 has been
programmed)
# Hold for 2 seconds to exit call (hang up)
Commands During A Call
Auxiliary Output #1 Closed until end of the call
Auxiliary Output #2 Slaved to Auxiliary #1
Auxiliary Outputs (default)
Pin 1
12 – 24V A Cor DC
12 – 24V AC or DC
Phone Line TIP
P hone L ine R ING
Aux Output #1
Aux Output #1
Aux Output #2
Aux Output #2
Aux Input #1
Aux Input #1
Aux Input #2
Aux Input #2
Aux Input #3
Aux Input #3
Code Blue •259 Hedcor Street •Holland, MI 49423 USA •800.205.7186 •www.codeblue.com GU-145-Epage 8 of 23
IA3100
Administrator Guide
6 Initial Calling In Commands
Commands on Initial Call In
Command Explanation Format/Default
1 Establish voice communication with IA3100
(two-way monitoring)
1<<monitor password>>#
2 Put the IA3100 into programming or
diagnostic mode
2<<programming password>>#
4 Establish silent monitoring with the IA3100
(one-way monitoring)
4<<monitor password>>#

Code Blue •259 Hedcor Street •Holland, MI 49423 USA •800.205.7186 •www.codeblue.com GU-145-Epage 9 of 23
IA3100
Administrator Guide
7 Important Initial Programming Information
In all instances, the information to be programmed into the phone is represented by <<name>>.
Therefore, when the instructions call for the entering of 2<<programming password>>#, simply
press 2and the appropriate digits followed by #on your telephone keypad. For example, since the
default password on the IA3100 is 2258, you would input 2 2258 # to enter programming mode.
When you enter a command correctly, the unit will respond with a single beep. If a command has
been entered incorrectly, the unit will respond with a triple beep (rejection tone). When commands
are met with a triple beep, the command has not been accepted and will not affect the programming
of the unit.
As a precaution against tampering, entering an incorrect Programming Password or Monitor Pass-
word will cause the phone to hang up.
While many of the instructions indicate calling the unit as a rst step, other programming steps can
be strung together. Any time the unit responds (with either a single beep or a rejection tone) it is
capable of accepting another command.
The unit can be forced to hang up by pressing the pound button “#” for at least two seconds. Oth-
erwise, hanging up the guard telephone will result in the phone hanging up once it has received a
signal from the PBX (if capable), or once the programmed time-out period has expired (Command
64).
When you rst dial into the IA3100, you will hear a Request for Acknowledge (RFA) tone. If a re-
sponse is not received within ve seconds, the IA3100 will hang up. Because your phone has not
yet been programmed, you should press 2<<2258>># on your touch-tone keypad to enter program-
ming mode.

Code Blue •259 Hedcor Street •Holland, MI 49423 USA •800.205.7186 •www.codeblue.com GU-145-Epage 10 of 23
IA3100
Administrator Guide
8 First Time Programming Instructions
Enter Password
1. Call the unit from a touch-tone phone. The IA3100 will answer at the rst ring. When the
IA3100 answers and is ready to receive a command you will hear a Request For Acknowl-
edge (RFA) tone.
2. From the time of the RFA, you have ve seconds to enter a “2”. The “2” must be followed by
the programming password (default is 2258) and “#”. (2 – 2258 – #)
3. If the password is correct, you will hear a single beep and you can continue to enter your
next command. If the password is incorrect, you will hear a triple beep and the IA3100 will
hang up.
Enter Basic Programming
1. Enter “2 - 2258#” to enter programming.
2. Enter “90 - #” (resets phone to defaults) wait for beep.
3. Enter “50<<1st Emergency Number>>#” (Sets the rst number to call when the red button
is pressed). Wait for beep. Repeat for command 51, 52. (51 to 55 if using a IA3100-D or
IA3100-K Faceplate)
4. Hold down “#” for two to three seconds to exit programming.
Ring Down Mode Programming
1. Enter “2 - 2258#” to enter programming.
2. Enter “90 - #” (resets phone to defaults), wait for beep.
3. For Ring Down or “Hot-Line,” enter “35 - 4 - #”. Wait for beep.

Code Blue •259 Hedcor Street •Holland, MI 49423 USA •800.205.7186 •www.codeblue.com GU-145-Epage 11 of 23
IA3100
Administrator Guide
Commands During a Call
Command Explanation Format/Default
0Play 1st message – Play rst message to
guard only (speaker and mic are disabled).
0
1Extend the off hook time to the dened
time. (see command 63)
1
2Mic gain – The IA3100 responds with a
single beep when put into high. The IA3100
responds with a double beep when put into
low.
2 / Default = Low
3Stop playing voice message 3
4Turn on auxiliary output #1 4
5Speaker – IA3100 responds with a single
beep when the speaker is turned on. The
IA3100 responds with a double beep when it
is turned off.
5 / Default = On
6Turn on auxiliary output #2 – Not valid if
auxiliary output #2 is slaved (see
command 44)
6
7Transmit the ANI (see command 35) 7
8Speaker volume up 8
9Speaker volume down 9
*0 Mic – IA3100 responds with a single beep
when the mic is turned on. The IA3100
responds with a double beep when it is
turned off.
*0
*1 Auxiliary outputs stay on for 10 minutes –
10 minutes starts when command is given.
*1
*2 Auxiliary outputs stay on for 20 minutes
(See command * 1)
*2
*3 Auxiliary outputs stay on for 30 minutes
(See command * 1)
*3
*4 Turn off auxiliary output # 1 and output #
2 if slaved
*4
*5 Turn off Auxiliary output #2 – Not valid if
auxiliary output #2 is slaved (see command
44)
*5
*6 Disable auxiliary input #1 – Disable for time
dened by command 85 (This allows the
guard to temporarily disable the actions of
auxiliary input #1)
*6
#Hang up # must be held for 2 seconds

Code Blue •259 Hedcor Street •Holland, MI 49423 USA •800.205.7186 •www.codeblue.com GU-145-Epage 12 of 23
IA3100
Administrator Guide
9 Advanced Programming
Information programmed into the phone is represented by <numbers, symbols and/or recording>.
When the instructions call for entering 2<programming password>#, simply press 2and the default
password, followed by the #(pound) symbol on your telephone keypad. For example, the default
password on the IA3100 is 2258. To put the IA3100 into Program Mode, dial 22258#.
When you enter a command (CMD) correctly, the unit will respond with a single beep (DTMF “B”).
If a command has been entered incorrectly, the unit will respond with a rejection triple beep (DTMF
“BBB”). When commands are met with a triple beep, the command has not been accepted and will
not affect the programming of the unit.
All necessary commands can be entered during one programming session. Any time the unit
responds (with either a single beep or a rejection triple beep), it is capable of accepting another
command.
When you rst dial into the IA3100 speakerphone, you will hear a Request For Acknowledgment
(RFA) tone. Because the unit has not yet been programmed, you should dial 22258# on your touch-
tone keypad to enter Program Mode.
The unit can be forced to hang up by pressing the # (pound) symbol for two seconds on the
telephone keypad. If the # sequence is not used to hang up the IA3100, the phone is programmed
to recognize a Disconnect Supervision, such as a WINK, reorder tones or revert to dial tone from the
PBX or PSTN. Also available is a Silent Time Out (CMD 64). The speakerphone will hang up once
it has received any of these standard end of call signals. If none of those Supervised Disconnects
occur, the speakerphone will stay active (i.e., Call received LED light stays on) after the called party
has hung up or until the Call Timer expires.
NOTE: You MUST program the speakerphone after installing the Code Blue unit.

Code Blue •259 Hedcor Street •Holland, MI 49423 USA •800.205.7186 •www.codeblue.com GU-145-Epage 13 of 23
IA3100
Administrator Guide
Programming Command List
Command Explanation Format/Default
10 1st Voice message (See also command 30-34) 10<<voice message>>#
11 2nd Voice message (See also command 30-34) 11<<voice message>>#
30 1st single instruction must be less than 18
seconds and will be played only to the guard
30
31 1st message must be less than 18 seconds and
will be played at the IA3100 until guard answers.
(see command 72)
31 / Default
32 1st instruction must be less than 9 seconds and will
be played at the IA3100 until the guard answers.
2nd message must be less than 9 seconds and will
be played to the guard and at the IA3100 after the
guard answers. (see command 72)
4
33 1st message must be less than 9 seconds and will
play at both ends after the guard answers.
2nd message must be less than 9 seconds and
will play at both ends after the 1st message. (see
command 72)
32
34 Recording playback level – This is the volume
level that a recording will be played at.
34<<level>># / Default = 2
1=low
2=medium
3=high
35 Ring down selection & Automatic Number
Identication: Command 0,1, 2 and 3 are for
standard analog trunck line mode; Commands
4,5 and 6 are used for analog Ring Down
lines. (ANI) The ANI is 27 DTMF tones sent at
the beginning of the call. The ANI is translated
by software at the guard station to give the units
location, data input information, condition of
inputs, and status of the phone’s batteries.
35<<ANI Selection>># / Default
= 0
Regular line
0=Disable ANI
1=”Help” only
2=”Info” only
3=”Help”+”Info”
36 Call Button Function – This command is used
with the IA3100-K Keypad faceplate to allow for
a number to be automatically dialed before using
the keypad. (This feature only relates to the black
“Call” button)
36<<Function>># / Default = 0
0 = Auto Dial Off
1 = Auto Dial On
37 Call Progress Tone Detection – This command
allows for the enabling and the disabling of the call
progress tone monitor for hang up.
37<<mode>># / Default = 1
0 = Disabled
1 = Enabled
38 Disconnect Pulse Width (Wink) – This is the
minimum amount of time that the phone line must
drop or reverse polarity for the IA3100 to hang up.
(0-9)
38<<time>># / Default = 2
0 = Disable
1 - 9 = 100 Milliseconds - 900
Milliseconds
(Continued on next page)

Code Blue •259 Hedcor Street •Holland, MI 49423 USA •800.205.7186 •www.codeblue.com GU-145-Epage 14 of 23
IA3100
Administrator Guide
39 Commands During a Call – This command
will enable or disable the operator from using
the commands during a call. This feature is only
usable with the FP1 or FP2 style faceplate.
39<<mode>># / Default = 1
0 = Disable
1 = Enable
43 Ring time counter – This command sets the
amount of time that the IA3100 will wait for a call
to be answered before moving on to the next
number. (00-60 seconds)
43<<Ring time (two digits)>># /
Default = 30
44 Slave auxiliary output #2 with auxiliary output
#1.
44 / Default
45 Disable command 44 45
46 Enables auto connection of auxiliary output
#2 during incoming calls. (This command is not
available if auxiliary output #2 is slaved.)
46
47 Disable command 46 47 / Default
48 Time the auxiliary output #2 stays active. Time
starts from the time auxiliary output #2 becomes
active (i.e. command 6 or command 46)
48<<Active time (two digits)>>#
/ Default = 00
00=ends when call ends
01-89=ends after 1-89 minutes
90-99=5-50 seconds
(90=5 sec. / 91=10 sec. / 92=15
sec. / etc.)
50 First phone number for “Push for help” or
“Emergency” button
50<<1st Emergency number>>#
Up to 16 digits
=2-second pause
50Veries the rst Emergency number 50<<1st Emergency
number>>#
Triple beep = rejected
Single beep = OK
51 Second phone number for “Push for help” or
“Emergency” button
51<<2nd Emergency number>>#
Up to 16 digits
=2-second pause
51Veries the second Emergency number 51<<2nd Emergency
number>>#
Triple beep = rejected
Single beep = OK
52 Third phone number for “Push for help” or
“Emergency” button
52<<3rd Emergency number>>#
Up to 16 digits
=2-second pause
52Veries the third Emergency number 52<<3rd Emergency
number>>#
Triple beep = rejected
Single beep = OK
53 First phone number for “Info” or “Call” button 53<<1st Information number>>#
Up to 16 digits
=2-second pause
53Veries the rst Information/Call number 53<<1st Information
number>>#
Triple beep = rejected
Single beep = OK
(Continued on next page)

Code Blue •259 Hedcor Street •Holland, MI 49423 USA •800.205.7186 •www.codeblue.com GU-145-Epage 15 of 23
IA3100
Administrator Guide
54 Second phone number for “Info” or “Call”
button
54<<2nd Information number>>#
Up to 16 digits
=2-second pause
54Veries the second Information/Call number 54<<2nd Information
number>>#
Triple beep = rejected
Single beep = OK
55 Veries the third Information/Call number 55<<3rd Information number>>#
Up to 16 digits
=2-second pause
55Veries the third Information/Call number 55<<3rd Information
number>>#
Triple beep = rejected
Single beep = OK
57 Assign progress tone table to each of the
phone numbers. The IA3100 recognizes the four
different tone tables.
57<<abcdefg>># / Default =
1111111
a = 1st Emergency (cmd. 50)
b = 2nd Emergency (cmd. 51)
c = 3rd Emergency (cmd. 52)
d = 1st Information (cmd. 53)
e = 2nd Information (cmd. 54)
f = 3rd Information (cmd. 55)
g = Power loss warning (cmd.
59)
58 Cycle count – Number of cycles for the
programmed numbers to repeat. (1-3)
58<<Cycle count>># / Default
= 2
59 Power loss phone number – This is a number
that will be called when the IA3100 has lost power
for 15 minutes. This feature is best used when it
has been programmed to dial a specic display
phone.
59<<power loss number>>#
Up to 16 digits
60 Unique ID number – This number is sent with
the ANI to identify the unit and is required with the
Code Blue software. (Also see command 65)
60<<ID number>>#
Up to 16 digits
60Veries the Unique ID number 60<<ID number>>#
Triple beep = rejected
Single beep = OK
61 Programming password (command 61must
follow immediately after command 61)
61<<new program password>>#
Default = 2258
61Veries the new programming password – This
action can only be used during this programming
instance, meaning if you log out of programming
and return to the programming sequence to
verify the password you will not receive a OK
conrmation tone.
61<<new program
password>>#
Triple beep = rejected
Single beep = OK
62 Monitoring password (command 62must
follow immediately after command 62)
62<<new monitor password>>#
Default = 2258
62Veries the new monitoring password – Same
conditions apply as stated in 61*
62<<new monitor
password>>#
Triple beep = rejected
Single beep = OK
(Continued on next page)
Line Ring Back (Seconds) Busy Tones
(Seconds)
Recorder Tone
1 2 On, 4 OFF ½ ON, ½ OFF ¼ ON, ¼ OFF
2 ½ ON, ¼ OFF, ½ ON, 4 OFF ½ ON, ½ OFF ¼ ON, ¼ OFF
3 ½ ON, ½ OFF, ½ ON, 2½ OFF ½ ON, ½ OFF ¼ ON, ¼ OFF
4 1 ON, 3 OFF ½ ON, ½ OFF ¼ ON, ¼ OFF

Code Blue •259 Hedcor Street •Holland, MI 49423 USA •800.205.7186 •www.codeblue.com GU-145-Epage 16 of 23
IA3100
Administrator Guide
63 Off hook time – The maximum conversation time
in minutes. (00-99) Minutes
63<<Off hook time (2 digits)>>#
Default = 10
64 Silent time out & Alternate Hang up method – If
this command is enabled, the IA3100 will hang
up after hearing silence for the set number of
seconds consecutively. (05-99) Seconds
64<<silent time (2 digits)>># /
Default = 00
00 = Disabled
05-99 = 5-99 Seconds
65 User ID or ANI sends out select – This
command may be used if the Unique ID is to be
sent in place of the complete ANI. (see command
35 and 60)
65<<mode select..#/default = 0
0 = Complete ANI
1 = Unique ID only
72 Voice message repetition – This is the number
of times that the recording in command 31 is to be
repeated. (0-4)
72<<message repetitions>># /
Default = 1
73 Enable auxiliary input #1 – Auxiliary #1 performs
the same as the “Emergency” button.
73#
74 Disable auxiliary input #1 74 / Default
80 Speaker Operation (0-2) – Formally known on
the CB3100 as “Call Progress Tone Monitoring,”
this feature turns off or on the phone’s ability to
allow a user to hear the IA3100 place its call and
progress through the call sequences. Best use of
this feature is when two IA3100s are sharing one
phone line; Phone 1 is activated and then Phone
2 is activated. If this feature is “0” disabled, then
User 2 will not hear Phone 1 call.
80<<mode>># / Default = 2
0= Speaker is disabled during
entire call.
1= Speaker is disabled during
the placement of the call.
2= Speaker is enabled during
the entire call.
85 Temporary disable time for auxiliary input #1
(see command 6) (00-99)
85<<disable time (2 digits)>># /
Default = 30
00-99 = 0-99 Minutes
86 Wait for dial tone – This time is the maximum
time that the IA3100 will wait for dial tone (The
phone will place the call as soon as it has veried
dial tone for four seconds ). On a standard trunk
line or ring down trunk, this time period is the time
that the phone will wait to hear the call progress
tone (This is to eliminate any dial tone that may be
present during the dialing of the ring down trunk).
(0-99) Seconds
86<<wait time>># / Default = 0
Actual time is: programmed time
+ 5 sec.
87 Wait for call progress tone – This time is the
maximum time that the IA3100 will wait for a call
progress tone after the last digit has been dialed.
(0-99 Seconds)
87<<wait time>># / Default = 0
sec.
Actual time is: programmed time
+ 5 sec.
90 Return to defaults – Returns all commands
to their defaults, including all passwords. (See
command 92)
90#
(Continued on next page)

Code Blue •259 Hedcor Street •Holland, MI 49423 USA •800.205.7186 •www.codeblue.com GU-145-Epage 17 of 23
IA3100
Administrator Guide
91 Data Input – This command enables and disables
the RS485 Data input to initiate an Emergency
Call.
91<<mode>># / Default = 1
0= Disabled
1= Enabled
92 Partial Reset to default – Returns all commands
to their defaults with the exception of stored phone
numbers, passwords, tone tables, and voice
recordings.
92#
93 Diagnostic Routine – This can be used to verify
that the speakerphone is functioning correctly.
This command will cause the IA100 to hang up
and perform a self check. When the self check
is complete, the IA3100 will call the “Call Back
Number” and report with either a single tone for a
failure or a double tone for a pass.
93<<Call Back Number>>#
# Hang up - forced # = forced hang up

Code Blue •259 Hedcor Street •Holland, MI 49423 USA •800.205.7186 •www.codeblue.com GU-145-Epage 18 of 23
IA3100
Administrator Guide
10 Troubleshooting
1.0 Required Tools
1.1 Lineman’s Test Set (Buttset)
1.2 Digital Multi-meter
1.3 Phillips Screwdriver
1.4 Code Blue Security Bit
2.0 Begin Troubleshooting
2.1 Begin troubleshooting at the phone’s faceplate.
2.2 Press the red button to begin and keep in mind that every step through a call attempt is a timed
event. The phone commands referenced in this owchart are elaborated on the CB3000 & CB3100
programming and operations instruction guide.
FLOWCHART ON NEXT PAGE

Code Blue •259 Hedcor Street •Holland, MI 49423 USA •800.205.7186 •www.codeblue.com GU-145-Epage 19 of 23
IA3100
Administrator Guide
Activate the Red Button.
Did the red LED (call being
placed) illuminate, and did
you hear a noise
Did you hear
dial tone?
Did you hear
the phone dial
the
programmed
number?
Do you hear
ringing.
Check Power
Ensure the ribbon cable is plugged into the
faceplate IDE connector. Verify the red button
connector is plugged into J3 on the printed circuit
board on the faceplate. Verify the actual voltage on
pins 1&2 of the green Phoenix connector. Did the
voltage meet specifications (12-24 VAC or 12-30
VDC)?
Correct the lack of power
issue
CB3100 only
Disconnect the ribbon cable from the
faceplate and the 14 pin green
Phoenix connector found at the
bottom of the blue box.
Then reconnect both and test.
Did this resolve the issue?
No
The problem was
excessive AC
voltage. Correct by
lowering the voltage
to published
specifications.
Check for dial tone on pins 3 & 4 of
the 14 pin green Phoenix connector.
Follow the wires back to the surge
suppressor and test for dial tone on
both side of protector. If there is dial
tone on the input then replace the
surge suppressor. If there is no dial
tone check with the service provider.
Can the called party hear you? If not you my be on a Ring Down line, reprogram the phone using CMD
354# (page 4 in the program booklet).
Please contact Code Blue Technical Support:
1-800-205-7186 Option 3 if this does not resolve your issues.
No
Yes
Yes
Yes
Yes
Yes
Yes
No
No
No
Did you hear
ringing
Instead?
No Yes
No
Program command 354# into the
phone for ring down operation.
Contact Tech
Support:
1-800-205-7186
Option 3
Verify the correct phone
number is programmed
(50<<number>>#)
Did the phone retry? If yes, change CMD
8715# (increase wait time). If the problem
continues then contact
Tech Support:
1-800-205-7186 Option 3

Code Blue •259 Hedcor Street •Holland, MI 49423 USA •800.205.7186 •www.codeblue.com GU-145-Epage 20 of 23
IA3100
Administrator Guide
If the IA3100 doesn’t seem to be functioning properly, follow the steps below to test line loop current,
ring voltage and talk battery. These line levels are important to the proper function of the IA3100.
For those using non auto ranging meter.
Please make sure you have proper polarity set
up for each test.
For those with Fluke Meters, they are generally
auto-ranging. Also they’re bidirectional,
meaning polarity is not an issue.
Note
0.0
AC DC
Curren
t
Com AC DC
Volts
Code Blue
Phone
Telephone
Tip & Ring
Analog
POTS Line
Source Tip
Ring
Testing Loop Current
Interrupt one wire of the pair and connect
through your Amp Meter, as diagrammed.
Set your meter on mA DC range
Either call the Code Blue Phone or
Activate the Code Blue Phone and note
the mA reading, once the connection to
the party has been made.
The IA3100 Min Loop current is 27mA with a max of
50mA.
The IA3100 Loop Current is 23 –35mA.
0.0
AC DC
Curren
t
Com AC DC
Volts
Code Blue
Phone
Telephone
Tip & Ring
Analog
POTS Line
Source
Testing Ring Voltage
With your volt meter connected
to tip and ring.
The meter needs to be set to AC.
Place a call to the unit and
record the AC voltage during the
ring cycle.
Normal Ring Voltage, according
to the FCC, is 100 Volts AC.
0.0
AC DC
Curren
t
Com AC DC
Volts
Code Blue
Phone
Telephone
Tip & Ring
Analog
POTS Line
Source
Testing Talk Battery
Connect your meter as diagrammed.
Set the meter to DC mode.
Activate the phone while connected in
conversation mode record the DC voltage.
Ranges: S-B PBX -24 to -48 Volts DC
Larger systems, including the Bell
network, are always -48.
Loop Current Test Configuration Ring Voltage Test Configuration
Talk Battery
(Continued on next page)
Other manuals for IA3100
1
Table of contents
Other Code Blue Telephone manuals

Code Blue
Code Blue Centry Series Service manual

Code Blue
Code Blue IP5000 User manual

Code Blue
Code Blue CB 2 Series Service manual

Code Blue
Code Blue IA4100 Service manual

Code Blue
Code Blue IP5000 2.0 Series Service manual

Code Blue
Code Blue LS2000 Manual

Code Blue
Code Blue IP1500 User manual

Code Blue
Code Blue CB RT Service manual

Code Blue
Code Blue IP2501-s Service manual

Code Blue
Code Blue IP5000 Quick start guide