Compleo eBOX professional User manual

The power to move
Version 20230904
Operating manual
eBOX professional
Article no. i00021648, i00021667, i00021743, i00021693
(Generation 3.5)

2
About this document
These instructions for use contain information on
the proper use of eBOX professional
(generation 3.5). The eBOX must be handled
in accordance with these instructions for use.
Before installing the eBOX, the installation of
an eCLICK is required, as the eCLICK serves
as a docking station. This pre-installation must
be carried out by a qualied electrician and is
described in detail in the installation instructions
enclosed with the eCLICK. For complete
installation, please refer to the installation
instructions mentioned above. Please follow
the steps in these instructions for use exactly to
ensure your personal safety and the functionality
of the eBOX. Do not carry out any work on the
eBOX that is not described in these instructions
for use. If in doubt, consult an expert.
Furthermore, only use accessories specially
manufactured for the eBOX.
Intended purpose
The instructions for use refer to eBOX
professional and are valid for the use of
eBOXes within the EU and the United
Kingdom. Please check the country-specic
safety standards.
Compleo eBOX: intended use
The device is intended for outdoor and indoor
use. In public areas, the operator guarantees that
these instructions will be legible permanently.
The operation of the eBOX requires knowledge
of these instructions. The device is intended
exclusively for charging electric vehicles with
type-2 plugs according to IEC 62196-2, with type-
1 plug according to SAE J1772-2009 (only possible
with alternative eBOX socket version) and
charging current control via pilot signal according
to IEC 61851-1. For a device without attached
charging cable, at least a type-2 plug must be
used on the infrastructure side. Use for supplying
power to other devices is not permitted.
Safety information
Please note:
• Any use of adapters and converters as well as
charging cable extensions is prohibited.
• Two protection devices are installed outside
of eBOX and eCLICK; both protection devices
must be easily accessible.
Danger
Important
Note
Danger to life and limb
Considerable risk of injury/
damage to property
Information on optimising
the application
Warning of electrical
voltage!
Important! There is a risk
of injury or damage to
property!
Observing this information
can improve the product’s
application.
Operating manual | eBOX professional

3
Danger
Handling live components incorrectly
may cause grievous injuries and death.
So heed at all times the ve safety rules
under DIN VDE 0105:
• Disconnect from all power sources
• Lock against reactivation
• Verify zero voltage (all poles)
• Earth and short circuit
• Cover or partition-o adjoining live
parts
Danger
Turn o circuit before remounting or
replacing the eBOX.
Important
Technically non-functioning or
defective charging infrastructure must
not be used. In addition, do not use
any charging infrastructure that does
not comply with the intended use
or the conditions specied by the
manufacturer or which is not regularly
checked.
Important
eBOX bases have sharp edges. Do not
grasp the eBOX by the bases.
Important
The contents of the delivery must
be checked for completeness and
intactness.
Important
When selecting the installation location,
please ensure that the eBOX is not
exposed to permanent sunlight.
Important
Keep equipment pack away from small
children. There is a risk that small
parts could be swallowed by children,
resulting in death. Do not install in the
presence of children.
Important
Ensure that no ammable or
combustible materials are stored at
a distance of less than 5 m from the
charging infrastructure and that no re
is lit.
Important
Ensure that all components are dry
during installation.
Important
Check that the warranty seal on
the back of the eBOX is intact. Do
not operate the product unless the
warranty seal isundamaged.
Damaged warranty seals void the
warranty.
Important
It is recommended not to install the
eBOX in areas where electromagnetic
emissions from large industrial facilities
may interfere with communication.
Note
This is a CE-certied product. All
relevant product standards and rules
and regulations applicable to the
product are conrmed in the product’s
EC Declaration of Conformity.
Note
eBOX professional is a maintenance-
free product. It does not contain any
reparable parts or components. Do not
carry out any repair work. In case of a
permanent error, replace the eBOX.
Operating manual | eBOX professional

4
Product overview
1
4
3
5
7
8
6
2
9
Included in delivery
1x eBOX professional with attached notes for use
1x set of instructions for use with attached PUK
for Bluetooth
eBOX professional – Product details
1 Shutter
2 Socket/plug compartment
3 Type plate
4 Notes for use
5 LED ring
6 Bluetooth pairing button
7 Vehicle LED
8 Authentication LED
9 eCLICK (separate delivery)
Operating manual | eBOX professional

5
Before mounting the eBOX, make sure there is no
voltage across the eCLICK.
If an eSMARTMETER is installed, make sure the
ports are connected to the supplied data cable.
Connect port 3a (eSMARTMETER) to port 3b
(eCLICK) using the data cable. Take the eBOX and
identify the connecting points (blue here) on its
rear side
Connect the black ribbon data cable of the eBOX
to port “5 Expansion Terminal” at the bottom
right of the eCLICK.
Connect the white ribbon data cable of the
eBOX to port 1 on the left side of the eCLICK.
Communication via LAN or SIM card can only be
ensured when the black and white ribbon data
cables are connected.
Clicking the eBOX into the eCLICK
90°
3a
3b
1
8
2b
45
7
6
2a
1 LAN 3 RJ45
(eBOX communication)
2a LAN 2 RJ45
(to Internet router)
2b LAN 2 LSA-Plus
(to Internet router)
3a eSMARTMETER output
(optional)
3b eSMARTMETER input
(optional)
4 Cable clip position
for S/FTP cable
5 RJ50 Terminal
(eBOX communication)
6 Grid control box connection
7 Shunt release connection
8 LAN 1 RJ45 (deactivated)
Operating manual | eBOX professional

6
Please prepare the installation by pulling down
the locking bracket completely and ensuring
to hold it rmly in this position. Now place the
eBOX carefully on the eCLICK and push it rmly
in the middle with the other hand until it stops
Be careful not to exert excessive pressure on the
circle LEDs.
Now release the bracket and let it lift
automatically. Please hold the eBOX in place with
one hand.
Please continue to hold the eBOX in place with
one hand. Check the nal position of the locking
bracket, it must be fully raised. The enlarged
detail view demonstrates the desired nal
position. The pin on the locking bracket must be
exactly level with the triangle on the eBOX.
If the bracket has not reached the desired nal
position, please push it further upwards to the
desired nal position.
Clicking the eBOX into the eCLICK
Tighten the pre-installed grub screw on the
eCLICK using the allen wrench to secure the
locking mechanism in place and to secure the
eBOX on the eCLICK against unauthorised
removal.
Now the eBOX is mounted on the eCLICK. Power
on the eCLICK circuit.
Important
Make sure that the at ribbon data cables are not
trapped between the eCLICK and eBOX when
mounting the eBOX.
Note
The grub screw can only be fully screwed in when
the locking bracket is inserted completely.
Important
Make sure that the eBOX clicks correctly into the
eCLICK. The locking bracket must be in the nal
position. The grub screw must be fully screwed in.
Check eBOX for rm attachment.
Operating manual | eBOX professional

7
Conguration for private use
Technical commissioning and conguration must
be carried out entirely by an electrician. Have the
PUK of your eBOX at hand for this purpose.
You will nd the PUK on the back of these
instructions for use. Keep the PUK and the
instructions for use in a safe place and also pass
them on to any subsequent owners of the eBOX.
After technical commissioning by the electrician,
you as the user can congure, control and
manage your eBOX via app.
You have the option of using the eCHARGE+ app
or your provider’s app:
Via eCHARGE+ App
Please download the eCHARGE+ app from the
Apple or Google Play Store. You can congure
your eBOX in the menu item “Charge at home”.
Please follow the instructions in the app.
Via third-party app
For details on how to use your provider’s app,
please contact your eBOX dealer.
eBOX system conguration
Conguration for commercial use
Technical commissioning and conguration must
be carried out entirely by an electrician. Use the
Compleo eCONFIG app for the conguration for
commercial use.
You have the option of connecting your eBOX to
the Compleo backend or a third-party backend
of your choice:
Via Compleo Backend
With your purchase of the eOPERATE software
service, your product’s system was automatically
congured to your specied e-mail address.
Please use the eOPERATE portal for any
conguration and administration. You have
received the initial password by e-mail. If you no
longer have it, you can reset your password at
eoperate-portal.com.
Via Backend eines Drittanbieters über OCPP
Please contact your backend provider if you have
any questions about the system conguration.
Would you like to use eCHARGE+ or eCONFIG?
Download your app: Note
This product contains antennas that emit
electromagnetic elds that can interfere with other
electronic devices such as mobile phones and
medical devices when exposed to prolonged periods
of time at intervals less than 3.5 cm. If prolonged
exposure is expected, a minimum distance of 20 cm
is recommended to avoid interference.
Operating manual | eBOX professional

8
Charging process
The charging process consists of connecting
your vehicle to the eBOX, authenticating the
charging process, charging your vehicle and nally
disconnecting your vehicle from the eBOX.
Please make sure to carefully stow away any rmly
connected cables after use (steps 1 and 2 are
interchangeable).
Connect your electric vehicle to the eBOX. To do
this, plug the cable into the eBOX rst. Once your
car is successfully connected, the vehicle LED will
turn o and the LED ring will light up white.
Proper use of charging cables
No charging cables with adapters of any kind may
be used on the eBOX. The use of extension cables
is also not permitted.
Authenticate the charging process via RFID card
or app (e.g. eCHARGE+ app). For the latter, you
need the charging point number, which is located
on the front of the eBOX. In addition, the eBOX
can be activated from the backend.
Shortly after successful authentication, the LED
ring will begin to pulse blue and your vehicle will
charge. After 10 seconds, the authentication LED
turns on again. To save power, the ring is switched
o after a few minutes when you move away from
the eBOX.
The charging process is nished* when the LED
ring lights up white again. After you have unlocked
the vehicle or the charging process has ended,
remove the charging cable, which disconnects
the eBOX from the vehicle.
* Optionally, the charging process can also be
terminated by presenting the previously used
RFID card again or via app (e.g. eCHARGE+ app).
Operating manual | eBOX professional

9
Troubleshooting
Most eBOX malfunctions occur due to incorrect
operation, which means they cannot be
registered by the device and thus cannot be
displayed. This includes the following situations,
among others:
• No power source connected
• Charging cable connected incorrectly
If a malfunction continues to occur despite
following the instructions for use, we recommend
restarting the eBOX. To do this, disconnect the
eBOX from the power supply for a short time
by switching o the circuit breaker in the
subdistribution and then reconnect the eBOX.
If necessary, also check the connection at the
vehicle.
Charging process malfunction
In rare cases, the charging process is disrupted
or slowed down by external inuences. This can
occur for the following reasons:
• Overheating of the eBOX:
The eBOX automatically reduces the charging
power when a temperature limit is exceeded,
slowing down the charging process temporarily.
Therefore, avoid any direct sunlight on the
eBOX.
• Charging issue at the vehicle:
Check the error display of your vehicle.
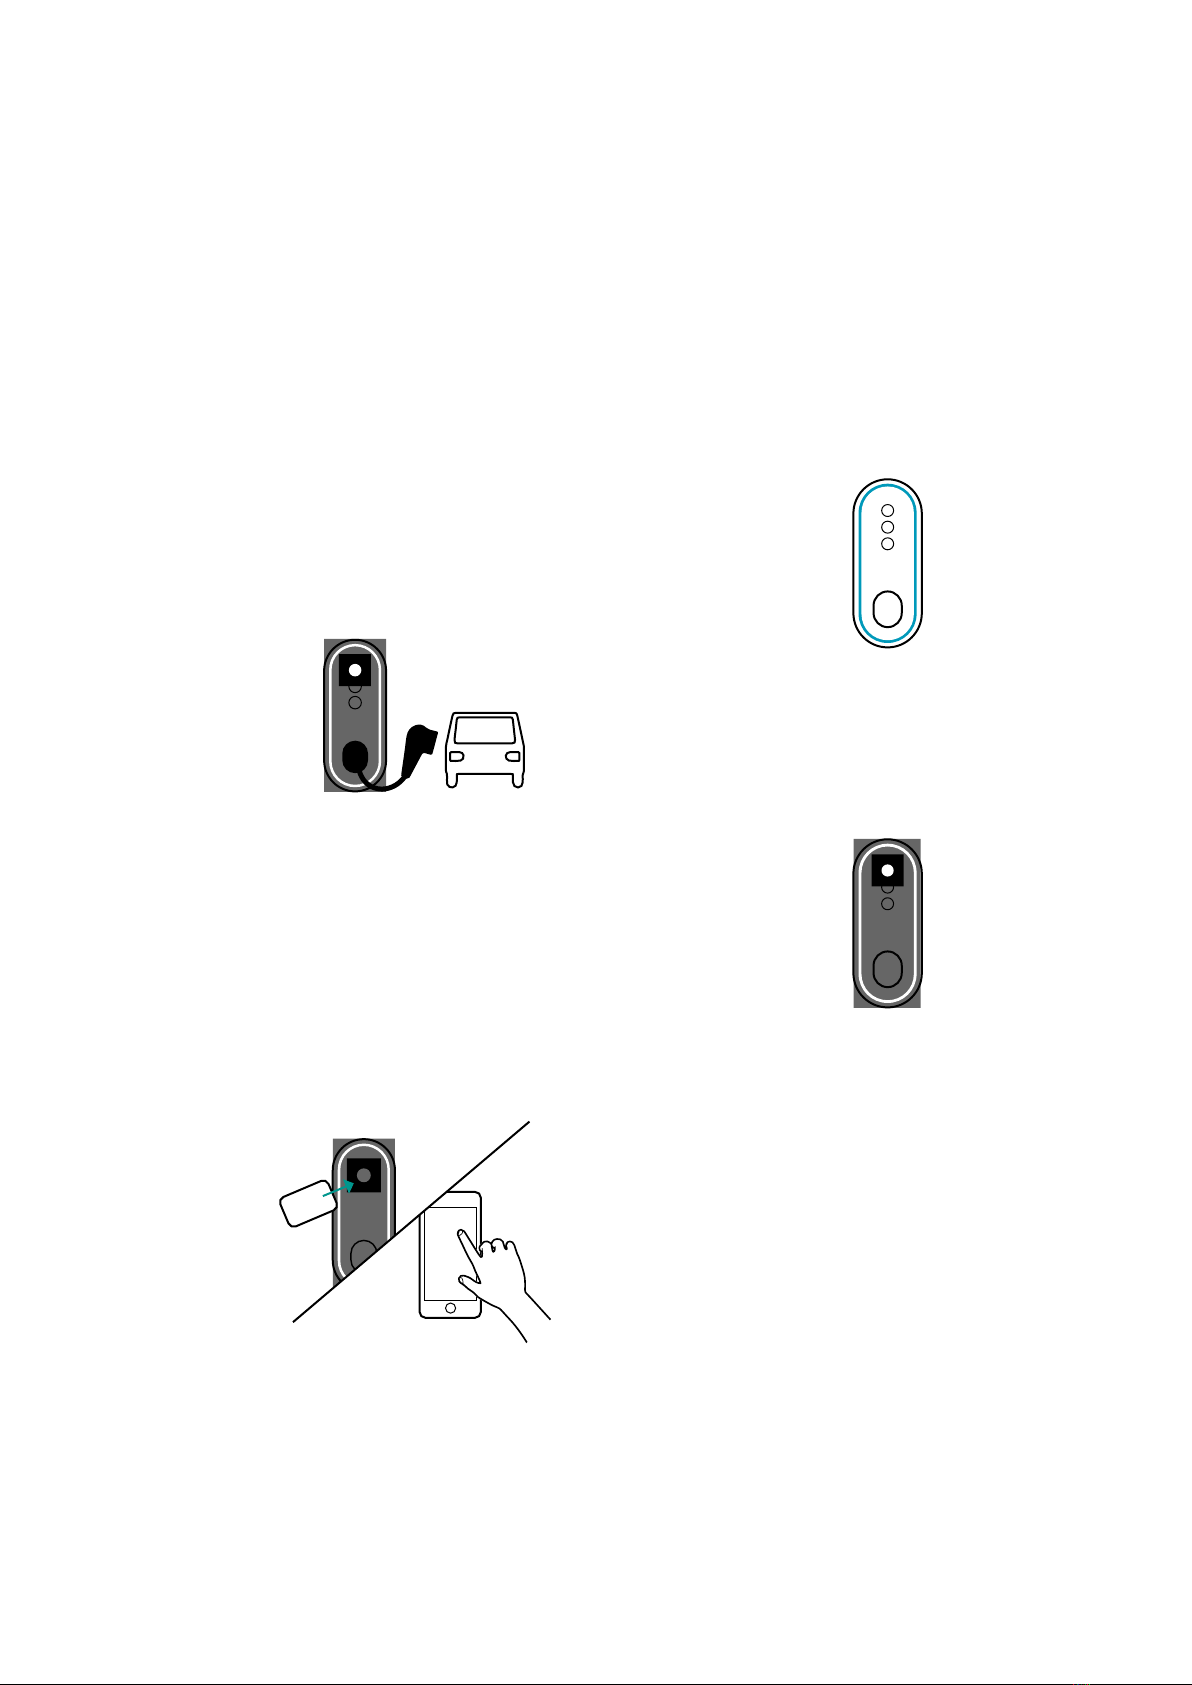
Authentication error
• Authentication LED remains on
(LED ring ashes red briey):
Authentication via app (e.g. eCHARGE+ app)
was unsuccessful. Please repeat the
authentication process via app.
• Authentication LED remains on
(LED ring red briey):
RFID card not recognised or not congured.
Please hold the congured RFID card in front
of the authentication LED again or congure an
RFID card.
Troubleshooting
Vehicle not connected properly
• Vehicle LED remains on
(LED ring does not light up):
Error in communication between vehicle and
eBOX. Check the connection between vehicle
and eBOX and reconnect if necessary.
Faulty Bluetooth connection
• Bluetooth pairing button does not light up:
Error in Bluetooth communication between
the eBOX and your smartphone/tablet (only
relevant in private eBOX operation in oine
mode). Restart the Bluetooth connection on
your smartphone/tablet and on the eBOX by
pressing the Bluetooth pairing button.
Critical error
The eBOX can no longer be used due to a
device error and must be disconnected from
the mains immediately. If the error persists after
restarting and cooling down the eBOX, please
consult a qualied electrician and initiate eBOX
replacement if necessary.
Note
An additional ventilation option is not provided for
the eBOX.
Danger
Device error. Warning of electrical voltage
Operating manual | eBOX professional

10
General Informationen
Number of charging points 1
Cable length (in cable version) 6.5 m
Charging mode Mode 3 according to IEC 61851
Areas of application Indoor and outdoor
IP code of the housing IP55
Protection class (impact resistance) IK10 according to IEC 62262:2002
UV protection Outdoor areas (F1)
Housing material Copolymer
Storage temperature -30 °C to +80 °C
Weight 3.1kg without cable, 6.4kg with cable
(each without eCLICK and without eSMARTMETER)
Packaging dimensions (W x D x H) 515 mm x 225 mm x 235 mm without cable,
695 mm x 370 mm x 235 mm with cable
Power consumption in standby mode 6 W
Certications CE (tested and conrmed by certied body); UKCA
Foliation Custom lm with customer logo available
Charging point number (EVSE ID) Lasered on shutter
Working conditions
Operating temperature -30 °C to +50 °C at full load output
Thermal overload protection:
output power reduced at higher temperatures
Air humidity 5% to 95% as dened under IEC 61851-1 Ed.3/EN 61851-1 (2017)
Max. altitude above sea level Max. 2,000 m (air pressure: 860 hPa to 1,060 hPa)
Protection class Protection class I
Electrical input/power connection
Input power from eCLICK Three-phase current 400 V AC, 32 A (22 kW)/20 A (13.8 kW)/16 A (11 kW)
Alternating current 230 V AC, one-phase, 32 A (7.4 kW)/20 A (4.6 kW)/16 A (3.7 kW)
Charging power 3.7/4.6/7.4/11/13.8/22 kW (16 A, 20 A, 32 A; one or three-phase)
Output power Three-phase current 400 V AC, 32 A (22 kW) or 16 A (11 kW)
Alternating (one-phase) current 230 V AC, 32 A (7.4 kW) or 16 A (3.7 kW)
Plug assembly Without charging cable: Type-2 plug assembly as dened under
DIN EN 62196-2 with automatic plug locking, shutter
With charging cable: Type-2 plug as dened under
DIN EN 62196-2, plug compartment on eBOX, shutter
Consumption measuring Electricity meter eSMARTMETER: optional for eCLICK,
MID-compliant (Europe) and CE-certied
Technical data
Operating manual | eBOX professional

11
Protective equipment
DC fault current monitoring
(personal protection)
Integrated all-current sensitive current monitor
(GFCI) for DC fault monitoring,
response value: DC 6 mA
Welding detection
(indication signal for welded power contacts)
Connection via change-over contact (max. 230 V, 1 A),
use e.g. for shunt release for disconnection of main power path
Integrated overvoltage protection According to IEC 61851-21-2:2018 (ESD/surge/burst)
Communication
Vehicle communication Charging current controlled via PWM pilot signal
in accordance with IEC 61851-1:2017
Direct communication Bluetooth Class 1 and 2 (power level)
Backend connectivity Via OCPP 1.6J to Compleo backend or third-party backends
(with connection via SIM card the provider is to be specied prior to order)
Backend communication WLAN with 2.4 GHz IEEE 802.11 b/g/n with WPA2
(antenna gain, frequency-dependent, max. 4.6 dBi) or LAN
or mobile radio via backend-specic and xed SIM card, can be provided
prior to production
(frequency and direction dependent, maximum 4.4 dBi antenna gain);
With use of private Compleo software services only via WLAN or LAN
Control by grid operator Potential-free contacts available to connect to a grid control box
Authentication
Authentication Free charging, smartphone app (eCHARGE+ app/third-party apps) via
contract charging or direct payment via epowerdirect.com
Plug & Charge (ISO 15118) Yes
RFID authentication Yes, according to ISO 14443A, Type V (ISO/IEC 15693/Vicinity).
Supported protocols:
MIFARE Classic 1K, MIFARE Classic 4K, MIFARE DESre V1 4K, MIFARE DESre
V2 4K, MIFARE DESre V1 8K, MIFARE DESre V2 8K, MIFARE Ultralight
Standard, MIFARE Ultralight C, MIFARE Ultralight NXP NTAG 216, MIFARE Plus
SE 1K, MIFARE Plus X 2K, LEGIC advant ATC 1024-MV, Legic advant ATC 4096,
J3A081 JCOP 2.4.1 Rev 3, ICODE SLIX, ICODE ISO, TAG-IT HFI plus 2048 and
SLE 66 R 35
UI/UX
Display/interaction LED ring for charging status;
2 LED indicators for authentication and vehicle connection status,
1 LED button for Bluetooth connection
Notes for use Attached to the side of the eBOX as a graphic
External accessories
Personal protection
to be installed
in sub-distribution
Fault current protection switch type A (RCD type A):
32A connection: ABB F204A-40/0.03, type A, 4-pole
(short-time delay, operating voltage: 230/400 V AC)
16A connection: ABB F204A-25/0.03, type A, 4-pole
(short-time delay, operating voltage: 230/400 V AC)
In Unterverteilung zu installierender
Kurzschluss-/Überlastschutz
Circuit breaker:
32A connection: ABB S203-NA K40A (rated switching capacity: 6,000 A)
16A connection: ABB S203-NA K20A (rated switching capacity: 6,000 A)
Operating manual | eBOX professional

12
Notes
The product eBOX professional must always be
used in conjunction with the eCLICK.
Electric vehicle charger characteristics
according to IEC 61851-1 Ed. 3:
1. The product must be connected to an AC
mains.
2.The product is connected permanently to the
mains.
3.The product is eCLICK-compatible. It is
available in the variants with a type-2 socket
and with a type-2 plug with attached cable.
4.The product is compatible with electric
vehicles charged with AC in mode 3.
5.The product can be installed and used in
protected indoor areas and unprotected
outdoor areas exposed to rain and direct
sunlight.
6. The product can be used in closed-o and
public areas.
7. The product can be installed on walls and in
compatible Pole products.
8.The product eBOX professional in conjunction
with the eCLICK or coverage is rated electrical
protection class I. The open eCLICK is rated
electrical protection class I.
Maintenance/repair
The eBOX is a maintenance-free product.
It does not contain any reparable parts or
components. Do not carry out any repair work. In
case of a permanent error, replace the eBOX
Disposal
The eCLICK and the eBOX are are electrical
devices. These must be disposed of accordingly
in compliance with EU Directive WEEE II, the
ElektroG of 20 October 2015 in Germany, or
the VREG, SR 814.620, of 14 January 1998 in
Switzerland.
Cleaning
The eBOX may only be cleaned with water; the
use of lukewarm water is recommended. Do not
use any cleaning agents containing solvents.
Disassembly
To disassemble the eBOX, you rst have to
disconnect the power supply. First unscrew the
grub screw on the side and remove the eBOX
from the eCLICK by pulling down the locking
bracket, removing the charging unit and, if
necessary, the Ethernet cables which connect
the eBOX and the eCLICK.
Danger
The eCLICK must be disconnected from the power
supply before disassembly. Make sure that all
components are dry during disassembly.
Operating manual | eBOX professional

13
Copyright © 2023 Compleo Charging Solutions
GmbH & Co. KG. All rights reserved. This
document is intellectual property right- and
copyright-protected. No part hereof may be
edited, duplicated, or published in any manner
purposing other than the proper use of the eBOX
without express written permission of Compleo
Charging Solutions GmbH & Co. KG.
Compleo Charging Solutions GmbH & Co. KG
Business address:
Ezzestraße 8
44379 Dortmund
Germany
Register court Iserlohn HRA 5622
Registered oce: Lüdenscheid
Imprint
Operating manual | eBOX professional

Locations &
Contact information

Compleo Charging Solutions GmbH & Co. KG
Ezzestraße 8
44379 Dortmund, Germany
+49 231 53492370
compleo-charging.com
Compleo Charging Software GmbH
Ezzestraße 8
44379 Dortmund, Germany
+49 231 53492370
[email protected]oftware.com
emobility.software
Compleo Charging Solutions UK Ltd.
The Lambourn, Wyndyke Furlong
Abingdon, OX14 1UJ, United Kingdom
+44 1235 355189
compleocharging.co.uk
Compleo Charging Solutions AG Schweiz
Hardturmstrasse 161
8005 Zürich, Switzerland
compleo-charging.ch
Compleo CS Nordic AB
Derbyvägen 4
212 35 Malmö, Sweden
+46 40 6850500
compleocs.se
Compleo Charging Solutions GmbH
Campus 21, Liebermannstraße F05, 402/7
2345 Brunn am Gebirge, Austria
compleo.at

The power to move
Compleo Charging Solutions GmbH & Co. KG
Ezzestraße 8
44379 Dortmund
Germany
compleo-charging.com
©2023 Compleo. All rights reserved.
This document may not be copied or reproduced in any form
or by any means, in whole or in part, without written permission.
All illustrations in this document serve only as examples and may
dier from the delivered product. All information in this document
is subject to change without notice and does not represent a
commitment on the part of the manufacturer. Technical changes and errors excepted.
Other manuals for eBOX professional
1
This manual suits for next models
4
Table of contents
Other Compleo Batteries Charger manuals

Compleo
Compleo Cito BM 500 User manual

Compleo
Compleo eCLICK User manual

Compleo
Compleo eBOX professional User manual

Compleo
Compleo ECO s User manual

Compleo
Compleo eBOX smart User manual

Compleo
Compleo SOLO N+ User manual

Compleo
Compleo SOLO advanced AV06 User manual

Compleo
Compleo SOLO smart User manual

Compleo
Compleo DUO bm User manual

Compleo
Compleo GO User manual