6© 2020 HALFEN · INST_WDI 03/15 · www.halfen.com
Deutsch English
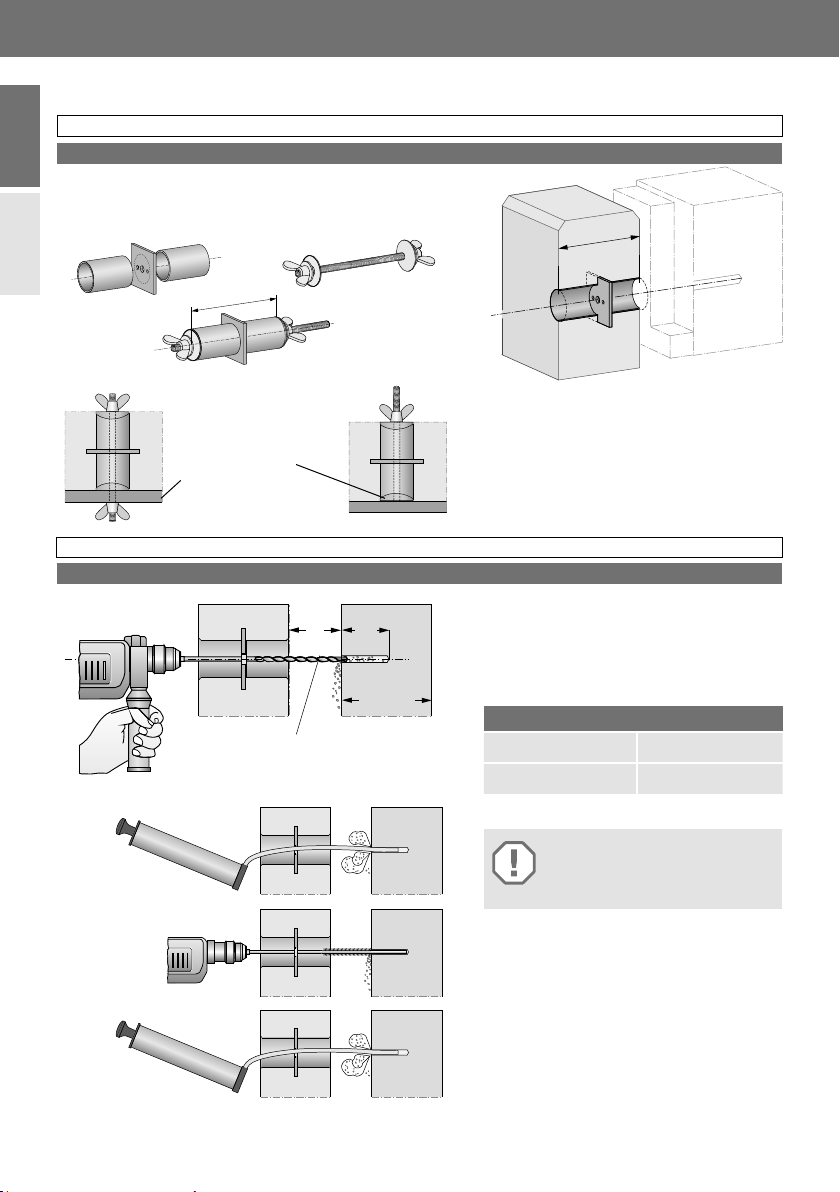
HALFEN WDI Montageanleitung
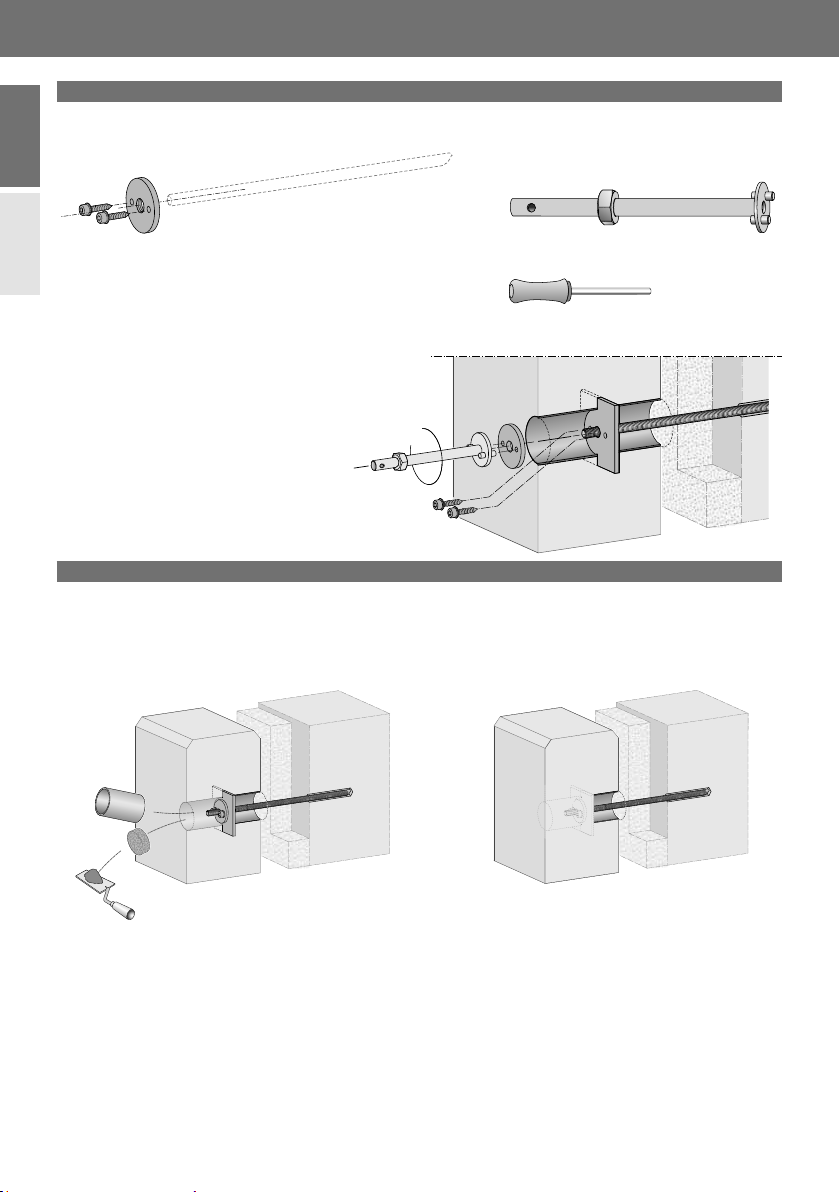
Montage der Gewindestange
WDI Mörtelset
Injektionskartusche
Gewindestab
Fixierplatte
Montageteil WDI-M
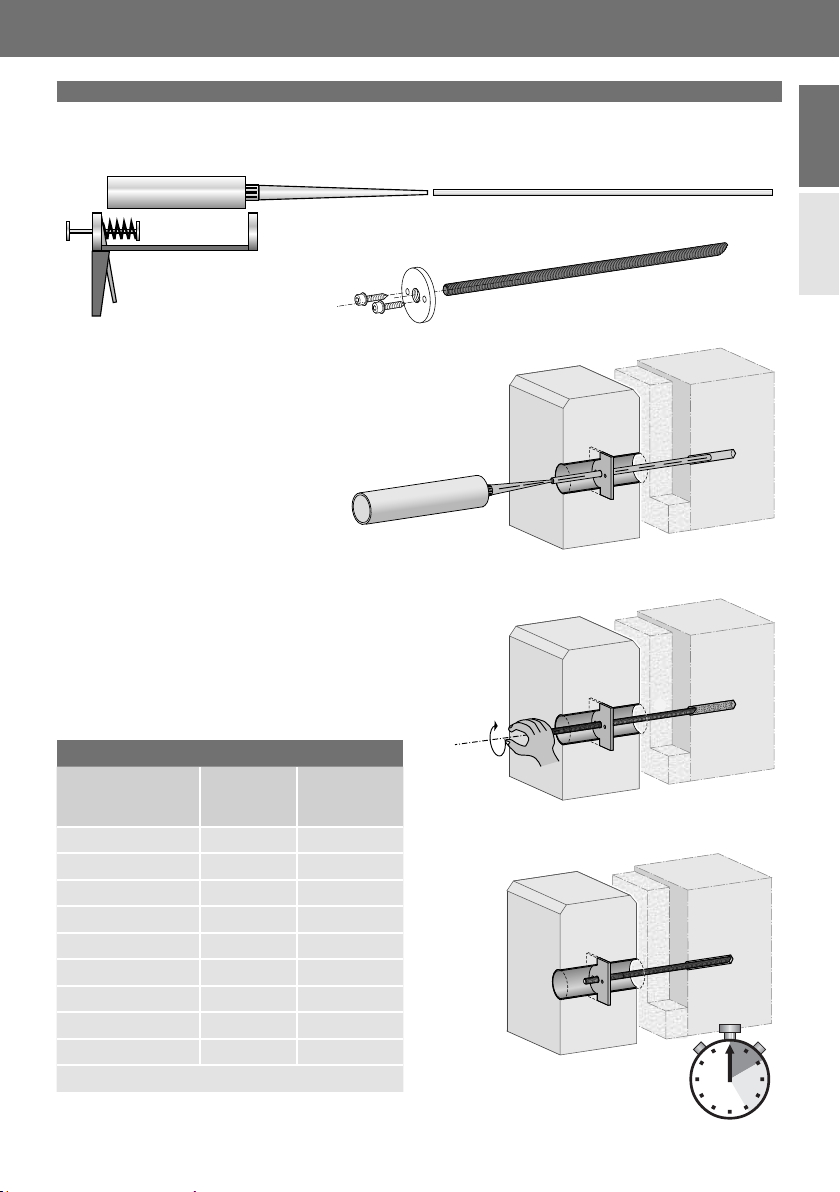
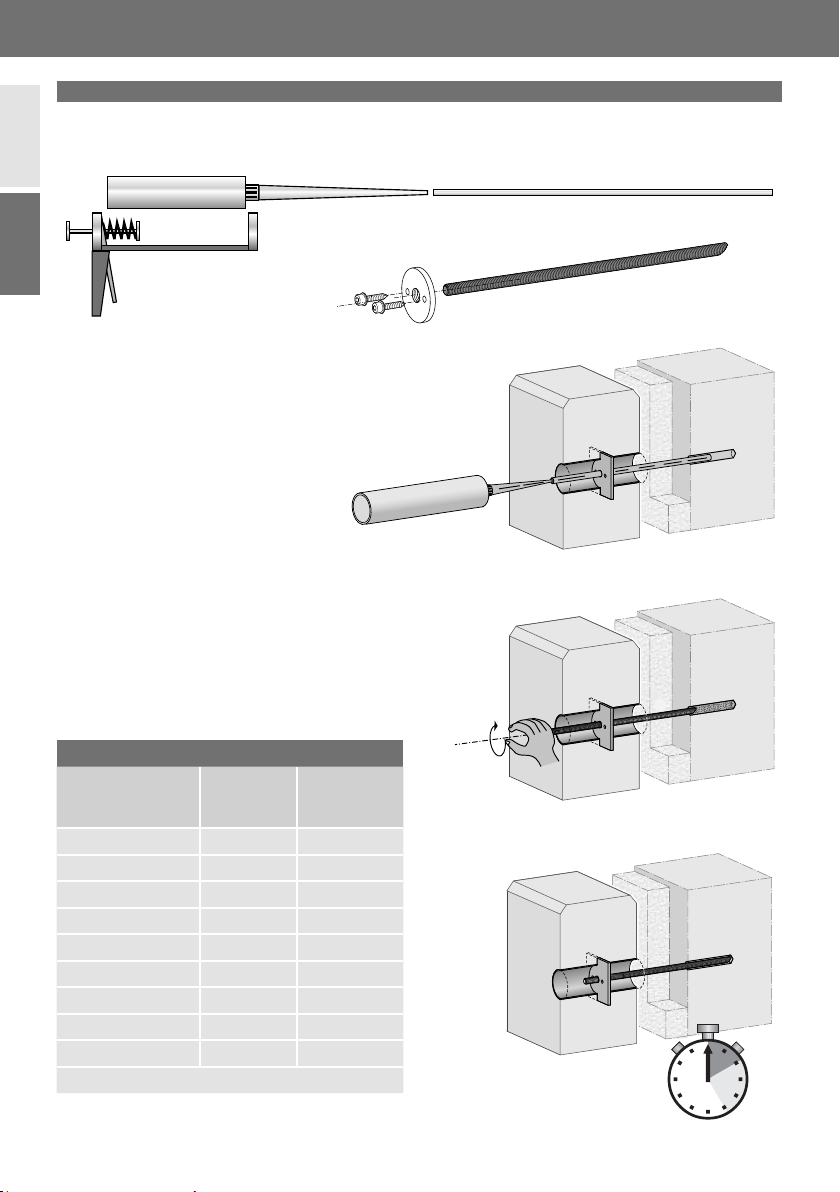
Statikmischer Verlängerungsrohr 1m
WDI Mörtelset zusammensetzen, Mörtelkartusche in die
Auspresspistole einlegen.
Ca. 2 volle Hübe oder einen 10 cm langen Mörtelstrang
auspressen, bis der austretende Injektionsmörtel eine
gleichmäßige graue Farbe aufweist. Dieser Vorlauf darf
nicht verwendet werden. Auspresspistole während
des Verfüllens — vom Bohrlochgrund beginnend —
langsam dem Druck folgend zurückziehen. Pro
Bohrloch ca. 11 ml injizieren.
Die in der Tabelle angegebenen Verarbeitungs-
und Aushärtezeiten sind zu beachten.
Verarbeitungs und Aushärtezeiten
Temperatur [C°]
im Bohrloch
Maximale
Verarbei-
tungszeit
Minimale
Aushärtezeit
(*)
+ 40° C 85 Sekunden 15 Minuten
+ 35°C bis + 39°C 85 Sekunden 20 Minuten
+ 30°C bis + 34°C 2 Minuten 25 Minuten
+ 20°C bis + 29°C 4 Minuten 45 Minuten
+ 10°C bis + 19°C 6 Minuten 1:20 Stunden
+ 5°C bis + 9°C 12 Minuten 2:00 Stunden
+ 0°C bis + 4°C 20 Minuten 3:00 Stunden
- 4°C bis - 1°C 45 Minuten 5:30 Stunden
- 5°C 1:30 Stunden 5:30 Stunden
(*) Werte gelten für trockenen Beton.
Gewindestab unter leichtem Drehen bis zum Bohrlochgrund
einbringen. Die Ankerstange ist richtig eingesetzt, wenn an
der Ankerstange, um die Bohrlochöffnung herum Mörtel
austritt.
Vor Ablauf der Aushärtezeit darf die Gewindestange weder
bewegt noch belastet werden.
Injektion des Mörtels
Eindrehen des Gewindestabes
Aushärtezeit beachten