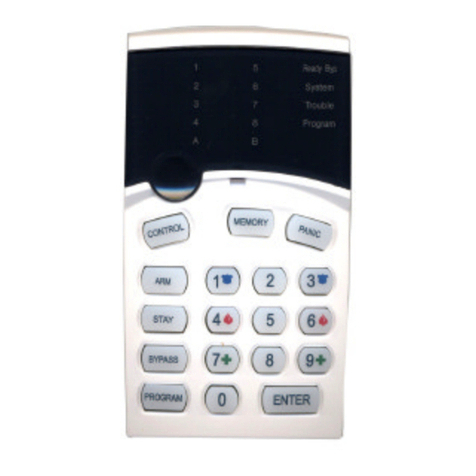
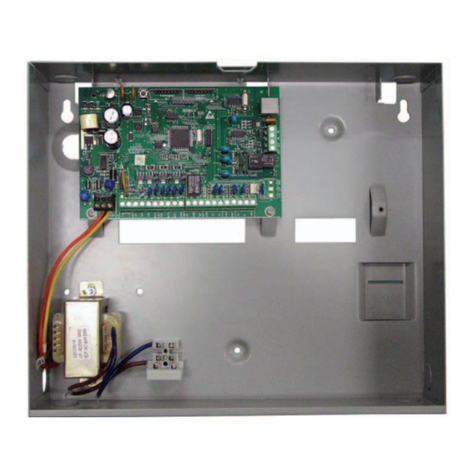
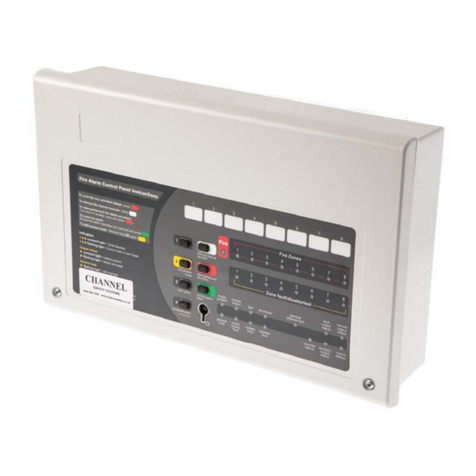
Crow RUNNER 8/64 Operating instructions

Installation &
Programming Guide
RUNNER 8/64
8/64 Zones Control Panel

ThisRUNNER 48/6
alarmcontrol panel has been designed to provide the most requested
features for both the installer &the end-user. These features include ease of installation, ease of
programming and user friendlyoperation all ina package which isreliable, functional and attractive.
Utilising many years of experience in the securityindustry and implementing valuable feedback, we are
proud to provide you with anew generation of alarm controller. The RUNNER 48/6 isa de-signed
and built product which brings you the qualityand features which you deserve at an affordable price.
In addition to the the advanced design, onlythe highest qualitycomponents have been used in the
production of this Alert panel to ensure the highest degree of reliability.
Thismanual will guide you through the installation and programming of your RUNNER 48/6 alarm
panel. For additional information regarding the operating instructions and options, please refer to the
“RUNNER User’s Guide”.
Revision Feb. D.Z A 2018

Page3
CONTENTS PageNo.
CONNECTIONDIAGRAM5
Wiringzone and output expanderstothePanel5
ZONE EXPANDERDIPSWITCH SETTINGS6
OUTPUTEXPANDER DIPSWITCH SETTINGS7
WIEGAND EXPANDER DIPSWITCH SETTINGS8
SELECTIVE ARM/DISARMING withMULTIPLE AREAS10
INPUTS11
ExamplesofZoneWiring12
Inputs13
Outputs13
Accessories14
DTMFCOMMAND CONTROLOVERVIEW14
HowtouseDTMFRemoteControl14
MEMORY VIEWMODE 15
Current Alarms 15
HistoricalMemoryEvents15
ICONAND FULL LCD KEYPADINSTALLATION 16
Keypad AddressAssignment16
Keypad Zone orListen-in Input16
KEYPADADJUSTMENTS17
AdjustingLCD Keypad Backlighting17
AdjustingKeypad Buzzer17
FULL LCD KEYPADTEXTEDITING18
Programming LCD User, Display, Output, Area, KeypadZoneText18
FULL LCD KEYPADMENU OPERATION 19
ACCESSING PROGRAMMODE22
USERS24
User Codes24
User Type 24
User Areas25
User Arm/Disarmoptions25
User ProgramMode Access26
Radio User Type & Panicoptions26
User Time-zoneControl27
User Keypadassignment27
User turnsOutput Onor Off28
Learn/FindandDeleteRadio KeyCodes28
Learn/FindandDeleteRadio Access Cards29
MISCELLANEOUS PANEL &CLOCK SETTINGS30
InstallerCode30
DuressDigit30
Dial Delay30
SupervisedDetectorTimer30
TwoTrigger Time 30
MainsFail Report Delay30
Receiver FailTimer31
Upload/downloadSiteCode Number31
TemporaryOutputDisable31
MiscellaneousInstaller& Panel Options31
Hide User Codes33
SettingTime, Date& DaylightSaving34
OUTPUTS34
ProgramLCD Output Name34
ProgramOutput1& 2Volume34
MiscellaneousOutput Options35
Output OnDelay, Pulse, Reset & ChimeTimes37
Output VoiceBoardRemoteControlStart message37
Un-Map an Output38
AssigningaTimeZone toan Output38

Page4
AREAS38
Area Armand SpecialFunctionOptions38
Area Arm/StayPulse& ChirpstoOutputs39
Area Exit DelayBeepstoKeypads41
Arm& StayExit DelayTime42
Monitoring Account Code Number42
RemoteArm/DisarmDTMFCode & Start Voice Message42
Area DelinquencyTime43
Auto-Arm/DisarmTime-zone 43
ProgramLCD Area Name43
KEYPADS44
Keypad Area Assignment44
Keypad Button Operations,Misc BeepsandLED Control44
Keypad “ARM”, “STAY”, “A” & “B” Button Options45
Keypad Number and “CONTROL” Button toOutput Mask49
Keypad “Panic” “Fire” &“Medical” AlarmstoOutputs& KP Buzzer49
Keypad ChimeTimer49
Full LCD DisplayOptions51
ProgramLCD Keypad name51
ZONES 52
Zone KeySwitchOptions52
Zone AreaAssignment52
Zone AlarmType Options53
Zone EOL&VibrationSettings55
Zone Radio Type56
Zone AlarmstoOutput& Keypad Buzzer Mapping58
Armed & StayMode EntryDelayTimes60
Zone LockoutTime60
VariousZone CID Report Codes60
Zone InactivityTimer61
Learn/Find& DeleteRadio Zone Codes61
ProgramLCD ZoneNames62
TIME-ZONES62
Time-ZoneDays 62
Time-ZoneStart & Stop Times62
DIALLER63
EnableDialler and Set Type ofDialling63
Dialling Cycles, Auto-answerRing Count64
TimetoFirst Test Call 64
Keypad Listen-in Options64
Dialling Pre-fixNumber65
Keypad “Panic” “Fire” &“Medical” AlarmsCID Report Code65
Output, Microphone &VoiceKiss-off DTMFRemoteCodes65
MiscellaneousVoiceReportingMessage Numbers66
TELEPHONE NUMBERS 66
Programming TelephoneNumbers66
ReportingFormats66
Dial ProgressOptions67
Enable/DisableMiscellaneousDiallerReports68
IPREPORTING PORTNUMBER 70
SIAREPORTING CODES 71
DIAGNOSTIC&DEFAULTOPTIONS 72
DisplaySoftwareVersion, Keypad Number,Keypad Areas72
DisplayActiveTime-zones,batteryVoltage72
Start Walk-Test Mode72
Read orWritetoDTU72
RestoreDefaults73
Clear MemoryBuffer73
PROGRAM SUMMARY GUIDE75
SPECIALKEYPADOPERATING FEATURES90
QUICK STARTPROGRAM GUIDE 91
CONTACTIDREPORTING CODE SUMMARY94
SIAREPORTING CODE SUMMARY95

Page5
Line
In
Phone
Out
CONNECTIONDIAGRAM
LIN DAT CLK NEG POS
RELAY
LINE_OUT
LINE_IN
AC_IN
Outputs
0V 12V 1 2 3 4 0V 12V 1 C 2 3 C54C 6 7 C 8 TM 0V 12V NC
EXP 1
REDBLK
Mains
Earth
230V
AC
Input
RUNNER 48/6
V10.00
Bat-
+
_
RST
RESETTING THEPANEL
Power-upthepanel withthetamperinputin
alarm whileshortingout“RST”pinsfor5
seconds(youmust shortoutthe“RST”pins
beforethepanel LED starts toflash).
Thiswill Disarm All ArmedAreas andallow
access to installermodebyentering<PROG>
<ENTER>.
TheReset featureisdisabledifInstallerLock-
out isturnedon.
TCP/IP
NOC
SERIAL
EXP 2
17VAC
BATTERY
DIPSwitch
-+
13V8IN
TAMP C
0V12V
OUT 0V12V
OUT
DAT CLK 0V 12V
OUT
12C34
INPUT 56C78
INPUT
ZoneExpander
DAT CLK 0V 12V
OUT
0V12V
OUT -+
13V8IN
TAMP C
DIPSwitch
OutputExpander
NOCNC
RELAY2 NOCNC
RELAY3 NOCNC
RELAY4
NOCNC
RELAY1
POS
CLK
NEG
DAT
CLK DAT
CLK DAT
POS
POS
NEG
NEG
NOTE:Ifthe Plug-inPowersupply is fittedDONOT CONNECT (N/C)the Panel POSto Expander13.8VIN
Ifthe Wiegand Interface boardis usedyou mustfollowthe same wiring as above.
13.8V
N/C
13.8V
N/C
DIPSwitch
-+
13V8IN
TAMP C
0V12V
OUT 0V12V
OUT
DAT CLK 0V 12V
OUT
12C34
INPUT 56C78
INPUT
ZoneExpander -+
- +
Plug-inPowersupply
12V-24V-AC-AC
0V12V
OUT -+
13V8IN
DAT CLK 0V 12V
OUT
TAMP C
DIPSwitch
OutputExpander
NOCNC
RELAY2
NOCNC
RELAY3 NOCNC
RELAY4
NOCNC
RELAY1
-+
- +
Plug-inPowersupply
12V-24V-AC-AC

Page6
ZoneExpanderDIPSwitchsettings
Ifthe zonesareset toa type 0-13 then everyzoneisset to a singlezoneperinput andeachzone can besetdiffer-
ently.
Ifthe Globalzone doublingoption isturned on atP119Eall zoneson the panelare set to eitheratype14 or15
(depending on the selectedoption).When zone doubling isselected everysecondzone expanderisused asperthe
above chart astherewillbe 16 zonesperexpandernot8.
DIPswitch number8 disablesthe on-board tamperinput ifnot required.
DIPSwitches4, 5, 6, &7 are currentlyunused.
There isan LEDassociatedwith everyinput. Theyare labelled IP1—IP8.
LED IP1relatesto zone input 1 through toLED IP8 relatesto zone input 8.
At powerup the LED’swill cycle backand forth until communicationsisestablished with the main controlpanel.
Undernormalconditionsthe LED’swillbe off when thezone issealed and on when thezone isunsealedsothe
state ofthe zone can be displayed at the expander.
Ifthe zone ismonitored fora tampercondition (zone types12,13 or14)the associated LEDwillflash to indicate a
tampercondition.
The zoneexpandercan bepowered fromthe main controlpanel(asshown on the connection diagramon theprevi-
ouspage)orthereisan optionalplug in 1Apowersupplymodule that can be fitted to the zone expander.
When the optionalpowersupplymodule isfitted the 13.8V(POS)fromthe panelmust not beconnected,onlythe 0V
fromthe main controlpanelshould be connected to thezone expander0V.
NOTE:Ifthere is anaddress clash(egtwozone expanderssetto the sameaddress number)the8 LED’s will
displaythe following pattern, LED’s 1 & 8 On, changing to LED’s 2 & 7On, changing to LED’s 3 & 6 On,
changing to LED’s 4 &5 On, thenall 8 LED’s will flashtogethertwice thenthe patternwill repeatuntil the
address clashis removed.
Expanders-ZoneDoublingExpanders-NOZoneDoubling 1 2 3 4 5 6 7 8
Not used EXP #1(zones 9-16) ON off off
EXP #2(zones 17-32) EXP #2(zones 17-24) off ON off
Not used EXP #3(zones 25-32) ON ON off
EXP #4(zones 33-48) EXP #4(zones 33-40) off off ON
Not used EXP #5(zones 41-48) ON off ON
EXP #6(zones 49-64) EXP #6(zones 49-56) off ON ON
Not used EXP #7(zones 57-64) ON ON ON
On BoardTamperIgnoredON
On BoardTamperActive off
DIP Switch#

Page7
OutputExpanderDIPSwitchsettings
DIPswitch number8 disablesthe on-board tamperinput ifnot required.
DIPSwitches4, 5, 6, &7 are currentlyunused.
There isan LEDassociatedwith everyoutput. Theyare labelled OUTPUT1-4.
LED1 relatesto output1 through to LED4 relatesto output4.
At powerup the LED’swill cyclein numericalorderbackand forth untilcommunicationsisestablishedwith the main
controlpanel.Ifthereisan address clash (eg two output expanders set to the same address number) theywillcon-
tinue tocycleuntiltheclashisresolved bychanging the switcheson one ofthe expanders.
Undernormalconditionsthe LED’swillbe off when the output isoff.When an LED isonthat indicatesthe associated
relayison.
The outputexpandercan be powered fromthe main controlpanel(asshown onthe connection diagramon the previ-
ouspage)orthereisan optionalplug in 1Apowersupplymodule that can be fitted to the output expander.
When the optionalpowersupplymodule isfitted the 13.8V(POS)fromthe panelmust not beconnected,onlythe 0V
fromthe main controlpanelshould be connected to the output expander0V.
DIP Switch#
OutputExpanderNumber 1 2 3 4 5 6 7 8
O/PEXP#1 off off off FollowsOutputs 1-4
O/PEXP#2 ON off off FollowsOutputs 5-8
O/PEXP#3 off ON off FollowsOutputs 9-12
O/PEXP#4 ON ON off FollowsOutputs 13-16
O/PEXP#5 off off ON FollowsOutputs 17-20
O/PEXP#6 ON off ON FollowsOutputs 21-24
O/PEXP#7 off ON ON FollowsOutputs 25-28
O/PEXP#8 ON ON ON
On BoardTamperIgnoredON
On BoardTamperActive off
FollowsOutputs 29-32

Page8
WiegandInterfaceDIPSwitchsettings
DIP Switch#
WiegandInterface Address 1 2 3 4 5
WiegandI/F#1 off off off off off
WiegandI/F#2 ON off off off off
WiegandI/F#3 off ON off off off
WiegandI/F#4 ON ON off off off
WiegandI/F#5 off off ON off off
WiegandI/F#6 ON off ON off off
WiegandI/F#7 off ON ON off off
WiegandI/F#8 ON ON ON off off
WiegandI/F#9 off off off ON off
WiegandI/F#10 ON off off ON off
WiegandI/F#11 off ON off ON off
WiegandI/F#12 ON ON off ON off
WiegandI/F#13 off off ON ON off
WiegandI/F#14 ON off ON ON off
WiegandI/F#15 off ON ON ON off
WiegandI/F#16 ON ON ON ON off
WiegandI/F#17 off off off off ON
WiegandI/F#18 ON off off off ON
WiegandI/F#19 off ON off off ON
WiegandI/F#20 ON ON off off ON
WiegandI/F#21 off off ON off ON
WiegandI/F#22 ON off ON off ON
WiegandI/F#23 off ON ON off ON
WiegandI/F#24 ON ON ON off ON
WiegandI/F#25 off off off ON ON
WiegandI/F#26 ON off off ON ON
WiegandI/F#27 off ON off ON ON
WiegandI/F#28 ON ON off ON ON
WiegandI/F#29 off off ON ON ON
WiegandI/F#30 ON off ON ON ON
WiegandI/F#31 off ON ON ON ON
WiegandI/F#32 ON ON ON ON ON
DIP Switch#
OPTION 6 7 8
1Door Cntrl off - -
2Door Cntrl ON - -
CPT-Wiegand - off off
PWREADER - ON off
Spare - off ON
Spare - ON ON

Page9
INSTALLING PROXIMITY READERS
The Wiegand Interface board allowsvarious accesscontrol readers/keypads to be connected to the RUNNER 648/
key-pad bus.
The Wiegand Interface has an 8 wayDIPswitchthat allowsthe keypad addressto be set to a value between 1-32.
It alsohas two inputs and a relayoutput that arelinked to the keypad address, eg ifthe Wiegand Interface board is
set to keypad addressnumber 15 (Switches 2, 3 &4 ON) then input 1 can become zone 15 on the control panel
(provided option 4, “zone isa keypad zone”, isturned on at panel program address P122E15E)and relay1 willfol-
lowoutput 15 from the control panel.
Thisallowsthe input to be used for door monitoring or as a REX(request to exit) input that iscontrolled bythe main
panel.
It alsoallowsthe door control relay(output 1 on the Wiegand Interface) to be controlled bythe main panel.
There isalso two LED outputs for each reader port labelled LD1 &LD2. LD1 ispreset to follow the status of the as-
sociated relayon the board, eg LD1 on wiegand interface 1 willfollow relay1.
LD2 has two functions.
The first isit gives a single flash when anycard ispresented or a button on the keypad ispressed.
The second isLD2 can be programmed to followan output on the panel at program addressP98E so that when the
output ison LD2 willalso be on to drive the LED on the reader. Thiscan be used to indicate an arm/disarmstate,
etc.
The Buzzer output on the Wiegand reader connectionswillfollowthe keypad beeps fromthe panel. If the Wiegand
keypad has a built-innumerickeypad the Buzzer output (BUZ)willbeep as a button ispressed as audible feedback
that the button was received bythe panel. The same Buzzer output can also followother beeps fromthe panel such
as entryor exit delaybeeps, chime zone beeps, etc.
DIP switch 6 sets the Wiegand Interface to be a singledoor or two door controller.If DIP switch 6 isoffthe board is
a single door controller and onlyWiegand interface 1 isused for the reader input. Input 1 can be linked to the zone
number that matches the keypad addressof the boardand output 1 islinked to the output number that matches the
keypad address. Also when DIP switch 6 isoff, input two islinked to relay1. If input 2 istriggered the output reset
time programmed for the output associated with relay1 will operate relay1 for that timed period. Input 2 can there-
fore be used as a request to exit button.
If DIP switch 6 ison then both reader interfaces are used and both inputs and outputs are active. The second reader
willbe the addressset byswitches 1-5 plus 1, eg ifthe board addressisset to number 12 (DIP switches 1, 2 & 4
ON) then reader interface 1 willbe keypad address12 and reader interface 2 will be keypad address13. In the
same example input 1 on the Wiegand interface can be set to zone 12 and input 2 set to zone 13, output 1 on the
Wiegand interface willfollowoutput 12 and output 2 will followoutput 13.
NOTE: Always ensureDIPSwitch 6 is OFF if the boardis toonly use one keypad address otherwise there
could be a keypad address clash, eg if one WiegandIF boardis addressed as keypad # 10 andanotheras
keypad address # 11 but DIP switch 6 was turned ON onthe boardset as keypad # 10 there will be aclash
due tothere beingtwokeypad # 11’s, one will be the second reader input onthe boardset as address # 10
andthe other will be the boardset as keypad address # 11.
NOTE2: If there is an address clash (eg twoWiegandIF boards set tothe same address number)the 8
LED’s will displaythe followingpattern, LED’s 1 & 8 On, changingtoLED’s 2 & 7 On, changingtoLED’s 3 &
6 On, changingtoLED’s 4 & 5 On, then all 8 LED’s will flash together twice then the patternwill repeatuntil
the address clash is removed.
DIP switches 7-8 allowthe type of accesscontrol technologyto be selected (see chart on page 8).There are two
proximityreadersthat can be connected to the control panel. Theyare;
1-CPT-Wiegand reader/keypad
2-PWREADERProx/PIN readers.
EachWiegand Interface board must havea unique keypad address numberfrom1-32 toavoid data conflictsand to
allowassigned programoptionsto bedirected to the correct unit.

Page10
SELECTIVEARM/DISARMINGwithMULTIPLEAREAS
At softwareversion V225anewmethod forselectivearm/disarmwhen multipleareasareassigned toa
user was added tomakeitmoreflexible.Tousethisnewselectivearm/disarmyou mustturnONoption 6
at P25E13E.
If auser hasmanyassigned areastheycanchosetoselectwhich area or areas theywouldliketoarmor
disarm. Theareasassigned totheuser musthave“ARMBeforeCode” selected for all ofthe areas(P45E
option 1ON)and all areas assigned tothe user mustbe assignedtotheirkeypad (P71E) andtheARM
button(P74E).
For exampleUser1has 10 assigned areas andtheyareusingKeypad #1.Theoptionstoprogram are:
P2E1EUser 1has areas01,02,03,04,05,06,07,08,09,10.
P45E1-10EAreas1-10haveoption 1ON.
P71E1Keypad 1has areas 01,02,03,04,05,06,07,08,09,10.
P74E1Keypad 1“ARM” buttonhas areas01,02,03,04,05,06,07,08,09,10
WhenUser1entersARM- CODE -ENTERtheywillbe presented withalist of areastoarm.
Thedisplaywouldlooklikethis(only6areascanbe displayed at one time):
All displayed areas arehighlighted sotheyarereadyfor Arming.Belowthisselection line will be thecus-
tomisedtext nameforthecurrentlyselectedarea(egifarea 01was named“Reception PIR”thatname
will appear underneaththe selectedareanumber). The currentlyselected area isarea 01becauseit is
inside the ><brackets.Toselectthenext areaandalso seetheother areaspressthe “BYPASS “ but-
ton tomovethedisplaytotheright.Tomoveback pressthe““button tomovebacktothe left.
If all the selectedareasaretobearmed simplypres the“ENTER”button tostartarmingof all areas.
Toremovean areayou can pressthe“ARM” button when the required areaisselected.It will changeto
beingun-highlightedasshowninthe examplebelowwherearea 01was removed fromthearming list.
Bydefault all assigned areas will be highlighted meaning theyareall going toarm.Ifthe userwantsto
reverse thatselection sothatall areasarenothighlighted (egnonewill arm)theycanpress00.To
changeit backthe usercan press99 toselectALL areasagain.If auserhas alargenumberof areas as-
signed buttheyonlywanttoarmafewofthem theycan press00 todeselect all areas then use the
“ARM” button toselectthefewtheywant toarm.Iftheywant toarm most ofthe areas but exclude justa
fewtheywouldstart off withall areasselected(99)then simplydeselectthe fewtheydon’t want usingthe
“ARM” button. Once the selection has beenmadetheysimplypresstheENTER buttontoarmthe se-
lected areas.
Thesamesituation works for disarmingonlytheuser pressesCODE - ENTER andtheyarepresented
withalistof areastodisarm.Theselection togglewiththe “ARM” buttonand the00 &99 functionswork
the sameduringdisarm.
Area/stoarm
><Reception PIR
01 02 03 06
0504
Area/stoarm
><Reception PIR
01 02 03 060504

Page11
2k2
Tamper
4k7 8k2
Tamper
AlarmorKey-switch1Contact
AlarmorKey-switch2Contact
NCorNO NCorNO
INPUTS
The RUNNER 48/6 controlboard has 9 separate programmable monitored analogue inputs,
8 x Programmable, multi-state zone inputs
1 x Programmable tamper input
Each input must be terminated with the appropriate value or combination of end-of-line resistors,
even if the input isunused.
ZONE INPUTS-Each of the 8 zone inputs can be assigned one of the following End of Line (EOL) configuration
options,
Zone EOL Type (P125E) Input Resistor Comments
0 (Short circuit) LoopEOL
1 1k(Brown, Black, Red) Single EOL
2 1k5 (Brown, Green, Red) Single EOL
3
(P126E“Vibration Mode”only
supports this EOL value)
2k2 (Red, Red, Red) Single EOL
4 3k3 (Orange, Orange, Red) Single EOL
5 3k9 (Orange, White, Red) Single EOL
6 4k7 (Yellow,Violet, Red) Single EOL
7 5k6 (Green, Blue, Red) Single EOL
8 6k8 (Blue, Grey, Red) Single EOL
9 10k(Brown, Black, Orange) Single EOL
10 12k(Brown, Red, Orange) Single EOL
11 22k(Red, Red, Orange) Single EOL
12 (series) 2k2Tamper, 4k7 Zone Zone &Tamper
13 (series) 3k3Tamper, 6k8 Zone Zone &Tamper
14 (series) 2k2Tamper, 4k7 Low Zone, 8k2 High Zone Zone Doubling, with Tamper
15 (series) 4k7 Low Zone, 8k2 High Zone Zone Doubling, No Tamper
16 (parallel) 4k7 Low Zone, 8k2 High Zone Zone Doubling, No Tamper
Type 1-11 (SingleEOL noTamper)
Type 14 (Zone Doubling with Tamper)
n/c
n/o EOLResistor
Type 0 (Short/LoopCircuit)
n/c
Type 12-13 (Single Zone with Tamper)
2k2or3k3
AlarmContact
n/corn/o
4k7or6k8
TamperResistor

Page12
Zone
0V
N/C
Shortcircuitloop, NoEOL
N/C
Zone
0V
2k2EOL,No Tamper
2k2
N/O
2k2
0V
Zone
Type 12 Configuration.Alarm&Tamper monitoring(contactscanbeN/Cor N/O)
4k7
N/C orN/O
Zone ResistorTamper Resistor
0V
WiringaPIRDetector (N/C) for Alarm&Tamper Monitoring
Zone
2k2
4k7 AlarmContact (N/C)
PIRInternalConnections
Alarm
Tamp
Tamp
Alarm
0V
+12V
Tamper Contact (N/C)
0V
12V
EXAMPLESOFZONEWIRINGOPTIONS
Type 15 Configuration.Zone Doubling, NOTamper (contactscan beN/Cor N/O)
4k7
0V
Zone
N/C orN/O
Lo-Zone Resistor Hi-Zone Resistor
N/C orN/O
8k2
Type 16 Configuration.Zone doubling no Tamper monitoring
0V
Zone
8k2
N/C
High Zone
4k7
LowZone
N/C
NOTE:WithType16 configuration NOcontacts cannotbeused

Page13
INPUTScont.
TAMPER -A24Hrtampercircuitisavailableformonitoringsystemtampers.ThisTampercircuitisprogrammable
aseithernormallyclosed loop or2k2EOLsupervision(the defaultisnormallyclosed loop).AnyTamperalarmson
thisinput are mappedto alarmoutputsin the same mannerasfordetection zones.
In addition to the Zone&Tamperinputs,you will find the following additionalinputson the controlPCB;
AC -Connectthe 17VACyellowwires(nopolarity)fromthe transformerto the terminalsmarked AConthePCB.
The panelincludesa mainstransformerrated at 1.4 ampsat 17 VAC.
EARTH -Connectthemainsearth tothe appropriateterminalonthemainsterminalblockinthecontrolbox
cabinet. Alsoconnectalead fromthisearth point to the terminalmarked with the Earth symbol(nextto AC
terminals) on the panelPCB.
BATTERY -Connect a sealed lead acid rechargeable12VDCbatteryto theterminalslabelledred andblackon the
controlpanelbeingcarefultoobservethecorrectpolarity.Theminimumrecommended batterycapacityis7amp
hours.Batterycharge current attheseterminalsislimited to300mAmaximum.Thebatteryconnection isprotected
againstshortcircuitsbyathermalfuse. The panelperformsadynamicload teston thebatteryevery15seconds
and ifit failsthe test at anytime itwill indicate a batterylowcondition.
LINEIN -Theseterminalsareusedtoconnectthepaneltotheincoming telephone line. Thediallerusesthis line
forreporting alarmevents.AnADSLfilterwillberequired beforetheLine InterminalsifADSLispresentinthe
building.
LINEOUT -Theseterminalsareused to connecttelephonesand othercommunication equipment to theincoming
phonelineviathe paneldiallercircuit. The telephone lineispassed through the controllerto ensurethat theline is
available to the controllerwhen itisrequired. OUTPUTS
12 VOLTOUTPUTS -Therearethree 12VDC outputson thepanelPCB.These12 voltoutputsareregulated and
Thermalfuseprotected againstshortcircuits.The accessoryoutputsaremarked12Vand 0V,whilethe keypad
buss 12Vsupplyislabelled“POS”&“NEG”.The 12Voutputsaresupplied bythermalfuses.The recommended
maximumtotalload that should bedrawn fromall ofthe 12Voutputsis1A.
OUTPUTS1&2-Thesefullyprogrammable, highcurrent, opendrain(high-going-low)typeFEToutputscapable
ofswitchingupto 1.5A@12VDC. These2outputsarenormallyset asswitchedoutputs,providingpowerfor12V
sirensorpiezos. Ifrequired, theseoutputscanbe programmed to besirenoutputsdesigned to drivean8ohm10
watt hornspeakeron eachoutput (see P37Eoption1).Ifan inductiveloadisconnected to theseoutputsaback
EMFdiode should be fitted.
OUTPUT3&4 -Thesearemediumcurrent, opendrain(high-going-low)typeFEToutputscapableofswitchingup
to 1A.LikeOutputs1&2theyarefullyprogrammable. Ifan inductiveload isconnected totheseoutputsaback
EMFdiode should be fitted.
NOTE:- Connecting devices thatdrawcurrent inexcess of 1A to outputs 3 or4 will damagethe output.
OUTPUT4Relay -Thisisarelayoutput(rated 1A@30VDC)that worksinparallelwith the FETon output4.It has
single polechangeovercontacts. Like Outputs1 &2 it is fullyprogrammable.
KEYPADPORT -The terminalsmarked POS,NEG,CLOCK, &DATA makeup the communicationsportwhichthe
keypadsand otherintelligentfielddevicesusetotalkto thecontroller.The terminalsareconnected to
corresponding terminalsonthe remote devices.The "lin" terminalisonlyused bythe keypadsand utilisesafifth
wireto provideacommunicator“listen-in” facility.Thisfeatureisparticularlyusefulwhenservicingmonitoring
faults. The keypad 12Vsupply(POS,NEG)isprotected bya thermalfuse.
EXPANSIONPORTS- Therearetwo highspeedexpansionports(labelledEXP1&EXP2)plusone 9600 baud
serialport(labelled SERIAL).The serialporthasno functionat present andisprovidedforpossiblefutureuse. The
two expansion portsallowoptionaldevicessuchasthe Cellularback-up module,CANbusinterfaceandother
peripheralsto come later.
ETHERNETPORT- The on-boardEthernet portallowsupload/downloadviathebuilt-inwebpage, IPmonitoring
and remote controlvia Smartphone and tablet apps.

Page14
ACCESSORIES
DTMFCOMMANDCONTROLSEQUENCE
IfDTMFCommand Controlhasbeen enabled the operation isperformed asfollows.
Callthe controlpanel.
When the panelanswers itwillplaythe message “Enteryourcode followed bythe # key”.
At that point enterinyourDTMFCode (programlocation P63EforArea Arm/DisarmorP175E12EforOutput control)
followed bythe #keyon the phone.
DTMFArming and Disarming
Ifforexample the DTMFcode toremotelyarmand disarmArea 1 (P63E1E)was1234and Area 1 wasdisarmed,
when you enterthe Area 1DTMFcode;
1234# -(you will hearthemessage “Area 1 Disarmed”)
If you then press the *keyit will change the stateorArea 1,eg
*-(youwillhearthe message “Area 1Armed”)
DTMFOutput Control
Ifforexample the DTMFcode toremotelycontrolOutputs(P175E12E)was9876 and youwerecontrollingOutput1
(whichwascurrentlyOff), when you enterthe Output DTMFcode followed byoutput 1 (01);
987601 # -(you will hearthe message “Output 1 Off”)
If you then press the *keyit will change the stateofOutput1, eg
*-(youwillhearthe message “Output 1 On”)
Exiting DTMFControlMode
When all DTMFremote controlfunctionsare completedyou caneitherhang upthe phone andthecontrolpanelwill
hangup automaticallyin 15 secondsoryou can press;
00 # -(youwillhear“Goodbye”) andthepanelwillhang up immediately.

Page15
MEMORYVIEWMODE
CURRENTALARMS
When viewing the memoryevent bufferat the keypadbypressing the “MEMÇ”button, the first thing that will al-
waysbe displayedare anyCurrent Alarmsthat are still active. When allcurrent systemalarmshave been dis-
played the keypad willthen start to show the historicalmemoryevents.
The chart belowliststhe possible current alarmsthat could beshowninmemory.
HISTORICALMEMORYEVENTS
Following the “Current Alarms” the panelwilldisplaythe historicalmemoryevents.The panelstoresthemostre-
cent events,(upto approx12000),includingallalarmevents,allsystemeventssuchasmainsfailureetcaswell
asarming byArea. The memoryeventsaredisplayedchronologicallywiththemostrecent event shownfirstand
subsequent eventsfollowing indescending orderfromnewest to oldest.
Tovieweventssimplypressthe “MEMÇ”buttonto moveto the nextevent.Ifyouwishtogobackand lookat an
earlierevent youcan usethe “È”button togo backto an earlierevent. Eachtimethe Downarrowispressed the
memorywillgo backone event.
The keypadwill beep andthe displayisadvanced to the nexteventeverytimethe “MEMÇ”button ispressed.
When all eventsinmemoryhavebeen displayed thekeypad will exitmemorymode and returnto thenormalidle
state. Tocancelthememorydisplayjustpress “ENTER”.Ifno buttonsarepressedforaperiod of20 secondsthe
keypadwillautomaticallyexit memorydisplaymode.
CURRENTALARMS FULL LCD Display
None NoFaults
1 Mains Failure PowerFailure
2 BatteryLow BatteryLow
3 12VFuse orOutput Failure O/PorFuse Fail
4 Telephone Line Failure Phone Line Fail
5 RadioDetectorBatteryLow RadioBatt Low
6 RadioPendant Battery Low Pendant Batt Low
7 Zone Supervise Failure SupervisedFail
8 SensorWatchAlarm SensorWatchFail
9 DelinquencyAlarm Area Delinquency
10 KeypadMissing/Fault KeypadMissing
11
12
13 DiallerKiss-off Failure DialerFailure

Page16
FULLLCDKEYPADINSTALLATION
INSTALLATION
Connectthe 4wiresfromthe keypad buson the maincontrolpanelto the correspondingconnectionson thekeypad
(DAT,CLK,POS&NEG) The 5th wireisan optional“Listen-in“connection. It isconnectedfromthe "Input"terminal
ofthe keypadto the"Lin"terminalofthe panelkeypadport. With the Listen-inwireconnected the usercan hearthe
call progress during diallingat the keypad (providedthe desired programoptionsat address P175E6Eareturned
on). The keypad input must not be set asa zone (P122Eoption 4)forthelisten-in featureto work.
The maximum recommended cabledistanceusing standard0.2mm securitycableis50m,or100musing 0.5mm se-
curitycable. Forlongercable runsthereisa keypad busextendermodule available.
FULLLCDKEYPADADDRESSASSIGNMENT
Atotalof32devices(keypadsorwiegandinterfacemodules) canbeconnectedtothepanel.Eachkeypadmustbe
addressed individuallytoavoidBUSconflictswhen multipleusers are operatingdifferent keypadssimultaneously.By
default,each keypad comesaddressed asKP# 1.
SettingtheLCD keypad address isdone in “LocalProgramMode”.
Toenter “Local ProgramMode” on the FULL LCD Keypadyou mustpress <PROGRAM>then <BYPASS> then
<ENTER>(sequentialbutton entry).The displaywillshow“keypad number” and the currentlyassignedkeypad ad-
dress numberwillbe shown.
Bypressinganynumberfrom01-32 thenpressing<ENTER>the keypad will changeit’saddress tothenewentry
and automaticallyexitLocalprogrammode.
Ifyou do not assign a unique address to every keypadand readerconnectedto the keypadbuss, a conflict
will existthatwill cause erraticoperation. EachreaderorkeypadMUSThavea different address.
FULLLCDKEYPADZONEINPUT
On the FULL LCD keypadsthereisa spare terminallabelled“Input”.
Thisinput can be used forlistening inwhen the dialleris active orasa zone input linked backto the main panel.
The zoneassociated withthe keypad inputislinked tothe keypad address, eg ifthe keypad address isset to 23 the
input on the keypad willbe linked to zone 23.
Ifthe zone input at P122Ehasoption 4 turned off the keypad input isused forthelisten in function.
Ifoption 4 isturned on the input will workasthe associated zone input, eg ifthe keypad address issetto 23 and op-
tion4 isturned on at P122E23Ethe keypad input will workaszone 23 sending sealed and unsealed statusbackto
the panel.

Page17
FULLLCDKEYPADADJUSTMENTS
ADJUSTING THE LCDKEYPADBACKLIGHTING
The installercanadjust the backlight levelofeachLCDdisplayand the keypad button backlight levelsbyprogram-
ming the required value atP95Ein the main controlpanel.
The value isa range from0-100%.
Ifset to 0 both the LCD andthe keypad button backlighting will be off.
Ifset to 100both willbe setto the maximum.
The programoption isP95E01-32E(forkeypad # 1-32)0-100E(0-100%)
ADJUSTING THE KEYPADBUZZERTONE–FULL LCD
Tochange thebuzzerfrequencyandhencevolumeon the FULL LCD Keypad you mustfollowthe instructionsbe-
low;
Press and holddownthe <CONTROL>button then within2secondspress the <1>buttonto increasethe frequency
orpress the <2>button to decrease the frequency.
To movethroughthedifferent frequenciesyouhavetocontinue to holddown the<CONTROL>button and press and
releaseeitherthe <1>or<2>button to move through the different settings.
DISPLAYIP&MACADDRESSATTHEKEYPAD
When the panelisinnormalmode (ie not in programmode)it ispossible to displaythe currentlyassignedIPaddress
forthe paneland the MACaddress.
ToviewtheMACAddress
At the LCD keypad press and holdthe<8>button for4 secondsuntilthe displayshowsthe panelsMACaddress. To
exit the displaymode press the <ENTER>button.
Toviewthe IPAddress
At the LCD keypad press and holdthe<9>button for4 secondsuntilthe displayshowsthe panelsIPaddress. To
exit the displaymode press the <ENTER>button.

Page18
FULLLCDKEYPADTEXTEDITING
The FUL LCD keypad hasvarioustextlocationsthatallow forcustomising ofnamesthat will appearwhen viewing
eventsin memorymode. Forexample allofthe2000 users can havea unique 20 charactername. AllLCD Text edit-
ing isdone in the “InstallerProgramMode”at the main controlpanel. Alistofthe text that can be customised when in
InstallationProgrammode isasfollows;
ProgramLCDKP“User“Name
P16E1-2000EProgramLCD KP“User” NameText
LCDKP“Idle”DisplayName
P25E14EThislocation iswherethe LCD KP“Idle”DisplayName can beProgrammed.
ProgramLCDKP“Output”Name
P31E1-32EProgramLCD KP“Output”NameText
ProgramLCDKP“Area”Name
P69E1-32EProgramLCD KP“Area”NameText
ProgramLCDKP“Keypad”Name
P100E1-32EProgramLCD KP“Keypad”Name Text
ProgramLCDKP”Zone”Name
P169E1-64EProgramLCD KP“Zone”NameText
When in InstallerProgramModeand at one ofthe aboveprogramlocationsthe arrowbuttonscan be used.
The “MEMÇ”orthe “È”buttonscan be used tochange between upper(Capital)and lowercase letters. The“Å”or
“Æ”buttonscan be used to move the cursorleft orrightto the letteryouwishto change.
In the chart belowthe maincharacters are those selected when set to Uppercase(Capital)mode. The characters in
bracketsare those selectedwheninlowercase mode.
Button # 1st Press 2nd Press 3rd Press 4thPress
1 *(‘) #(<) =(>) 1
2 A(a) B(b) C (c) 2
3 D (d) E (e) F(f) 3
4 G(g) H (h) I (i) 4
5 J (j) K(k) L(l) 5
6 M(m) N(n) O(o) 6
7 P (p) Q(q) R (r) 7
8 S (s) T(t) U(u) 8
9 V (v) W(w) X (x) 9
0 Blank Y(y) Z(z) 0

Page19
FULLLCDKEYPADMENUPROGRAMMING
The FULL LCD Keypad enables “Menu” programming of the RUNNER 48/6 panel. Easyto followplaintext Menus
willbe displayed on the keypad to enable selection of the desired programming options.
<ENTER>keyselectsthe Menu youwish toworkin orthe option ina Sub-Menu you wish
to use.
<PROG>keywillstep youbackto the previousMenulevel.
ÇÈ <Up>or<Down>arrowkeyswillallowyou to cycle throughtheMenu options(Main&Sub Menus).
ÅÆ <Left>or<Right>arrow keyscan be usedwhen in theData Entry-Menustocyclethrough the
options(eg ifin “USERS”Data Entry-Menu, the optionswouldbe Users 1-2000, ifin “ZONES”the
optionswould Zones1-64,etc).
SELECTINGTHEMAIN-MENU HEADINGS(“ÇUp”or“ÈDown”ArrowKeys)
Enter“INSTALLER”ProgramMode eg <PROG>-<INSTALLER CODE(000000)>-<ENTER>.
The LCD willdisplay“INSTALLER:USERS”. Thisisthe default Main-Menu heading.
To access a desired programlocation youfirst navigate to the desired Main-Menu byusing the “ÇUp”buttonto cy-
cle forward throughthemenu headings(the “ÈDown”button movesbackwardsthrough the menu headings). Each
press of“ÇUp”button willadvance the displayto the next Menu heading.
The Main-Menu headingsare shownon the top line of the LCD display.
To access the Sub-Menuoptionsfroma Main-Menu press the <ENTER>button.
SELECTINGTHESUB-MENU HEADINGS(“ÇUp”or“ÈDown”ArrowKeys)
Havingpressed the <ENTER>button attheselected Main-Menuheading the keypad willnow showSub-Menusfor
that heading.
The Main-Menu heading will remain on the top line ofthe LCD displayandtheSub-Menuswill appearon the bottom
line.
Each press of“ÇUp”or“ÈDown”arrow keyswilladvance the Sub-Menusdisplayed on the bottomline eitherup or
downbyone location.
To access the Data Entry-Menuoptionsfromthe Sub-Menu press the <ENTER>button.
SELECTINGTHEDATAENTRY-MENU HEADINGS
Havingpressed the <ENTER>button atthedesired Sub-Menu heading,the keypadwill nowbe in the DataEntry-
Mode.
The Main-Menu headingonthe top line ofthe displaywillbe replaced with the actualdata entryfielddescription, eg if
you had gone from“USERS”to “CODES”thento the data entryfield ofcodesthe displaywillshow “USERCODE1”
on the top line ofthe displayand the code “123”on thebottomline (“123”beingthe default User1 code).
You can nowchangethecode, eg to change Code # 1 to 4567 press <4567><ENTER>. The bottomline willnow
showthe new codeof“4567”.
At thispoint you can use the “ÇUp”or“ÈDown”arrowkeystocyclethrough theotherSub-Menu optionsforUser
Code 1 toprogramallofthe optionsforcode 1, or;
You can usethe “ÅLeft”or“ÆRight”arrowkeystocycle through allofthe Usercodes. Thisallowsyou toprogram
allofthe usercodesfrom1-2000. The “ÆRight”arrow keywhen pressed willtakeyou upone Userata time and the
“ÅLeft”arrow keywill take you down one User,eg ifthe displaywascurrentlyshowing“USER CODE10”, pressing
the “ÅLeft”arrowkeywilltake the displayto “USER CODE9”,pressingthe“ÆRight”arrowkeywilltake the
displayto “USER CODE11”.
You can also usethe“ÅLeft”or“ÆRight”arrow keysto move through allofthe Usercodes, andwhile ata particular
User,you can alsouse the“ÇUp”or“ÈDown”arrowkeysto programall optionsforthat User.
ENTER
PROG

Page20
STEPPINGBACK THROUGH THEMENUS
If you areina Menu location, egthe“USER”DataEntryfield, and youwishto step backone stage totheprevious
Sub-Menu, youneed topress the <PROG>button.
Each time the <PROG> button ispressed the displaywillstepbackto the previousstage (remembering whereyou
were before)untilyougetbackto the Main-Menu.
Forexample if youwereinthe “KEYPADS”Main-Menu, then pressed <ENTER>to get to the “AREAS”Sub-Menufor
keypads, then pressed <ENTER>again to get to the “AREAS”DataEntry-Menuforkeypads,you could nowpress
the <PROG>button once and itwouldtakeyou backto the“KEYPADS/AREAS”Sub-Menu. Pressing <PROG>
againwilltakeyou backto the “KEYPADS”Main-Menu, and pressing <PROG>one more time will returnyou backto
the default “USERS”Main-Menu.
If you get backto the “USERS”menu andpress the <PROG>button once more the displaywill go to the
programexit menu. If you press <ENTER>when atthis point the panelwillleaveprogrammode. If you don’twish to
leaveprogrammode you can press the <PROG>button again toreturnto the “USERS”menu.
The flowchartbelowindicatesthe programmenu stepsusingthe“ARROW”, “ENTER”&“PROG” Buttonson the
keypad.
ÇorÈArrows will Cycle
through Main-Menus
MAIN-MENU
SUB-MENU
ÇorÈArrows will Cycle
through Sub-Menus
DATAENTRY-MENU
USER 1 CODE
123 (Data)
USER 2000 CODE
— (Data) USER 2 CODE
— (Data)
USER 1 ACCESSOPT
--------(Data)
LEARN RADIOUSER1
-ENTER-TOLEARN ÇÈÅÆ Arrowscan be used intheData-
Menu fields.See belowfor details.
PROGRAMButton
Leaves Sub-Menu and
goes back toMain-Menu
PROGRAMButton
Leaves Data-Mode and
goes back toSub-Menu
USERS (Main-Menu Heading)
_
USERS (Main-Menu Heading)
CODES(Sub-Menu Heading)
ENTERButton
ToaccessSub-Menu
ENTERButton
ToaccessData-Menu
ÇArrow
ÅArrow ÈArrow Arrow Æ
Table of contents
Other Crow Control Panel manuals

Crow
Crow PowerWave-8 Installation guide

Crow
Crow Runner Series Operator's manual

Crow
Crow Arrowhead Elite V6 Operating instructions

Crow
Crow serenity User manual

Crow
Crow PowerWave - 64 Operating instructions
Crow
Crow RUNNER-8 Operating instructions

Crow
Crow Power Wave - 'ST' User manual

Crow
Crow Runner Series User manual

Crow
Crow Runner Series Operator's manual

Crow
Crow PowerWave-16 Installation guide
