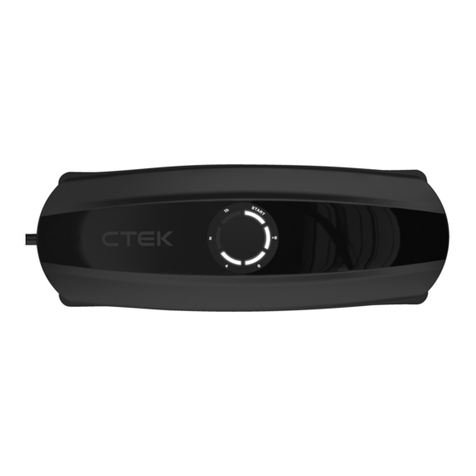
CTEK 1082 User manual

EN • 3
EN
MANUAL
CONGRATULATIONS
To the purchase of your new professional switch mode battery
charger. This charger is included in a series of professional
chargers from CTEK SWEDEN AB and represents the latest
technology in battery charging. The LITHIUM US charger
model is designed for Lithium-ion batteries using LiFePO4
technology only. Please check with the battery manufacturer
for details. Do not use the LITHIUM US charger for any other
battery technology.
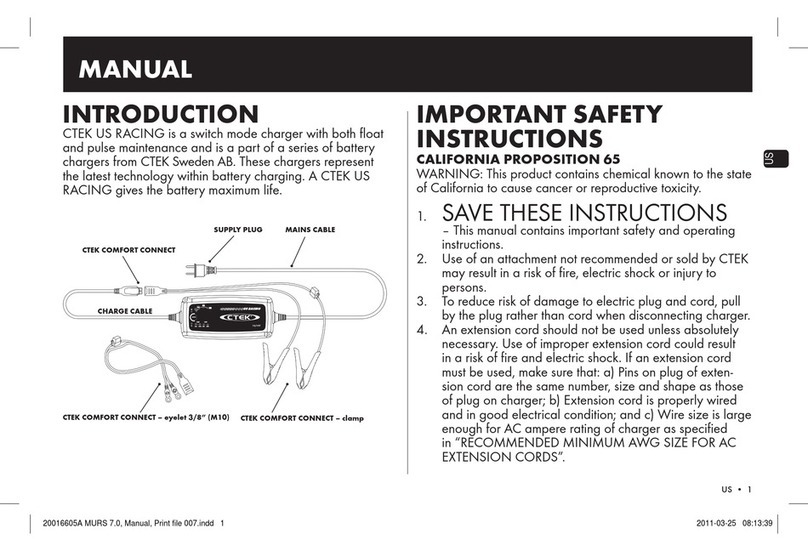
CTEK COMFORT CONNECT – eyelet ¼” (M6)
CTEK COMFORT CONNECT
MAINS CABLE
CTEK COMFORT CONNECT – clamp
CHARGE CABLE
SUPPLY PLUG*
*Supply plugs may differ to suit your wall socket.
IMPORTANT SAFETY
INSTRUCTIONS
CALIFORNIA PROPOSITION 65
WARNING: This product contains chemical known to the state
of California to cause cancer or reproductive toxicity.
1. SAVE THESE INSTRUCTIONS
– This manual contains important safety and operating
instructions for battery charger model LITHIUM US.
2. Do not expose charger to rain or snow.
3. Use of an attachment not recommended or sold by CTEK
may result in a risk of fire, electric shock or injury to
persons.
4. To reduce risk of damage to electric plug and cord, pull
by the plug rather than cord when disconnecting charger.
5. An extension cord should not be used unless absolutely
necessary. Use of improper extension cord could result
in a risk of fire and electric shock. If an extension cord
must be used, make sure that: a) Pins on plug of exten-
sion cord are the same number, size and shape as those
of plug on charger; b) Extension cord is properly wired
and in good electrical condition; and c) Wire size is large
20018058 B.indd 1 2016-04-07 12:33:51

4 • EN
enough for AC ampere rating of charger as specified
in “RECOMMENDED MINIMUM AWG SIZE FOR AC
EXTENSION CORDS”.
6. Do not operate charger with damaged cord or plug –
return the charger to the retailer.
7. Do not operate charger if it has received a sharp blow,
been dropped or otherwise damaged in any way; take it
to the retailer.
8. Do not disassemble charger; take it to the retailer when
service or repair is required. Incorrect reassembly may
result in a risk of electrical shock or fire.
9. To reduce risk of electric shock, unplug charger from AC
outlet before attempting any maintenance or cleaning.
10. follow these instructions and those published by the
battery manufacturer and the manufacturer of any
equipment you intend to use in vicinity of battery. Review
cautionary marking on these products and on engine.
11. PERSONAL PRECAUTIONS
a) Consider having someone close enough by to come to
your aid when you work near a lithium-Ion battery.
b) NEVER smoke or allow a spark or flame in vicinity of bat-
tery or engine.
c) Be extra cautious to reduce risk of dropping a metal tool
onto battery. It might spark or short-circuit battery or
other electrical part that may cause explosion.
d) Remove personal metal items such as rings, bracelets,
necklaces, and watches when working with Lithium-Ion
battery. A Lithium-Ion battery can produce a short-circuit
current high enough to weld a ring or the like to metal,
causing a severe burn.
e) Use charger for charging a LiFePO4battery only. It is
not intended to supply power to a low voltage electrical
system other than in a starter-motor application. Do not
use battery charger for charging dry-cell batteries that
are commonly used with home appliances. These batter-
ies may burst and cause injury to persons and damage to
property.
f) Never charge a battery with temperature below 32°F if
not specified by the battery manufacturer.
12. PREPARING TO CHARGE
a) If necessary to remove battery from vehicle to charge,
always remove grounded terminal from battery first.
Make sure all accessories in the vehicle are off, so as not
to cause an arc.
b) Study all battery manufacturer’s specific precautions
while charging and recommended rates of charge.
c) Determine voltage of battery by referring to car owner’s
manual and make sure it matches output rating of battery
charger.
20018058 B.indd 2 2016-04-07 12:33:51

EN • 5
EN
13. CHARGER LOCATION
a) Locate charger as far away from battery as DC cables
permit.
b) Never place charger directly above battery being
charged.
c) Do not set a battery on top of charger.
14. DC CONNECTION
PRECAUTIONS
a) Connect and disconnect DC output clips only after setting
any charger switches to “off” position and removing AC
cord from electric outlet. Never allow clips to touch each
other.
b) Attach clips to battery and chassis as indicated in 15(e),
15(f), 16(b) through 16(d).
15. FOLLOW THESE STEPS WHEN
BATTERY IS INSTALLED IN
VEHICLE. TO REDUCE RISK OF
A SPARK NEAR BATTERY:
a) Position AC and DC cords to reduce risk of damage by
hood, door or moving engine part.
b) Stay clear of fan blades, belts, pulleys, and other parts
that can cause injury to persons.
c) Check polarity of battery posts. POSITIVE (POS, P, +)
battery post usually has larger diameter than NEGATIVE
(NEG, N, -) post.
d) Determine which post of battery is grounded (connected)
to the chassis. If negative post is grounded to the chassis
(as in most vehicles) see (e). If positive post is grounded to
the chassis, see (f).
e) For Negative-grounded vehicle, connect POSITIVE
(RED) clip from battery charger to POSITIVE
(POS, P, +) ungrounded post of battery. Connect
NEGATIVE (BLACK) clip to vehicle chassis or engine
block away from battery. Do not connect clip to carbure-
tor, fuel lines, or sheet-metal body parts. Connect to a
heavy gage metal part of the frame or engine block.
f) For Positive-grounded vehicle, connect NEGATIVE
(BLACK) clip from battery charger to NEGATIVE
(NEG, N, –) ungrounded post of battery. Connect
POSITIVE (RED) clip to vehicle chassis or engine block
away from battery. Do not connect clip to carburetor,
fuel lines, or sheet-metal body parts. Connect to a heavy
gage metal part of the frame or engine block.
g) When disconnecting charger, turn switches to off, discon-
nect AC cord, remove clip from vehicle chassis, and then
remove clip from battery terminal.
h) See operating instructions for length of charge
information.
20018058 B.indd 3 2016-04-07 12:33:51

6 • EN
16. FOLLOW THESE STEPS
WHEN BATTERY IS OUTSIDE
VEHICLE. TO REDUCE RISK OF
A SPARK NEAR BATTERY:
a) Check polarity of battery terminals. POSITIVE (POS,
P, +) battery post usually has a larger diameter than
NEGATIVE (NEG, N, -) post.
b) Connect POSITIVE (RED) charger clip to POSITIVE (POS,
P, +) post of battery.
c) Position yourself and free end of cable as far away from
battery as possible – then connect NEGATIVE (BLACK)
charger clip to NEGATIVE (NEG, N, -) post of battery.
d) Do not face battery when making the final connection.
e) When disconnecting charger, always do so in reverse
sequence of connecting procedure and break first con-
nection while as far away from battery as practical.
f) A marine (boat) battery must be removed and charged
on shore. To charge it on board requires equipment spe-
cially designed for marine use.
IMPORTANT SAFETY
INFORMATION!
• Charge no other batteries than specified in TECHNICAL
INFORMATION.
• Check the charger cables prior to use. Ensure that no
cracks have occurred in the cables or in the bend protec-
tion. A charger with damaged cables must be returned to
the retailer.
• Ensure that the cabling does not jam or comes into contact
with hot surfaces or sharp edges.
• Never charge a damaged battery.
• Never place the charger on top of the battery when
charging.
• Avoid covering the charger.
• All batteries fail sooner or later. A battery that fails dur-
ing charging is normally taken care of by the chargers
advanced control, but some rare errors in the battery could
still exist. Don’t leave any battery during charging unat-
tended for a longer period of time.
• If power consumers like fitted alarms and navigation com-
puters are connected to the battery, the charging process
takes longer and may drain the battery.
20018058 B.indd 4 2016-04-07 12:33:51
EN • 7
EN
• Always check that the charger has switched to STEP 7
before leaving the charger unattended and connected for
long periods. If the charger has not switched to STEP 7
within 24 hours, this is an indication of an error. Disconnect
the charger.
• This appliance is not designed for use by young children or
people who cannot read or understand the manual unless
they are under the supervision of a responsible person to
ensure that they can use the battery charger safely. Store
and use the battery charger out of the reach of children,
and ensure that children cannot play with the charger.
• Connection to the mains supply must be in accordance with
the national regulations for electrical installations.
• Do not extend the charge cable.
RECOMMENDED
MINIMUM AWG SIZE
FOR AC EXTENSION CORDS
LENGTH OF CORD
FEET (M) AWG SIZE OF CORD
25 (7.6) 18
50 (15.2) 18
100 (30.5) 18
150 (45.6) 16
CONNECT AND
DISCONNECT THE
CHARGER TO A BATTERY
+
+
–
–
Comfort
Connect
Comfort
Connect
Comfort
Connect
20018058 B.indd 5 2016-04-07 12:33:51

8 • EN
ERROR LAMP
If the error lamp is lit, check the following:
1. Is the chargers positive lead connected
to the battery’s positive pole?
2.Is the charger connected to a 12V
LiFePO4battery?
3.Has charging been interrupted in
STEP 1 or 4?
Restart the charger by pressing the RESET-
button. If charging is still being interrupted, the
battery...
STEP 1: ...can not accept charge.
...may be too large for the charger to
wake up. Press RESET-button up to
5 times.
...a paralell load may be connected to
the battery. Disconnect the battery and
try again.
STEP 4: ...can not keep charge and may need
to be replaced.
POWER LAMP
If the power lamp is lit with a:
1. STEADY LIGHT
The mains cable is connected to the wall
socket.
2. FLASHING LIGHT:
The charger has entered the energy save
mode. This happens if the charger isn´t con-
nected to the battery within 2 minutes or the
battery on board UVP (under voltage protec-
tion) is activated.
READY TO USE
The table shows the estimated time for an empty
battery to reach 90% state of charge (SOC).
Please note that charging times are
longer in low ambient temperatures.
BATTERY SIZE (AH) TIME TO 90% CHARGED
8Ah 2h
20Ah 5h
60Ah 15h
20018058 B.indd 6 2016-04-07 12:33:51
EN • 9
EN
RESET
13.2V/5.0A
LiFe60
ERROR LAMP
FULLY CHARGEDREADY TO USE
POWER LAMP
RESET-BUTTON
BATTERIES WITH "UNDER VOLTAGE PROTECTION"
Some Lithium-ion batteries have an on-board UVP (under volt-
age protection) that disconnects the battery to avoid it becom-
ing too deeply discharged. This prohibits the CTEK charger
from detecting that there’s a battery connected. To bypass this,
the battery charger needs to open the UVP.
By pressing the RESET-button for 10 seconds, the charger
opens the UVP. During this process, the charging STEP 7 is
lit. Once the UVP has been opened and the battery is ready
to be charged, the charger automatically starts the charging
cycle.
OPERATING INSTRUCTIONS
1. Connect the charger to the battery.
2. Connect the charger to the wall socket. The
power lamp will indicate that the mains cable
is connected to the wall socket. The error lamp
will indicate if the battery clamps are incorrectly
connected. The reverse polarity protection will
ensure that the battery or charger will not be
damaged.
3. Follow the 8-step display through the charging
process.
The battery is ready to start the engine when
STEP 3 is lit.
The battery is fully charged when STEP 7 is lit.
4. Stop charging at any time by disconnecting the
mains cable from the wall socket.
20018058 B.indd 7 2016-04-07 12:33:52

10 • EN
CHARGING PROGRAM
ACCEPT BULK ABSORPTION ANALYSE COMPLETION MAXIMIZATION FLOAT PULSE
VOLTAGE (V)
1
17
2 3 4 5 6 8
CURRENT (A)
4.3A until 11.0V Increasing voltage to
13.8V
4.3A
Declining current
13.8V Checks if voltage
drops to 12V Max
1.5A Max
14.4V 13.6V
4.3A 13.4V–13.8V
4.3–1.0A
Limit: Max 30s Max 10h Max 30h 3minutes Max 2h 10 days
Charge cycle restarts
if voltage drops
Charge cycle restarts
if voltage drops
20018058 B.indd 8 2016-04-07 12:33:52

EN • 11
EN
STEP 1 ACCEPT
Tests if the battery can accept charge. This step prevents that charging proceeds with a
defect battery.
STEP 2 BULK
Charging with maximum current until approximately 90% battery capacity.
STEP 3 ABSORPTION
Charging with declining current to maximize up to 95% battery capacity.
STEP 4 ANALYSE
Tests if the battery can hold charge. Batteries that can not hold charge may need to be
replaced.
STEP 5 COMPLETION
Final charge with reduced current.
STEP 6 MAXIMIZATION
Final charge with maximum voltage up to 100% battery capacity.
STEP 7 FLOAT
Maintaining the battery voltage at maximum level by providing a constant voltage
charge.
STEP 8 PULSE
Maintaining the battery at 95–100% capacity. The charger monitors the battery voltage
and gives a pulse when necessary to keep the battery fully charged.
20018058 B.indd 9 2016-04-07 12:33:52

12 • EN
*) Back current drain is the current that drains the battery if the charger is not connected to the mains. CTEK chargers have a
very low back current.
**) The quality of the charging voltage and charging current is very important. A high current ripple heats up the battery which
has an aging effect on the positive electrode. High voltage ripple could harm other equipment that is connected to the battery.
CTEK battery chargers produce very clean voltage and current with low ripple.
***) The battery charger is designed to operate from -20°C to +50°C. However battery manufacturers may recommend other
temperature ranges for charging their batteries. Please check battery specifications.
TECHNICAL SPECIFICATIONS
Model number 1082
Rated Voltage AC 110–120VAC, 50–60Hz
Charging voltage 14.4V
Min battery voltage 2.0V
Charging current 4.3A
Current, mains 1.1A rms (at full charging current)
Back current drain* <1Ah/month
Ripple** <4% of rated current
Ambient temperature*** -4°F to +122°F (-20˚C to +50˚C), output power is reduced automatically at high temperatures
Charger type Eight step, fully automatic charging cycle
Battery types 12V LiFePO4batteries
Battery capacity 5–60Ah, up to 120Ah for maintenance
CEC-400 Battery capacity 6.9–60Ah
Dimensions 6½ x 2½ x 1½ inches (L x W x H)
Weight 1.4 Ibs
20018058 B.indd 10 2016-04-07 12:33:52

EN • 13
EN
MAINTENANCE
INSTRUCTIONS
The LITHIUM US is maintenance-free. The charger must not
be opened; doing so will invalidate the warranty. If the power
cable is damaged the charger must be returned to the retailer.
The charger casing can be cleaned using a damp cloth and
mild cleaning agent. Remove the plug from the power socket
before cleaning.
LIMITED WARRANTY
CTEK Power Inc., issues this limited warranty to the original
purchaser of this product. This limited warranty is not trans-
ferable. The warranty applies to manufacturing faults and
material defects. The customer must return the product for
inspection together with the receipt of purchase to the retailer.
CTEK Power Inc. will, in its sole discretion, either (i) return the
product to customer if it is not determined to be defective, or
(ii) without regard to whether or not the original product is
determined to be defective, either (A) provide customer with a
new replacement product of the same or comparable model
to customer, or (B) provide customer with a full refund for the
product purchase price. This warranty is void if the battery
charger has been opened, handled carelessly or repaired
by anyone other than CTEK Power Inc. or its authorized
representatives. THE FOREGOING WARRANTY, RIGHTS
AND REMEDIES ARE EXCLUSIVE AND IN LIEU OF ALL
OTHER WARRANTIES, RIGHTS OR REMEDIES, EXPRESS
OR IMPLIED, WHICH MAY OTHERWISE BE AVAILABLE;
ALL OTHER WARRANTIES, INCLUDING BUT NOT LIMITED
TO, ANY WARRANTY OF MERCHANTABILITY OR FITNESS
FOR A PARTICULAR PURPOSE, ARE HEREBY EXPRESSLY
DISCLAIMED, EXCLUDED AND WAIVED BY CUSTOMER
TO THE FULLEST EXTENT PERMITTED BY LAW. UNDER NO
CIRCUMSTANCES SHALL CTEK POWER INC. OR ANY
AFFILIATED PARTY THEREOF BE LIABLE FOR ANY INDIRECT,
INCIDENTAL, PUNITIVE OR CONSEQUENTIAL DAMAGES
OF ANY KIND.
SUPPORT
For support, FAQ, latest revised manual and more information
about CTEK products: www.ctek.com.
20018058 B.indd 11 2016-04-07 12:33:52

14 • EN
20018058B
20018058 B.indd 12 2016-04-07 12:33:52

FR • 15
FR
20018058B
MANUEL
FÉLICITATIONS
pour l’achat de votre nouveau chargeur de batteries profes-
sionnel à commutation de mode. Ce chargeur fait partie d’une
gamme de chargeurs professionnels de CTEK SWEDEN AB
et représente la toute dernière technologie de charge des bat-
teries. Le modèle de chargeur LITHIUM US est conçu unique-
ment pour la technologie des batteries Lithium-ion LiFePO4.
Consultez le fabricant de la batterie pour plus d'informations.
N'utilisez pas le chargeur LITHIUM US avec une autre techno-
logie de batterie.
CONSIGNES DE SÉCURITÉ
IMPORTANTES
PROPOSITION 65 DE LA CALIFORNIE
AVERTISSEMENT : Ce produit contient des produits chimiques
connus dans l'état de Californie comme étant cancérigènes ou
toxiques pour la reproduction.
1. CONSERVEZ CES
INSTRUCTIONS- ce manuel contient des
consignes de sécurité et d'utilisation importantes pour le
modèle de chargeur de batteries LITHIUM US.
2. N'exposez pas le chargeur à la pluie ou à la neige.
3. L'utilisation d'un accessoire non recommandé ou non
vendu par CTEK peut créer un risque d'incendie, d'élec-
trocution ou de blessure pour les personnes.
4. Pour réduire le risque de dommages à la fiche et au cor-
don électriques, tirez la fiche plutôt que le cordon pour
débrancher le chargeur.
5. N'utilisez pas de rallonge si cela n'est pas absolument
nécessaire. L'utilisation d'une rallonge incorrecte pour-
rait créer un risque d'incendie et d'électrocution. Si
vous devez utiliser une rallonge, contrôlez les points
suivants : a) Les broches de la fiche de la rallonge sont
du même nombre, de la même taille et forme que celles
CTEK COMFORT CONNECT– eyelet ¼” (M6)
CTEK COMFORT CONNECT
CÂBLE SECTEUR
CTEK COMFORT CONNECT– clamp
CÂBLE DE CHARGE
FICHE
D'ALIMENTATION*
* Les fiches d’alimentation peuvent différer selon votre prise murale.
20018058 B.indd 13 2016-04-07 12:33:52

16 • FR
de la fiche du chargeur ;b) La rallonge est correctement
câblée et en bon état électrique ; et c) Le calibre des fils
est assez grand pour l'intensité nominale CA du char-
geur comme spécifié dans «CALIBRE AWG MINIMAL
RECOMMANDÉ POUR LES RALLONGES CA».
6. N'utilisez pas de chargeur au cordon ou à la fiche
endommagés, rapportez-le au revendeur.
7. N'utilisez jamais de chargeur qui a reçu un choc violent,
est tombé ou a été endommagé autrement, apportez-le
au revendeur.
8. Ne démontez pas le chargeur, portez-le au revendeur
si une révision ou une réparation sont nécessaires. Un
remontage incorrect peut créer un risque d'électrocution
ou d'incendie.
9. Pour réduire le risque d'électrocution, débranchez le char-
geur de la prise CA avant d'entreprendre un entretien ou
un nettoyage.
10. Suivez ces instructions, celles publiées par le fabricant
de la batterie et le fabricant de tout équipement que
vous avez l'intention d'utiliser à proximité de la batterie.
Observez les marquages d'avertissement sur ces produits
et sur le moteur.
11. PRÉCAUTIONS
PERSONNELLES
a) Veillez à ce qu'une personne soit assez proche pour venir
à votre aide lorsque vous travaillez près d'une batterie
lithium-Ion.
b) Ne fumez JAMAIS, ne créez pas d'étincelle et n'allumez
pas de flamme à proximité de la batterie ou du moteur.
c) Soyez extrêmement prudent afin de réduire le risque de
chute d'un outil métallique sur la batterie. Il pourrait créer
des étincelles, court-circuiter la batterie ou d'autres élé-
ments électriques qui peuvent déclencher une explosion.
d) Retirez les objets personnels tels que des bagues, des
bracelets, des colliers et des montres pour travailler sur
une batterie Lithium-Ion. Une batterie Lithium-Ion peut
produire une intensité de court-circuit assez forte pour
souder une bague ou un autre objet en métal et brûler
gravement.
e) Utilisez le chargeur uniquement pour charger une batte-
rie LiFePO4. Il n'est pas prévu pour assurer l'alimentation
d'un système électrique basse tension autre que dans
une application de démarreur. N'utilisez pas le chargeur
de batteries pour charger les batteries à cellules sèches
utilisées généralement dans les appareils ménagers. Ces
batteries peuvent éclater, blesser les personnes et endom-
mager les biens.
f) Ne chargez jamais une batterie dont la température est
inférieure à 0°C (32°F) si le fabricant de la batterie ne le
spécifie pas.
20018058 B.indd 14 2016-04-07 12:33:52

FR • 17
FR
12. PRÉPARATION DE LA CHARGE
a) Le cas échéant, déposer la batterie du véhicule à charger,
démontez toujours la borne négative de la batterie en
premier. Veillez à ce que tous les accessoires du véhicule
soient éteint afin de ne pas créer d'arc.
b) Étudiez toutes les précautions particulières du fabricant
de la batterie sur la charge et les valeurs de charge
recommandées.
c) Déterminez la tension de la batterie en consultant le
mode d'emploi du véhicule et assurez-vous qu'elle corres-
pond à la puissance de sortie du chargeur de batteries.
13. EMPLACEMENT DU
CHARGEUR
a) Positionnez le chargeur aussi loin de la batterie que les
câbles CC le permettent.
b) Ne placez jamais le chargeur directement au-dessus de
la batterie à charger.
c) Ne placez pas la batterie sur le chargeur.
14. PRÉCAUTIONS DE
BRANCHEMENT CC
a) Branchez et débranchez les pinces de sortie CC seule-
ment après avoir réglé tous les commutateurs du chargeur
sur la position «OFF» et une fois le cordon CA débranché
de la prise électrique. Ne laissez jamais les pinces se
toucher.
b) Fixez les pinces à la batterie et au châssis comme indiqué
dans 15 (e), 15 (f), 16 (b) à 16 (d).
15. SUIVEZ CES ÉTAPES QUAND
LA BATTERIE EST MONTÉE
DANS LE VÉHICULE. POUR
RÉDUIRE LE RISQUE D’UNE
ÉTINCELLE PRÈS DE LA
BATTERIE :
a) Positionnez les cordons CA et CC afin de réduire le risque
de dommages par le capot, une porte ou une pièce
mobile du moteur.
b) Restez à l’écart des pales de ventilateur, des courroies,
des poulies et des autres pièces susceptibles de blesser
les personnes.
c) Contrôlez la polarité des bornes de la batterie. Le dia-
mètre de la borne de batterie POSITIVE (POS, P, +) est
habituellement supérieur à celui de la borne NÉGATIVE
(NEG, N, -).
d) Déterminez quelle borne est reliée à la masse du châs-
sis. Si la borne négative est reliée à la masse du châssis
(comme sur la plupart des véhicules) voir (e). Si la borne
positive est reliée à la masse du châssis, voir (f).
20018058 B.indd 15 2016-04-07 12:33:52

18 • FR
16. SUIVEZ CES ÉTAPES
QUAND LA BATTERIE
EST HORS DU VÉHICULE.
POUR RÉDUIRE LE RISQUE
D'UNE ÉTINCELLE PRÈS DE LA
BATTERIE :
a) Contrôlez la polarité des bornes de la batterie. Le dia-
mètre de la borne de batterie POSITIVE (POS, P, +) est
habituellement supérieur à celui de la borne NÉGATIVE
(NEG, N, -).
b) Brancher la pince POSITIVE (ROUGE) du chargeur à la
borne POSITIVE (POS, P, +) de la batterie.
c) Placez-vous avec l'extrémité libre du câble aussi loin
que possible de la batterie - branchez ensuite la pince
NÉGATIVE (NOIRE) du chargeur à la borne NÉGATIVE
(NEG, N, -) de la batterie.
d) Ne vous tenez pas face à la batterie pour effectuer le
branchement final.
e) Pour débrancher le chargeur, toujours le faire à l'inverse
de la procédure de branchement et toujours effectuer
la première déconnexion en se tenant aussi loin de la
batterie que possible.
e) Pour un véhicule à masse négative, branchez la pince
POSITIVE (ROUGE) du chargeur de batterie à la borne
POSITIVE (POS, P, +) non à la masse de la batterie.
Branchez la pince NÉGATIVE (NOIRE) au châssis du
véhicule ou au bloc-moteur à distance de la batterie. Ne
branchez pas la pince au carburateur, aux canalisations
de carburant ou à des pièces en tôle. Branchez-la une
pièce métallique de forte section de la structure ou du
moteur.
f) Pour un véhicule à masse positive, branchez la pince
NÉGATIVE (NOIR) du chargeur de batterie à la borne
NÉGATIVE (NEG, N, -) non à la masse de la batterie.
Branchez la pince POSITIVE (ROUGE) au châssis du
véhicule ou au bloc-moteur à distance de la batterie. Ne
branchez pas la pince au carburateur, aux canalisations
de carburant ou à des pièces en tôle. Branchez-la une
pièce métallique de forte section de la structure ou du
moteur.
g) Pour débrancher le chargeur, basculez les commutateurs
sur arrêt, débranchez le cordon CA, retirez la pince du
châssis du véhicule puis retirez la pince de la borne de la
batterie.
h) Voir le mode d’emploi pour connaître les durées de
charge.
20018058 B.indd 16 2016-04-07 12:33:52

FR • 19
FR
f) Une batterie marine (de bateau) doit être déposée et
chargée à terre. La charge à bord requiert un équipement
spécifiquement conçu pour l'utilisation marine.
INFORMATIONS DE
SÉCURITÉ IMPORTANTES !
• Ne charger aucune autre batterie que celles spécifiées
dans INFORMATIONS TECHNIQUES.
• Contrôlez les câbles du chargeur avant l’utilisation. Vérifiez
que les câbles ou la protection de courbure ne sont pas
fendus. Un chargeur dont les câbles sont endommagés doit
être rapporté au revendeur.
• Vérifiez que le câblage n’est pas emmêlé et ne touche pas
des surfaces chaudes ou des arêtes vives.
• Ne chargez jamais une batterie endommagée.
• Ne mettez jamais le chargeur sur la batterie pendant la
charge.
• Ne couvrez pas le chargeur.
• Toutes les batteries tombent en panne tôt ou tard. Une
batterie qui tombe en panne pendant la charge est norma-
lement prise en charge par le contrôle avancé du chargeur,
mais quelques rares défauts peuvent toujours persister dans
la batterie. Ne laissez pas une batterie en cours de charge
sans surveillance sur une longue durée.
• Si des consommateurs tels que les alarmes embarquées et
les ordinateurs de navigation sont branchés sur la batterie,
le processus de charge prend plus longtemps et la batterie
peut être vidée.
• Vérifiez toujours que le chargeur est passé à l’ÉTAPE 7
avant de le laisser sans surveillance et branché sur une
longue durée. Si le chargeur n’est pas passé à l’ÉTAPE
7 dans les 24 heures, c’est l’indication d’une erreur.
Débranchez le chargeur.
• Cet appareil n’est pas conçu pour être utilisé par les jeunes
enfants ou les personnes qui ne peuvent pas lire ou com-
prendre le manuel, sauf sous la surveillance d’une personne
responsable qui s’assure qu’ils peuvent utiliser le chargeur
de batterie sans risque. Stockez et utilisez le chargeur de
batterie hors de la portée des enfants et vérifiez qu’ils ne
peuvent pas jouer avec.
• La connexion au secteur doit être conforme aux réglementa-
tions nationales sur les installations électriques.
• Ne prolongez pas le câble du chargeur.
20018058 B.indd 17 2016-04-07 12:33:52

20 • FR
CALIBRE AWG MINIMUM
RECOMMANDÉ POUR LES
RALLONGES CA
LONGUEUR DU
CORDON
PIED (M)
CALIBRE AWG DU
CORDON
25 (7.6) 18
50 (15.2) 18
100 (30.5) 18
150 (45.6) 16
CONNEXION ET
DÉCONNEXION DU
CHARGEUR À UNE
BATTERIE...
+
+
–
–
Comfort
Connect
Comfort
Connect
Comfort
Connect
20018058 B.indd 18 2016-04-07 12:33:52

FR • 21
FR
TÉMOIN DE DÉFAUT
Si le témoin d'erreur s'allume, contrôlez les points suivants:
1. Le fil positif du chargeur est branché
sur la borne positive de la batterie ?
2.Le chargeur est branché sur une batte-
rie 12 V LiFePO4?
3.La charge a été interrompue dans les
ÉTAPES 1 ou 4 ?
Redémarrez le chargeur en appuyant sur le bou-
ton RESET. Si la charge est toujours interrompue,
la batterie...
ÉTAPE1: ...ne peut pas accepter la charge.
...peut être trop grosse pour déclen-
cher le chargeur. Appuyez sur le
bouton RESET jusqu'à 5 fois.
...une charge parallèle peut être
branchée à la batterie. Débranchez
la batterie puis réessayez.
ÉTAPE4: ...ne conserve pas la charge et peut
devoir être remplacée.
TÉMOIN D'ALIMENTATION
Si le témoin d'alimentation s'allume comme suit :
1. FIXE
Le câble secteur est branché dans la prise
murale.
2. CLIGNOTANT:
Le chargeur est entré en mode économie
d'énergie. Ceci se produit si le chargeur n'est pas
branché à la batterie dans les 2 minutes ou si la
protection UVP (protection de sous-tension) de la
batterie est activée.
PRÊTE À L'EMPLOI
Le tableau indique le temps prévu pour qu'une bat-
terie vide atteigne 90% de sa charge. Notez que
les temps de charge sont plus longs si la
température est basse.
CAPACITÉ DE BATTERIE
(AH) TEMPS POUR 90% DE
CHARGE
8Ah 2h
20Ah 5h
60Ah 15h
20018058 B.indd 19 2016-04-07 12:33:52

22 • FR
RESET
13.2V/5.0A
LiFe60
TÉMOIN DE
DÉFAUT
CHARGE
COMPLÈTE
PRÊTE À
L'EMPLOI
TÉMOIN
D'ALIMENTATION
BOUTON
RESET
BATTERIES AVEC «PROTECTION DE SOUS -TENSION»
Certaines batteries Lithium-ion intègrent une UVP (protection
de sous-tension) qui déconnecte la batterie afin d'éviter une
décharge trop profonde. Ceci empêche le chargeur CTEK de
détecter la batterie branchée. Pour éviter ceci, le chargeur de
batteries doit ouvrir l'UVP.
Appuyez sur le bouton RESET pendant 10 secondes, pour
que le chargeur ouvre l'UVP. Pendant ce processus, l'ÉTAPE 7
de la charge est allumée. Une fois l'UVP ouverte et la batterie
prête à être chargée, le chargeur démarre automatiquement le
cycle de charge.
MODE D'EMPLOI
1. Branchez le chargeur à la batterie.
2. Branchez le chargeur dans la prise murale. Le
témoin d'alimentation indiquera que le câble
secteur est branché dans la prise murale. Le
témoin de défaut signale un mauvais branche-
ment des pinces de la batterie. La protection
contre l'inversion de polarité évitera d'endom-
mager la batterie ou le chargeur.
3. Suivez l'affichage des 8 étapes tout au long du
processus de charge.
La batterie est prête à démarrer le moteur
lorsque STEP 3 est allumé.
La batterie est complètement chargée quand
STEP 7 est allumé.
4. La charge peut être arrêtée à tout moment
en débranchant le câble secteur de la prise
murale.
20018058 B.indd 20 2016-04-07 12:33:52
Table of contents
Languages:
Other CTEK Batteries Charger manuals

CTEK
CTEK Multi XS 7000 User manual

CTEK
CTEK D250S Dual User manual

CTEK
CTEK PRO15S User manual

CTEK
CTEK 1055 User manual

CTEK
CTEK US 800 User manual

CTEK
CTEK M200 Assembly instructions

CTEK
CTEK E-MOBILITY CHARGESTORM Connected User manual

CTEK
CTEK MXS 5.0 Polar User manual

CTEK
CTEK 250TS User manual

CTEK
CTEK M200 User manual