Description
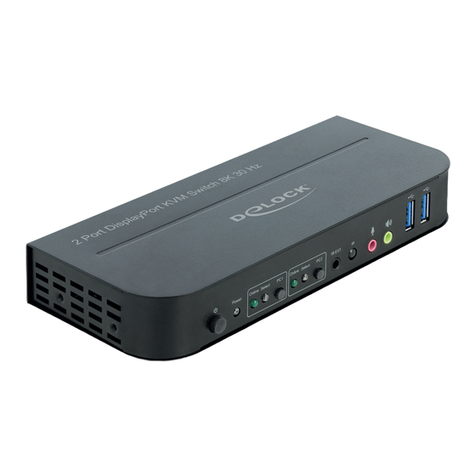
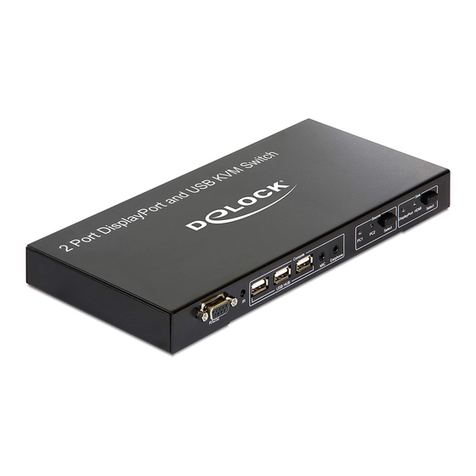
This Delock Displayport KVM switch is a convenient solution for connecting one
monitor, TV etc. to two computers. Furthermore the USB ports enable you to
connect a mouse, keyboard, hard disk and USB memory. By using the button or
the remote control you can switch between both computers. In addition you can
transmit audio signals in order to use a speaker and microphone with both
computers.
Specification
• Connector:
2 x Displayport female (connection for PC1 and PC2)
1 x Displayport female (Monitor or TV)
1 x HDMI-A female (Monitor or TV)
3 x USB A female (mouse, keyboard, hard disk, USB memory etc.)
2 x USB B female (connection for PC1 and PC2)
2 x 3.5 mm stereo jack female (1 x for speaker, 1 x for microphone)
1 x Sub-D 9 pin female RS232 (for configuration)
1 x DC power connector
1 x 3.5 mm stereo jack female for additional IR-receiver (optionally)
• 2 x switch button with LED indicator for source and sink
• Switching via button or remote control
• Resolution up to Full-HD 1080p
• Configuration and controlling the device via RS232 interface
• Colour: black
• Dimension (LxWxH): ca. 257 x 112 x 33 mm
• OS independent, no driver installation necessary
System requirements
• 2 PCs / Mac with each 1 x Mini Displayport female + 1 x USB A female
• Additional 1 x 3.5 mm stereo jack for speaker,
1 x 3.5 mm stereo jack for microphone
• Monitor or TV with Displayport or HDMI interface
Package content*
• Displayport KVM Switch USB and Audio
• 2 x cable USB A male to USB B male, length ca. 2 m
• 1 x cable DP male to Mini DP female, length ca. 0.9 m
• 2 x cable DP male to Mini DP male, length ca. 0.9 m
• External power supply 5 V / 2 A
• Remote control, user manual
*Make sure that the product package contains all items before operation. If any
item is missing or damaged, then please contact your dealer immediately.
Safety instructions:
• Protect the product against moisture
• Protect the product against direct sunlight
Hardware Installation
1. Make sure that all of your devices are turned off.
2. Connect the included cables to the Displayport, USB-B and stereo jack ports of
the KVM switch. Afterwards connect these cables to the appropriate ports on
your computer.
3. Now you can connect the cables of your monitor, mouse, keyboard, speaker
and microphone to the KVM switch.
4. After starting the computer you can use the KVM switch.
Note:
Please don’t use the switch button while the computer is booting.
Support Delock
If you have further questions, please contact our customer support
You can find current product information on our homepage: www.delock.com
Final clause
Information and data contained in this manual are subject to change without notice
in advance. Errors and misprints excepted.
Copyright
No part of this user manual may be reproduced, or transmitted for any purpose,
regardless in which way or by which means, electronically or mechanically, without
explicit written approval of Delock.
Edition: 08/2013
Kurzbeschreibung
Dieser Delock Displayport KVM Switch ist eine praktische Lösung, um einen
Monitor, TV etc. an zwei Computern zu betreiben. Des Weiteren können Sie über
die USB Anschlüsse Ihre Maus, Tastatur, Festplatten und USB Speicher
anschließen. Per Knopfdruck am Gerät oder per Fernbedienung können Sie von
einem Computer zum anderen schalten. Zusätzlich besteht die Möglichkeit
Audiosignale zu übertragen, sodass Sie einen Lautsprecher und ein Mikrofon mit
beiden Computern verwenden können.
Technische Daten
• Anschlüsse: 2 x Displayport Buchse (Anschluss für PC1 und PC2)
1 x Displayport Buchse (Monitor oder TV)
1 x HDMI-A Buchse (Monitor oder TV)
3 x USB A Buchse (Tastatur, Maus, Festplatte, USB Speicher etc.)
2 x USB B Buchse (Anschluss für PC1 und PC2)
2 x 3,5 mm Klinke Buchse (1 x für Lautsprecher, 1 x für Mikrofon)
1 x Sub-D 9 Pin Buchse RS232 (zur Programmierung)
1 x DC Stromanschluss
1 x 3,5 mm Klinke Buchse für zusätzlichen IR-Empfänger (optional)
• 2 x Umschalttasten mit LED Anzeigen für Quelle und Ziel
• Umschaltung durch Umschalttaste oder per Fernbedienung
• Auflösung bis Full-HD 1080p
• Konfiguration und Steuerung des Gerätes über RS232 Schnittstelle möglich
• Farbe: schwarz
• Maße (LxBxH): ca. 257 x 112 x 33 mm
• OS unabhängig, keine Treiberinstallation erforderlich
Systemvoraussetzungen
• 2 PCs / Mac mit jeweils Mini Displayport Buchse + 1 x USB A Buchse
• Zusätzlich 1 x 3,5 mm Klinke Buchse für Lautsprecher,
1 x 3,5 mm Klinke Buchse für Mikrofon
• Monitor oder TV Mini Displayport oder HDMI Anschluss
Packungsinhalt*
• Displayport KVM Switch USB und Audio
• 2 x Kabel USB A Stecker zu USB B Stecker, Länge ca. 2 m
• 1 x Kabel DP Stecker zu Mini DP Buchse, Länge ca. 0,9 m
• 2 x Kabel DP Stecker zu Mini DP Stecker, Länge ca. 0,9 m
• Externes Netzteil 5 V / 2 A
• Fernbedienung
• Bedienungsanleitung
*Überzeugen Sie sich vor Inbetriebnahme, dass alle Bestandteile des
Lieferumfangs in der Verpackung enthalten sind. Sollte etwas fehlen oder
beschädigt sein, wenden Sie sich bitte umgehend an Ihren Fachhändler.
Sicherheitshinweise:
• Produkt vor Feuchtigkeit schützen
• Produkt vor direkter Sonneneinstrahlung schützen
Hardware Installation
1. Stellen Sie sicher, dass Ihre Geräte ausgeschaltet sind.
2. Schließen Sie die beigelegten Kabel an die Displayport Anschlüsse, USB-B
Anschlüsse, sowie an die Klinke Anschlüsse des KVM Switches an.
Verbinden Sie diese anschließend mit den entsprechenden Anschlüssen an
Ihren Computern.
3. Verbinden Sie nun die Kabel des Monitors, Maus, Tastatur, Boxen und Mikrofon
mit dem KVM Switch.
4. Nach dem Start der Computer können Sie den KVM Switch verwenden.
Hinweis:
Bitte betätigen Sie den Umschalter des KVM Switch nicht während die
Computer hochfahren.
Support Delock
Bei weitergehenden Supportanfragen wenden Sie sich bitte an
Aktuelle Produktinformationen und Treiber Downloads finden Sie auch auf unserer
Homepage: www.delock.de
Schlussbestimmung
Die in diesem Handbuch enthaltenen Angaben und Daten können ohne vorherige
Ankündigung geändert werden. Irrtümer und Druckfehler vorbehalten.
Copyright
Ohne ausdrückliche schriftliche Erlaubnis von Delock darf kein Teil dieser
Bedienungsanleitung für irgendwelche Zwecke vervielfältigt oder übertragen
werden, unabhängig davon, auf welche Art und Weise oder mit welchen Mitteln,
elektronisch oder mechanisch, dies geschieht.
Stand: 08/2013

