manuals.online logo
Brands
  1. Home
  2. •
  3. Brands
  4. •
  5. DeLonghi
  6. •
  7. Heater
  8. •
  9. DeLonghi TCH 8993ER.BC User manual

DeLonghi TCH 8993ER.BC User manual

9
IMPORTANT SAFEGUARDS
Danger!
Failure to observe the warning may result in life threatening
injury by electric shock.
- The appliance must not be placed im-
mediately under a xed power socket.
- Do not use the appliance near show-
ers, bathtubs, sinks, swimming pools,
etc.
- If the power cable is damaged, it must
be replaced by the manufacturer, an
authorised service centre or a qualied
electrician in order to eliminate all risk.
Important!
Failure to observe the warning could result in injury or dam-
age to the appliance.
- This appliance can be used by children
aged from 8 years and above and per-
sons with reduced physical, sensory or
mental capabilities or lack of experi-
ence and knowledge if they have been
given supervision or instruction con-
cerning use of the appliance in a safe
way and understand the hazards in-
volved. Children shall not play with the
appliance. Cleaning and user mainte-
nance shall not be made by children
without supervision.
- Children of less than 3 years should be
kept away unless continuously super-
vised.
- Children aged from 3 years and less
than 8 years shall only switch on/o
the appliance provided that it has been
placed or installed in its intended nor-
mal operating position and they have
been given supervision or instruction
concerning use of the appliance in a
safe way and understand the hazards
involved. Children aged from 3 years
and less than 8 years shall not plug
in, regulate and clean the appliance or
perform user maintenance.
CAUTION — Some parts of this
product can become very hot and
cause burns. Particular attention
has to be given where children
and vulnerable people are pres-
ent.
- ATTENTION: To avoid the safety sys-
tem resetting accidentally, this appli-
ance must not be powered through
an external on/o device such as a
timer, or connected to a circuit which
is turned o and on regularly by the
energy supplier.
- Do not use the appliance in small
rooms when they are occupied by per-
sons that are not capable of leaving
the room, unless constant supervision
is provided.
Danger of burns!!
Failure to observe the warning could result in burns or scalds.
- WARNING: To avoid overheat-
ing, never under any circum-
stances cover the appliance
during operation as this would lead to
a dangerous rise in temperature.
Please note:
This symbol indicates recommendations and important infor-
mation for the user.
- Always use the appliance in an upright position.
- The use of extension leads is not recommended.
However if they cannot be avoided, follow the instruc-
tions accompanying the extension lead and never ex-
ceed the power limit marked on the extension.
- The heater must be positioned at least 50 cm from furni-
ture or other objects.
- Do not use the appliance in rooms with a oor area of
less than 4m2.
- Before putting the appliance away, make sure it is com-
pletely o and unplugged from the mains socket. Wrap
10
the cable around the base.
Do not store in dusty atmospheres.
- Do not rest anything on the appliance.
- Do not use the appliance to dry laundry. Do not obstruct
the air intake and outlet grilles (danger of overheating).
- Do not use the appliance near walls, furniture, curtains,
etc.
Safety functions
-Safety device: the appliance is tted with a safety
device which switches it o in the event of accidental
overheating (e.g. obstruction of air intake and outlet
grilles, motor turning slowly or not at all).
To reset, unplug the appliance from the mains socket for
a few minutes, remove the cause of overheating then
plug in again.
If the appliance doesn't work please contact the
De'Longhi Customer Service.
-Tip over safety device: a tip over safety device turns
the appliance o if it falls over or is positioned inappro-
priately in such a way as to jeopardise safety.
The appliance emits a beep and a dot ashes on the
display. The appliance resumes operation a few seconds
after being placed in an upright position again.
Disposing of the appliance
The appliance must not be disposed of with house-
hold waste, but taken to an authorised waste separa-
tion and recycling centre.
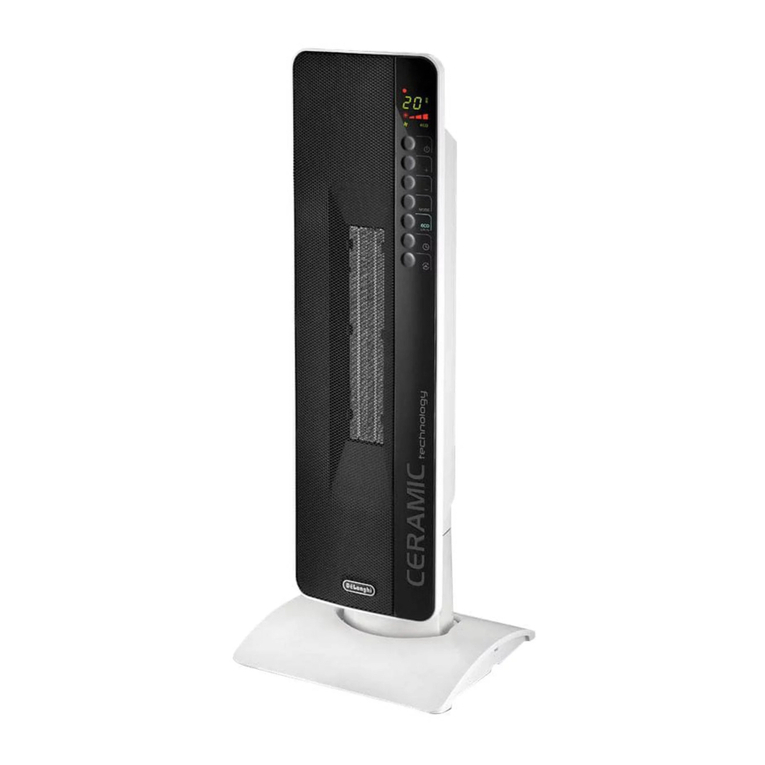
DESCRIPTION
(see g. 1)
A ON/STAND-BY button
B +/- adjustment buttons
C MODE button (selects the operating mode)
D “ECO plus”button
E Timer button
F Swing button
G Remote control receiver
H Remote control
I Indicator light
J Air intake grille
K Filter
USE
Installation
The appliance can be used on any horizontal surface.
Do not overload the electrical circuit. Avoid using the same
socket for other appliances.
Electrical connection
-Before plugging the appliance into the mains socket,
check that the mains power supply corresponds to the
value indicated on the rating plate and that the mains
power supply is adequate for the load.
- THIS APPLIANCE COMPLIES WITH DIRECTIVE 2004/108/
EEC ON RADIO INTERFERENCE SUPPRESSION.
Mounting the base
- Fit the two parts of the base together, matching the
guide pins on the front with the recesses on the back
and snapping the two clips into place (g. A and g. B).
- Turn the appliance upside down and position the as-
sembled base on the appliance in order to couple the
two openings with the two tabs on the appliance,
tilting it as shown in gure C, consequently turn the
base down till the two frontal teeth snaps into position
(gure D).
- Assembly time: approx. 5 minutes.
- Optional screw
- Fasten the tower to the base using the screw provid-
ed to achieve extra stability (gure D).
- Tools needed and estimated time:
1 Phillips head screwdriver type PH 2 x 100
1 screws (included)
Assembly time: approx. 2 minutes.
Operation and use
- Plug into the mains socket.
- The appliance emits a beep. The indicator light (I) comes
on and remains lit while the appliance is powered.
- The appliance switches to stand-by. A dot ashing on
the display means the tip over device has been activat-
ed. See paragraph:“Safety functions”.
- Press the ON/STAND-BY (A) to turn the appliance on. It
begins heating the room according to the current set-
tings.
- Press the MODE button (C) to select one of the following
operating modes:
-Fan
In this mode, only the fan operates and the appliance
does not heat the room.
-Freeze prevention
In this mode, the appliance keeps the room at a
temperature of 7°C to avoid freezing.
-Heating
In this mode, the desired temperature can be selected
by pressing the adjustment buttons + and – (B):
-Heating
Silent+
11
The appliance operates at minimum power, automati-
cally reducing energy consumption and noise level. The
tones emitted by the commands are lower than in other
modes for even more silent operation.
-Heating
The appliance operates at medium power.
-Heating
The appliance operates at high power to heat the room
rapidly.
“ECO plus” function
The “ECO plus” function is available in Heating 1, 2 and 3
modes only.
To activate the function, press the “ECO plus”button (D).
When this function is active the appliance automatically sets
the most appropriate power level to guarantee optimum
comfort while reducing energy consumption.
While the “ECO plus” function is active, the appliance may
switch automatically to a lower heating power than the one
displayed. This may happen a number of times in an hour.
- To distribute the air ow over a wider surface, press the
swing button (F). The appliance starts swinging to
the right and left. To stop the appliance in the desired
position, simply press the swing button (F) again.
- To turn the appliance o, press the ON/STAND-BY
button (A). The display may visualize a countdown for
about 6 seconds.
Please note: Room temperature can be displayed in ei-
ther °C or °F. To change the unit of measurement for the tem-
perature, press the + button for a few seconds, then release.
Digital 24 h timer
This function can be activated from any operating mode.
Auto-start: with the appliance in STAND-BY, press the timer
button (E) .
The symbol is displayed together with the time remain-
ing before the appliance comes on.
To adjust the timer, use the adjustment buttons + and - (B),
then wait a few seconds for the setting to be memorised. The
stand-by light (I) is displayed together with the symbol,
indicating that the timer has been set.
When the programmed time is reached, the appliance comes
on with the settings used during the previous period of op-
eration.
Auto-o: with the appliance on, press the timer button
(E). The symbol is displayed together with the time re-
maining before the appliance goes o.
To set the timer, use the adjustment buttons + and - (B),
then wait a few seconds for the setting to be memorised.
The current settings are displayed again, together with the
symbol indicating that the timer has been set.
When the programmed time is reached, the appliance goes
o automatically. To go back to operation without the timer,
press the timer button (E) twice.
The timer symbol disappears from the display.
USING THE REMOTE CONTROL
The functions on the remote control are the same as those
on the appliance control panel. For a description of the func-
tions, see the “Operation and use” section on the previous
page.
Inserting or replacing the batteries
The remote control is powered
by a CR2032 lithium battery.
To operate the remote control,
pull and remove the plastic
strip under the battery cover.
To replace the batteries, re-
move the battery cover by slid-
ing it as shown in the gure.
When replacing the batteries,
make sure you respect the po-
larity (see gure 2).
Replace the cover as shown in the gure.
Old batteries are harmful to the environment and must be
removed and disposed of in compliance with current legis-
lation.
MAINTENANCE
- Always unplug from the mains socket before cleaning.
- During the season when the appliance is in use, clean
the air intake and outlet grilles regularly using a vacuum
cleaner.
- To clean the lter, remove the rear grille by pulling it
outwards (g. 1).
Remove the dust lter which retains impurities in the air
drawn in from the room, blow on it lightly then replace
in the appliance.
- Never use abrasive powders or solvents to clean the ap-
pliance.
TECHNICAL CHARACTERISTICS
Supply voltage See rating plate
Absorbed power “
Fig. 2
12
PROBLEM CAUSE SOLUTION
PF display and emits a beep Temperature sensor is not working
properly
Please contact Customer Service
Product doesn’t turn on Check that the plug is connected to the
outlet
Auto-start is on
Room temperature reaches the set
temperature
Plug in
Wait till time elapsed or press the but-
ton (E) twice to cancel the auto-start
and push the button (A)
Use the “+” button to increase the set
temperature
The appliance goes o unexpectedly Check that the plug is connected to the
outlet
The set temperature has been reached
or the time set on the timer has elapsed
Plug in
A dot is ashing and unit is o The tip-over switch has been activated Make sure the appliance is standing
upright on a at surface.
If the appli-
ance doesn’t work please contact Cus-
tomer Service
The display shows "Ht" blinking The internal temperature is too high.
The air intake or outlet grille is
obstructed
Check the appliance is correctly
positioned respecting the minum
distances from the wall, or objects, as
indicated on the instruction manual,
if not, position the appliance correctly
Remove the obstruction
Disconnect the plug from the outlet
and let the appliance cool down. After
few minutes plug the appliance again.
If the appliance doesn't work
please
contact Customer Service
TROUBLESHOOTING

Other DeLonghi Heater manuals

DeLonghi FAN HEATER User manual

DeLonghi

DeLonghi FAN HEATER User manual

DeLonghi EW 7707CM User manual

DeLonghi

DeLonghi EW 7707CM User manual

DeLonghi RADIANT HEATER Firmware update

DeLonghi

DeLonghi RADIANT HEATER Firmware update

DeLonghi MICATHERMIC PANEL HEATER User manual

DeLonghi

DeLonghi MICATHERMIC PANEL HEATER User manual

DeLonghi TRV Series User manual

DeLonghi

DeLonghi TRV Series User manual

DeLonghi CERAMIC FAN HEATER User manual

DeLonghi

DeLonghi CERAMIC FAN HEATER User manual

DeLonghi EW7707CBCA User manual

DeLonghi

DeLonghi EW7707CBCA User manual

DeLonghi FAN HEATER User manual

DeLonghi

DeLonghi FAN HEATER User manual

DeLonghi EW7707CB User manual

DeLonghi

DeLonghi EW7707CB User manual

DeLonghi TRD40615ECA User manual

DeLonghi

DeLonghi TRD40615ECA User manual

DeLonghi HCM Series User manual

DeLonghi

DeLonghi HCM Series User manual

DeLonghi HFX65 Series User manual

DeLonghi

DeLonghi HFX65 Series User manual

DeLonghi TRRSE Series User manual

DeLonghi

DeLonghi TRRSE Series User manual

DeLonghi FAN HEATER User manual

DeLonghi

DeLonghi FAN HEATER User manual

DeLonghi HFX30 Series User manual

DeLonghi

DeLonghi HFX30 Series User manual

DeLonghi KH390715CB-6A User manual

DeLonghi

DeLonghi KH390715CB-6A User manual

DeLonghi HCX Series User manual

DeLonghi

DeLonghi HCX Series User manual

DeLonghi TCH Series User manual

DeLonghi

DeLonghi TCH Series User manual

DeLonghi TRD Series User manual

DeLonghi

DeLonghi TRD Series User manual

DeLonghi FAN HEATER User manual

DeLonghi

DeLonghi FAN HEATER User manual

DeLonghi HCX3120FS User manual

DeLonghi

DeLonghi HCX3120FS User manual

DeLonghi HSX Series User manual

DeLonghi

DeLonghi HSX Series User manual

DeLonghi HSX2320 Series User manual

DeLonghi

DeLonghi HSX2320 Series User manual

DeLonghi TRRS0920E.G User manual

DeLonghi

DeLonghi TRRS0920E.G User manual

Popular Heater manuals by other brands

Adler Europe AD 7731 user manual

Adler Europe

Adler Europe AD 7731 user manual

El-Björn TF 50HW EBC manual

El-Björn

El-Björn TF 50HW EBC manual

camry Premium CR 7724 user manual

camry

camry Premium CR 7724 user manual

PCB Piezotronics T333B30 Installation and operating manual

PCB Piezotronics

PCB Piezotronics T333B30 Installation and operating manual

TESY CN206ZF Usage and Storage Instructions

TESY

TESY CN206ZF Usage and Storage Instructions

BGS technic 73372 instruction manual

BGS technic

BGS technic 73372 instruction manual

Toyotomi Kero Sun Omni 120 (Type C) Operation and maintenance instructions

Toyotomi

Toyotomi Kero Sun Omni 120 (Type C) Operation and maintenance instructions

emerio HO-107774.1 instruction manual

emerio

emerio HO-107774.1 instruction manual

Marley FRC3027C Installation & maintenance instructions

Marley

Marley FRC3027C Installation & maintenance instructions

Sunrise Medical DeVilbiss 9200 Series Instruction guide

Sunrise Medical

Sunrise Medical DeVilbiss 9200 Series Instruction guide

Marley Smart series ARWH4807 Operation manual

Marley

Marley Smart series ARWH4807 Operation manual

Ancona Prima Dual User's manual & installation instructions

Ancona

Ancona Prima Dual User's manual & installation instructions

Schuller 748261 Assembling instructions

Schuller

Schuller 748261 Assembling instructions

Himalaya Premium 7.0 Installation and operating instructions

Himalaya

Himalaya Premium 7.0 Installation and operating instructions

nedis HTBA10GY manual

nedis

nedis HTBA10GY manual

EINHELL GCH 2000 Original operating instructions

EINHELL

EINHELL GCH 2000 Original operating instructions

Kratki PATIO Installation and operating instructions

Kratki

Kratki PATIO Installation and operating instructions

Ducoterra SolaRay instructions

Ducoterra

Ducoterra SolaRay instructions

manuals.online logo
manuals.online logoBrands
  • About & Mission
  • Contact us
  • Privacy Policy
  • Terms and Conditions

Copyright 2025 Manuals.Online. All Rights Reserved.