manuals.online logo
Brands
  1. Home
  2. •
  3. Brands
  4. •
  5. DentalEZ
  6. •
  7. Dental Equipment
  8. •
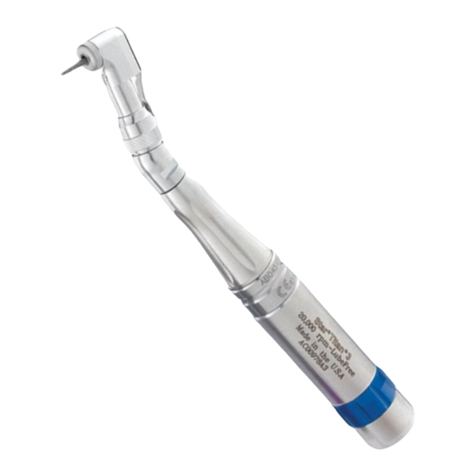
  9. DentalEZ Star Titan Low-Speed User manual

DentalEZ Star Titan Low-Speed User manual

2. Fit angle disconnect wrench,
StarDental Part #203048, furnished
with every angle, to mating
indentations on angle neck; tighten
securely(FIG. 3).
1. Loosen knurled ring enough to disengage splines.
2. Pull head assembly up; turn to desired position.
3. Carefully mesh the splines on the knuckle with the
splines of the head (see FIG.1).
4. Tighten knurled ring onto knuckle threads until snug.
1. Open latch (FIG.5).
2. Insert a concentric .0925" diameter (2.350 mm) shank RA (standard
length for Contra Angle) bur the full length of chuck.
3. Engage latch lock firmly in latch of instrument.
4. Tug on bur to verify proper seating and retention.
INSTALLATION INTO THE MANUAL LATCH ANGLE
NOTE: A concentric .0925" diameter (2.350 mm) groove & flat shank (ISO 1797-1.Type 1) bur should be used.
NOTE: Before installing bur, install motor to the motor-to-angle adapter; then install latch angle to
motor-to-angle adapter as described in Angle Installation.
INSTALLATION INTO THE AUTO LATCH ANGLE
1. Grasp angle firmly so that your thumb touches the cap; push on center of cap (FIG. 4).
2. While continuing to hold cap down, insert a concentric .0925" diameter (2.350 mm) shank RA
(standard length for Contra Angle) bur the full length of chuck.
3. Rotate bur until fully engaged in latching mechanism and release thumb.
4. Tug on bur to verify proper seating and retention.
TITAN BALL BEARING
AUTO LATCH ANGLE HEAD
KNURLED RING
SPLINES
KNUCKLE
UNLOCKED
POSITION
DO NOT USE FOR ORAL SURGERY
Lubricate the Transmission Gear Daily
1. To disassemble angle: unthread knurled ring. Remove
knuckle and transmission gear from angle head.
2. Place a drop of DentaLube II in the two transmission gear
(FIG. 6) joints between the gear and gear housing and a
drop of DentaLube II in the hole in the center of the gear
housing. Rotate the gears to allow DentaLube II to work
into the bearings. Apply a light coat of DentaLube II to the
gear teeth.
3. To reassemble angle, insert transmission gear into angle
head. Engage splines of knuckle with mating splines of
head to achieve proper alignment.
4. Tighten knurled ring onto knuckle threads until snug.
5. Place angle on motor, connect to handpiece tubing; insert bur and run for 20 seconds to evenly distribute
lubricant and disperse any residual lubricant.
6. Proceed to Cleaning & Sterilization procedures before use.
REMOVAL FROM AUTO LATCH
Grasp angle firmly so that your thumb touches the cap; push on center of cap and hold cap down while
pulling bur straight out.
REMOVAL FROM MANUAL LATCH
Open latch, pull bur straight out.
Before operating the angle, carefully read and follow all of these instructions. Save these instructions for future
reference and observe all warnings and cautions.
MOTOR-TO-ANGLE
ADAPTER DRIVE GEAR
NOTE: If angle does not seat on adapter, gears are not meshed
correctly.Remove angle;spin motor-to-angle adapter drive
gear and repeat Step 1.
1. Thread angle onto the motor-to-angle adapter,
StarDentalTitan 3 Part #264073 or Titan T Part # 263970,
by hand. Seat completely.
ANGLE INSTALLATION
ANGLE ADJUSTMENT
BUR INSTALLATION AND REMOVAL
LUBRICATION - For Lubricated Angles ONLY
DISCONNECT
WRENCH
MATING
INDENTATIONS
BALL BEARING
MANUAL LATCH
ANGLE
MOTOR-TO-
ANGLE ADAPTER
Motor
MOTOR-TO-ANGLE ADAPTER
TITAN BALL BEARING
AUTO LATCH ANGLE
PUSH ON
CENTER OF END CAP
StarDental® Instrument Solutions
RED TIP APPLICATOR
KNUCKLE TRANSMISSION
GEAR KNURLED
RING
REPLACEMENT OF THE AUTO LATCH CARTRIDGE
NOTE: Remove transmission gear first before removing cartridge from head (FIG.8.)
1. Unthread knurled ring.
2. Remove knuckle and transmission gear from head.
3. Unthread end cap using end cap wrench, StarDental Part #261339 (FIG. 7). Note
the order and orientation of components when removed from head. Reverse the
order when reassembling cartridge.
End Cap
Wrench
CARTRIDGE REPLACEMENT
CAUTION
TO MINIMIZE RISK OF SERIOUS INJURY:
• Always insert bur the full length of the chuck. If you attempt to extend it from the chuck, the bur may
dislodge during use and possibly injure you or your patient.
• Use only recommended burs to prevent damage to the autochuck and in some cases to prevent burs from
improper or incorrect placement. An improperly clamped bur may dislodge during use, causing injury to you
or your patient. A sudden high-pitched sound or increased vibration while handpiece is operating alerts the
operator to the possibility that the chuck is not latched properly to retain the bur or a bent bur is inserted.
TO MINIMIZE RISK OF INJURY OR DAMAGE TO ANGLE:
• Replace cartridge when handpiece does not run at full speed or runs noisily.
• Follow these safety instructions:
- Confirm bur is secure by tugging on it after it is loaded
- Verify concentric rotation by operating handpiece outside oral cavity. Do not use if it does not
run concentrically or runs with excessive noise.
- Do not operate angle without an installed bur.
- Always use burs with overall length of less than 24mm. Shank length must be at least 7.3mm.
- When using auto chuck angle, never depress end cap while bur is rotating.
NOTICE LubeFree Angles denoted by having 3 rings on neck - see image on first panel - are lubricated
for life. Never clean ultrasonically or immerse in solvent that would dilute the lubricant.
Motor 5K 5K 20K 20K 20K
Accessories M TA 16:1 Endodontic
Motor to Angle
Adapter
M TA Torque Multiplier
& MTA
Torque Multiplier &
16:1 Endodontic Motor
to Angle Adapter
Ratio 1:1 16:1 1:1 4:1 64:1
Max Allowable RPM 5,000 300 20,000 5,000 300
4. Pushing from the front of the head, remove the cartridge by using a 3/32" pin (FIG. 10).
5. Clear housing of all dirt, debris, and/or remaining parts of previous cartridge. Install new wave
washer - supplied with new cartridge. Insert new cartridge by installing gear and small bearing end
first. Slide cartridge into housing with alignment tab of cartridge mating with groove in head. Install
end cap.
6. To reassemble angle, insert transmission gear into angle head. Engage splines of knuckle with
mating splines of head to properly align.
7. Tighten knurled ring onto knuckle threads until snug.
REPLACEMENT OF THE MANUAL LATCH CARTRIDGE
1. Unthread knurled ring.
2. Remove knuckle and transmission gear from head.
3. Unthread end cap using plastic wrench (FIG. 9).
4. Position latch arm in the unlocked position.
5. At rear of head, push out old cartridge using a 3/32" pin
(FIG. 10).
6.
Clear housing of all dirt, debris, and/or remaining parts
of previous cartridge.
Insert new cartridge with alignment
tab of cartridge
and gears toward end cap and align with mating
groove in head. Install
end cap (FIG. 11).
7. To reassemble angle, insert transmission gear into angle head. Engage
splines of knuckle with mating splines of head to achieve proper alignment.
8. Tighten knurled ring onto knuckle threads until snug.
PLASTIC WRENCH
GEARS
END
CAP
HEAD
3/32"
PIN
MATING
GROOVE
ALIGNMENT
TAB
NOTE: Remove transmission gear first before removing
cartridge from head.
Used intraorally by trained dental professionals for drilling and preparation of dental cavities for restoration,
such as fillings, disking, cavity and crown preps, polishing, post and pin drilling and pin setting.
062732 Rev P Date of Issue 2023-01-30 ©2023 DENTALEZ, Inc.
TITAN LOW-SPEED
BALL BEARING LATCH ANGLES
TITAN 3 LUBEFREE BB AUTO LATCH
TITAN 3 LUBRICATED BB AUTO LATCH
TITAN-T LUBEFREE BB AUTO LATCH
TITAN 3 LUBEFREE BB MANUAL LATCH
TITAN 3 LUBRICATED BB MANUAL LATCH
TITAN-T LUBEFREE BB MANUAL LATCH
TITAN-T LUBRICATED BB MANUAL LATCH
INDICATIONS FOR USE
Caution: U.S. Federal law restricts this device to sale by or on the order of a licensed physician.
Under normal operating conditions, air is exhausted from the back of the head of this
handpiece. If air is directed into an open soft tissue wound or beneath the mucosa or
dermis, injury to the patient could result from air emphysema of air embolism.
This angle has no internal air or water cooling capabilities. External water for cooling maybe
required.
WARNING
WARNING
Sterilizable up to 135°C
135°C
CONTENTS
FEATURES
ANGLE ADJUSTMENT
ANGLE INSTALLATION
BUR INSTALLATION AND REMOVAL
SAFETY INSTRUCTIONS
LUBRICATION
CARTRIDGE REPLACEMENT
CLEANING AND STERILIZATION
TROUBLESHOOTING
LATCH REPLACEMENT
REPLACEMENT PART NUMBERS
WARRANTY
Rated for use with StarDental Motors andAttachments
Auto Latch or Manual Bur Latch Contra Angles
Smooth Running, Low Friction Performance
Field Replaceable Cartridges and Transmission Gears
Easy Maintenance
Long Term Reliability
Steam sterilization: 275° F (135° C) max.
FEATURES
FIG.1
FIG.2
FIG.3
FIG.4
FIG.5
FIG.6
WARNING
SAFETY INSTRUCTIONS
FIG.7
FIG.9
FIG.11
END CAP
GEAR AND
SMALL BEARING
CARTRIDGE ALIGNMENT TAB
MATING
GROOVE
WAVE
WASHER FIG.8
FIG.10
NON-STERILE
DENTALEZ, Inc., StarDental ®Division
1816 Colonial Village Lane
Lancaster, PA 17601 USA
NOTE: Always use ISO burs to prevent locking and slipping of burs in latch angle. If a problem persists,
contact dealer for further assistance; or, contact StarDental Technical Service at 1-866-DTE-INFO.
1. Remove latch screw and arm. Install new latch arm, StarDental
Part #203371, and align
latch hole with
hole in the angle head. Install
latch screw and tighten (FIG . 12).
2. If latch arm does not lock onto knurled ring, open latch and press down on arm to bend slightly.
Auto Latch Angle
Problem: BUR LOCKS IN AUTO LATCH
Cause: Debris buildup in latching mechanism
Correction: Place 2 drops of DentaLube II on latching mechanism and run handpiece briefly.
Problem: DIFFICULTY ENGAGING AUTO LATCH
Correction: Place 2 drops of DentaLube II on latching mechanism and aerate with syringe air.
Manual Latch Angle
Problem: BUR DOES NOT ENGAGE LATCH
Cause: Incorrect position of cartridge shaft
Correction: Attach angle to motor to ‘lock’ gearing in one place. Locate bur as necessary.
Problem: LATCH ARM HAS VIBRATION
Cause: Latch screw loose
Correction: Tighten latch screw.
Cause: Latch arm bent
Correction: Open latch arm; gently press arm down 1/8". Close latch arm.
Always Insist on StarDental Parts for Best Performance.
Item NumberDescription
KNURLED RING
LATCH ARM
LATCH SCREW
Titan Ball Bearing Auto Latch Angle
Titan 3................................................................................. LubeFree: 264146 ....... Lubricated: 264182
Angle Cartridge .................................................................. LubeFree: 264088 ....... Lubricated: 263961
Transmission Gear.............................................................. LubeFree: 263960 ....... Lubricated: 264093
End Cap.................................................................................................................................... 263962
Auto Latch End Cap Wrench..................................................................................................... 261339
Titan Ball Bearing Manual Latch Angle
Titan 3................................................................................. LubeFree: 262738 ....... Lubricated: 259005
Angle Cartridge .................................................................. LubeFree: 262721 ....... Lubricated: 259009
Transmission Gear.............................................................. LubeFree: 262724 ....... Lubricated: 259008
End Caps (Pkg. of 2)..................................................................................................................259010
Latch Arms and Screw (Pkg. of 3) ............................................................................................ 203371
Titan 3 BB Motor-to-Angle Adapter ........................................................................................... 264073
Titan T BB Motor-to-Angle Adapter ........................................................................................... 263970
Angle Disconnect Wrench......................................................................................................... 203048
DentaLube II ............................................................................................................................. 262539
TROUBLESHOOTING
LATCH REPLACEMENT
REPLACEMENT PART NUMBERS
It is the responsibility of the user to use only FDA compliant sterilizing equipment and accessories that are capable of meeting the manufacturers recommendations
below.
CAUTION Do not exceed 135°C
To prevent damage to the bur, use an autoclavable bur block.
Do not use: • dry heat sterilizer • cold sterilizers • ultrasonic cleaners • chemical disinfectors • immersion techniques • hand soaps
• surface wipes • surface sprays • surgical milk • detergents • sterilizer bags containing disinfectants
Refer to Daily Cleaning section for an exception in ultrasonically cleaning a specific chuck component.
LIMITS ON REPROCESSING Repeated processing has minimal effect on these angles. End of life is normally determined by wear and damage due to use.
INSTRUCTIONS
WARNING Clean and sterilize angle as soon as practical before first use and after each patient.
CONTAINMENT AND
TRANSPORTATION:
It is recommended that angles are reprocessed as soon as is reasonably practical following use.
PREPARATION FOR CLEANING: Remove bur. Remove angle from motor to angle adapter.
CLEANING - AUTOMATED: Washer-disinfectors are not recommended.
CLEANING - MANUAL: Remove debris from external surfaces using a small brush and isopropyl alcohol. Dry thoroughly. Clean auto latch daily. Remove bur from chuck. Aerate with syringe air.
LUBRICATION: Lubricate - For Lubricated Angles ONLY - See 'Lubrication' instruction section
DISINFECTION: Use steam sterilization exclusively for complete sterility as outlined below.
MAINTENANCE: Angle should be routinely maintained, checked for corrosion, worn parts, etc. and should be replaced on an as needed basis.
INSPECTION & FUNCTION TESTING: See Installation, Operating Recommendations, and/or Troubleshooting sections of this manual.
PACKAGING: Single: A standard sterilization packaging material must be used. Ensure that the pack is large enough to contain the item without stressing the seals.
In sets: Angles may be loaded into dedicated instrument trays or general purpose sterilization trays. Ensure that cutting edges are protected and do not exceed the tray
manufacturer’s limit per tray. Wrap the trays using appropriate packaging materials and methods.
WRAPPED INSTRUMENT
STERILIZATION:
Gravity Type Autoclave: Pre-Vacuum Autoclave:
• Minimum of 15 minutes at 132° C • Minimum of 4 minutes at 132° C
• Minimum of 30 minutes at 121° C
Do not exceed 135° C
DRYING: Dry the angle for 30 minutes minimum using the sterilization dry cycle and allow the angle to cool to room temperature in bag prior to use. If moisture is present,
increase your sterilizer dry cycle appropriately.
STORAGE: Store in bag after sterilization until ready to use.
ADDITIONAL INFORMATION: Do not exceed the sterilizer manufacturer’s guidelines for load capacity. Use only paper or paper/plastic bags.
MANUFACTURER CONTACT: See first or last panels of this manual.
CLEANING AND STERILIZATION
TROUBLESHOOTING, CON'T.
CAUTION
FIG.12
LIMITED WARRANTY
DENTALEZ warrants the Titan Lubricated Latch Angles for 3 months from the date of purchase*; and the
Titan LubeFree Latch Angles for 1 year from the date of purchase*:
Please note the following additional terms of our warranty and return policy:
• Warranty covers manufacturing defects only and does not cover defects resulting from abuse,
accidents, misuse, improper handling, cleaning, care or maintenance or the failure to follow or observe
our operating/use, maintenance and/or installation instructions. Damage resulting from the use of
chemicals, cleaners, disinfectants or sterilization is not covered under this warranty nor is normal
wear and tear. Failure to use authorized parts or an authorized repair facility voids this warranty.
• Liability is limited to repair or replacement of the defective part(s) or products at our sole discretion.
All other liabilities, in particular liability for damages, including, without limitation, special, exemplary,
consequential or incidental damages are excluded
• THIS WARRANTY IS IN LIEU OF ALL OTHER WARRANTIES, EXPRESSED OR IMPLIED,
INCLUDING ANY IMPLIED WARRANTIES OF MERCHANTABILITY OR FITNESS FOR A
PARTICULAR PURPOSE. NO EMPLOYEE, REPRESENTATIVE OR DEALER IS AUTHORIZED TO
CHANGE THIS WARRANTY IN ANY WAY OR TO GRANT ANY OTHER WARRANTY.
*Provided conditions in warranty are met.
WARRANTY REGISTRATION
Please visit the website below to register your StarDental product. This will ensure proper registration
and prompt and accurate service should any of your purchases need evaluation or repair during the
warranty period.
StarDental Products: WWW.DENTALEZ.com/warranty
FOR NEW PRODUCTS, MANUALS AND TECHNICAL INFORMATION, CALL
1-866-DTE-INFO OR VISIT OUR WEB SITE @ WWW.DENTALEZ.COM
IMPORTANT NOTICE ABOUT RETURNING PRODUCT TO DENTALEZ INC.
Anyone wishing to return any DENTALEZ Inc. product to a DENTALEZ facility MUST obtain the proper
RETURN AUTHORIZATION NUMBER from the Customer Service Department. The RA Number must
appear clearly marked on both the outside and inside of the returned product carton. When calling for a
return authorization number you will be asked to provide the following information:
To Obtain A
Return Authorization
Number Call
1-866-DTE-INFO
1. Product Name, Model Number or Part Number
2. Serial Number of Product
3. Dealer Return Purchase Order Number
4. Reason For Return
5. Copy of Invoice Showing Purchase
Items will be evaluated. Return Authorization Number is not a guarantee for credit. Your cooperation with
this procedure will help us expedite processing of any returns.

Other DentalEZ Dental Equipment manuals

DentalEZ Star TITAN 3 User manual

DentalEZ

DentalEZ Star TITAN 3 User manual

DentalEZ Forest User manual

DentalEZ

DentalEZ Forest User manual

DentalEZ StarDental Blis-sonic K User manual

DentalEZ

DentalEZ StarDental Blis-sonic K User manual

DentalEZ Star TITAN 3 5K MOTOR User manual

DentalEZ

DentalEZ Star TITAN 3 5K MOTOR User manual

DentalEZ StarDental PROPHY STAR 3 User manual

DentalEZ

DentalEZ StarDental PROPHY STAR 3 User manual

DentalEZ RAMVAC Utility User manual

DentalEZ

DentalEZ RAMVAC Utility User manual

DentalEZ Aeras Star 500 Elite Handpice User manual

DentalEZ

DentalEZ Aeras Star 500 Elite Handpice User manual

DentalEZ aXcs Magellan User manual

DentalEZ

DentalEZ aXcs Magellan User manual

DentalEZ Heritage CORE Delivery Unit User manual

DentalEZ

DentalEZ Heritage CORE Delivery Unit User manual

DentalEZ Heritage User manual

DentalEZ

DentalEZ Heritage User manual

DentalEZ StarDental Concentrix FX User manual

DentalEZ

DentalEZ StarDental Concentrix FX User manual

DentalEZ Star User manual

DentalEZ

DentalEZ Star User manual

DentalEZ StarDental Titan LubeFree Five Star User manual

DentalEZ

DentalEZ StarDental Titan LubeFree Five Star User manual

DentalEZ Star TITAN User manual

DentalEZ

DentalEZ Star TITAN User manual

DentalEZ StarDental 430 SWL Flex User manual

DentalEZ

DentalEZ StarDental 430 SWL Flex User manual

DentalEZ Simplicity LED Light Head Manual

DentalEZ

DentalEZ Simplicity LED Light Head Manual

DentalEZ Star Aeras 500 Elite User manual

DentalEZ

DentalEZ Star Aeras 500 Elite User manual

DentalEZ Aeras 400 Flex User manual

DentalEZ

DentalEZ Aeras 400 Flex User manual

DentalEZ Star LUBRICATED PROPHY ANGLE User manual

DentalEZ

DentalEZ Star LUBRICATED PROPHY ANGLE User manual

DentalEZ J-Chair J-3 User manual

DentalEZ

DentalEZ J-Chair J-3 User manual

DentalEZ StarDental Titan 3 257506 User manual

DentalEZ

DentalEZ StarDental Titan 3 257506 User manual

DentalEZ AERAS Star User manual

DentalEZ

DentalEZ AERAS Star User manual

DentalEZ Star User manual

DentalEZ

DentalEZ Star User manual

DentalEZ StarDental 430 SWL RA User manual

DentalEZ

DentalEZ StarDental 430 SWL RA User manual

Popular Dental Equipment manuals by other brands

Planmeca FIT CAD System user manual

Planmeca

Planmeca FIT CAD System user manual

Anthogyr Implanteo instruction manual

Anthogyr

Anthogyr Implanteo instruction manual

Dentsply Sirona Primescan Connect operating instructions

Dentsply Sirona

Dentsply Sirona Primescan Connect operating instructions

DENTSPLY CEREC MC X Cleaning and maintenance

DENTSPLY

DENTSPLY CEREC MC X Cleaning and maintenance

Good Doctors Dr's Light 2 user manual

Good Doctors

Good Doctors Dr's Light 2 user manual

Carestream DENTAL CS 3800 User and installation guide

Carestream DENTAL

Carestream DENTAL CS 3800 User and installation guide

Candulor CA 3.0 Instructions for use

Candulor

Candulor CA 3.0 Instructions for use

Patterson 043-2005 BB-Y Operation manual

Patterson

Patterson 043-2005 BB-Y Operation manual

Vaniman StoneVac II manual

Vaniman

Vaniman StoneVac II manual

Dentsply Sirona Purevac HVE Directions for use

Dentsply Sirona

Dentsply Sirona Purevac HVE Directions for use

NSK Ti-Max NL400 CDE installation manual

NSK

NSK Ti-Max NL400 CDE installation manual

Dabi Atlante Syncrus G3 owner's manual

Dabi Atlante

Dabi Atlante Syncrus G3 owner's manual

Instrumentarium Orthopantomograph OP200 D user manual

Instrumentarium

Instrumentarium Orthopantomograph OP200 D user manual

Hu-Friedy Symmetry IQ 4000 Series manual

Hu-Friedy

Hu-Friedy Symmetry IQ 4000 Series manual

Orascoptic EyeZoom Instructions for use

Orascoptic

Orascoptic EyeZoom Instructions for use

KaVo MASTERsurg Service manual

KaVo

KaVo MASTERsurg Service manual

HeyGears UltraCraft AirCure ChairSide quick start

HeyGears

HeyGears UltraCraft AirCure ChairSide quick start

Durr Dental XR 24 Nova Series manual

Durr Dental

Durr Dental XR 24 Nova Series manual

manuals.online logo
manuals.online logoBrands
  • About & Mission
  • Contact us
  • Privacy Policy
  • Terms and Conditions

Copyright 2025 Manuals.Online. All Rights Reserved.