manuals.online logo
Brands
  1. Home
  2. •
  3. Brands
  4. •
  5. DentalEZ
  6. •
  7. Dental Equipment
  8. •
  9. DentalEZ Star TITAN User manual

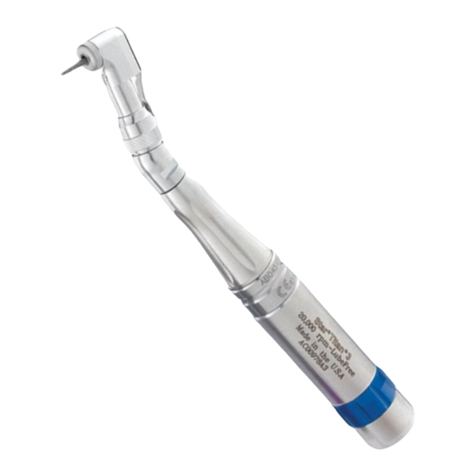
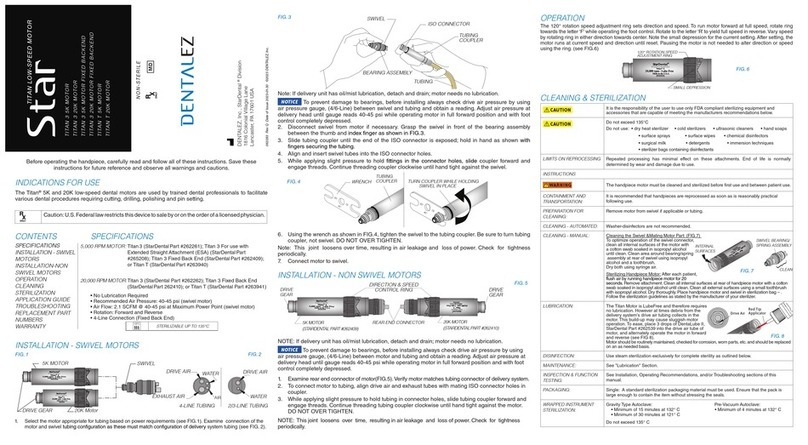
DentalEZ Star TITAN User manual

CAUTION To prevent injury, always remove bur or cutting
tool from the straight nose
cone before installing or disconnecting
the straight nose cone.
1. Assemble straight nose cone or motor-to-angle adapter to torque multiplier or motor
by retracting the quick connect
collar with fingers while placing straight nose cone or
motor-to-angle adapter on motor; release the quick connect collar. (Fig. 1)
2. To remove straight nose cone, motor-to-angle adapter or torque multiplier, reverse
the above procedure.
Note:Never use force to connect or disconnect the straight nose cone, motor-to-angle
adapter or torque multiplier.
STRAIGHT NOSE CONE OPERATION
DOTS ALIGNED DOTS NOT ALIGNED
CHUCK: CLOSED AND LOCKED CHUCK: OPEN AND UNLOCKED
Engraved on the sleeve and chuck locking collar of the straight nose cone are two dots.
(See Fig. 2) Aligned dots indicate chuck is closed and locked. When dots are not aligned,
chuck is open and unlocked.
To open chuck, grasp the chuck locking collar with one hand, the sleeve with the other,
and rotate counterclockwise until a ‘click’ is heard. (See Fig. 3)
With the chuck open, insert a .0925"(2.350mm)Ø shank bur, Doriot angle or disposable
prophy angle the full length of the chuck. Close chuck and lock by reversing the opening
procedure.
CAUTION Operate the straight nose cone with a bur, Doriot angle or disposable angle
in chuck. Operating either with the chuck open or without a bur, Doriot angle or disposable
angle installed will damage the chuck.
ANGLE INSTALLATION
1. Thread contra angle attachment of choice onto the motor-to-angle adapter, Titan-T
BB Star Part #263970 or Titan 3 BB Star Part #264073, by hand. Seat completely.
MOTOR-TO-ANGLE
ADAPTER DRIVE GEAR
MATING INDENTATIONS
UNIVERSAL
WRENCH
MOTOR-TO-ANGLE
ADAPTER
2. Fit universal wrench, Star Part #203048, furnished with every angle, to mating
indentations on angle neck; tighten securely. (See Fig. 5)

7LWDQ
USP/XEH)UHH
0DGHLQWKH8 6$
-;;;;;
6WDU'HQWDO

MOTOR-TO-ANGLE ADAPTER
QUICK CONNECT COLLAR
TORQUE MULTIPLIER
STRAIGHT NOSE CONE
MOTOR
DO NOT USE FOR ORAL SURGERY
LUBEFREE
SMOOTH RUNNING, LOW FRICTION PERFORMANCE
EASY MAINTENANCE
LONG-TERM RELIABILITY
QUICK-DISCONNECT MECHANISM
STEAM STERILIZATION: 275° F (135° C) MAXIMUM
FEATURES
Sterilizable up to 135°C
135°C
CONTENTS
FEATURES
SPECIFICATIONS
INSTALLATION
TORQUE MULTIPLIER OPERATION
STRAIGHT NOSE CONE OPERATION
ANGLE INSTALLATION
CLEANING & STERILIZATION
TROUBLESHOOTING
REPLACEMENT PART NUMBERS
WARRANTY
INSTALLATION
The torque multiplier, Titan 3 Star Part #258443 or Titan-T Star Part# 263944, fits
between the motor and either the straight nose cone or motor-to-angle adapter. Use the
torque multiplier to reduce speed four to one and increase torque by a multiple of four.
When used with the 20K motor, low speed capability expands to perform low speed,
high torque procedures: prophylaxis, pin placement, endodontics, caries removal, and
operations where higher torque is required.
Before operating the handpiece, carefully read and follow all of these instructions. Save
these instructions for future reference and observe all warnings and cautions.
Note:
If angle does not seat on
adapter, gears are not
meshed correctly (see Fig. 4). Remove angle;
spin motor-to-angle adapter drive gear and
repeat step one.
TORQUE MULTIPLIER OPERATION
INSTRUCTIONS
WARNING
CAUTION
CLEANING & STERILIZATION
CAUTION
INDICATIONS FOR USE
Low speed dental attachments are used intraorally by trained dental professionals for drilling
and preparation of dental cavities for restoration, such as fillings. This also includes disking,
cavity and crown preps, polishing, post and pin drilling and pin setting.
064972 Rev K Date of Issue: 2022-11-01 ©2022 DENTALEZ, Inc.
STRAIGHT NOSE CONE
MOTOR-TO-ANGLE ADAPTER
TORQUE MULTIPLIER
Fig. 1
Fig. 2
Fig. 3
Fig. 4
Fig. 5
It is the responsibility of the user to use only FDA compliant
sterilizing equipment and accessories that are capable of meeting
the manufacturers recommendations below.
Do not exceed 135°C
Do not use:
dry heat sterilizer cold sterilizers
ultrasonic cleaners sterilizer bags containing disinfectants
immersion techniques surface sprays
detergents surface wipes
surgical milk hand soaps
chemical disinfectors
LIMITS ON
REPROCESSING
Repeated processing has minimal effect on these attachments.
End of life is normally determined by wear and damage due to
use.
The attachments must be cleaned and sterilized before first use and
after each patient.
CONTAINMENT
AND
TRANSPORTATION:
It is recommended that attachments are reprocessed as soon as
is reasonably practical following use.
PREPARATION
FOR CLEANING:
Wear puncture-resistant gloves to prepare attachments for
sterilization. Remove bur, disc or prophy cup from angle
attachment. Disconnect straight nose cone, torque multiplier or
angle and motor-to-angle adapter from motor. Disconnect angle
from motor-to-angle adapter.
CLEANING
AUTOMATED:
Washer-disinfectors are not recommended.
SPECIFICATIONS
257506 Titan ®3 Straight Nose Cone
263942 Titan-TTM Straight Nose Cone
264073 Titan ®3 BB Motor-to-Angle Adapter
263970 Titan-TTM BB Motor-to-Angle Adapter
258443 Titan ®3 Torque Multiplier
263944 Titan-TTM Torque Multiplier
PART # DESCRIPTION
Titan-TTM Motors
Titan® 3 Motors
FOR USE WITH
Titan-TTM Angles
Titan® 3 Angles
DENTALEZ, Inc., StarDental ®Division
1816 Colonial Village Lane
Lancaster, PA 17601 USA
NON-STERILE
TITAN
Caution: U.S. Federal law restricts this device to sale by or on the order of a
licensed physician.
MD
REPLACEMENT PART NUMBERS
TROUBLESHOOTING
ALWAYS INSIST ON STAR PARTS FOR BEST PERFORMANCE.
DESCRIPTION ITEM
Note: Always use ISO burs to prevent locking and slipping of burs in chuck. If a problem
persists, contact dealer for further assistance or Star Customer Service at
1-866-DTE-INFO.
Problem: LOW POWER
Cause: Crimped tubing
Correction: Straighten tubing inside and outside delivery head.
Cause: Debris build-up in attachment
Correction: Clean and lubricate the attachment (see Cleaning & Lubricating);
and clean the motor (refer to Titan Motor Instruction Manual, Star Part
#062283).
Cause: Straight nose cone, motor-to-angle adapter or torque multiplier
mechanism is worn
Correction: Verify speed by attaching an alternate attachment. If alternate
attachment shows better performance, send attachment to factory for
repair through your authorized dealer.
Cause: Air pressure
Correction: Verify proper motor air pressure
(Refer to Titan Motor Instruction Manual, Star Part #062283).
Problem: BUR LOCKS IN CHUCK
Cause: Use of non-ISO burs
Correction: Always use ISO burs less than 24 mm overall length and a shank length
of at least 7.3 mm.
Problem: BUR SLIPS IN CHUCK
Cause: Use of non-ISO burs
Correction: Always use ISO burs less than 24 mm overall length and a shank length
of at least 7.3 mm.
Cause: Bur not properly installed
Correction: SNC - Remove and re-install bur per Straight Nose Cone Operation
section of this manual
Angle - Remove and re-install bur per the applicable section of the
angle’s instruction manual
Titan 3 Straight Nose Cone ................................................................... 257506
Titan-T Straight Nose Cone................................................................... 263942
Straight Nose Cone Cleaning Brush...................................................... 203043
Straight Nose Cone Tip ......................................................................... 257504
Titan 3 BB Motor-to-Angle Adapter ........................................................ 264073
Titan-T BB Motor-to-Angle Adapter........................................................ 263970
Titan 3 Torque Multiplier......................................................................... 258443
Titan-T Torque Multiplier ....................................................................... 263944
Universal Wrench................................................................................... 203048
Cleaning Brush
CAUTION
CLEANING-MANUAL: Cleaning the Straight Nose Cone
Remove straight nose cone from motor. Close chuck (dots
aligned). Insert round end of brush provided (see Fig. 6), Star
Part #203043, straight into chuck and withdraw.
Note:Do not rotate brush while inserting or removing. After
removing brush, tap nose of chuck to expel debris.
1. Do not adjust, disassemble or lubricate straight nose
cone.
2. Clean all external surfaces of attachments and angles
using a small brush and isopropyl alcohol.
Note:Only use isopropyl alcohol to clean attachments. DO
NOT use any products that contain chlorine, such as
disinfecting wipes or sprays. These can cause the
attachments to corrode.
3. Dry thoroughly.
4. Place attachments in a sterilization bag; use paper
or paper/plastic bags only. Follow the sterilization
guidelines as stated by the manufacturer of your
sterilizer.
5. Remove attachments from sterilizer after the drying cycle
and allow to cool in bag.
MAINTENANCE: Attachments should be routinely maintained, checked for
corrosion, worn parts, etc. and should be replaced on an as
needed basis.
LUBRICATION: No lubrication required.
DISINFECTION: Use steam sterilization exclusively for complete sterility as
outlined below.
INSPECTION &
FUNCTION TESTING:
See Installation, Operating Recommendations, and/or
Troubleshooting sections of this manual.
PACKAGING: Single: A standard sterilization packaging material must be
used. Ensure that the pack is large enough to contain the
item without stressing the seals.
WRAPPED
INSTRUMENT
STERILIZATION:
Gravity Type Autoclave:
• Minimum of 15 minutes at 132° C
• Minimum of 30 minutes at 121° C
Pre-Vacuum Autoclave:
• Minimum of 4 minutes at 132° C
Do not exceed 135° C
DRYING: Always use complete dry cycle of sterilizer. Always allow product
to cool in bag to room temperature prior to using. Contact your
sterilizer manufacturer if moisture remains inside bag and on
product after drying.
STORAGE: Store in bag after sterilization until ready to use.
ADDITIONAL
INFORMATION:
Do not exceed the sterilizer manufacturer’s guidelines for load
capacity. Use only paper or paper/plastic bags.
MANUFACTURER
CONTACT:
See first or last panels of this manual.
FOR NEW PRODUCTS, MANUALS AND TECHNICAL INFORMATION, CALL
1-866-DTE-INFO OR VISIT DENTALEZ.COM
IMPORTANT NOTICE ABOUT RETURNING PRODUCT TO DENTALEZ INC.
Anyone wishing to return any DENTALEZ Inc. product to a DENTALEZ facility MUST obtain
the proper RETURN AUTHORIZATION NUMBER from the Customer Service Department.
The RA Number must appear clearly marked on both the outside and inside of the returned
product carton. When calling for a return authorization number you will be asked to provide
the following information:
To Obtain A
Return Authorization
Number Call
1-866-DTE-INFO
1. Product Name, Model Number or Part
Number
2. Serial Number of Product
3. Dealer Return Purchase Order Number
4. Reason For Return
5. Copy of Invoice Showing Purchase
Items will be evaluated. Return Authorization Number is not a guarantee for credit. Your
cooperation with this procedure will help us expedite processing of any returns.
LIMITED WARRANTY
DENTALEZ warrants the Titan Low Speed System to be free of defects in material and
workmanship, under normal usage, under the following terms:
Star Products: Warranty Period*:
Titan Torque Multiplier 6 Months from date of purchase
Titan Straight Nose Cone 6 Months from date of purchase
Titan Motor to Angle Adapter 6 Months from date of purchase
Please note the following additional terms of our warranty policy:
• Warranty covers manufacturing defects only and does not cover defects resulting
from abuse, accidents, misuse, improper handling, cleaning, care or maintenance
or the failure to follow or observe our operating/use, maintenance and/or installation
instructions. Damage resulting from the use of chemicals, cleaners, disinfectants or
sterilization is not covered under this warranty nor is normal wear and tear. Failure to
use authorized parts or an authorized repair facility voids this warranty.
• Liability is limited to repair or replacement of the defective part(s) or products at our
sole discretion.All other liabilities, in particular liability for damages, including, without
limitation, special, exemplary, consequential or incidental damages are excluded
• THIS WARRANTY IS IN LIEU OF ALL OTHER WARRANTIES, EXPRESSED OR
IMPLIED, INCLUDING ANY IMPLIED WARRANTIES OF MERCHANTABILITY OR
FITNESS FOR A PARTICULAR PURPOSE. NO EMPLOYEE, REPRESENTATIVE
OR DEALER IS AUTHORIZED TO CHANGE THIS WARRANTY IN ANY WAY OR
TO GRANT ANY OTHER WARRANTY.
*Provided conditions in warranty are met.
WARRANTY REGISTRATION
Please visit the website below to register your Star product.This will ensure proper registration
and prompt and accurate service should any of your purchases need evaluation or repair
during the warranty period.
Star Products: www.DENTALEZ.com/warranty
Fig. 6

This manual suits for next models

6

Other DentalEZ Dental Equipment manuals

DentalEZ Star LUBRICATED PROPHY ANGLE User manual

DentalEZ

DentalEZ Star LUBRICATED PROPHY ANGLE User manual

DentalEZ Forest User manual

DentalEZ

DentalEZ Forest User manual

DentalEZ Star TITAN 3 5K MOTOR User manual

DentalEZ

DentalEZ Star TITAN 3 5K MOTOR User manual

DentalEZ aXcs Operatory Light User manual

DentalEZ

DentalEZ aXcs Operatory Light User manual

DentalEZ StarDental Titan LubeFree Five Star User manual

DentalEZ

DentalEZ StarDental Titan LubeFree Five Star User manual

DentalEZ Heritage User manual

DentalEZ

DentalEZ Heritage User manual

DentalEZ Aeras Ramvac C3 User manual

DentalEZ

DentalEZ Aeras Ramvac C3 User manual

DentalEZ Star Aeras 500 Elite User manual

DentalEZ

DentalEZ Star Aeras 500 Elite User manual

DentalEZ Heritage CORE Delivery Unit User manual

DentalEZ

DentalEZ Heritage CORE Delivery Unit User manual

DentalEZ aXcs Series User manual

DentalEZ

DentalEZ aXcs Series User manual

DentalEZ Aeras Star 500 Elite Handpice User manual

DentalEZ

DentalEZ Aeras Star 500 Elite Handpice User manual

DentalEZ StarDental 430 SWL Flex User manual

DentalEZ

DentalEZ StarDental 430 SWL Flex User manual

DentalEZ StarDental Solara QT User manual

DentalEZ

DentalEZ StarDental Solara QT User manual

DentalEZ StarDental 430 SWL RA User manual

DentalEZ

DentalEZ StarDental 430 SWL RA User manual

DentalEZ Star TITAN 3 User manual

DentalEZ

DentalEZ Star TITAN 3 User manual

DentalEZ Aeras 400 Flex User manual

DentalEZ

DentalEZ Aeras 400 Flex User manual

DentalEZ Star User manual

DentalEZ

DentalEZ Star User manual

DentalEZ Aeras Ramvac RV4-12 User manual

DentalEZ

DentalEZ Aeras Ramvac RV4-12 User manual

DentalEZ Forest User manual

DentalEZ

DentalEZ Forest User manual

DentalEZ J-Chair J-3 User manual

DentalEZ

DentalEZ J-Chair J-3 User manual

DentalEZ everLight EVLCE User manual

DentalEZ

DentalEZ everLight EVLCE User manual

DentalEZ Heritage Simplicity LED Light User manual

DentalEZ

DentalEZ Heritage Simplicity LED Light User manual

DentalEZ aXcs Magellan User manual

DentalEZ

DentalEZ aXcs Magellan User manual

DentalEZ StarDental Concentrix FX User manual

DentalEZ

DentalEZ StarDental Concentrix FX User manual

Popular Dental Equipment manuals by other brands

Ivoclar digital PrograMill Base operating instructions

Ivoclar digital

Ivoclar digital PrograMill Base operating instructions

Aseptico ADU-03ST Operation and maintenance instruction manual

Aseptico

Aseptico ADU-03ST Operation and maintenance instruction manual

Renfert Mobiloskop S instruction manual

Renfert

Renfert Mobiloskop S instruction manual

Dentsply Sirona CEREC MC XL Supplement to operating instructions

Dentsply Sirona

Dentsply Sirona CEREC MC XL Supplement to operating instructions

Belmont Evogue Q3300 Instructions for use

Belmont

Belmont Evogue Q3300 Instructions for use

Xo YB-782 Adjustment

Xo

Xo YB-782 Adjustment

Vatech PAX Duo3D installation manual

Vatech

Vatech PAX Duo3D installation manual

GLO Science Professional user manual

GLO

GLO Science Professional user manual

3TECH GUTTA-CUTTER EASYCUT user guide

3TECH

3TECH GUTTA-CUTTER EASYCUT user guide

Healthmark Flexistem FLEX008 Instructions for use

Healthmark

Healthmark Flexistem FLEX008 Instructions for use

Amanngirrbach centrofix Series instructions

Amanngirrbach

Amanngirrbach centrofix Series instructions

Sirona teneo operating instructions

Sirona

Sirona teneo operating instructions

Miele A 105 operating instructions

Miele

Miele A 105 operating instructions

Belmont Clesta II operating instructions

Belmont

Belmont Clesta II operating instructions

Carestream DENTAL CS 1500 user guide

Carestream DENTAL

Carestream DENTAL CS 1500 user guide

Engler Vet II manual

Engler

Engler Vet II manual

KaVo INTRA LUX KL 703 LED Instructions for use

KaVo

KaVo INTRA LUX KL 703 LED Instructions for use

Satelec Implant Center 2 user manual

Satelec

Satelec Implant Center 2 user manual

manuals.online logo
manuals.online logoBrands
  • About & Mission
  • Contact us
  • Privacy Policy
  • Terms and Conditions

Copyright 2025 Manuals.Online. All Rights Reserved.