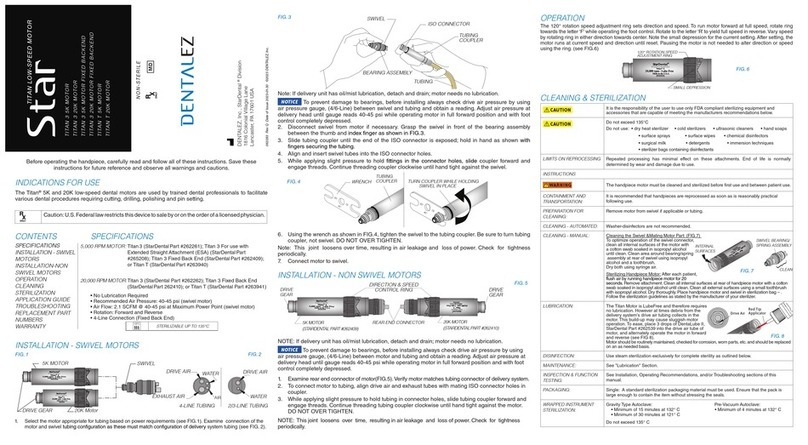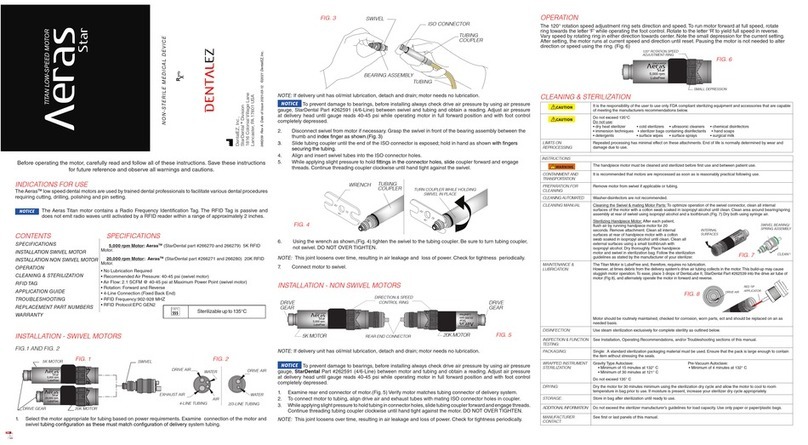
Problem: YELLOWISH LIGHT
Cause: Debris on optical surfaces
Correction: Clean all exposed optical surfaces, refer to Cleaning.
Problem: REDUCED LIGHT
Cause: Low voltage
Correction: Refer to Fiber Optic Electrical System or Tubing Instruction Manual or contact
StarDental customer service at 1-866-DTE-INFO.
Cause: Swivel lamp burned out
Correction: Replace lamp - See Replacement Part Numbers section of this manual.
When operating with non-StarDental 6-Pin F.O. systems, use StarDental Replacement Lamp Part #262962 and consult your
operator’s manual for correct voltage; Note: See Handpiece Installation, Non-Star 6-Pin F.O. system.
Problem:LACK OF POWER
Cause: Air pressure too low
Correction: Verify proper handpiece air pressure. Refer to Handpiece Installation.
Cause: Crimped tubing
Correction: Straighten tubing inside and outside delivery head
Cause: Debris build-up
Correction: Clean inside of housing and end cap with swab and alcohol. Lubricate with DentaLube
II after reassembly.
Note: Before cleaning, check for and remove any debris from turbine housing to prevent
damage and to ensure turbine performance.
Cause: Worn out turbine
Correction: Refer to Turbine Replacement.
Cause: Handpiece or swivel not threaded fully onto tubing
Correction: Refer to Handpiece Installation.
Problem: WATER LEAKAGE
Cause: Brittle handpiece or swivel silicone rubber seal
Correction: Replace silicone rubber seal:
For 4-line xed back end handpieces and 4-line non HiFlo,non LED swivels - StarDental Part #202897 (Green)
For 6-line non HiFlo, non LED swivels - StarDental Part #262520 (Green)
For 4-line HiFlo ber optic swivel - StarDental Part #263734 (Black)
For 6-pin HiFlo and LED swivels - StarDental Part #263770 (Black)
Cause: Swivel O-rings worn
Correction: Replace both O-rings on all non HiFlo swivels with StarDental Part #259884; or, for HiFlo
and LED swivels, use StarDental Part #263771. Refer to O-ring and Rear Seal Replacement
section in applicable swivel instruction manual.
Problem: SWIVEL WILL NOT DISENGAGE FROM HANDPIECE
Cause: Build-up of debris
Correction: Place two drops of DentaLube II into swivel/tubing connector area. Rotate swivel to circulate lube. Disengage
handpiece. Contact dealer if unable to disengage swivel. To prevent reoccurrence, refer to Cleaning.
Problem: IMPROPER SPRAY
Cause: Clogged lters, tubes, or water ports
Correction: Inspect and clean water lter in delivery head. Disconnect handpiece and depress foot
control. Verify water exits the swivel. If water does not come from swivel, refer to Cleaning.
Cause: Brittle handpiece or swivel silicone rubber seal
Correction: Replace silicone rubber seal
Cause: Swivel O-rings worn
Correction: Replace O-rings. (See replacement O-rings.)
Problem: BUR LOCKS OR SLIPS IN AUTOCHUCK
Cause: Debris build-up in chucking mechanism
Correction: Clean Chuck, see 'CLEANING The Chuck' under 'Cleaning and Lubricating'.
Cause: Use of non-ISO burs
Correction: Always use ISO burs.
Problem:NO LIGHT OR INTERMITTENT LIGHT
Cause: Electrical connections
Correction: Verify connections: wall outlet- power pack, power pack- lamp control, and lamp control-tubing connector.
Cause: Crimped signal air line to lamp control
Correction: Straighten signal air line to allow air ow.
Cause: Tubing corrosion on lamp contact pins
Correction: Remove lamp from swivel connector and clean contact pins with isopropyl alcohol.
Cause: Swivel lamp burned out
Correction: Replace lamp - See Replacement Part Numbers section of this manual.
When operating with non-StarDental 6-Pin F.O. systems, use StarDental Replacement Lamp Part #262962 and consult your operator’s
manual for correct voltage; Note: See Handpiece Installation, Non-Star 6-Pin F.O. system.
Troubleshooting
Note: Always use ISO burs to prevent locking and slipping of burs in turbine chuck. If problems of locking and/or slipping continues, replace worn Turbine
immediately. Replace Autochuck Turbine with StarDental Part #260296, Autochuck Turbine Replacement Kit. Replace Manual Chuck Turbine with
StarDental Part #258661, Manual Chuck Turbine Replacement Kit.
If any problem persists, contact dealer for further assistance; or, contact StarDental Technical Service at 1-866-DTE-INFO.
Turbine Replacement
Note: Replace the turbine when the handpiece fails to achieve full speed and/or increases sharply in noise level. The replacement cartridge is available
from your dealer and is easily replaced in the ofce. When ordering an Autochuck Turbine replacement, be sure to order StarDental Autochuck Turbine
Replacement Kit, StarDental Part #260296. When ordering a Manual Chuck Turbine replacement, be sure to order StarDental Manual Chuck Turbine
Replacement Kit, StarDental Part #258661.
Replacement Part Numbers
Always insist on StarDental Parts for best performance.
Concentrix® FX Handpiece with ISO 4-Line Fixed Connection and Autochuck Turbine.................................................................................................................... 265634
Concentrix® FB Handpiece with ISO 4-Line Fixed Connection and Manual Chuck Turbine..............................................................................................................265635
Concentrix® SX Fiber Optic Handpiece with Autochuck Turbine..................................................................................................................................................................265632
Concentrix® SW Handpiece with Autochuck Turbine ........................................................................................................................................................................................265633
HiFlo Swivel Assembly: 4-Line Fiber Optic ............................................................................................................................................................................................................263758
HiFlo Swivel Assembly: ISO/C (6-pin 3.3 Vdc Fiber Optic)................................................................................................................................................................................263772
LED Swivel ............................................................................................................................................................................................................................................................................ 265400
HiFlo Swivel Assembly: ISO/C (6-pin 3.1 Vdc) (for non-Star F.O. System)................................................................................................................................................... 263773
Steel Bearing Autochuck Turbine Replacement Kit for Lubricated High-Speed Handpieces............................................................................................................ 260296
End Cap, Steel Bearing Autochuck Turbine............................................................................................................................................................................................................. 260294
End Cap Wrench, Steel Bearing Autochuck Turbine ............................................................................................................................................................................................203048
Steel Bearing Manual Chuck Turbine Replacement Kit for Lubricated High-Speed Handpieces (For Concentrix FB)..............................................................258661
Chuck, For Manual Chuck Turbine..............................................................................................................................................................................................................................258659
End Cap, Steel Bearing Manual Chuck Turbine......................................................................................................................................................................................................254204
End Cap Wrench, Steel Bearing Manual Chuck Turbine.....................................................................................................................................................................................258739
Bur Changing Tool, Manual Chuck Turbine .............................................................................................................................................................................................................257629
Replacement LED Lamp for LED Swivel (Package of 1)........................................................................................................................................................................................265399
Replacement LED Lamp for halogen-style 6-Pin swivel 3.3Vdc only, swivel Part#263772 (Package of 1)..................................................................................... 265385
Replacement Halogen Lamp with spring (Package of 2)(For ColoRight Tubing, 5.5 Vdc) .................................................................................................................... 260986
Replacement Halogen Lamp, 6-pin 3.3 Vdc for swivel connected to StarDental F.O. Tubing (Package of 2)...............................................................................262522
Replacement Halogen Lamp, 6-Pin 3.1 Vdc for swivel connected to non-StarDental F.O. Tubing (Package of 2)...................................................................... 262962
Rear Seal, HiFlo 4-Line Fiber Optic Swivel (Package of 3) .................................................................................................................................................................................263734
Rear Seal, 4-Line for xed back end handpieces and non HiFlo,non LED swivels (Package of 3) ...................................................................................................202897
Rear Seal, HiFlo 6-Pin Fiber Optic and LED Swivels (Package of 3)................................................................................................................................................................ 263770
Rear Seal, 6-Line for non HiFlo, non LED swivels (Package of 3) ....................................................................................................................................................................262520
Swivel O-Ring Kit for HiFlo Swivels (2 Large, 2 Small) ......................................................................................................................................................................................... 263771
Swivel O-Ring Kit for all non HiFlo Swivels (2 Large, 2 Small) .........................................................................................................................................................................259884
Air Pressure Gauge (ISO 4/6-Line) ..............................................................................................................................................................................................................................262591
Cleaning Wire (Gauge: 0.008, Package of 2)............................................................................................................................................................................................................. 256719
DentaLube II .......................................................................................................................................................................................................................................................................262539
ISO Tubing Set Screw (Package of 2)........................................................................................................................................................................................................................... 261355
Allen Wrench .035............................................................................................................................................................................................................................................................. 280830
Junk-Out High-Speed Chuck Cleaner.........................................................................................................................................................................................................................263790
Note: Swivel assemblies sold separately.
Description Item Number
Spray
Tube
Clean
debris from
inside of
housing
Bearings
For new products, manuals and technical information, call
1-866-DTE-INFO or visit our web site @ www.dentalez.com
Important Notice About
Returning Product To The DentalEZ Inc.
Anyone wishing to return any DentalEZ Inc. product to a DentalEZ facility MUST obtain the proper RETURN AUTHORIZATION NUMBER from the
Customer Service Department. The RA Number must appear clearly marked on both the outside and inside of the returned product carton.
When calling for a return authorization number you will be asked to provide the following information:
To Obtain A
Return Authorization
Number Call
1-866-DTE-INFO
• Product Name, Model Number or Part Number
• Serial Number of Product
• Dealer Return Purchase Order Number
• Reason For Return
• Copy of Invoice Showing Purchase
Items will be evaluated. Return Authorization Number is not a guarantee for credit. Your cooperation with this procedure will help us expedite
processing of any returns.
Autochuck Turbine - Concentrix® FX, Concentrix SX and Concentrix SW:
Manual Chuck Turbine - Concentrix® FB:
1. Remove old end cap and turbine assembly, use end cap wrench shown.
2. Inspect housing before cleaning. Remove any obvious debris to prevent damage and to insure performance of turbine.
3. Connect handpiece and run air through turbine
housing without turbine installed for 5 seconds.
4. Clean housing thoroughly with cotton swab and
isopropyl alcohol. Dry with syringe air.
5. Place turbine assembly into housing and gently
insert as shown.
6. Position and engage threads of end cap into the
housing by hand until snug.
7. Tighten end cap with the combination end cap
wrench employing the wrench opening marked
AC as shown above. Position wrench with marked
side facing end cap for best wrench control.
Autochuck Turbine
Housing
Wrench Opening
1. Remove old end cap and turbine assembly, end cap wrench shown.
2. Inspect housing before cleaning. Remove any obvious debris to prevent damage and to insure performance of turbine.
3. Connect handpiece and run air through
turbine housing without turbine installed
for 5 seconds.
4.Clean housing thoroughly with cotton swab
and isopropyl alcohol.Dry with syringe air.
5. Place turbine assembly into housing and
gently insert as shown.
6.Position and engage threads of end cap into
the housing by hand until snug.
7. Tighten end cap with the manual chuck
turbine end cap wrench.
Limited Warranty
O-Rings and Seals are specifically excluded from this warranty.
DentalEZ®warrants the Concentrix Handpiece to be free of defects in material and workmanship,under normal usage,under the following
terms:
StarDental® Products: Warranty Period:
Handpieces:
Concentrix FX 1 Year from date of purchase*
Concentrix FB 1 Year from date of purchase excluding turbine (turbine 6 months)*
Concentrix SX 1 Year from date of purchase*
Concentrix SW 1 Year from date of purchase*
Handpiece Parts:
Manual Bur Changing Turbine 6 Months from date of purchase*
Steel Bearing Autochuck Turbine 1 Year from date of purchase*
Please note the following additional terms of our warranty and return policy:
• Warranties cover manufacturing defects only and do not cover defects resulting from abuse, improper handling, cleaning, care or
maintenance,normal wear and tear or non-observance of operating,maintenance or installation instructions. Failure to use authorized
parts or an authorized repair facility voids this warranty.
• Liability is limited to repair or replacement of the defective product at our sole discretion. All other liabilities, in particular liability for
damages, including, without limitation, consequential or incidental damages are excluded.
• THIS WARRANTY IS IN LIEU OF ALL OTHER WARRANTIES, EXPRESSED OR IMPLIED, INCLUDING ANY IMPLIED WARRANTIES OF
MERCHANTABILITY OR FITNESS FOR A PARTICULAR PURPOSE. NO EMPLOYEE, REPRESENTATIVE OR DEALER IS AUTHORIZED
TO CHANGE THIS WARRANTY IN ANY WAY OR TO GRANT ANY OTHER WARRANTY.
WARRANTY REPAIRS: Parts repaired or replaced on a product that is in warranty will be warranted for the duration of that product's
original warranty.
NON-WARRANTY REPAIRS:The warranty on parts either repaired or replaced on an out-of-warranty product will cover the repaired part
only and will be for the time frame of a new parts warranty period.
PRODUCT RETURN:Opened products or product returns more than a year old cannot be returned for credit.There will be a 15% ($25.00
minimum) restocking charge on all items authorized for return.
*Provided conditions defined in the Instruction Manual are met.
WARRANTY REGISTRATION
PLEASE VISIT ONE OF THE WEBSITES BELOW TO REGISTER YOUR STARDENTAL PRODUCT. THIS
WILL ENSURE PROPER REGISTRATION AND PROMPT AND ACCURATE SERVICE SHOULD ANY OF
YOUR PURCHASES NEED EVALUATION OR REPAIR DURING THE WARRANTY PERIOD.
For Identa® Oral Cancer Screening System products: www.identa.net/warranty
For all Other StarDental® Products: www.dentalez.com/warranty
Packaging: Single: A standard sterilization packaging material must be used. Ensure that the pack is large enough to contain
the handpiece without stressing the seals.
In sets: Handpieces may be loaded into dedicated instrument trays or general purpose sterilization trays. Ensure
that cutting edges are protected and do not exceed the tray manufacturer’s limit per tray. Wrap the trays using
appropriate packaging materials and methods.
Storage Store in bag after sterilization until ready to use.
Additional Information Do not exceed the sterilizer manufacturer’s guidelines for load capacity.
Lubrication: Lubricate - See 'Lubrication' instruction section
Disinfection: Use steam sterilization exclusively for complete sterility as outlined below.
Cleaning - Manual:
(Continued)
Cleaning the Autochuck (Concentrix FX, SX and SW):
PLEASE NOTE: to ensure that your High-Speed chuck continues
to be in optimum working condition, clean once a week with
Junk-Out High-Speed Chuck Cleaner Kit P/N 263790:
Shake well before use
-Install brush to handle. See diagram at right.
-Use one new brush per cleaning application.
-Do not reuse brushes.
-Remove bur from chuck.
-Dip brush into bottle.
-Remove excess cleaner from the brush.
-Insert brush into bur end of turbine.
-Clean gently by rotating and inserting the brush in and out of the
turbine.
-Repeat process if necessary.
Reseal cap on bottle immediately after use to reduce evaporation.
Cleaning Burs
NOTE: Burs Must Be Cleaned and Sterilized Before First Use and After Each Patient.
Cleaning Diamond Burs:
- After each use, clean the diamond bur by running it against a wet
diamond cleaning stone.
To mechanically clean, the diamond bur should be held in a solution of
either enzymatic presoak or water.
- Rinse the bur thoroughly and allow it to dry.
- Sterilize – See Sterilization
Cleaning Optical Surfaces
Every exposed optical surface of the Concentrix® SX Fiber Optic Handpiece system accumulates debris which ultimately
decreases light output. To maintain maximum intensity, clean each surface with an alcohol soaked cotton swab. Use rm
rubbing motion to remove debris and mineral deposits. See the illustration below denoting each of the surfaces to clean.
For swivels: Disconnect handpiece from swivel; disconnect swivel from tubing by rotating coupler in the opposite
direction shown in Handpiece Installation. Depress foot control; verify water exits tubing.
Prior to cleaning, let lamp cool a few minutes, then remove. After cleaning, let lamp dry completely before reinstalling.
NOTE: Do not attempt to disassemble
handpiece or swivel.
Cleaning the Swivel
1. Disconnect handpiece from swivel; disconnect swivel from tubing by rotating coupler in the opposite direction as
shown in Handpiece Installation. Depress foot control; verify water exits tubing.
2. Connect swivel to tubing by following steps in Handpiece Installation. Depress foot control; if almost no water exits
front of swivel, clean as follows.
3. Remove swivel and nd water tube on front face of swivel. See illustration.
4. Insert cleaning wire, StarDental® Part #256719, into water tube. For 6-pin
Fiber Optic and LED swivels, remove duckbill valve assembly from swivel
to avoid damage. Move wire back and forth to loosen debris at blockage.
5. Remove wire and apply a blast of air into water tube with syringe air.
Cleaning the Mating Parts of the Swivel
To optimize operation of the swivel disconnect mechanism, swab all internal
surfaces of handpiece with a cotton swab soaked in isopropyl alcohol until clean. Dry using syringe air.
Clean area from bearing/spring assembly at rear of swivel using isopropyl alcohol and a toothbrush. Dry using syringe
air.
Chuck
Chuck Slot
Threaded
Coupler
Swivel
Bearing/
Spring
Assy.
= Fiber Optic Surfaces
Clean
Water
Tube
Krypton-
Halogen F.O.
Lamp
6-Pin HiFlo Swivel
Rear Seal
Xenon-Halogen Fiber
Optic Lamp Duckbill
Valve Assy.
CAUTION
Water Tube
4-line HiFlo
F.O. Swivel
Clean Internal Surfaces
Bearing/
Spring
Assy.
Maintenance: Use Junk-Out High Speed Chuck Cleaner Kit (263790) once a week prior to sterilization to ensure optimum
working condition of the chuck. Instructions for cleaning the chuck are included in the Junk-Out kit.
See Turbine Replacement section of this manual for additional information.
Inspection & function testing: See Handpiece Operation or Troubleshooting sections of this manual.
Wrapped Instrument
Sterilization Gravity Type Autoclave: Pre-Vacuum Autoclave:
• Minimum of 15 minutes at 132° C • Minimum of 4 minutes at 132° C
• Minimum of 30 minutes at 121° C
Do not exceed 135° C
Housing
Manual Chuck Turbine
Manual Chuck Turbine
End Cap Wrench
Drying: Dry the handpiece for 30 minutes minimum using the sterilization dry cycle and allow the handpiece to cool to
room temperature in bag prior to use. If moisture is present, increase your sterilizer dry cycle appropriately.
Manufacturer contact: See front or back panels of this manual.
Swivel O-rings at
the front of
the swivel


