Always insist on StarDental parts for best performance.
Replacement Part Numbers
Description Item Number
Troubleshooting
Problem: NO VIBRATION OR NOISE
Cause: No air
Correction: Check pressure at compressor and delivery unit.
Cause: Blocked air line
Correction: Check for air at tubing coupler.
Cause: Control unit not functioning
Correction: Check operation of handpieces and syringe. If needed, remove tubing from control block and check for blockage
of drive air tubing.
Problem: LOW VIBRATION LEVEL OR LOW POWER
Cause: Low air pressure
Correction: Check for full depression of foot control, unit pressure and compressor output. Check pressure at scaler with air
gauge 4/6-line, StarDental® Part #262591.
Cause: Tip loose
Correction: Finger tighten, do not tighten tip with wrench. Refer to Tip Installation.
Cause: Dirty rotor
Correction: Lubricate with DentaLube for Blis-sonic® Sonic Scalers, StarDental Part #261818.
Cause: Tip touches nose
Correction: Check all joints on nose, handle and torque reaction sleeve for tightness.
If OK, return scaler to factory for repair.
Cause: Rotor seal rings out of alignment
Correction: Remove scaler handle, relocate rotor seal rings in shallow grooves. Carefully thread
scaler handle on to prevent damage to seal rings.
Cause: Broken or worn tip
Correction: Refer to Tip Operation for tip lengths. Replace if shorter by .02” (1/2mm) or more.
Cause: Rotor broken
Correction: Remove scaler handle; replace rotor. Refer to Rotor & Seal Rings Replacement.
Cause: Broken rear suspension (very high air noise, low pitch)
Correction: Return scaler to dealer or factory for repair.
Cause: Defective swivel, O-rings and/or seal
Correction: Refer to O-Rings & Rear Seal Replacement.
Problem: BLOCKED MUFFLER
Cause: Replace mufer
Correction: Refer to Mufer Replacement.
Problem: UNABLE TO DETACH SWIVEL FROM SCALER
Cause: Lack of maintenance
Correction: Spray a short burst of DentaLube® for Sonic Scalers into swivel-tubing connector area; rotate swivel to circulate
lube. Disengage handpiece. Contact dealer if unable to disengage swivel. To prevent reoccurrence, refer to
Cleaning.
Problem: NO WATER
Cause: Water off
Correction: Check dental unit controls and inlet supply.
Cause: Tip blocked
Correction: Remove tip, check ow. If tip blocked, refer to Cleaning Tip.
Cause: Water tube blocked or swivel clogged
Correction: Clean scaler or swivel water tube. Refer to Cleaning Water Tube.
Cause: Worn swivel O-rings or seal
Correction: Replace O-rings and/or seal. Refer to O-Rings & Rear Seal Replacement.
Problem: WATER LEAKS AT REAR
Cause: Rear seal
Correction: Tighten tubing coupler. If leak persists, refer to O-Rings & Rear Seal Replacement.
Problem: WATER LEAKS BETWEEN TIP AND HANDLE
Cause: Tip shaft seat dirty
Correction: Clean shaft end recess with cotton swab soaked in isopropyl alcohol. Clean conical tip seat.
Problem: AIR LEAK INTO WATER STREAM
Cause: Rear seal leaks
Correction: Tighten tubing coupling. If leak persists, refer to O-Rings & Rear Seal Replacement.
Problem: WATER DOES NOT ATOMIZE
Cause: Front suspension O-rings
Correction: Replace front suspension, refer to O-Rings & Rear Seal Replacement.
Problem: AUDIBLE IRREGULARITY, CHANGE IN PITCH OR NOISE
Cause: Tip loose
Correction: Finger tighten, do not tighten tip with wrench. Refer to Tip Installation.
Cause: Rotor broken
Correction: Remove handle assembly, replace rotor. Refer to Rotor & Seal Rings Replacement.
Cause: Rear suspension broken
Correction: Return to factory through authorized dealer for repair.
Note: If any problem persists, contact dealer for further assistance or contact StarDental Customer Service at 1-866-DTE-INFO.
1. Remove tip, see ‘Tip Installation’
2. Remove grip, see ‘Grip Replacement - Removal of Grip’
3. Unthread the front of the scaler nose to expose the front suspension O-rings.
4. Remove the two old O-rings and install the replacement O-rings, StarDental Part #256718.
5. Rethread scaler nose to original position.
O-Rings & Rear Seal Replacement
Blis-sonic K/SW Rear Seal & Swivel O-Rings
2/3-line for Blis-sonic SW and Blis-sonic K
Rear Seal
Blis-sonic K
2/3-line
Blis-sonic SW
2/3-line
Rear Seal
Swivel
1. Remove 2/3-line rear seal with an explorer.
2. Place new rear seal over drive air and water tubes.
3. Carefully push seal into place using a blunt instrument.
Swivel O-Rings: Periodically replace the swivel O-rings, StarDental
Part #259884.
Front Suspension O-Rings: After two years, front suspension O-rings
relax resulting in play between shaft and handle.
Seals wear with repeated use. Replace rear seals annually or as needed.
On either the 2/3-line swivel or Blis-sonic K 2/3-line scaler, replace the
2/3-line rear seal with StarDental Part #203103. On either the 4-line swivel
or Blis-sonic K 4-line scaler, replace seal with StarDental Part #202897.
If rotor fails, scaler emits a low pitch ‘burbling’ sound and power reduces
dramatically. Replace rotor and seals on Blis-sonic SW or Blis-sonic K
with Rotor Spares Kit, StarDental Part #256715.
1. Remove scaler tip.
2. Use clamp wrench provided to unthread handle from scaler torque
reaction sleeve exposing the shaft.
CAUTION: Handle precision rotor with extra care.
3. Slide off 2 pairs of seal rings and the old rotor.
4. Clean shaft with a 2 x 2 gauze.
5. Slide new rotor and new seal rings onto shaft; verify both pair of rings
are in both shallow grooves.
6. Thread scaler handle assembly onto torque reaction sleeve. Take care to not catch seal rings with handle assembly.
7. Firmly tighten handle assembly to shaft.
8. Lubricate scaler and reconnect to handpiece tubing.
9. If power is inadequate after replacing rotor, reverse the rotor on the shaft as shown.
CAUTION: Never remove scaler nose nor handle with tip assembled to the scaler, this could damage the shaft assembly.
Rotor & Seal Rings Replacement
Replace the washer gasket or o-ring on the Blis-sonic K water tube assembly annually with the gasket provided in the StarDental Spares
Kit #256888 for the 2/3-line, or the o-ring provided in the StarDental Spares Kit #264952 for the 4-line.
Water Tube Gasket Replacement
1. Remove the water tube assembly. Remove retaining ring with an old dental instrument
such as an explorer. Gently tug on the air tube with needle nose pliers to remove water
tube assembly. Retaining ring pops out when removing assembly. Take care not to lose
retaining ring.
2. Slide old gasket off water tube.
3. Slide on new gasket and seat in place.
4. Insert water tube into handle, rotate slowly between thumb and forenger to locate internal water tube assembly. Push
lightly to fully seat tube.
Note: Reinstall retaining ring. Then assemble rear seal over tubes and retaining ring.
CAUTION: Use needle nose pliers carefully to prevent distortion of the air tube when
removing water tube assembly.
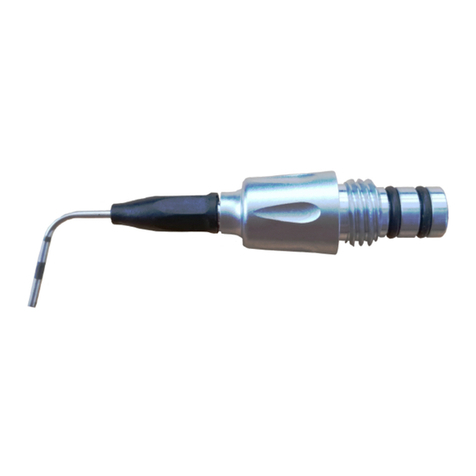
Universal Tip (Plastic Cover Included) ..................................................................................................................................................................... 261668
Sickle Tip (Plastic Cover Included) ..............................................................................................................................................................................261667
Perio Tip (Plastic Cover Included) ...............................................................................................................................................................................261669
Perio Left Tip (Plastic Cover Included) ...................................................................................................................................................................... 263397
Perio Right Tip (Plastic Cover Included) ................................................................................................................................................................... 263398
Tip, Plastic Cover ................................................................................................................................................................................................................261358
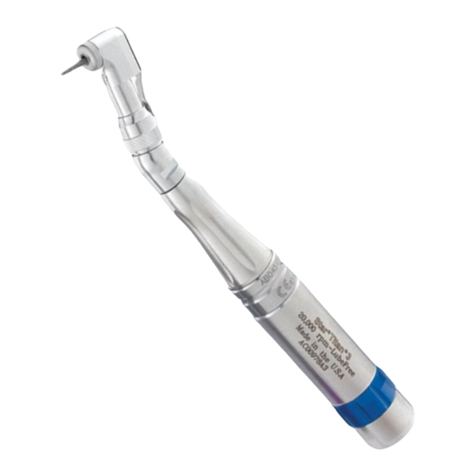
TITAN® Blis-sonic SW Titan Scaler (4 Line) ............................................................................................................................................................264563
TITAN® Blis-sonic K Titan Scaler (2/3 Line) ...........................................................................................................................................................264564
TITAN® Blis-sonic K Titan Scaler (4 Line) ................................................................................................................................................................264565
Sensi–Tip Kit ......................................................................................................................................................................................................................263485
Sensi–Tip Replacement Pkg. of 100 ...........................................................................................................................................................................263486
Sensi–Tip Holder...............................................................................................................................................................................................................263487
Sensi–Tip Wrench .............................................................................................................................................................................................................263488
Cleaning Wire .008 Gauge (Package of 2) ................................................................................................................................................................256719
Retaining Ring ..................................................................................................................................................................................................................... 261349
O-Rings - Swivel (2 large, 2 small) ...............................................................................................................................................................................259884
O-Rings - Front Suspension (Package of 2) ..............................................................................................................................................................256718
Rotor Spares Kit (Rotor, 4 Seal Rings) .........................................................................................................................................................................256715
Rear Seal, 2/3-line (Package of 3) ................................................................................................................................................................................203103
Rear Seal, 4-line (Package of 3) .................................................................................................................................................................................... 202897
Water Tube Assembly, Gasket, Retaining Ring, 2/3-line TITAN® Blis-sonic K ..........................................................................................256454
Water Tube Assembly, 4-line TITAN® Blis-sonic SW ...........................................................................................................................................260503
Water Tube Assembly, Gasket, 4-line TITAN® Blis-sonic K............................................................................................................................... 264593
Water Seal Assembly ........................................................................................................................................................................................................ 261707
DentaLube for Sonic Scalers (8.0 .oz. Spray Can) ................................................................................................................................................261818
Air Pressure Gauge (ISO, 4/6-line) ...............................................................................................................................................................................262591
Universal Wrench .............................................................................................................................................................................................................203048
Rubber Grip Replacements (1 each: Aqua, Blue, Lavender and Pink) ..........................................................................................................264571
Rubber Grip Replacement, Four Aqua ...................................................................................................................................................................... 264555
Rubber Grip Replacement, Four Blue .......................................................................................................................................................................264556
Rubber Grip Replacement, Four Lavender ..............................................................................................................................................................264557
Rubber Grip Replacement, Four Pink........................................................................................................................................................................264558
StarDental, Water Tube Assy, Washer Gasket Spares Kit for 2/3 Line ........................................................................................................256888
StarDental, Water Tube Assy, O-Ring Spares Kit for 4 Line .............................................................................................................................264592
For new products, manuals and technical information, call
1-866-DTE-INFO or visit our web site @ www.dentalez.com.
Rear Seal
on the 4-line
Blis-sonic K
Rear Seal on
the 4-line Swivel
O-Ring
Rear Seal
Unthread
Water Tube Assembly
Water Tube
Water
Manifold
4-Line
Grip Replacement
Removal of grip: Installation of grip:
1. With thumb at rear of grip, push down
and forward
2. Continue pushing until grip clears nose
PLEASE NOTE: DO NOT PULL OR PEEL TO REMOVE
Swivel O-Rings
Front Suspension O-Rings
Scaler Nose Handle
Torque Reaction Sleeve
Rear of Grip
Front Recess
Wall
Rear Recess Wall
Grip Recess Area
(Shaded in Gray)
Front of Grip
1. Push grip onto nose at front of grip
2. Continue pushing until grip ts in
nose grip recess area. Grip should
rest against front and rear recess
walls.
3. Grip must not protrude past front
of handpiece (scaler nose).
Water
Tube
Plate
Retaining
Ring
Gasket
2/3-line
Water Tube
Assembly
Water
Manifold
Nose with Grip Handle Blis-sonic SW
Rotor
Shallow
Groove
1st pair
of Seal Rings
(Slid Out Of Shallow Groove)
2nd pair of
Seal Rings in
Shallow Groove
Shaft
Blis-sonic Scaler
Clamp Wrench
Rotor
2 pairs
of Seal Rings
Torque Reaction
Sleeve
Torque
Reaction
Sleeve
Blis-sonic K
2/3 Line:
1. Remove rear seal. Then, using a 7/16” open end wrench, or an adjustable wrench, unthread
manifold assembly (water tube assembly).
2. Slide old o-ring off of water tube.
3. Slide on new o-ring and seat in place.
4. Insert water tube into handle, rotate slowly between thumb and forenger to locate
internal water tube assembly. Thread manifold assembly (water tube assembly) into
torque reaction sleeve. Tighten using 7/16” open end wrench, or adjustable wrench.
Note: Reinstall rear seal.
4 Line:
DentalEZ Dental Products (GB) Ltd.,
Cleveland Way,
Hemel Hempstead, Hertfordshire
HP2 7DY, ENGLAND
064590 D Date of Issue 10/15/2010
Division of DentalEZ Group
Lancaster, PA 17601 U.S.A.
Printed in the U.S.A.
©2010 DentalEZ, Inc.
Limited Warranty
StarDental® Blis-sonic™ SW and K Ergonomic Sonic Scalers are warranted against defects in material and workmanship (excluding rotor, O-rings,
and scaling tips) for one year from date of purchase. This warranty is subject to the following conditions:
Handpieces, swivel and LubeFree Turbine with Autochuck must not be abused and must have been operated in accordance with procedures
detailed in this manual.
Warranty covers manufacturing defects only and does not cover defects resulting from abuse, improper handling, cleaning care or maintenance,
normal wear and tear, or nonobservance of operating, maintenance or installation instructions. Failure to use authorized parts or an authorized
repair facility voids this warranty.
Liability is limited to repair or replacement of the defective product at our sole discretion. All other liabilities, in particular liability for damages,
including, without limitation, consequential or incidental damages, are excluded.
THIS WARRANTY IS IN LIEU OF ALL OTHER WARRANTIES, EXPRESSED OR IMPLIED, INCLUDING ANY IMPLIED WARRANTIES OF MERCHANTABILITY
OR FITNESS FOR A PARTICULAR PURPOSE. NO EMPLOYEE, REPRESENTATIVE OR DEALER IS AUTHORIZED TO CHANGE THIS WARRANTY IN ANY
WAY OR TO GRANT ANY OTHER WARRANTY.
Product complies
with MDD 93/42/EEC
0344
®
Important Notice About
Returning Product To The DentalEZ Group
Anyone wishing to return any DentalEZ Group product to a DentalEZ facility MUST obtain the proper RETURN AUTHORIZATION NUMBER from
the Customer Service Department. The RA Number must appear clearly marked on both the outside and inside of the returned product carton.
When calling for a return authorization number you will be asked to provide the following information:
To Obtain A
Return Authorization
Number Call
1-866-DTE-INFO
• Product Name, Model Number or Part Number
• Serial Number of Product
• Dealer Return Purchase Order Number
• Reason For Return
• Copy of Invoice Showing Purchase
Items will be evaluated. Return Authorization Number is not a guarantee for credit. Your cooperation with this procedure will help us expedite
processing of any returns.
CAUTION: Never remove scaler nose nor handle with tip assembled to the scaler, this could damage the shaft assembly.


