DE
Sehr geehrte Kundin, sehr geehrter Kunde
Vielen Dank, dass Sie sich für ein Qualitätsprodukt aus dem Hause
Dentaurum entschieden haben.
Damit Sie dieses Produkt sicher und einfach zum größtmöglichen Nutzen
für sich und die Patienten einsetzen können, muss diese Gebrauchs-
anweisung sorgfältig gelesen und beachtet werden.
In einer Gebrauchsanweisung können nicht alle Gegebenheiten einer
möglichen Anwendung beschrieben werden. Deshalb steht Ihnen unsere
Hotline gerne für Fragen und Anregungen zur Verfügung.
Aufgrund der ständigen Weiterentwicklung unserer Produkte empfehlen
wir Ihnen auch bei häufiger Verwendung des gleichen Produktes immer
wieder das aufmerksame Durchlesen der jeweils aktuell beiliegenden
bzw. im Internet unter www.dentaurum.com hinterlegten
Gebrauchsanweisung.
1. Hersteller
Dentaurum GmbH & Co. KG
Turnstr. 31 I 75228 Ispringen I Deutschland
2. Anwendungshinweise
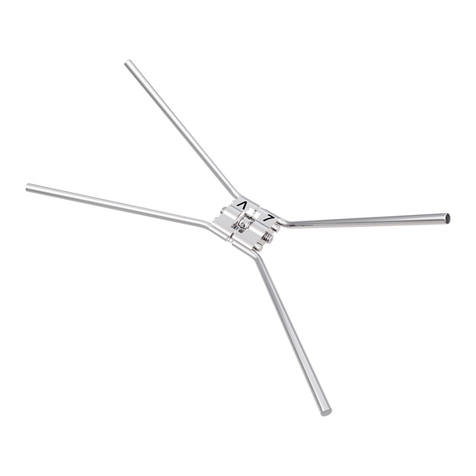
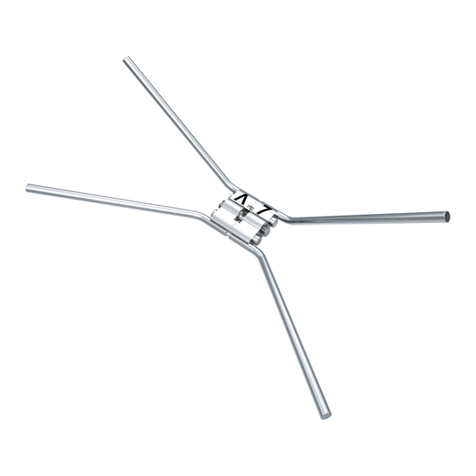
Das Herbst IV ist eine Weiterentwicklung des klassischen Herbst I Schar-
nieres. Es ist mit einem Kugelgelenk versehen, welches dem Patienten
eine größere Bewegungsfreiheit ermöglicht, was zu erhöhtem Komfort
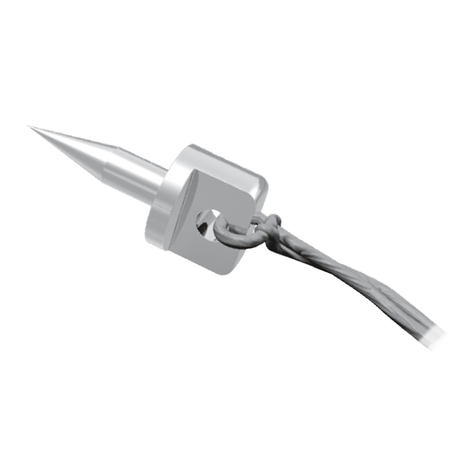
und Akzeptanz in der Behandlung führt. Das Fixieren durch Sicherungs-
scheiben (C-Clips) ist eine Erleichterung beim Einsetzen durch den Kiefer-
orthopäden und ersetzt das relativ umständliche Eindrehen der Schrauben.
3. Herstellung der Herbst IV-Apparatur
Die Abformungen, welche die bereits passenden, vorher ausgewachsten
Bänder der 1. Prämolaren und Molaren beinhalten, werden mit einem
Klasse IV Gips, z.B. Rapidur®(REF 164-450-00), ausgegossen. Die
Modelle werden dann lagegerecht mit dem vom Behandler erstellten
Konstruktionsbiss im FKO-Split Fixator (REF 072-004-00) eingegipst.
Halbrunder, z.B. F 1,50 x 0,75 mm (REF 528-155-00), oder runder, z.B.
ø 1,00 mm (REF 528-100-00), remaloy®Draht wird als Lingualbogen
gebogen und mit den Bändern verschweißt und/oder verlötet. Im OK
wird ein Palatinalbogen zur Stabilisierung angebracht, z.B. remanium®
„GOSHGARIAN“ Palatinalbügel oder aus rundem 1,0 mm remaloy®
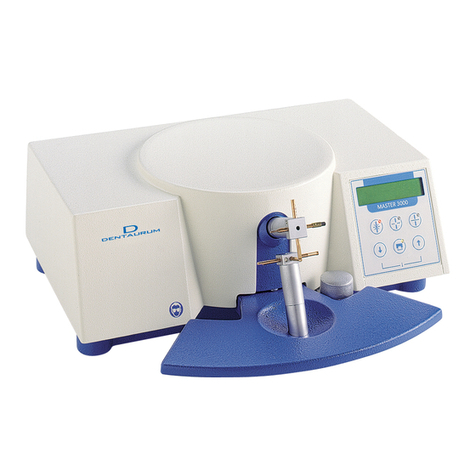
Draht (REF 528-100-00). Die Sockel der Retentionsscharniere werden
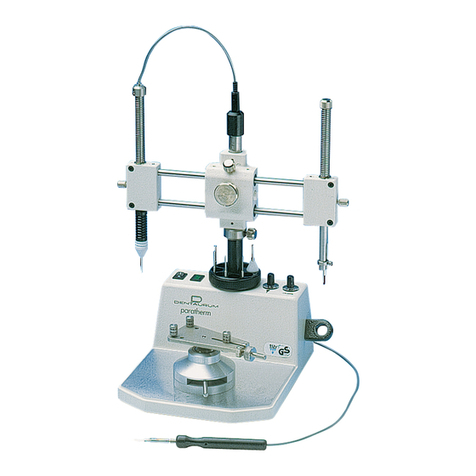
an die Bänder geschweißt und/oder verlötet, z.B. mit dem Punkt-
schweißgerät Master 3000 (REF 079-000-00).
Alternativ können auch anstatt Bänder gegossene Schienen im Modell-
gussverfahren angefertigt werden. Aus Gründen der Präzision und der
Biokompatibilität sind die Sockel der Retentionsscharniere hierbei nicht
einzugießen, sondern abschließend anzulöten. Es muss darauf geachtet
werden, dass die Richtung der Schrauben winkelgerecht zur Verbin-
dungslinie zwischen OK und UK liegt. Wichtig ist, dass die Retentions-
scharniere friktionsfrei laufen, um eine unbehinderte Funktion der Teleskop-
mechanismen zu gewährleisten. Bei Friktion kann die Apparatur – speziell
die Bänder – zerstört werden.
Anpassen der Teleskoprohre und -stangen:
Zuerst werden die Teleskoprohre entsprechend dem Konstruktionsbiss
gekürzt, anschließend die Teleskopstangen. Diese sind ca. 2 mm länger.
Zu kurze Teleskopstangen führen bei weiten Mundöffnungen zum
„Aussteigen“ aus der Apparatur. Zu lange Teleskopstangen können
Schleimhautreizungen verursachen (Verletzungsgefahr!). Die korrekte
Länge muss abschließend am Patienten kontrolliert und ggf. korrigiert
werden.
Hinweis: Um die Gefahr der Zerstörung der Bänder durch Abscherkräfte
zu minimieren, sollten „Doppelte Bänder“ verwendet werden. Das heißt,
über das passende Band wird ein zweites Band geschweißt (z.B. mit dem
Punktschweißgerät Master 3000).
Üblicherweise passt ein Band, welches 2 bis 3 Bandgrößen größer als
das untere Band ist. Fertig geschweißte „Doppelbänder“ können bei
Dentaurum bezogen werden. Ein Bestellformular erhalten Sie
auf Anfrage.
Einsetzen im Mund:
Die Bänder werden mit einem Glasionomerzement im Mund eingesetzt.
Nach dem Aushärten des Zementes werden die vorbereiteten
Retentionsscharniere auf die Sockel gesteckt und jeweils mit einer
Sicherungsscheibe, C-Clip, befestigt. Bei korrektem Sitz auf dem Sockel
muss der C-Clip so in die beiden Schlitze des Kugelkopfes eingeführt
werden können, dass auf jeder Seite eines der Enden steckt. Für das
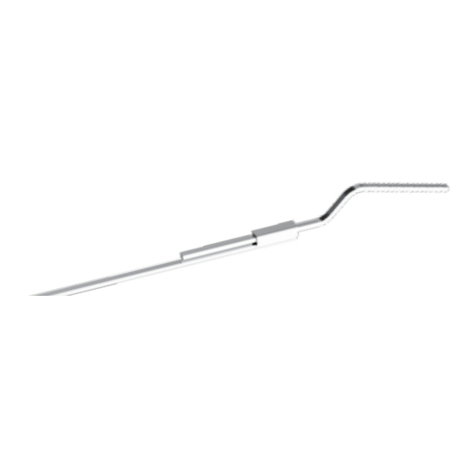
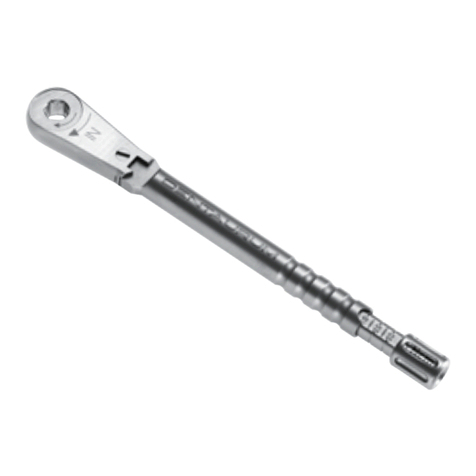
bessere Greifen der C-Clips wird die Weingart Universalzange
(REF 003-120-00) oder die How Zange (REF 003-111-00) empfohlen.
Erster Kontrolltermin nach dem Eingliedern der Apparatur sollte nach
einer Woche sein!
Bei Bedarf kann die Herbst IV Apparatur mit Distanzringen aktiviert
werden, siehe Lieferprogramm.
4. Angaben zur Zusammensetzung
Die Zusammensetzung entnehmen Sie bitte der Werkstoffliste, siehe
www.dentaurum.com
5. Sicherheitshinweise
Es ist zu beachten, dass der C-Clip parallel zum Schlitz des Kugel-
scharniers aufgeschoben wird! Bei schrägem Aufsetzen kann der C-Clip
verbogen werden und sich im Mund lösen.
Nach dem Einsetzen der Herbst IV Apparatur sowie bei jedem Kontroll-
termin ist der exakte Sitz der Sicherungsscheiben, C-Clips, zu prüfen.
Bei mehrmaligem Ein- und Ausbau der C-Clips verlieren diese ihre
Spannkraft und müssen ersetzt werden!
6. Hinweise für Produkte zum einmaligen Gebrauch
Die Herbst IV Apparatur ist nur zur einmaligen Verwendung vorgesehen.
Die Wiederaufbereitung eines einmal benutzten Herbst IV (Recycling)
sowie dessen erneute Anwendung am Patienten ist nicht zulässig.
7. Lieferprogramm
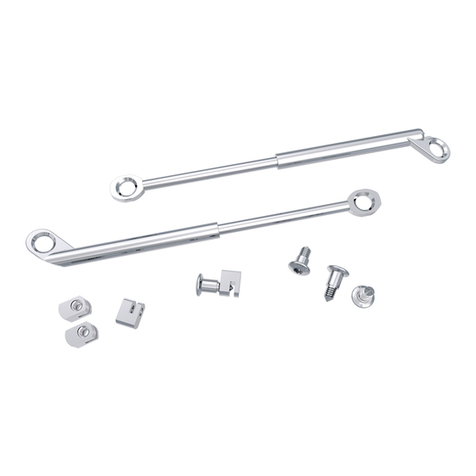
Herbst IV Set REF 607-115-00 1 Set
mit Kugelkopf
Zum Anschweißen/-löten auf Bänder oder gegossene Schienen. Große
Beweglichkeit. Wird mit Sicherungsscheiben am Sockel befestigt. Keine
Verschraubung, dadurch kein Schraubenverlust. Hoher Patientenkomfort.
Inhalt:
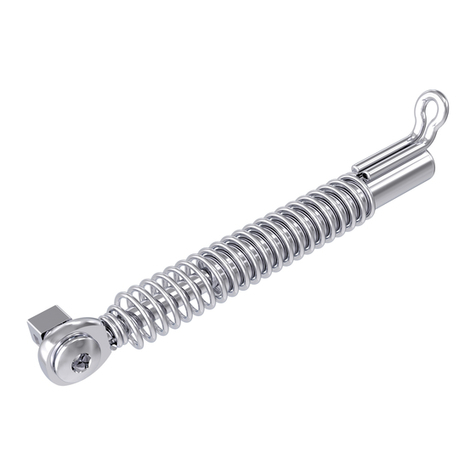
2 x Teleskoprohr mit Kugelgelenk
2 x Teleskopstange mit Kugelkopf
2 x Kupplung für Kugelkopf
4 x Sockel
10 x C-Clips, Sicherungsscheiben
1 x Gebrauchsanweisung
Sicherungsscheiben (C-Clips) REF 607-116-00 10 Stück
für Herbst IV
Sockel REF 607-118-00 10 Stück
für Herbst IV
Teleskoprohr REF 607-125-00 1 Stück
mit Kugelgelenk für Herbst IV
Teleskopstange REF 607-128-00 1 Stück
mit Kugelkopf für Herbst IV
Distanzringe
für Herbst I/ II/ IV
Länge: 1 mm REF 607-103-00 10 Stück
Länge: 2 mm REF 607-104-00 10 Stück
Länge: 3 mm REF 607-105-00 10 Stück
Länge: 4 mm REF 607-107-00 10 Stück
Länge: 5 mm REF 607-112-00 10 Stück
8. Qualitätshinweise
Dentaurum versichert dem Anwender eine einwandfreie Qualität der Pro-
dukte. Der Inhalt dieser Gebrauchsanweisung beruht auf eigener Erfahrung.
Der Anwender ist für die Verarbeitung der Produkte selbst verantwortlich.
In Ermangelung einer Einflussnahme von Dentaurum auf die Verarbeitung
durch den Anwender besteht keine Haftung für fehlerhafte Ergebnisse.
9. Erklärung der verwendeten Etikettensymbole
Bitte Etikett beachten. Zusätzliche Hinweise finden Sie
im Internet unter www.dentaurum.com
(Erklärung der Etikettensymbole REF 989-313-00).
Stand der Information: 11/17
Änderungen vorbehalten.
EN
Dear Customer
Thank you for choosing this high-quality product from Dentaurum.
In order to achieve the best results with this product, it is important to
carefully study and follow these instructions for use.
The written instructions cannot cover all possible situations that can
occur during use. For this reason, our hotline is available to answer any
other questions or concerns that may arise.
Due to constant developments, we recommend, even when using the
same products regularly, that you study the enclosed current instructions
for use or refer to our website at www.dentaurum.com.
1. Manufacturer
Dentaurum GmbH & Co. KG
Turnstr. 31 I 75228 Ispringen I Germany
2. Range of indications
The Herbst IV is a further development of the standard Herbst I hinge. It
has a ball hinge that allows the patient greater freedom of movement,
increasing comfort and tolerance during treatment. Retention using snap
rings (C-clips) facilitates fitting by the orthodontist and replaces the
relatively awkward insertion of screws.
3. Fabricating the Herbst IV appliance
Pour the impressions, which include the fitted, waxed out bands on the
first premolars and molars, using Class IV dental stone, e.g. Rapidur®
(REF 164-450-00). Then mount the models with plaster in the orthodontic
Split Fixator (REF 072-004-00) to the correct relationship using the
activating bite registered by the dentist. Bend remaloy®wire, half-round,
e.g. F 1.50 x 0.75 mm (REF 528-155-00), or round, e.g. ø 1.00 mm
(REF 528-100-00), to form a lingual arch and then weld and/or solder the
wire to the bands. Fit a palatal arch in the upper jaw to provide stabilization,
e.g. remanium®GOSHGARIAN palatal bar or round 1.0 mm remaloy®
wire (REF 528-100-00). Weld and/ or solder the base of the retention
hinges to the bands, e.g. using the spot welding unit Master 3000
(REF 079-000-00).
Another option is to fabricate CrCo splints instead of using bands. The
bases of the retention hinges should not be cast on in this technique but
soldered afterwards for reasons of accuracy and biocompatibility. Ensure
that the screws are at the correct angle to the axis between the upper
and lower jaw. It is important that the retention hinges operate friction
free to guarantee perfect functioning of the telescope mechanism.
Friction can damage the appliance – in particular the bands.
Fitting the telescopic tubes and rods:
First, shorten the telescopic tubes according to the activating bite and
then fit the telescopic rods, which should be approx. 2 mm longer. If the
telescopic rods are too short, they could come out of the telescopic tube
if the patient’s mouth is opened too wide. If the telescopic rods are too
long, they could cause mucosal irritation (risk of injury!). The correct
length should be checked again intraorally and adjusted if necessary.
Note: “Double bands” should be used to minimize the risk of the bands
being damaged by shear forces. This involves welding a second band
over the band already fitted (e. g. using the spot welding unit
Master 3000).
Generally the second band is 2 to 3 sizes larger than the first band fitted.
Ready-welded “double bands” can be ordered from Dentaurum. The order
form is available on request.
Fitting intraorally:
The bands are fitted intraorally using glass ionomer cement. After the
cement has set, the prepared retention hinges are fitted on the bases and
secured with a snap ring, C-clip. When the hinges are fitted correctly on
the base, it should be possible to insert the C-clip into the two slots of the
ball unit so that the ends are clipped in at both sides. We recommend
using Weingart universal pliers (REF 003-120-00) or How pliers
(REF 003-111-00) to facilitate gripping the C-clips.
The first recall appointment should be one week following fitting of the
appliance!
If necessary, the Herbst IV appliance can be activated using various
spacers, refer to Product range.
4. Composition
The composition is included in the materials list, refer to
www.dentaurum.com.
5. Safety instructions
Ensure that the C-clip is fitted parallel to the slot of the ball hinge! If the
C-clip is fitted at an angle it can be bent and become loose in the mouth.
Always check that the snap rings, C-clips, are properly seated after fitting
the Herbst IV appliance and at each recall appointment. If the C-clips are
repeatedly fitted and removed, they lose their spring tension and should
be replaced!
6. Information on single-use products
The Herbst IV appliance is intended for single use only. Reconditioning of
Herbst IV that has already been used (recycling) and its reuse on a
patient is not permitted.
7. Product range
Herbst IV set REF 607-115-00 1 set
with ball and socket hinge
For welding or soldering to bands or cast splints. Ball and socket hinge
for great lateral movement, with a C-clip to hold the rods in place. No
screws required. Greater patient comfort.
Contents:
2 x Telescopic tube with ball and socket joint
2 x Telescopic rod with ball head
2 x Coupling for ball head
4 x Bases
10 x C-clip, lock washer
1 x Instructions for use
Snap rings (C-Clips) REF 607-116-00 10 pieces
for Herbst IV
Bases REF 607-118-00 10 pieces
for Herbst IV
Telescopic tube REF 607-125-00 1 piece
with ball and socket hinge for Herbst IV
Telescopic rod REF 607-128-00 1 piece
with ball and socket hinge for Herbst IV
Spacers
for Herbst I/ II / IV
Length: 1 mm REF 607-103-00 10 pieces
Length: 2 mm REF 607-104-00 10 pieces
Length: 3 mm REF 607-105-00 10 pieces
Length: 4 mm REF 607-107-00 10 pieces
Length: 5 mm REF 607-112-00 10 pieces
8. With reference to our quality standards
Dentaurum ensures a faultless quality of the products that we manufacture.
These recommendations are based upon our own experiences. The user
himself is responsible for the processing of the products. Responsibility
for failures cannot be taken, as we have no influence on the processing
on site.
9. Explanation of symbols used on the label
Please refer to the label. Additional information can be
found at www.dentaurum.com
(Explanation of the symbols REF 989-313-00).
Date of information: 11/17
Subject to change.
FR
Chère Cliente, cher Client
Nous vous remercions d’avoir choisi un produit de la qualité Dentaurum.
Pour une utilisation sûre et pour que vous et vos patients puissiez profiter
pleinement des divers champs d’utilisation que couvre ce produit, nous
vous conseillons de lire très attentivement son mode d’emploi et d’en
respecter toutes les instructions.
Ne pouvant décrire tous les aspects résultant de l’utilisation de ce produit
dans un mode d’emploi, les techniciens de notre support technique sont
à votre service pour répondre à vos questions et prendre note de vos
suggestions.
En raison du développement constant de nos produits, nous vous
recommandons, malgré l’utilisation fréquente du même produit, la
relecture attentive du mode d’emploi actualisé joint (cf. également sur
internet sous www.dentaurum.com).
1. Fabricant
Dentaurum GmbH & Co. KG
Turnstr. 31 I 75228 Ispringen I Allemagne
2. Conseils pour la mise en oeuvre
La charnière Herbst IV est une version nouvellement développée de la
charnière classique Herbst I. Elle est dotée d’une articulation sphérique
apportant au patient une plus grande liberté de mouvement ce qui se
traduit par plus de confort et une meilleure participation du patient
au traitement. La fixation à l’aide de clips (C-Clips) représente une
simplification lors de la mise en place par l’orthodontiste et remplace le
vissage relativement complexe.
3. Confection de l’appareil Herbst IV
Couler avec un plâtre de classe IV comme par exemple le Rapidur®
(REF 164-450-00) les empreintes contenant les bagues des 1ères
prémolaires et molaires, déjà ajustées et enduites de cire. Ensuite, fixer
avec du plâtre les deux modèles à l’intérieur du fixateur „Split“
(REF 072-004-00). Pour bien les positionner lors de cette étape, utiliser
le mordu réalisé par le praticien. Ensuite, réaliser avec du fil remaloy®
demi-jonc (par ex. : F 1,50 x 0,75 mm (REF 528-155-00)) ou rond (par
ex. : ø 1,00 mm (REF 528-100-00)) un arc lingual et le fixer sur les bagues
par brasage et/ou soudage. Pour le maxillaire : réaliser un arc palatin
stabilisateur en remanium®« GOSHGARIAN » ou en fil remaloy rond, de
1,0 mm (REF 528-100-00). Fixer ensuite (par soudage et/ou brasage) les
charnières sur leurs socles par soudage et/ou brasage, avec par ex. avec
la soudeuse par points Master 3000 (REF 079-000-00).
Au lieu des bagues, vous pouvez aussi utiliser des gouttières (coulées sur
le modèle). Pour des raisons de précision et de biocompatibilité, veillez à
ne pas inclure les socles si vous optez pour cette solution ; soudez-les
tout à la fin. Faire en sorte que les vis soient correctement inclinées par
rapport à ligne de jonction entre les deux arcades. Très important
également : les bielles devront coulisser sans coincer sinon il y a risque
d’endommagement de l’appareillage (surtout des bagues !).
Adaptation de la longueur des tubes et des bielles :
Commencer par raccourcir les tubes en se basant sur le modèle et,
seulement après, les bielles. Ces dernières devront dépasser de 2 mm
environ ; si elles sont trop courtes il y a risque qu’elles sortent de
l’appareillage quand l’ouverture buccale est maximale. Si elles sont trop
longues, il y a risque d’irritation de la muqueuse (et donc de blessures !).
Par conséquent, bien vérifier leur longueur sur le patient et la corriger s’il
y a lieu.
Remarque : pour réduire le mieux possible le risque de destruction des
bagues par l’effet de forces de cisaillement, des bagues dédoublées
doivent être utilisées. Cela signifie qu’une deuxième bague est soudée
par-dessus la bague déjà ajustée (par ex. avec la soudeuse par points
Master 3000).
De manière générale, une bague dont la taille est 2 à 3 fois plus grande
que la bague interne convient parfaitement. Des bagues dédoublées
déjà soudées peuvent être fournies par Dentaurum. soudées peuvent
être fournies par Dentaurum. Un bon de commande est disponible sur
demande.
Pose :
Sceller les bagues in situ avec un ciment verre ionomère comme. Après
durcissement de celui-ci, monter les charnières (prêtes) sur les socles et
les y fixer avec un clip (C-Clip). Pour une installation correcte sur le socle,
introduire le clip dans les deux fentes de façon à ce qu’il ressorte bien à
chaque bout. Pour une meilleure préhension des clips, nous vous
conseillons d’utiliser une pince universelle Weingart (REF 003-120-00)
ou How (REF 003-111-00).
Le premier contrôle de l’appareillage devra avoir lieu 8 jours après la
pose, pas plus tard ! Si nécessaire, activer la charnière Herbst IV avec des
anneaux d’écartement (voir programme « produits »).
4. Remarques concernant la composition
Vous pouvez prendre connaissance de la composition en consultant la
liste des matériaux, voir sur www.dentaurum.com.
5. Consignes de sécurité
Bien introduire le clip (C-Clip) parallèlement à la fente de la charnière !
Car si vous l’inclinez, il risque de se déformer et de se défaire en bouche.
Juste après la pose de la Herbst IV, de même que lors de chaque contrôle
ultérieur, toujours vérifier le positionnement des clips (C-Clips). A force
de les enlever et de les remettre , les clips perdent de leur élasticité, donc
bien penser à les changer lorsqu’elle deviendra insuffisante !
6. Remarques concernant les produits à usage unique
L‘appareil Herbst IV est un produit à usage unique. La remise en état d‘un
appareil Herbst IV déjà utilisé (recyclage) ainsi que sa réutilisation chez
un patient ne sont pas admissibles.
7. Liste des fournitures
Kit Herbst IV REF 607-115-00 1 kit
avec boule
Pour la soudure I brasure sur des bagues ou des gouttières coulées.
Grande mobilité. Fixée au socle par des disques de sécurité. Pas de
vissage, pas de perte de vis. Confort maximal pour le patient.
Conditionnement :
2 x Tubes télescopiques avec bielle à boule
2 x Tiges télescopiques avec boule
2 x Raccords pour la boule
4 x Socles
10 x C-Clips, disques de sécurité
1 x Mode d’emploi
C-Clips, disques de sécurité REF 607-116-00 10 pièces
pour Herbst IV
Socle REF 607-118-00 10 pièces
pour Herbst IV
Tube télescopique REF 607-125-00 1 pièce
avec bielle à boule pour Herbst IV
Tige télescopique REF 607-128-00 1 pièce
avec boule pour Herbst IV
Anneaux d‘écartement
pour Herbst I /II/ IV
Longueur : 1 mm REF 607-103-00 10 pièces
Longueur : 2 mm REF 607-104-00 10 pièces
Longueur : 3 mm REF 607-105-00 10 pièces
Longueur : 4 mm REF 607-107-00 10 pièces
Longueur : 5 mm REF 607-112-00 10 pièces
8. Remarques au sujet de la qualité
Dentaurum garantit à l’utilisateur une qualité irréprochable des produits.
Le contenu du présent mode d’emploi repose sur notre propre
expérience. L’utilisateur est personnellement responsable de la mise en
œuvre des produits. N’ayant aucune influence sur leur manipulation par
ce dernier, Dentaurum ne peut être tenu pour responsable de résultats
inexacts.
9. Explication concernant les symboles utilisés
sur l’étiquette
Référez-vous à l‘étiquette. Pour des renseignements
supplémentaires, rendez-vous sur notre site Internet
www.dentaurum.com
(Explication des symboles REF 989-313-00)
Mise à jour : 11/17
Sous réserve de modifications.
