IT
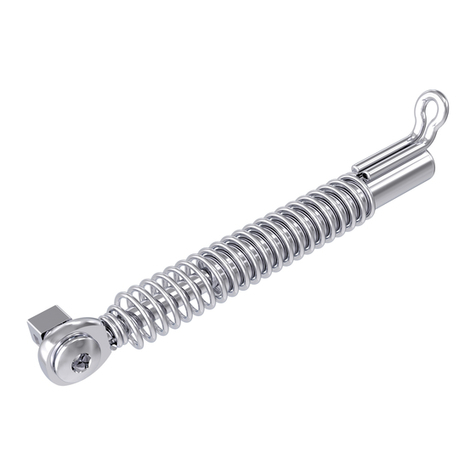
tomas®-uprighting spring
REF302-009-00
Egregio cliente
La ringraziamo per aver scelto un prodotto Dentaurum di qualità.
Per utilizzare questo prodotto in modo sicuro ed efficiente, le consigliamo di leggere e seguire attentamente queste
modalità d’uso.
Tenga presente che in ogni manuale d’uso non possono essere descritti tutti i possibili utilizzi dei materiali descritti
e pertanto rimaniamo a Sua completa disposizione qualora necessitasse di ulteriori spiegazioni.
Tutti i prodotti che commercializziamo sono il risultato di nuovi sviluppi tecnologici e, quindi, le raccomandiamo di
rileggere sempre attentamente le modalità d’uso allegate o quelle presenti nel sito www.dentaurum.com anche in
caso di ripetuto utilizzo dello spesso prodotto.
1. Produttore
Dentaurum GmbH & Co. KG I Turnstr. 31 I 75228 Ispringen I Germania
2. Descrizione generale del prodotto
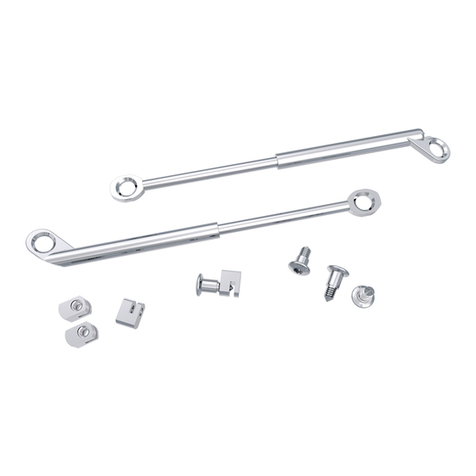
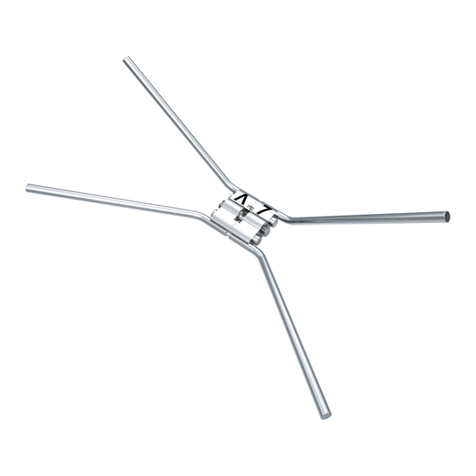
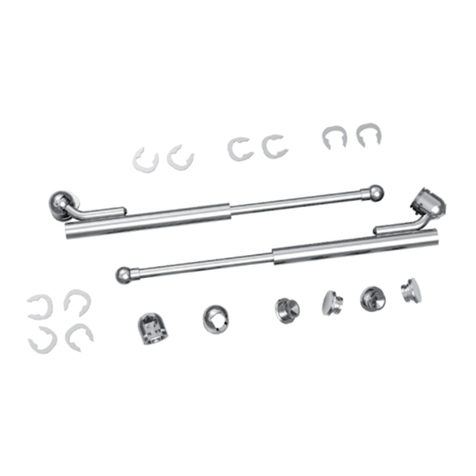
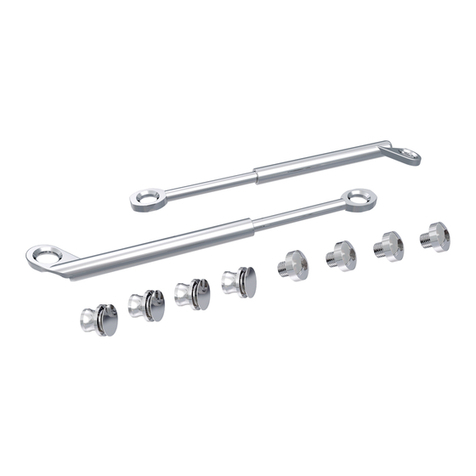
La tomas®-uprighting spring è composta da una molla in lega super elastica di nichel-titanio (dimensione 0,42mmx
0,62mm; 16x24) e da un filo in acciaio (dimensione 0,46mmx0,64mm; 18x25). Entrambi gli elementi in filo
sono uniti tra loro tramite un tubo, nel quale la molla in nichel-titanio può scorrere ed essere fissata in compressione
nella posizione desiderata.
Per un movimento dentale di ca. 40° il momento di uprighting è compreso tra 10 e 20Nmm. A seconda di come
viene realizzata la piega alfa la tomas®-uprighting spring offre un‘ampia gamma di possibilità da 8 a 15Nmm e
viene ottenuta una forza intrusiva da ca. 0,5 a 1,0N.
3. Campo d‘impiego
La tomas®-uprighting spring viene impiegata per raddrizzare i denti. A seconda del tipo di montaggio della molla,
il il movimento di uprighting può essere combinato ad una intrusione o ad una estrusione.
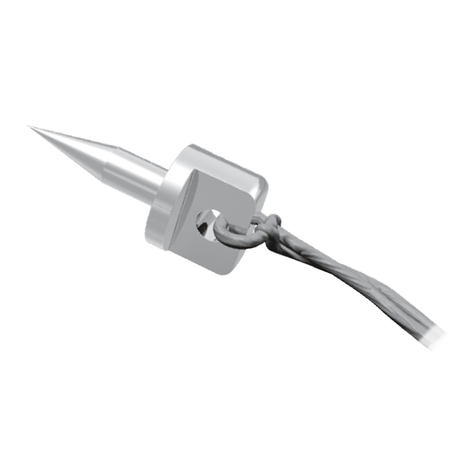
La tomas®-uprighting spring viene ancorata alla vite scheletrica tomas®-pin SD. È anche possibile l‘ancoraggio
dento-alveolare.
4. Indicazioni/controindicazioni mediche
4.1 Indicazione
Raddrizzamento dentale, in particolare dei molari
4.2 Controindicazioni
Denti che per lo stato coronale o parodontale non consentono il raddrizzamento.
Vedi anche indicazioni di sicurezza
5. Impiego
Per l‘uprighting dei molari inferiori, è consigliabile posizionare il tomas®-pinSD tra il primo ed il secondo premolare
inferiore. La testa della vite deve trovarsi in prossimità della gengiva aderente.
Sul dente da raddrizzare può essere montato un tubo buccale direct bonding oppure una banda convenzionale con
relativo tubo puntato. L‘adattamento del tubo buccale ad incollaggio diretto, la resistenza del collante impiegato e
le forze trasmesse, possono portare al distacco del tubo stesso anche in funzione della struttura del dente.
Step 1: Adattamento della tomas®-uprighting spring
L‘effetto della molla in nichel-titanio può essere influenzato dalla sua posizione nel tubo. Se si inserisce la molla
in nichel-titanio il più possibile all‘interno del tubo (vedi Fig.1 distanza C0), si ottengono i valori maggiori per i
momenti alfa e beta. Lo stesso vale per la forza inclusiva o estrusiva. Estraendo la molla in nichel-titanio dal tubo, si
ottiene una riduzione dei momenti alfa e beta nonché della forza di intrusione e di estrusione (C < C0). Ottenuta la
corretta posizione, si comprime la molla con una pinza e si blocca la molla in nichel-titanio.
Inserire la molla in nichel-titanio nel tubo fino alla sua prima piega. Mantenere la tomas®-uprighting spring parallela
al piano occlusale. Inserire la parte in acciaio della molla nello slot verticale del tomas®-pinSD e segnare la relativa
posizione sul filo (Fig.1). In funzione dell‘obiettivo terapeutico, il filo in acciaio verrà poi piegato all‘altezza della
marcatura e poi accorciato di conseguenza.
Step 2: Regolazione del desiderato obiettivo terapeutico
Con la tomas®-uprighting spring è possibile raddrizzare denti e dal tempo stesso intruderli, estruderli o distalizzarli.
È altresì possibile ottenere l‘uprighting dando solo torque mesiale della radice.
La distanza A0è la distanza orizzontale tra lo slot verticale del tomas®-pinSD e l‘angolo mesiale del tubo buccale.
La distanza B0si ottiene calcolando lo spazio verticale tra il filo d‘acciaio e lo spigolo verticale della vite. L‘angolo a
giace in posizione occluso-distale rispetto al punto d‘incrocio che si osserva nello slot della vite e nel filo in acciaio.
In partenza a= 90° (Fig.1). Cambiando i singoli valori possono essere raggiunti differenti risultati.
Uprighting
Per l‘uprighting si mantengono i valori iniziali:
a= 90° B = B0A = A0(Fig.2)
Uprighting con intrusione
Per l‘uprighting con intrusione si devono cambiare i seguenti parametri:
Variante 1 a > 90° (max. 135°) B = B0A = A0(Fig.3a)
Variante 2 a= 90° B < B0A = A0(Fig.3b)
Uprighting con estrusione
Per l‘uprighting con estrusione si devono cambiare i seguenti parametri:
Variante 1 a< 90° (min. 45°) B = B0A = A0(Fig.4a)
Variante 2 a= 90° B > B0A = A0(Fig.4b)
Uprighting con torque mesiale della radice
Per l‘uprighting si mantengono i valori iniziali:
a= 90° B = B0A = A0(Fig.5)
Aggiungendo una legatura, l‘uprighting del dente può essere con torque mesiale della radice.
Step 3: Montaggio della tomas®-uprighting spring
La molla in nichel-titanio deve essere fissata saldamente nel tubo.Per facilitare al paziente l‘igiene orale,si consiglia
di eliminare ogni sovrapposizione del filo in acciaio con il filoin nichel-titanio.
Inserire la molla in nichel-titanio nel tubo. Introdurre la parte piegata del filo d‘acciaio nello slot del tomas®-pinSD e
fissarla con un collante fotopolimerizzabile.Non è necessaria una sua successiva riattivazione durante il trattamento.
Step 4: Rimozione della tomas®-uprighting spring
Raggiunto il desiderato obiettivo terapeutico, asportare la tomas®-uprighting spring. Eliminare inoltre il collante
sulla testa del tomas®-pinSD con una pinza di Weingart (REF003-120-00) stringendo con cautela la stessa fino al
distacco del collante. Rimuovere il filo d‘acciaio dallo slot e sfilare la molla in nichel-titanio dal tubo.
Se il tomas®-pinSD non dovesse più servire per altri scopi, potrà essere a sua volta rimosso.A tal fine osservare le
specifiche modalità d‘uso del tomas®-pinSD (REF989-534-00).
6. Indicazioni sulla composizione
Per la composizione si prega di fare riferimento all’elenco delle materie prime riportata nel nostro catalogo o
pubblicate nel sito internet www.dentaurum.com.
7. Indicazioni di sicurezza
Nel caso fossero note reazioni allergiche a uno o più componenti, il prodotto non deve essere impiegato.
8. Indicazioni per prodotti monouso
La tomas®-uprighting spring è stata concepita per un solo utilizzo. La rigenerazione di una tomas®-uprighting spring
già usata una volta (Recycling) nonché il suo reimpiego nel paziente non è ammesso.
9. Indicazioni di qualità
La Dentaurum assicura la massima qualità dei prodotti fabbricati. Il contenuto di queste modalità d’uso è frutto di
nostre personali esperienze e pertanto l’utilizzatore è responsabile del corretto impiego del prodotto. In mancanza
di condizionamenti di Dentaurum sull‘utilizzo del prodotto da parte dell’utente, non sussiste alcuna responsabilità
oggettiva per eventuali insuccessi.
5. Spiegazione dei simboli presenti sull‘etichetta
Si prega di osservare quanto riportato sull’etichetta. Ulteriori indicazioni sono disponibili nel sito internet
www.dentaurum.com (Spiegazione dei simboli presenti sull‘etichetta REF989-313-00).
Con riserva di apportare modifiche
ES
tomas®-uprighting spring (resorte de enderezamiento)
REF302-009-00
Estimado cliente
Mucho le agradecemos que se haya decidido usted por un producto de calidad de la casa Dentaurum.
Para que usted pueda emplear este producto de forma segura y fácil y obtener los mayores beneficios posibles
del mismo para usted y los pacientes, debe ser leído detenidamente y observado este modo de empleo.
En un modo de empleo no pueden ser descritos todos los datos y pormenores de una posible aplicación o
utilización. En caso de preguntas, no dude en ponerse en contacto con su representante local.
Debido al permanente desarrollo de nuestros productos, recomendamos leer una y otra vez atentamente el
modo de empleo actualizado anexo al producto o bien el modo de empleo que Ud. encontrará en internet en
www.dentaurum.com, aún cuando Ud. utilice el mismo producto frecuentemente.
1. Fabricante
Dentaurum GmbH & Co. KG I Turnstr. 31 I 75228 Ispringen I Alemania
2. Descripción del producto
El tomas®-uprighting spring consta de un resorte superelástico de níquel-titanio (dimensiones 0,42mmx0,62mm;
16x24) y de un alambre de acero (dimensiones 0,46mmx0,64mm; 18x25).Ambos elementos de alambre están
unidos entre sí por un tubo de sujeción. El resorte de níquel-titanio puede ser incorporado en el tubo de sujeción y
de acuerdo con la posición deseada, puede ser fijado comprimiendo el tubo.
En una inclinación de los dientes de aprox. 40° el momento de enderezamiento está entre 10 y 20Nmm.Dependiendo
como se efectúe la flexión alfa, el tomas®-uprighting spring muestra una gran plataforma de posibilidades de 8 a
15Nmm, produciendo una fuerza de intrusión de entre 0,5 a 1,0N.
3. Área de aplicación
El tomas®-uprighting spring sirve para enderezar dientes, en particular molares. Según como se ajuste el resorte, el
movimiento de enderezamiento puede ser unido con un movimiento de intrusión o extrusión.
El anclaje esquelético del tomas®-uprighting spring se efectúa mediante el tomas®-pinSD. Como alternativa se
puede efectuar un anclaje dentoalveolar.
4. Indicaciones médicas /contraindicaciones
4.1 Indicacíón
Enderezamiento de dientes, en particular molares
4.2 Contraindicaciones
Dientes, cuyas coronas y zonas parodontales no permiten un enderezamiento
Véase las instrucciones de seguridad
5. Uso
Para el enderezamiento de molares inferiores se recomienda poner el tomas®-pinSD entre el primer y segundo
premolar inferior. La cabeza tiene que estar en el sector de la encía adherida (Attached Gingiva).
El diente a enderezar puede tener un tubo bucal de cementado directo o bien una banda con el tubo bucal
presoldado en la técnica convencional. El tubo bucal puede desprenderse del diente, dependiendo de la estructura
del diente, de la capacidad de ajuste del tubo bucal en la técnica adhesiva directa, de la resistencia de adherencia
del adhesivo y de las fuerzas transmitidas.
Paso 1: Adaptar del tomas®-uprighting spring
El efecto del resorte de níquel-titanio puede ser adaptado mediante un movimiento dentro del tubo de sujeción.
Si se empuja el resorte de níquel-titanio a lo más dentro posible del tubo (véase Fig.1, trecho C0), los momentos
alfa y beta alcanzan el máximo valor. Lo mismo vale para la fuerza de intrusión o de extrusión. Sacando el resorte
de níquel-titanio del tubo se consigue una reducción de los momentos alfa y beta, así como de la fuerza de intrusión
o de extrusión (C<C0). Después de regular la posición deseada, se comprime el tubo con unos alicates, fijando así
la posición del resorte de níquel-titanio.
Introducir el resorte de níquel-titanio en el slot del tubo bucal hasta la primera flexión. Mantener el tomas®-
uprightingspring paralelo al plano oclusal. Trazar la perpendicular del slot vertical del tomas®-pinSD al alambre
de acero, marcando el sitio correspondiente del alambre (Fig.1). Según el objetivo del tratamiento, el alambre de
acero se dobla o se acorta en el punto marcado (véase paso 2).
Paso 2: Ajustar el objetivo del tratamiento
El tomas®-uprighting spring sirve para enderezar dientes,y a la vez posibilita movimientos de intrusión, extrusión
o distalización. También posibilita efectuar el enderezamiento solo mediante el torque mesial de la raíz.
El trecho AOes la distancia horizontal entre el slot vertical del tomas®-pinSD y el borde mesial del tubo bucal. El
trecho BOresulta de la distancia vertical entre el alambre de acero y el borde oclusal del slot del pin. El ángulo
a se encuentra por oclusal-distal del punto de cruzamiento que resulta de la perpendicular del slot del pin y el
alambre de acero. En la situación de partida es a= 90° (Fig.1). Cambiando los valores individuales pueden
conseguirse resultados diferentes.
Enderezamiento
Para el enderezamiento se dejan los valores arriba citados:
a= 90° B = B0A = A0(Fig.2)
Enderezamiento con intrusión
Para el enderezamiento con intrusión se modifican los siguientes parámetros:
Versión 1 a > 90° (máx. 135°) B = B0A = A0(Fig.3a)
Versión 2 a= 90° B < B0A = A0(Fig.3b)
Enderezamiento con extrusión
Para el enderezamiento con extrusión se modifican los siguientes parámetros:
Versión 1 a< 90° (mín. 45°) B = B0A = A0(Fig.4a)
Versión 2 a= 90° B > B0A = A0(Fig.4b)
Enderezamiento con torque mesial de la raiz
Para el enderezamiento se mantiene el valor de partida:
a= 90° B = B0A = A0(Fig.5)
Fijando una ligadura adicional puede ser enderezado el diente con torque mesial de la raíz.
Paso 3: Montar el tomas®-uprighting spring
El resorte de níquel-titanio tiene que ir fijado de forma segura en el tubo de sujeción. Para facilitar al paciente la
higiene se recomienda quitar el alambre de níquel-titanio solapado con el alambre de acero, según regulación.
Introducir el resorte de níquel-titanio en el tubo bucal. Encajar el alambre de acero acodado en el slot del
tomas®-pin SD y fijarlo con un adhesivo fotopolimerizable. Generalmente no es necesaria una reactivación
durante el tratamiento.
Paso 4: Quitar el tomas®-uprighting spring
Una vez alcanzado el objetivo del tratamiento es necesario quitar el tomas®-uprighting spring. Para ello quitar el
adhesivo de la cabeza del tomas®-pinSD comprimiéndolo con cuidado con unos alicates Weingart (REF003-120-00)
hasta que el adhesivo se desprenda. Quitar el alambre de acero del slot y sacar el resorte de níquel-titanio del slot
del tubo bucal.
Si ya no se necesita el tomas®-pinSD para el anclaje durante el tratamiento, se puede quitar también. Para ello le
rogamos tener en cuenta el modo de empleo del tomas®-pinSD (REF989-534-00).
6. Especificaciones sobre la composición
Para la composición consulte las listas de materias primas en el catálogo o la página web www.dentaurum.com.
7. Instrucciones de seguridad
Si se conocen reacciones alérgicas a alguna o a varias materias primas, entonces no deberá ser aplicado el producto.
8. Observaciones sobre productos de un solo uso
El tomas®-uprighting spring está previsto para un solo uso. No está permitido ningún tipo de reprocesamiento una
vez empleado el tomas®-uprighting spring (reciclaje), ni tampoco su nuevo empleo en pacientes.
9. Observaciones sobre la calidad
Dentaurum garantiza al usuario una calidad impecable de los productos. Las indicaciones en este modo de empleo
se basan en experiencias propias. El usuario mismo tiene la responsabilidad de trabajar correctamente con los
productos. No respondemos por resultados incorrectos, debido a que Dentaurum no tiene influencia alguna en la
forma de utilización.
10. Explicación de los símbolos utilizados en las etiquetas
Observe la etiqueta. Más indicaciones se hallan en internet en www.dentaurum.com (Explicación de los
símbolos utilizados en las etiquetas REF989-313-00).
Reservado el derecho de modificación
FR
tomas®-uprighting spring (ressort de redressement)
REF302-009-00
Chère Cliente, cher Client,
Nous vous remercions d‘avoir choisi un produit de la qualité Dentaurum.
Pour une utilisation sûre et pour que vous et vos patients puissiez profiter pleinement des divers champs d‘utilisation
que couvre ce produit, nous vous conseillons de lire très attentivement son mode d‘emploi et d‘en respecter toutes
les instructions.
Un mode d‘emploi ne peut décrire de manière exhaustive tous les aspects liés à l‘utilisation d‘un produit. Si vous avez
des questions, votre représentant sur place est à votre service pour y répondre et prendre note de vos suggestions.
En raison du développement constant de nos produits, nous vous recommandons, malgré l‘utilisation fréquente
du même produit, la relecture attentive du mode d‘emploi actualisé ci joint (cf. également sur Internet sous
www.dentaurum.com).
1. Fabricant
Dentaurum GmbH & Co. KG I Turnstr. 31 I 75228 Ispringen I Allemagne
2. Description générale
Le tomas®-uprighting spring est constitué d‘un ressort super élastique en nickel-titane (dimensions : 0,42mmx
0,62mm ; 16x24) et d‘un fil en acier (dimensions : 0,46mmx0,64mm ;18x25). Ces deux éléments filaires sont
reliés l‘un à l‘autre par un tube de blocage. Le ressort en nickel-titane peut être déplacé à l‘intérieur de ce tube et y
être bloqué à l‘endroit souhaité par un écrasement du tube.
En présence d‘une inclinaison de la dent de 40°, le moment des forces de redressement est compris entre 10 et
20Nmm. En fonction du type de cintrage alpha, le tomas®-uprighting spring présente un grand plateau dans la
zone allant de 8 à 15Nmm et une force d‘intrusion d‘environ 0,5 à 1,0N est produite.
3. Domaine d‘application
Le tomas®-uprighting spring sert au redressement des dents, en particulier des molaires. Selon le réglage du ressort,
le mouvement de redressement peut être combiné soit à une intrusion soit à une extrusion.
Le tomas®-uprighting spring et le tomas®-pinSD font l‘objet d‘un ancrage squelettique. Un ancrage dento-alvéolaire
est également possible.
4. Indications/contre-indications médicales
4.1 Indication
Redressement des dents, en particulier les molaires.
4.2 Contre-indications
Dent dont l‘état de la couronne ou du parodonte ne permet pas de réaliser un redressement.
Voir aussi les consignes de sécurité.
5. Utilisation
Pour le redressement des molaires inférieures, il est conseillé de placer le tomas®-pinSD entre la première et la
deuxième prémolaire. La tête du pin doit se situer au niveau de la gencive attachée.
La dent à redresser peut être équipée, soit d‘un tube vestibulaire à coller soit, de manière plus conventionnelle,
d‘une bague présentant un tube vestibulaire soudé.Un tube vestibulaire peut se désolidariser de la dent en fonction
de la structure dentaire, de la capacité d‘adaptation du tube vestibulaire à coller, de la résistance du collage ainsi
que des forces à transmettre.
Etape 1 : Adaptation du tomas®-uprighting spring (ressort de redressement)
On peut modifier l‘action du ressort en nickel-titane en le déplaçant dans le tube de blocage. Si l’on enfonce aussi loin
que possible le ressort en nickel-titane dans le tube (voir fig.1, segment C0), les moments alpha et bêta atteignent leurs
valeurs maximales. Il en est de même pour la force d’intrusion ou d’extrusion. En retirant partiellement le ressort
en nickel-titane du tube, on obtient une diminution des moments alpha et bêta ainsi que de la force d’intrusion ou
d’extrusion (C<C0). Après le réglage de la position voulue, écraser le tube de blocage à l’aide d’une pince pour
fixer ainsi la position du ressort en nickel-titane.
Introduire le ressort en nickel-titane dans la gorge du tube vestibulaire jusqu’à sa première courbure. Maintenir le
tomas®-uprighting spring parallèlement à la surface occlusale. Repérer le prolongement de la gorge verticale du
tomas®-pinSD et le marquer sur le fil métallique (Fig.1). En fonction de l‘objectif du traitement (voir étape 2),
le fil sera plié au niveau du repère puis raccourci.
Etape 2 : Réglage en vue du résultat recherché
Avec le tomas®-uprighting spring, les dents peuvent être redressées et subir en même temps une intrusion, une
extrusion ou un déplacement en sens distal. Le redressement avec seulement une rotation localisée au niveau des
racines mésiales est également possible.
Le secteur A0 est la distance horizontale entre la gorge verticale du tomas®-pin SD et le bord mésial du tube
vestibulaire. Le secteur B0résulte de la distance verticale entre le fil et le bord occlusal du pin. L’angle ase situe
en région occluso-distale par rapport au point de croisement entre la verticale provenant de la gorge du pin et le
fil métallique.Au départ, a= 90° (Fig.1). En modifiant les diverses données, on peut obtenir différents résultats.
Redressement
Pour le redressement, on garde les valeurs citées plus haut :
a= 90° B = B0A = A0(Fig.2)
Redressement avec intrusion
Pour le redressement avec intrusion, il faut modifier les paramètres suivants :
Option 1 a > 90° (max. 135°) B = B0A = A0(Fig.3a)
Option 2 a= 90° B < B0A = A0(Fig.3b)
Redressement avec extrusion
Pour le redressement avec extrusion, il faut modifier les paramètres suivants :
Option 1 a< 90° (min. 45°) B = B0A = A0(Fig.4a)
Option 2 a= 90° B > B0A = A0(Fig.4b)
Redressement avec torque radiculaire mésial
Pour le redressement, on conserve les valeurs de départ :
a= 90° B = B0A = A0(Fig.5)
En plaçant une ligature supplémentaire, la dent peut être redressée à l’aide d’un effet de torque radiculaire mésial.
Etape 3 : Intégration du tomas®-uprighting spring
Le ressort en nickel-titane doit être très bien fixé dans le tube de blocage. Pour faciliter au patient les mesures
d’hygiène, il est conseillé de supprimer, selon le réglage effectué, le fil en nickel-titane dépassant sur le fil en acier.
Introduire le ressort en nickel-titane dans le tube vestibulaire. Placer le fil en acier plié dans la gorge du tomas®-pinSD
puis le fixer à l’aide d’un adhésif photopolymérisable. Une activation secondaire n‘est généralement pas nécessaire
pendant le traitement.
Etape 4 : Dépose du tomas®-uprighting spring
Déposer le tomas®-uprighting spring, une fois l‘objectif du traitement atteint. Pour cela, écraser prudemment
l’adhésif présent au niveau de la tête du tomas®-pinSD à l’aide d’une pince de Weingart (REF003-120-00) jusqu’à
ce que l’adhésif s‘en détache. Retirer le fil en acier de la gorge et tirer le ressort en nickel-titane hors de la gorge
du tube vestibulaire.
Si le tomas®-pinSD n’est plus sollicité pour une autre opération d’ancrage,on peut également le déposer.Pour cela,
respecter le mode d’emploi du tomas®-pinSD (REF989-534-00).
6. Informations relatives à la composition
Vous pouvez prendre connaissance de la composition en consultant la liste des matériaux (voir le catalogue ou
aller sur www.dentaurum.com).
7. Consignes de sécurité
Si le patient a connaissance de réactions allergiques à un ou plusieurs composants, ne pas utiliser le produit.
8. Indications concernant les produits à usage unique
Les tomas®-uprighting spring sont destinés à un usage unique. La remise en état d‘un tomas®-uprighting spring déjà
utilisé (recyclage) ainsi que sa réutilisation chez le patient ne sont pas autorisées.
9. Remarques au sujet de la qualité
Dentaurumgarantità l’utilisateur unequalitéirréprochable des produits.Lecontenudu présent mode d’emploirepose
sur notre propre expérience. L’utilisateur est personnellement responsable de la mise en œuvre des produits.
N‘ayant aucune influence sur leur manipulation par ce dernier, Dentaurum ne peut être tenue pour responsable
de résultats inexacts.
10. Explication des symboles utilisés sur l‘étiquette.
Référez-vous à l‘étiquette. Pour des renseignements supplémentaires, rendez-vous sur notre site Internet
www.dentaurum.com (Explication des symboles utilisés sur l‘étiquette REF989-313-00).
Sous réserve de modifications
