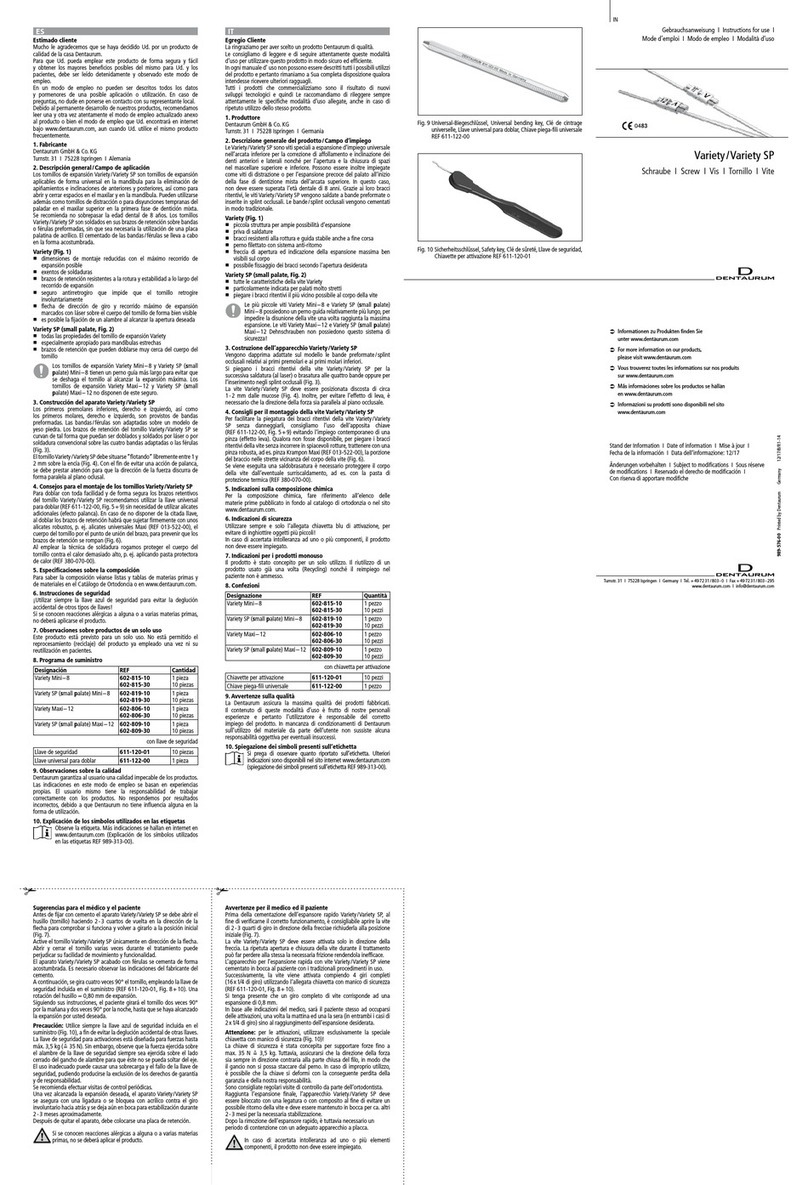
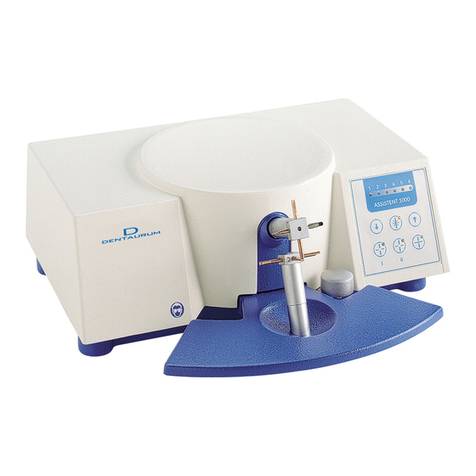
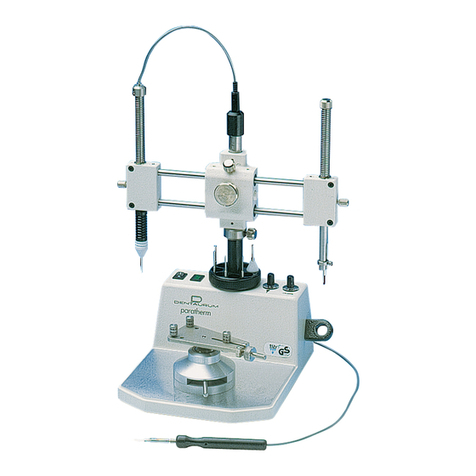
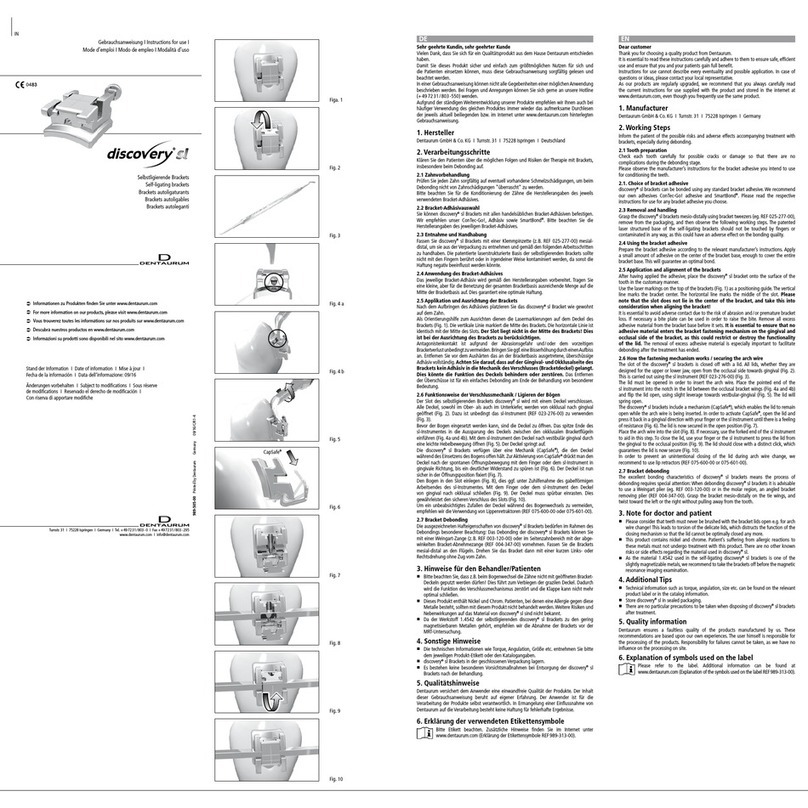
manuals.online logo
Brands
  1. Home
  2. •
  3. Brands
  4. •
  5. DENTAURUM
  6. •
  7. Dental Equipment
  8. •
  9. DENTAURUM tomas X marker User manual

DENTAURUM tomas X marker User manual

Gebrauchsanweisung tomas®-X marker
Idee: Dr. Björn Ludwig (Traben-Trarbach, Germany)
Sehr geehrte Kundin, sehr geehrter Kunde
Vielen Dank, dass Sie sich für ein Qualitätsprodukt aus dem Hause Dentaurum
entschieden haben.
Damit Sie dieses Produkt sicher und einfach zum größtmöglichen Nutzen für sich
und die Patienten einsetzen können, muss diese Gebrauchsanweisung sorgfältig
gelesen und beachtet werden.
In einer Gebrauchsanweisung können nicht alle Gegebenheiten einer möglichen
Anwendung beschrieben werden. Deshalb steht Ihnen unsere Hotline gerne für
Fragen und Anregungen zur Verfügung.
Aufgrund der ständigen Weiterentwicklung unserer Produkte empfehlen wir
Ihnen auch bei häufiger Verwendung des gleichen Produktes immer wieder das
aufmerksame Durchlesen der jeweils aktuell beiliegenden bzw. im Internet unter
www.dentaurum.de hinterlegten Gebrauchsanweisung.
1. Hersteller
Dentaurum GmbH & Co. KG
· Turnstraße 31 · 75228 Ispringen · Deutschland
2. Qualitätshinweise
Dentaurum versichert dem Anwender eine einwandfreie Qualität der Produkte.
Der Inhalt dieser Gebrauchsanweisung beruht auf eigener Erfahrung. Der
Anwender ist für die Verarbeitung der Produkte selbst verantwortlich. In
Ermangelung einer Einflussnahme von Dentaurum auf die Verarbeitung besteht
keine Haftung für fehlerhafte Ergebnisse.
3. Allgemeines
Im Rahmen der präoperativen Diagnostik kann der tomas®-X marker als ein
Hilfsmittel zum Auffinden der günstigsten Position für den tomas®-pin benutzt
werden. Der größte Durchmesser des tomas®-X marker ist identisch mit dem
Schaftdurchmesser der tomas®-pins; dadurch können die Platzverhältnisse
zuverlässig eingeschätzt werden. Die Auslieferung erfolgt mit einem
Sicherheitsfaden in einer zur Sterilisation vorbereiteten Verpackung.
4. Anwendung
Der tomas®-X marker ist bereits desinfiziert, gereinigt und zur Sterilisation vor-
bereitet. Den tomas®-X marker im Sterilbeutel bei 134 °C für 5 min im
Dampfsterilisator sterilisieren.
Den Bereich der geplanten Insertionsstelle anästhesieren (Oberflächen- oder
Lokalanästhesie). Die Sterilverpackung öffnen, den tomas®-X marker mit
einer Weingart-Zange (z.B. REF 003-120-00) am Haltegriff fassen und an der
geplanten Insertionsstelle durch die Schleimhaut bis zum Knochen drücken
(Fig.1). Anschließend wird ein Röntgenbild angefertigt (Fig.2). Beim Zahnfilm ist
die Rechtwinkel-Technik anzuwenden. Anhand des Bildes kann die Position für
den späteren tomas®-pin besser eingeschätzt werden.
Die kleine Perforation in der Schleimhaut dient als Orientierung für die Insertion des
tomas®-pins. Unter Berücksichtigung der klinischen und paraklinischen Befunde
kann der tomas®-pin an der ausgewählten Stelle inseriert werden (Fig. 3-4).
5. Sicherheitshinweise
In Abhängigkeit der Stellung von Röntgenröhre, Röntgenobjekt und Röntgenfilm
bzw. Röntgensensor zueinander, kann es bei allen Arten von Röntgenhilfen zu
optischen Verzerrungen kommen. In der Interpretation des Bildes führt dies unter
Umständen zu falsch positiven oder falsch negativen Ergebnissen. Für die Platzierung
einer Minischraube ist daher immer der klinische Befund ausschlaggebend.
Der tomas®-X marker ist nur zur einmaligen Verwendung vorgesehen. Die
Wiederaufbereitung des tomas®-X markers sowie dessen erneute Anwendung
am Patienten ist nicht zulässig.
6. Lieferprogramm
tomas®-X marker, 1 Stück, REF 302-004-19
7. Erklärung der verwendeten Symbole
REF
Bestellnummer
Chargenbezeichnung
unsteril
CE-Zeichen MP-Klasse 1
nicht zur Wiederverwendung
➔ www.dentaurum.de Gebrauchsanweisung im Internet erhältlich
Codablock-Barcode
Matrixcode
Stand der Information: 04/10
Änderungen vorbehalten
Gebrauchsanweisung
Instructions for use
Mode d’emploi
Modo de empleo
Modalità d‘uso
tomas®-X marker*
* Idee: Dr. Björn Ludwig (Traben-Trabach, Germany)
Photos: Courtesy of Dr. Björn Ludwig (Traben-Trarbach, Germany)
Fig. 2
Fig. 3
Fig. 1
Fig. 4
Instructions for use tomas®-X marker
Concept: Dr. Björn Ludwig (Traben-Trarbach, Germany)
Dear Customer
Thank you for choosing this high-quality product from Dentaurum.
In order to achieve the best results with this product, it is important to carefully
study and follow these instructions for use.
The written instructions cannot cover all possible situations that can occur during
use. For this reason, our hotline is available to answer any other questions or
concerns that may arise.
Due to constant developments, we recommend, even when using the same
products regularly, that you study the enclosed current instructions for use or
refer to our website at www.dentaurum.de.
1. Manufacturer
Dentaurum GmbH & Co. KG · Turnstraße 31 · 75228 Ispringen · Germany
2. With reference to our quality standards
Dentaurum ensures a faultless quality of the products that we manufacture.
These recommendations are based upon our own experiences. The user himself
is responsible for the processing of the products. Responsibility for failures
cannot be taken, as we have no influence on the processing on site.
3. General information
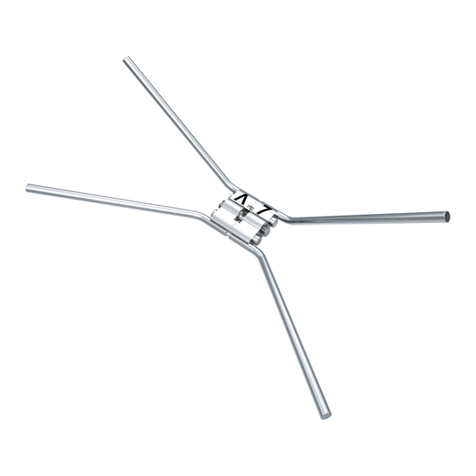
The tomas®-X marker is useful during pre-operative diagnostics for locating the
correct position for the tomas®-pin. The largest part of the tomas®-X marker is
identical to the shaft diameter of the tomas®-pins, thus the space requirements
can be accurately assessed. The product is supplied with a packaged safety
thread, prepared for sterilization.
4. Procedure
The tomas®-X marker has been cleaned, disinfected and is ready for sterilization.
Place the tomas®-X marker in the sterilization bag into the steam sterilizer at
134 °C/ 273 °F for 5 min.
Administer anesthetic to the planned area of insertion (superficial or local
anesthetic). Open the sterile packaging and remove the tomas®-X marker using
Weingart pliers (e.g. REF 003-120-00). Hold at the shaft handle and press into
the soft tissue at the area of insertion, up to the bone (Fig.1). Take an x-ray
picture of the situation (Fig.2). When making a dental film, use the right angled
technique. The x-ray image enables the final position of the tomas®-pin to be
easily determined.
Taking the clinical and paraclinical findings into account, the tomas®-pin is now
ready to be inserted at the selected position (Fig. 3 - 4).
5. Safety instructions
The accuracy of any type of x-ray aid such as x-ray tube, x-ray object, x-ray film and
x-ray sensor is dependant upon their position to each other, and is susceptible to
optical distortion. The interpretation of such an image can lead to false positive or
false negative results. Therefore when positioning a mini screw, please bear
the clinical findings in mind as the decisive factor.
The tomas®-X marker is intended for single use only. It is not permissable to
recycle the tomas®-X marker and after single use must not be re-used on any
other patient.
6. Availability
tomas®-X marker, 1 piece, REF 302-004-19
7. Explanations of symbols
REF
Order number
Batch description
Non-sterile
CE Mark MP Class 1
Not for reuse
➔ www.dentaurum.de Instructions for use available in the internet
Codablock barcode
Matrix code
Date of Information: 04/10
Subject to change
989-657-00 Printed by Dentaurum Germany 04/10/C/R1-6
Turnstraße 31 · 75228 Ispringen · Germany · Telefon + 49 72 31 / 803 - 0 · Fax + 49 72 31 / 803 - 295
www.dentaurum.de · E-Mail: [email protected]
DE EN
Für Ihre Fragen zur Verarbeitung unserer Produkte steht Ihnen unser
Customer Support gerne zur Verfügung.
Hotline Tel.-Nr. Festsitzende Technik + 49 72 31 / 803 - 550
Hotline Tel.-Nr. Herausnehmbare Technik + 49 72 31 / 803 - 555
Telefonische Auftragsannahme + 49 72 31 / 803 - 210

Mehr Informationen zu Dentaurum-Produkten finden Sie
im Internet.
www.dentaurum.de
Stand der Information:
Date of information:
Mise à jour :
Fecha de la información:
Data dell’informazione:
04/10
Mode d’emploi tomas®-X marker
D’après une idée de : Dr. Björn Ludwig (Traben-Trarbach, Allemagne)
Chère Cliente, Cher Client
Nous vous remercions d’avoir choisi un produit de la qualité Dentaurum.
Pour une utilisation sûre et pour que vous et vos patients puissiez profiter
pleinement des divers champs d’utilisation que couvre ce produit, nous vous
conseillons de lire très attentivement son mode d’emploi et d’en respecter toutes
les instructions.
Ne pouvant décrire tous les aspects résultant de l’utilisation de ce produit dans
un mode d’emploi, les techniciens de notre support technique sont à votre
service pour répondre à vos questions et prendre note de vos suggestions.
En raison du développement constant de nos produits, nous vous recommandons,
malgré l’utilisation fréquente du même produit, la relecture attentive du mode
d’emploi actualisé joint (cf. également sur internet sous www.dentaurum.de).
1. Fabricant
Dentaurum GmbH & Co. KG · Turnstraße 31 · 75228 Ispringen · Allemagne
2. Remarques au sujet de la qualité
Dentaurum garantit à l’utilisateur une qualité irréprochable des produits. Le
contenu du présent mode d’emploi repose sur notre propre expérience.
L’utilisateur est personnellement responsable de la mise en œuvre des produits.
N’ayant aucune influence sur leur manipulation par ce dernier, Dentaurum ne
peut être tenu pour responsable de résultats inexacts.
3. Remarques préliminaires
Le tomas®-X marker (marqueur) permet, lors du diagnostic préopératoire, de
définir une position optimale pour la tomas®-pin (vis) à poser. Son plus gros
diamètre étant identique à celui de la tige de la vis tomas®-X marker, cela permet
une évaluation très précise de l’espace disponible in situ. Le tomas®-X marker
est fourni avec un fil de sécurité, sous emballage stérile prêt pour la stérilisation.
4. Instructions d’utilisation
Le tomas®-X marker tel qu’il vous est livré a déjà été désinfecté, nettoyé
et préparé pour la stérilisation. Pour le stériliser, placer le sachet stérile dans
le stérilisateur vapeur (134 °C pendant 5 min).
Anesthésier le site prévu pour l’insertion (anesthésie de surface/locale). Ouvrir
l’emballage stérile puis saisir avec une pince Weingart (pince REF 003-120-00 par
exemple) le tomas®-X marker au niveau de son élément de préhension puis
l’enfoncer dans la muqueuse en allant jusqu’à l’os (Fig.1). Faire ensuite une radio
(Fig.2) en positionnant le film perpendiculairement par rapport au faisceau
émis puis définir à partir de cette radio la position optimale pour la tomas®-pin
à poser.
La miniperforation de la muqueuse vous servira de point de repère au moment
d’insérer cette tomas®-pin. L’insérer à l’endroit choisi en tenant compte des
résultats des examens cliniques et paracliniques effectués auparavant (Fig. 3-4).
5. Consignes de sécurité
Selon le positionnement du tube radiologique, de la zone à radiographier et du
film entre eux, l’image obtenue peut présenter des distorsions, lesquelles sont
source d’erreurs d’interprétation du cliché. Par conséquent, afin de garantir un
positionnement correct de la minivis, toujours – et ce, qu’elle que soit le type de
matériel radiologique utilisé – se baser prioritairement sur les résultats de
l’examen clinique.
Le tomas®-X marker est à usage unique. Par conséquent, ne pas le réutiliser sur
le patient, ni chercher à le reconditionner pour s’en resservir ultérieurement.
6. Gamme disponible
tomas®-X marker, 1 pièce, REF 302-004-19
7. Explication des symboles utilisés
REF
Numéro de commande
Désignation du lot
Non stérile
CE - DM- classe 1
Ne pas réutiliser
➔ www.dentaurum.de Mode d’emploi disponible sur Internet
Code barres Codablock
Matrixcode
Mise à jour: 04/10
Sous réserve de modifications
Modo de empleo tomas®-X marker
Ideado por: Dr. Björn Ludwig (Traben-Trarbach, Alemania)
Estimado cliente
Mucho le agradecemos que se haya decidido usted por un producto de calidad
de la casa Dentaurum.
Para que usted pueda emplear este producto de forma segura y fácil y obtener
los mayores beneficios posibles del mismo para usted y los pacientes, debe ser
leido detenidamente y observado este modo de empleo.
En un modo de empleo no pueden ser descritos todos los datos y pormenores
de una posible aplicación o utilización. Por eso nuestra línea telefónica directa
(Hotline) está a su disposición para preguntas o sugerencias.
Debido al permanente desarrollo de nuestros productos, recomendamos leer una
y otra vez atentamente el modo de empleo actualizado anexo al producto o bien
el modo de empleo que Ud. encontrará en internet en www.dentaurum.de, aún
cuando Ud. utilice el mismo producto frecuentemente.
1. Fabricante
Dentaurum GmbH & Co. KG · Turnstraße 31 · 75228 Ispringen · Alemania
2. Indicaciones de calidad
Dentaurum garantiza al usuario una calidad impecable de los productos. Las
indicaciones en este modo de empleo se basan en experiencias propias. El
usuario mismo tiene la responsabilidad de trabajar correctamente con los
productos. No respondemos por resultados incorrectos, debido a que Dentaurum
no tiene influencia alguna en la forma de utilización por el usuario.
3. Generalidades
En el cuadro de la diagnosis prequirúrgica puede ser utilizado el tomas®-X marker
como un elemento auxiliar para encontrar la posición más favorable para el
tomas®-pin. El diámetro mayor del tomas®-X marker es idéntico al diámetro del
vástago del tomas®-pin, así se pueden estimar de forma segura las condiciones
de espacio. El suministro se realiza con un hilo de seguridad en uno de los
envases preprado para la esterilización.
4. Aplicación
El tomas®-X marker está ya desinfectado, limpio y preparado para la esterilización.
Esterilizar el tomas®-X marker en la bolsa estéril a 134 °C durante 5 minutos en
un esterilizador de vapor.
Anestesiar (con anestesia de superficie o anestesia tópica) el ámbito del sitio
proyectado para la inserción. Abrir la caja estéril, agarrar el tomas®-X marker por
la agarradera con unos alicates Weingart (p. ej. 003-120-00) y apretarlo en el
sitio previsto para la inserción a través de la encía hasta el hueso (Fig.1).
Seguidamente se saca una radiografía (Fig.2). En la película de dientes hay que
emplear la técnica de ángulo recto. Mediante la radiografía puede calcularse
mejor la posición para la posterior inserción del tomas®-pin.
La pequeña perforación en la encía sirve de orientación para la inserción del
tomas®-pin. Teniendo en cuenta los resultados de los reconocimientos clínicos y
paraclínicos el tomas®-pin puede ser insertado en el sitio elegido (Fig. 3 - 4).
5. Indicaciones de seguridad
Dependiendo de la posición entre sí del tubo de rayos x, del objeto a
radiografiar y de la película radiográfica o sensor radiográfico pueden producirse
distorsiones ópticas con todos los tipos de elementos auxiliares radiográficos. En
la interpretación de la radiografía esto puede generar eventualmente resultados
positivos equivocados o negativos equivocados. Por eso para la colocación de un
minitornillo es siempre decisivo el resultado del reconocimiento clínico.
El tomas®-X marker está previsto para un solo uso. No está permitido el repro-
cesamiento del tomas®-X marker ni la reutilización de uno ya usado en pacientes.
6. Programa de suministro
tomas®-X marker, 1 pieza, REF 302-004-19
7. Explicación de los símbolos utilizados
REF
Núm de ref./Código de pedido
Número de lote
No estéril
Signo CE/ Clase 1 MP
Para un solo uso
➔ www.dentaurum.de Modos de empleo disponibles en Internet
Código de barras Codablock
Código Matrix
Fecha de la información: 04/10
Nos reservamos el derecho de efectuar cambios
Modalità d'uso tomas®-X marker
Idea: Dr. Björn Ludwig (Traben-Trarbach, Germania)
Egregio Cliente
La ringraziamo per aver scelto un prodotto Dentaurum di qualità.
Le consigliamo di leggere e di seguire attentamente queste modalità d’uso per
utilizzare questo prodotto in modo sicuro ed efficiente.
In ogni manuale d’uso non possono essere descritti tutti i possibili utilizzi del
prodotto e pertanto rimaniamo a Sua completa disposizione qualora intendesse
ricevere ulteriori ragguagli.
Il continuo sviluppo e miglioramento dei nostri prodotti, impone sempre da
parte dell’utilizzatore la rilettura delle allegate modalità d’uso anche in caso de
ripetuto utilizzo degli stessi. Le stesse informazioni sono anche pubblicate nel
nostro sito internet www.dentaurum.de alla sezione download.
1. Produttore
Dentaurum GmbH & Co. KG · Turnstraße 31 · 75228 Ispringen · Germania
2. Avvertenze sulla qualità
La Dentaurum assicura la massima qualità dei prodotti fabbricati. Il contenuto
di queste modalità d’uso è frutto di nostre personali esperienze e pertanto
l’utilizzatore è responsabile del coretto impiego del prodotto. In mancanza di
condizionamenti di Dentaurum sull’utilizzo del materiale da parte dell’utente
non sussiste alcuna responsabilità oggettiva per eventuali insuccessi.
3. Generalità
Il tomas®-X marker può essere impiegato, nell‘ambito della diagnosi preoperatoria,
come ausilio di ricerca del punto di inserzione del tomas®-pin. Il diametro più
grande del tomas®-X marker è identico a quello del tomas®-pin; in tal modo
le condizioni di spazio possono essere stimate in modo sicuro. Viene fornito
completo di filo di sicurezza, in una confezione pronta per la sterilizzazione.
4. Impiego
Il tomas®-X marker viene fornito già disinfettato, pulito e preparato per la
sterilizzazione, che dovrà avvenire nell‘apposita busta a 134 °C per 5 min con
sterilizzatrice a vapore.
Anestetizzare la zona d‘inserzione preventivata (anestesia superficiale o locale).
Aprire la confezione sterile, afferrare il tomas®-X marker per il supporto con una
pinza di Weingart (ad es. REF 003-120-00) e comprimerne la punta nella
mucosa corrispondente al punto d‘inserzione fino al raggiungimento dell‘osso
(Fig.1). Successivamente fare la radiografia (Fig.2) utilizzando la tecnica
dell‘angolo retto. In base all‘immagine, si potrà poi posizionare in modo migliore
il tomas®-pin.
Il piccolo foro rimasto sulla mucosa, fungerà da punto di riferimento per la
successiva inserzione del tomas®-pin. In considerazione del referto clinico e
paraclinico il tomas®-pin potrà essere inserito nella posizione desiderata (Fig. 3-4).
5. Indicazioni di sicurezza
In funzione del posizionamento tra loro del tubo radiante, dell‘oggetto da
radiografare e della pellicola ovvero del sensore radiante, si possono
verificare delle distorsioni ottiche. Nell‘interpretazione dell‘immagine ciò porta,
eventualmente, a risultati sbagliati. Pertanto per il posizionamento di un mini
impianto rimane sempre determinante il referto clinico.
Il tomas®-X marker è stato previsto per un solo uso. Il ripristino delle condizioni
iniziali nonchè il riutilizzo del tomas®-X su altri pazienti non è pertanto consentito.
6. Confezioni
tomas®-X marker, 1 pezzo, REF 302-004-19
7. Spiegazione dei simboli utilizzati
REF
Codice articolo
Numero di lotto
Non sterile
Marcatura CE Classe 1
Prodotto monouso
➔ www.dentaurum.de Modalità d’uso disponibili nel sito Internet
Codice a barre Codablock
Codifica Matrix
Data dell‘informazione: 04/10
Con riserva di apportare modifiche
Fig. 2
Fig. 3
Fig. 1
Fig. 4
FR ES IT
Other DENTAURUM Dental Equipment manuals

DENTAURUM desktop Compact User manual

DENTAURUM

DENTAURUM desktop Compact User manual

DENTAURUM Variety User manual

DENTAURUM

DENTAURUM Variety User manual

DENTAURUM Assistent 3000 User manual

DENTAURUM

DENTAURUM Assistent 3000 User manual

DENTAURUM Titan-hyrax Maxi - 12 User manual

DENTAURUM

DENTAURUM Titan-hyrax Maxi - 12 User manual

DENTAURUM discovery sl User manual

DENTAURUM

DENTAURUM discovery sl User manual

DENTAURUM Assistent 3000 User manual

DENTAURUM

DENTAURUM Assistent 3000 User manual

DENTAURUM tiologic User manual

DENTAURUM

DENTAURUM tiologic User manual

DENTAURUM tomas handpiece User manual

DENTAURUM

DENTAURUM tomas handpiece User manual

DENTAURUM hyrax User manual

DENTAURUM

DENTAURUM hyrax User manual

DENTAURUM Elegance User manual

DENTAURUM

DENTAURUM Elegance User manual

DENTAURUM palex screws User manual

DENTAURUM

DENTAURUM palex screws User manual

DENTAURUM Herbst I User manual

DENTAURUM

DENTAURUM Herbst I User manual

DENTAURUM Assistent 3000 User manual

DENTAURUM

DENTAURUM Assistent 3000 User manual

DENTAURUM hyrax click User manual

DENTAURUM

DENTAURUM hyrax click User manual

DENTAURUM tomas torque ratchet User manual

DENTAURUM

DENTAURUM tomas torque ratchet User manual

DENTAURUM Orthocryl LC User manual

DENTAURUM

DENTAURUM Orthocryl LC User manual

DENTAURUM desktop Compact User manual

DENTAURUM

DENTAURUM desktop Compact User manual

DENTAURUM tioLogic ZENOTEC User manual

DENTAURUM

DENTAURUM tioLogic ZENOTEC User manual

DENTAURUM Herbst IV User manual

DENTAURUM

DENTAURUM Herbst IV User manual

DENTAURUM Cito mini User manual

DENTAURUM

DENTAURUM Cito mini User manual

DENTAURUM Variety User manual

DENTAURUM

DENTAURUM Variety User manual

DENTAURUM Herbst II User manual

DENTAURUM

DENTAURUM Herbst II User manual

DENTAURUM tiologic User manual

DENTAURUM

DENTAURUM tiologic User manual

DENTAURUM discovery User manual

DENTAURUM

DENTAURUM discovery User manual

Popular Dental Equipment manuals by other brands

EMS AIR-FLOW MASTER Perio Operation instructions

EMS

EMS AIR-FLOW MASTER Perio Operation instructions

KaVo IXS user manual

KaVo

KaVo IXS user manual

Great Lakes MINISTAR S Troubleshooting & Fabrication Tips

Great Lakes

Great Lakes MINISTAR S Troubleshooting & Fabrication Tips

Wassermann Dental-Maschinen WSM-2 user manual

Wassermann Dental-Maschinen

Wassermann Dental-Maschinen WSM-2 user manual

Flash WHITEsmile Whitening Lamp Instructions for use

Flash

Flash WHITEsmile Whitening Lamp Instructions for use

KaVo ESTETICA E50 Life Instructions for use

KaVo

KaVo ESTETICA E50 Life Instructions for use

SybronEndo Apex ID Instructions for use

SybronEndo

SybronEndo Apex ID Instructions for use

orangedental spot-on nxt Instructions for use

orangedental

orangedental spot-on nxt Instructions for use

EMS AIR-FLOW handy 3.0 PERIO Operation instructions

EMS

EMS AIR-FLOW handy 3.0 PERIO Operation instructions

ivory SL631C Operation manual

ivory

ivory SL631C Operation manual

B.A. International Optima BA60E Instructions for use

B.A. International

B.A. International Optima BA60E Instructions for use

EMS FT-200 Operation instructions

EMS

EMS FT-200 Operation instructions

EMS AIR-FLOW handy 3.0 PERIO Operation instructions

EMS

EMS AIR-FLOW handy 3.0 PERIO Operation instructions

KaVo MASTERmatic LUX M25 L Instructions for use

KaVo

KaVo MASTERmatic LUX M25 L Instructions for use

Renfert EASY view+3D Original instructions

Renfert

Renfert EASY view+3D Original instructions

Anthogyr Implanteo instruction manual

Anthogyr

Anthogyr Implanteo instruction manual

DentalEZ StarDental 430 SWL Flex instruction manual

DentalEZ

DentalEZ StarDental 430 SWL Flex instruction manual

HAGER WERKEN Bravo Portable II Instructions for use

HAGER WERKEN

HAGER WERKEN Bravo Portable II Instructions for use

manuals.online logo
manuals.online logoBrands
  • About & Mission
  • Contact us
  • Privacy Policy
  • Terms and Conditions

Copyright 2025 Manuals.Online. All Rights Reserved.