manuals.online logo
Brands
  1. Home
  2. •
  3. Brands
  4. •
  5. Digiplex
  6. •
  7. Keypad
  8. •
  9. Digiplex DGP-641ACC Operating instructions

Digiplex DGP-641ACC Operating instructions

Access Control LCD Keypad V1.0
DGP-641ACC
Programming Guide
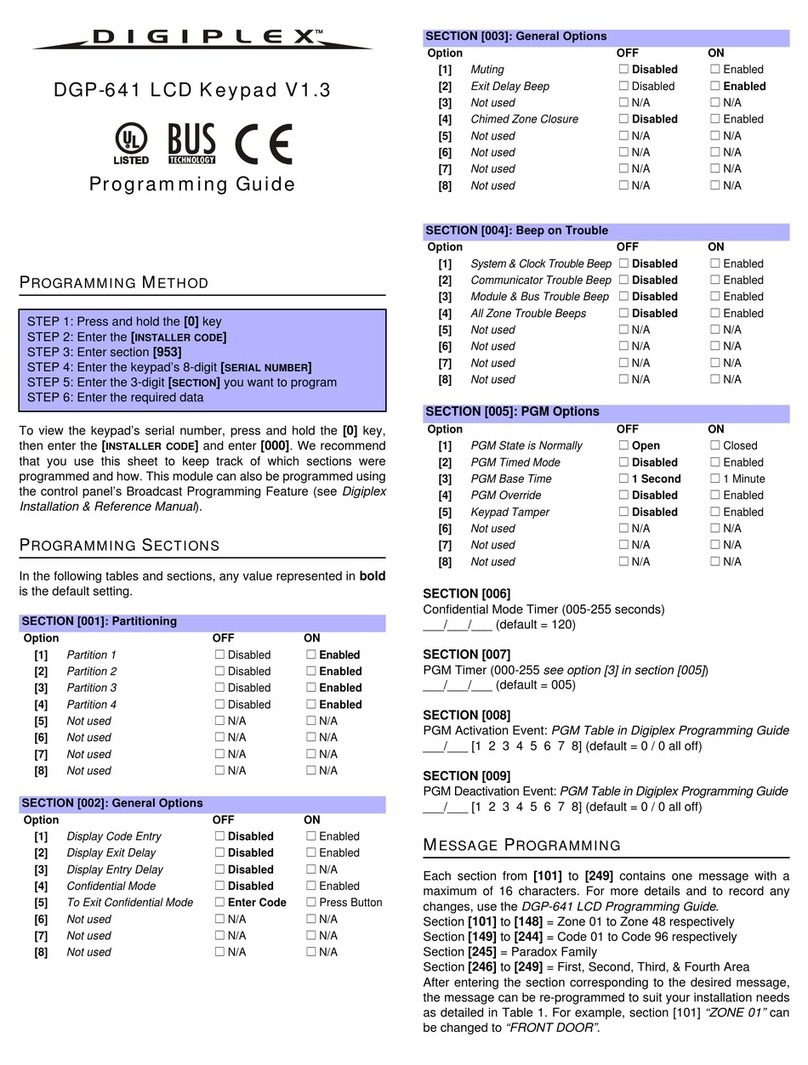
PROGRAMMING METHOD
To view the keypad’s serial number, press and hold the [0] key,
then enter the [INSTALLERCODE]and enter [000]. We recommend
that you use this sheet to keep track of which sections were
programmed and how. This module can also be programmed using
the control panel’s Broadcast Programming Feature (see Digiplex
Installation & Reference Manual).
PROGRAMMING SECTIONS
In the following tables and sections, any value represented in bold
is the default setting.
SECTION [006]
“Door Unlocked Period” (001-255 seconds)
___/___/___ (default = 005)
SECTION [007]
“Door Unlocked Period Extension” (001-255 seconds added to [007])
___/___/___ (default = 015)
SECTION [008]
“Door Left Open” Interval (001-255 seconds)
___/___/___ (default = 060)
SECTION [009]
“Door Left Open” Pre-Alarm Timer (001-255 seconds)
Time to start Pre-Alarm before alarm is triggered.
___/___/___ (default = 015)
SECTION [010]
Beep Timer for “Door Left Open” Alarm (001-255 seconds)
Amount of time “Door Left Open” alarm will beep.
___/___/___ (default = 005)
SECTION [011]
Beep Timer for “Door Forced Open” Alarm (001-255 seconds)
Amount of time “Door Forced Open” alarm will beep.
___/___/___ (default = 005)
STEP 1: Press and hold the [0] key
STEP 2: Enter the [INSTALLERCODE]
STEP 3: Enter section [953]
STEP 4: Enter the keypad’s 8-digit [SERIALNUMBER]
STEP 5: Enter the 3-digit [SECTION]you want to program
STEP 6: Enter the required data
SECTION [001]: Partitioning
Option OFF ON
[1] Partition 1 l Disabled l Enabled
[2] Partition 2 l Disabled l Enabled
[3] Partition 3 l Disabled l Enabled
[4] Partition 4 l Disabled l Enabled
[5] Assign Door to Partition 1 l Disabled l Enabled
[6] Assign Door to Partition 2 l Disabled l Enabled
[7] Assign Door to Partition 3 l Disabled l Enabled
[8] Assign Door to Partition 4 l Disabled l Enabled
SECTION [002]: General Options
Option OFF ON
[1] Display Code Entry l Disabled l Enabled
[2] Display Exit Delay l Disabled l Enabled
[3] Display Entry Delay l Disabled l Enabled
[4] Confidential Mode
(not for UL installations)
l Disabled l Enabled
[5] To Exit Confidential Mode l Enter Code l Press Button
[6] Reader’s red LED to follow
Partition’s status
l Disabled l Enabled
[7] Reader’s beeping to follow
Partition’s status when [6] ON
l Disabled l Enabled
[8] Not used l N/A l N/A
SECTION [003]: General Options
Option OFF ON
[1] Muting l Disabled l Enabled
[2] Exit Delay Beep l Disabled l Enabled
[3] “Door Left Open” Pre-Alarm l Disabled l Enabled
[4] Chimed Zone Closure l Disabled l Enabled
[5] “Door Left Open” Alarm l Silent l Audible
[6] “Door Left Open” Alarm follows l Alarm Restore l Beep Timer
[7] “Door Forced” Alarm l Silent l Audible
[8] “Door Forced” Alarm follows l Alarm Restore l Beep Timer
SECTION [004]: Beep on Trouble
Option OFF ON
[1] System & Clock Trouble Beep l Disabled l Enabled
[2] Communicator Trouble Beep l Disabled l Enabled
[3] Module & Bus Trouble Beep l Disabled l Enabled
[4] All Zone Trouble Beeps l Disabled l Enabled
[5] to [8]Not used l N/A l N/A
SECTION [005]: General Options
Option OFF ON
[1] Card Activates Door
Unlocked Schedule
l Disabled l Enabled
[2] Not used l N/A l N/A
[3] Not used l N/A l N/A
[4] Not used l N/A l N/A
[5] Keypad Tamper l Disabled l Enabled
[6] Door will Relock l Immediately l When closed
[7] Reader’s Green LED for
Access Granted
l Disabled l Enabled
[8] Door Handle Option for REX l Turn Handle l Push Open
SECTION [012]: Door Unlocked Schedule
Start time End time Days (turn ONor OFF)
SMTWT F SH
A:___ ___:___ ___ ___ ___:___ ___ 1 2 3 4 5 6 7 8
B:___ ___:___ ___ ___ ___:___ ___ 1 2 3 4 5 6 7 8
MESSAGEPROGRAMMING
Each section from [101] to [249] contains one message with a
maximum of 16 characters. The following are the programmed
defaults:
Section [101] to [148] = Zone 01 to Zone 48 respectively
Section [149] to [244] = Code 01 to Code 96 respectively
Section [245] = Paradox Family
Section [246] = First Area
Section [247] = Second Area
Section [248] = Third Area
Section [249] = Fourth Area
After entering the section corresponding to the desired message,
the message can be re-programmed to suit your installation needs
as detailed in Table 1. For example, section [101] “ZONE 01” can
be changed to “FRONT DOOR”.
Table 1: Message Programming
Key Function Details
[STAY]Insert Space Pressing the [STAY]key inserts a blank
space in the current cursor position.
[FORCE]Delete Pressing the [FORCE] key will delete
the character or blank space found at
the current cursor position.
[ARM]Delete Until the End Pressing the [ARM] key will delete all
charactersandspacestotherightofthe
cursor and at the cursor's position.
[DISARM]Numeric/Alphanumeric Every time the [DISARM]key is
pressed it will toggle numeric keys to
alphanumeric keys and vice versa.
Numeric: Keys [0] to [9] represent
numbers 0 to 9. Alphanumeric: refer
to Table 2.
[BYP]Lower/Upper Case Every time the [BYP]key is pressed it
will toggle the case setting from lower
to upper case and vice versa.
[MEM]Special Characters After pressing the [MEM]key, the
cursor will turn into a flashing black
square. Using Table 3, enter the
3-digit number that represents the
desired special character.
Table 2: Alphanumeric Keys
Key Press Key Once Press Key
Twice Press Key
Three Times
[1] A B C
[2] DEF
[3] GHI
[4] JKL
[5] MNO
[6] PQR
[7] STU
[8] VWX
[9] YZ
Table 3: Special Characters
Figure 1: DGP-641ACC LCD Keypad Installation drawing

Other Digiplex Keypad manuals

Digiplex DGP-641ACC Operating instructions

Digiplex

Digiplex DGP-641ACC Operating instructions

Digiplex DGP2-641AC User guide

Digiplex

Digiplex DGP2-641AC User guide

Digiplex DGP-641 Operating instructions

Digiplex

Digiplex DGP-641 Operating instructions

Digiplex DGP-641 User manual

Digiplex

Digiplex DGP-641 User manual

Digiplex DGP-641 Assembly instructions

Digiplex

Digiplex DGP-641 Assembly instructions

Digiplex DGP2-641 User guide

Digiplex

Digiplex DGP2-641 User guide

Digiplex EVO641 User manual

Digiplex

Digiplex EVO641 User manual

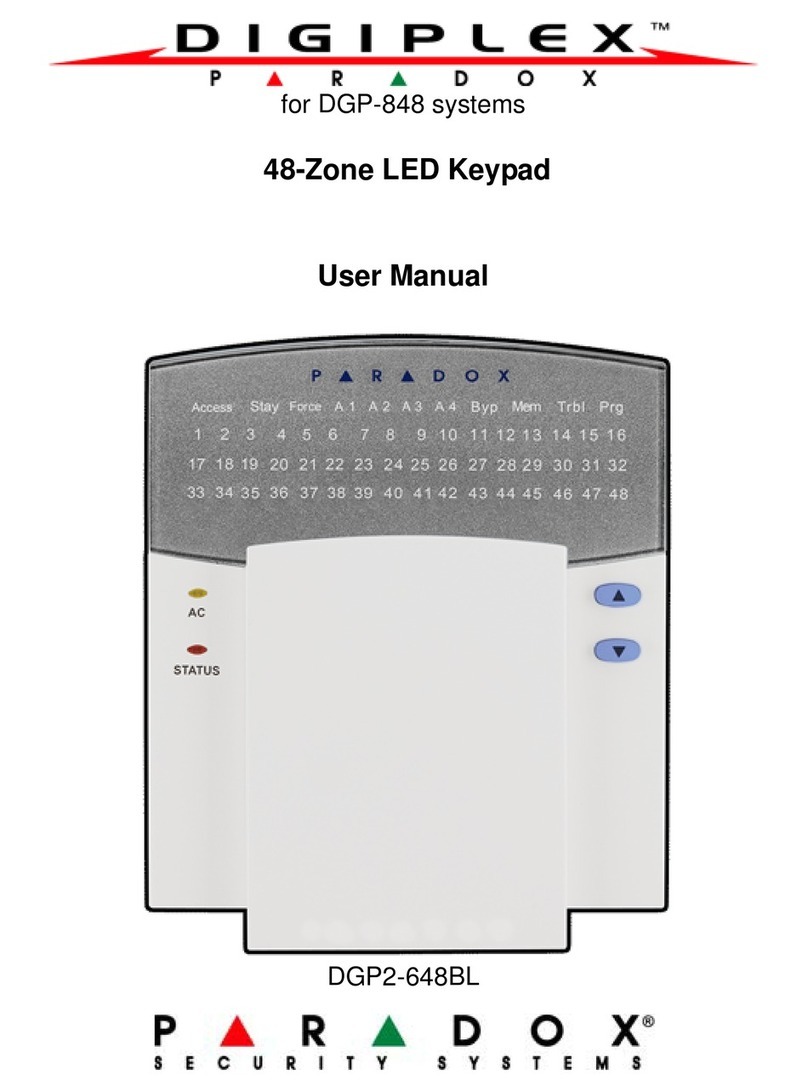
Digiplex DGP2-648BL User manual

Digiplex

Digiplex DGP2-648BL User manual

Digiplex DGP2-641 User guide

Digiplex

Digiplex DGP2-641 User guide

Popular Keypad manuals by other brands

Powercom Mini WRS7000DSI-5 user manual

Powercom

Powercom Mini WRS7000DSI-5 user manual

Digital Monitoring Products 9000 series installation guide

Digital Monitoring Products

Digital Monitoring Products 9000 series installation guide

ET NICE E-Pad O2 Active Installation and setup instructions

ET NICE

ET NICE E-Pad O2 Active Installation and setup instructions

Siemens IKP6-03 Installation instruction

Siemens

Siemens IKP6-03 Installation instruction

Defiant G7X2D01AA Instructions & assembly

Defiant

Defiant G7X2D01AA Instructions & assembly

Bosch DS7446KP user guide

Bosch

Bosch DS7446KP user guide

Aritech CS450 user manual

Aritech

Aritech CS450 user manual

First Alert FA220KP Installation and setup guide

First Alert

First Alert FA220KP Installation and setup guide

GE AL-1103 user manual

GE

GE AL-1103 user manual

Automotive Data Solutions TR4650A owner's manual

Automotive Data Solutions

Automotive Data Solutions TR4650A owner's manual

Rose electronics RCK-KP4x5-P Installation and operation manual

Rose electronics

Rose electronics RCK-KP4x5-P Installation and operation manual

NAPCO RP1016LCD operating guide

NAPCO

NAPCO RP1016LCD operating guide

BFT T-Box quick start guide

BFT

BFT T-Box quick start guide

DMP Electronics 7760 installation guide

DMP Electronics

DMP Electronics 7760 installation guide

Aidcall Touchsafe Pro user guide

Aidcall

Aidcall Touchsafe Pro user guide

Honeywell 6270 - Ademco TouchCenter Keypad quick guide

Honeywell

Honeywell 6270 - Ademco TouchCenter Keypad quick guide

Genie Series II installation guide

Genie

Genie Series II installation guide

motortronics VMX-agility Series user guide

motortronics

motortronics VMX-agility Series user guide

manuals.online logo
manuals.online logoBrands
  • About & Mission
  • Contact us
  • Privacy Policy
  • Terms and Conditions

Copyright 2025 Manuals.Online. All Rights Reserved.