dji AGRAS T30 User manual

v1.0
Quick Start Guide
クイックスタートガイド
Hướng dẫn Khởi động Nhanh
Kurzanleitung
Guía de inicio rápido
Guide de démarrage rapide
Guia de Início Rápido
AGRAS T30

EN
2
Agras T30
The AGRASTM T30 is DJI’s next-generation aircraft, boasting a revolutionary transforming structure and a max payload of
up to 40 kg. Using DJI’s digital agriculture solutions, the performance and efficiency of crop protection operations can be
greatly enhanced and improved. The updated Route Operation mode includes Connection Routing, which enables the
aircraft to automatically fly to a task route and avoid obstacles that have been marked in field planning. The new Smart
Supply Reminder calculates the remaining liquid amount to help users manage spraying operations.
The aircraft comes equipped with the Spherical Radar System, a pioneering new system for the agriculture industry.
Consisting of the Omnidirectional Digital Radar and Upward Radar, the system provides functions such as terrain following,
obstacle sensing, and obstacle circumventing. With the forward and backward FPV cameras and bright spotlights, the
system comprehensively ensures operational safety day and night in different weather.
Thanks to the innovative new plunger pumps and the 16 sprinklers, the spraying system offers improved spray width, rate,
distribution, and eciency. The 2-channel electromagnetic ow meter and continuous liquid level gauge make measurements
more accurate than ever. To spray orchards, users can purchase the optional orchard spray package to transform the aircraft into
Orchard Conguration. When spraying orchards, branch-targeting technology can be used for precise spraying with the help of
the all-new Spherical Radar System and DJITM Agras Cloud.
The aircraft has a protection rating of IP67 (IEC 60529) and the core components boast three layers of protection, making
the T30 corrosion-resistant, dustproof, and waterproof so that it can be washed directly with water.
1. Propellers
2. Motors
3. ESCs
4. Aircraft Front Indicators (on the M2
and M6 arms)
5. Frame Arms
6. Folding Detection Sensors (built-in)
7. Hoses
8. Sprinklers
9. Nozzles
10. Electromagnetic Exhaust
Valves
11. Omnidirectional Digital Radar
12. Upward Radar (built-in)
13. Heat Sinks
14. Liquid Level Gauge
15. Spray Tank
16. Battery Compartment
17. Forward FPV Camera
18. Backward FPV Camera
19. Landing Gear
20. OCUSYNCTM Antennas
21. Onboard D-RTKTM Antennas
22. Aircraft Status Indicators (on the
M1 and M4 arms)
23. Aircraft Rear Indicators (on the
M3 and M5 arms)
FoldedRear View
1
2
3
5
6
8
9
11
12
14
15
16
17
19
20
21
22
23
13
47
18
10

EN
3
Left Stick Right Stick
Up
Down
Turn Left Turn Right
Forward
Backward
Left Right
17
23
569
12
14
11
8
13
4
10
22
24
27
25
26
23
15
16
17 18 19
20
21
Remote Controller
The Smart Controller Enterprise uses DJI OcuSync Enterprise transmission technology, has a max transmission distance of
up to 7 km*, and supports Wi-Fi and Bluetooth. The remote controller has a 5.5-inch bright, dedicated screen and comes
with the updated DJI Agras app built-in, delivering a smooth and easy-to-use experience. Operations can be planned to
centimeter-level precision when the RTK dongle is connected to the remote controller. The Multi-Aircraft Control mode* of
the remote controller can be used to coordinate the operation of multiple aircraft at the same time, enabling pilots to work
efficiently. Both the built-in battery and external battery can be used to supply power to the remote controller. The remote
controller has a working time of up to 4 hours, making it ideal for long and high-intensity operations.
The gure below shows the function that each control stick movement performs and uses Mode 2 as an example. In Mode 2,
the left stick is used to control the altitude and heading of the aircraft while the right stick is used to control the forward,
backward, left, and right movements.
* The remote controller is able to reach its maximum transmission distance (FCC/NCC: 7 km (4.35 mi); SRRC: 5 km (3.11 mi); CE/
KCC/MIC: 4 km (2.49 mi)) in an open area with no electromagnetic interference, and at an altitude of approximately 2.5 m (8.2 ft).
Make sure to comply with local laws and regulations when using Multi-Aircraft Control mode.
1. Antennas
2. Back/Function Button
3. Control Sticks
4. RTH Button
5. Button C3 (customizable)
6. Flight Mode Switch
7. Status LED
8. Battery Level LEDs
9. 5D Button (customizable)
10. Power Button
11. Confirm Button
12. Touch Screen
13. USB-C Charging Port
14. Dongle Compartment Cover
15. Spray Rate Dial
16. Spray Button
17. HDMI Port
18. microSD Card Slot
19. USB-A Port
20. FPV/Map Switch Button
21. Aircraft Control Switch Dial
22. Air Outlet
23. Button C1 (customizable)
24. Button C2 (customizable)
25. Battery Cover
26. Battery Cover Release Button
27. Handle
Left Stick Right Stick
Up
Forward
Down
Turn Left Left
Turn Right Right
Backward

EN
4
Flight Environment Requirements
1. DO NOT use the aircraft to spray in winds exceeding 18 kph (11 mph).
2. DO NOT use the aircraft in adverse weather conditions such as winds exceeding 28 kph (17 mph), heavy rain exceeding 25 mm
(0.98 in) in 12 hours, snow, or fog.
3. DO NOT y more than 4.5 km (14,763 ft) above sea level.
4. The DJI Agras app will intelligently recommend the payload weight limit for the tank according to the current status and
surroundings of the aircraft. Do not exceed the recommended payload weight limit when adding material to the tank.
Otherwise, the ight safety may be aected.
5. Make sure that there is a strong GNSS signal and the D-RTK antennas are unobstructed during operation.
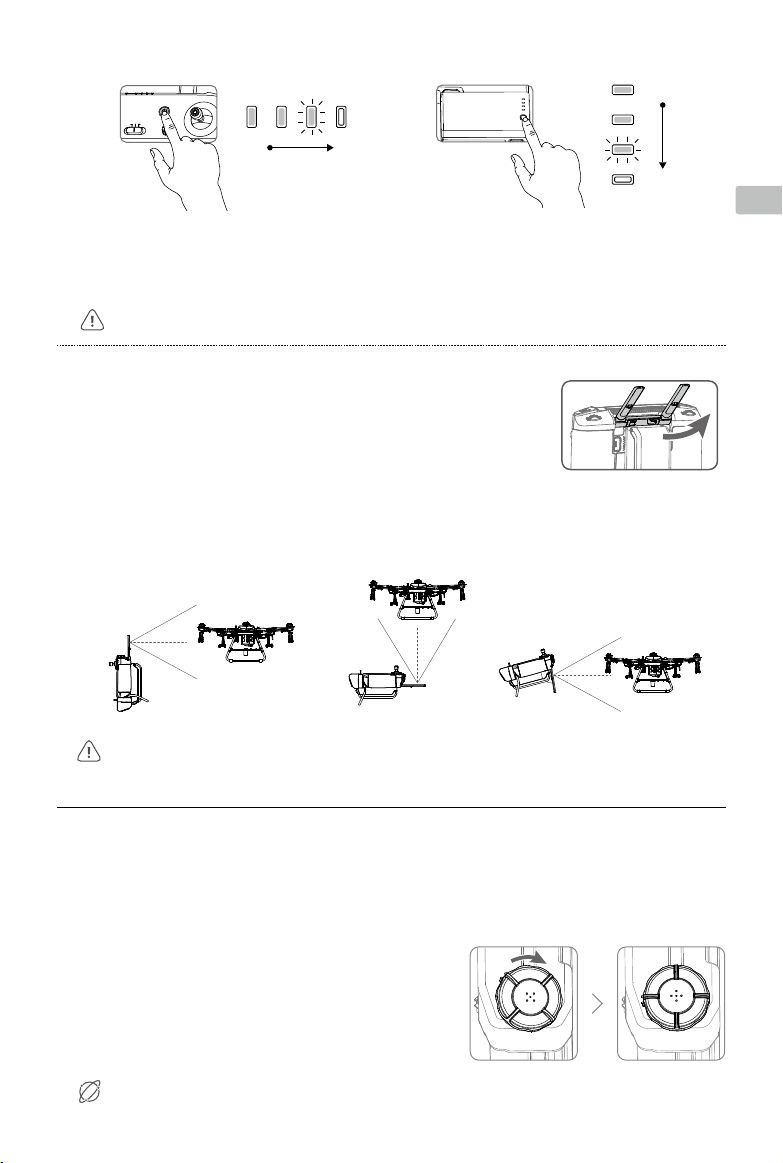
Return to Home (RTH)
The aircraft will automatically return to the Home Point in the following situations:
Smart RTH: user presses and holds the RTH button.
Failsafe RTH: the remote controller signal is lost.*
If there is an obstacle within 20 m of the aircraft, the aircraft decelerates and brakes and hovers. The aircraft will exit RTH and wait
for further commands.
If RTH is triggered during Route operations, the aircraft can plan a ight path for RTH to circumvent the obstacles added when
planning a eld.
Fly Safe
It is important to understand some basic ight guidelines, both for your protection and for the safety of those around you.
1. Flying in Open Areas: pay attention to utility poles, power lines, and other obstacles. DO NOT y near or above water,
people, or animals.
2. Maintain Control at All Times: keep your hands on the remote controller and maintain control of the aircraft when it is in
ight, even when using intelligent functions such as the Route and A-B Route operation modes and Smart Return to Home.
3. Maintain Line of Sight: maintain visual line of sight (VLOS) with your aircraft at all times and avoid ying behind buildings or
other obstacles that may block your view.
4. Monitor Your Altitude: for the safety of manned aircraft and other air trac, y at altitudes lower than 100 m (328 ft) and in
accordance with all local laws and regulations.
Visit https://www.dji.com/ysafe for more information on critical safety features such as
GEO zones.
* The aircraft will RTH or hover if the remote controller signal is lost. The action can be set in the app. Failsafe RTH will only be
available if RTH is set.
Pesticide Usage
1. Avoid the use of powder pesticides as much as possible as they may reduce the service life of the spraying system.
2. Pesticides are poisonous and pose serious risks to safety. Only use them in strict accordance with their specications.
3. Use clean water to mix the pesticide and lter the mixed liquid before pouring into the spray tank to avoid blocking the
strainer.
4. Effective use of pesticides depends on pesticide density, spray rate, spray distance, aircraft speed, wind speed, wind
direction, temperature, and humidity. Consider all factors when using pesticides.
5. DO NOT compromise the safety of people, animals, or the environment during operation.
●Obstacle avoidance is disabled when the aircraft is in Attitude mode, which it enters in situations such as when the
GNSS signal is weak. Note that obstacle avoidance is unreliable when using the aircraft in environments where the
radar module cannot operate normally. Extra caution is required in such situations.
It is important to understand the basic ight guidelines, both for your protection and for the safety of those
around you. Make sure to read the disclaimer and safety guidelines.

EN
5
1. Preparing the Intelligent Flight Battery
2. Preparing the Aircraft
●Make sure that the battery is firmly inserted into the aircraft. Only insert or remove the battery when the aircraft
is powered off.
●To remove the battery, press and hold the clamp and lift the battery up.
●Fold the M3 and M5 arms followed by the M2 and M6 arms and make sure that the arms are inserted into the
storage clamps on both sides of the aircraft. Otherwise, the arms may be damaged. Lift and lower the M1 and
M4 arms gently to reduce wear and tear.
Unfold the M2 and M6 arms, and fasten the
two arm locks. Avoid pinching ngers.
Unfold the M3 and M5 arms followed by M1 and M4 and
fasten the four arm locks. Avoid pinching ngers.
Unfold the propeller blades. Insert the Intelligent Flight Battery into the aircraft
until you hear a click.
Only use official DJI flight batteries (model: BAX501-29000mAh-
51.8V). Check the battery level before ying and charge according to
the corresponding manual document.
M6
M2
M3
M4
M1
M5
M2 M6
Using the T30

EN
6
●To remove the Intelligent Battery, press and hold the
battery release button and push the battery downward.
●Only use a DJI-approved dongle. The dongle supports various network standards. Use a SIM card that is
compatible with the chosen mobile network provider and select a mobile data plan according to the planned
level of usage.
●The dongle and SIM card enable the remote controller to access specific networks and platforms such as the
DJI Agras Management Platform. Make sure to insert them correctly. Otherwise, network access will not be
available.
Mounting the 4G Dongle and SIM Card
Mounting the External Battery
1Press the battery cover release button on the back of the
remote controller down to open the cover.
2Insert the Intelligent Battery into the compartment and push
it to the top.
3Close the cover.
Remove the dongle compartment cover.
Make sure the SIM card is inserted into the dongle. Insert the dongle into the
USB port and test the dongle.*
Dongle
Reattach the cover rmly.
* Test procedure: press the remote controller power button and press again and hold to power on the remote controller. In
DJI Agras, tap , and select Network Diagnostics. The dongle and SIM card are functioning properly if the status of all
the devices in the network chain are shown in green.
3. Preparing the Remote Controller
Charging the Batteries
Charge the external Intelligent Battery using the charging hub and AC power adapter. Charge the internal battery of the
remote controller using the USB charger and USB-C cable. Fully charge the batteries before using for the rst time.
AC Power Adapter
Charging Hub Power Outlet
(100 - 240 V)
Mounting the RTK Dongle
When using the RTK planning method to plan the operation area, attach the
RTK dongle to the USB-A port on the remote controller.
USB Charger
USB-C Cable
2
3
Battery Release Button

EN
7
Optimal Transmission Zone
●When using for the first time, activate the aircraft using the DJI Agras app. A DJI account and internet
connection are required.
Checking the Battery Levels
Press the power button on the remote controller once to check the internal battery level. Press once and press again and hold
for two seconds to power on or o.
Press the battery level button on the external Intelligent Battery once to check the battery level.
Adjusting the Antennas
Lift and adjust the antennas. The strength of the remote controller signal is aected by
the position of the antennas. For an optimal connection between the remote controller
and aircraft, make sure the angle between the antennas and the back of the remote
controller is 80° or 180°.
4. Getting Ready for Takeoff
A. Place the aircraft on open, at ground with the rear of the aircraft facing toward you.
B. Make sure that the propellers are securely mounted, there are no foreign objects in or on the motors and propellers, the
propeller blades and arms are unfolded, and the arm locks are rmly fastened.
C. Make sure that the spray tank and ight battery are rmly in place.
D. Pour liquid into the spray tank and tighten the cover. Make sure
that the four lines on the cover are aligned to the horizontal or
vertical direction.
E. Power on the remote controller, make sure that the DJI Agras app
is open, and power on the aircraft.
Internet
●Avoid using wireless devices that use the same frequency bands as the remote controller.
●If the RTK dongle is used for RTK planning, the module should be disconnected from the remote controller
after planning is completed. Otherwise, it will affect the communication performance of the remote controller.
●When using an external Intelligent Battery, it is still necessary to make sure that the internal battery has some
power. Otherwise, the remote controller cannot be powered on.
Try to keep the aircraft inside the optimal transmission zone. If the signal is weak, adjust the antennas or y the aircraft closer.
80°
Low High
Low
High

EN
8
OR
Throttle Stick
(left stick in Mode 2)
5. Flight
In the app, go to Operation View. Make sure that there is a strong GNSS signal and the system status bar indicates Manual
Route (GNSS) or Manual Route (RTK).* Otherwise, the aircraft cannot take o.
In order for the aircraft to automatically take o and perform an operation, it is recommended to create a plan for a eld and
select an operation before takeo. Refer to the Starting Operations section for more information. For other scenarios, take o
and land manually.
Landing
To land, pull down on the throttle stick to descend until the aircraft touches the ground. There are two methods to stop the
motors.
Method 1: when the aircraft has landed, push and hold the throttle stick down. The motors will stop after three seconds.
Method 2: when the aircraft has landed, push the throttle stick down, and perform the same CSC that was used to start the
motors. Release both sticks once the motors have stopped.
* RTK positioning is recommended. In the app, go to Operation View, tap , then RTK to enable Aircraft RTK Positioning,
and select a method for receiving RTK signals.
Calibrating the Compass
When the app prompts that compass calibration is required, tap , then , and swipe to the bottom. Select Advanced
Settings, then IMU, and Compass Calibration. Tap Calibration in Compass Calibration and follow the on-screen instructions.
Calibrating the Flow Meter
Make sure to calibrate the flow meter before using for the first time. Otherwise, the spraying performance may be
adversely aected.
A. Preparation
1 Fill the spray tank with approximately 2 L of water.
2Use the automatic trapped air discharge function to discharge the trapped air. Users can also manually discharge
the trapped air. Press the spray button to spray the trapped air and press the button again once all trapped air is
discharged.
B. Calibration
1In the app, tap Execute Task to enter Operation View. Tap , then , swipe up, and tap Calibration on the right of the
ow meter calibration section.
2 Tap Start Calibration to begin. Calibration will be complete after 25 seconds and the results are displayed in the app.
● Users can proceed once calibration is completed successfully.
● If calibration fails, tap “?” to view and resolve the problem. Recalibrate once the problem is resolved.
Discharging Trapped Air in the Hoses
The T30 features an automatic trapped air discharge function. When it is necessary to discharge trapped air, press and hold
the spray button for two seconds. The aircraft will discharge automatically until the trapped air is fully discharged.
Takeoff
Perform a Combination Stick Command (CSC) and push the throttle stick up to take o.

EN
9
●Spinning propellers can be dangerous. Stay away from spinning propellers and motors. DO NOT start the
motors in confined spaces or where there are people nearby.
●Maintain control of the remote controller as long as the motors are running.
●DO NOT stop the motors mid-flight unless in an emergency situation where doing so will reduce the risk of
damage or injury.
●It is recommended to use Method 1 to stop the motors. When using Method 2 to stop the motors, the aircraft
may roll over if it is not completely grounded. Use Method 2 with caution.
●After landing, power off the aircraft before turning off the remote controller.
Starting Operations
After the operation area and obstacles have been measured and settings have been congured, the DJI Agras app uses a
built-in intelligent operation planning system to produce a ight route based on the user’s input. Users can invoke an operation
after planning a eld. The aircraft will begin the operation automatically and follow the planned ight route.
In scenarios with complicated terrain, Phantom 4 RTK and DJI TERRATM can be used to plan ight routes and import routes to
the DJI Agras app for operation. Refer to the Agras T30 User Manual for more information.
Field Planning
The DJI Agras app supports ight route planning by ying the aircraft to waypoints, obstacles, and calibration points or by
walking to these points carrying a remote controller, a remote controller with an RTK dongle, or an RTK device. The following
route has been planned by walking to the points with a remote controller that has a RTK dongle connected. Before planning,
make sure that the RTK dongle is mounted to the remote controller.
Method 1 Method 2
OR
Walk to each obstacle in turn and
tap Obstacle Mode C1.*
Walk around the obstacle and tap Add
Obstacle C2 at several points around the
obstacle.*
Walk with the remote controller
alongside the boundary of the
operation area and tap Add
Waypoint C2 at turning points.
* Any obstacles in or out of the operation
area can be marked.
Tap Waypoint C1 to return
to add edge points to the
operation area.
The waypoints and ight route
can be edited. Fine-tune waypoint
positions, congure distance and
line spacing, and adjust the route
direction by tapping or dragging
the icon .
Save the eld plan.
Once you have nished planning, press the back button on the remote controller to return to the home screen.
Power on the remote
controller. Launch DJI Agras.
Tap Plan Field, select Walk
with RTK, and Walk with RTK
Dongle.
%+*"(3"4
"11
In RTK settings, select a method for receiving
RTK signals and congure the corresponding
settings. Make sure the aircraft status bar at
the top of the screen is green.
RTK

EN
10
More Operation Modes and Functions
Refer to the Agras T30 User Manual for more information about the A-B Route, Manual, and Manual Plus Operation modes
and on how to use functions such as Connection Routing, Operation Resumption, System Data Protection, Empty Tank, and
Smart Supply Reminder.
6. Maintenance
Clean all parts of the aircraft and remote controller at the end of each day of spraying after the aircraft returns to a normal
temperature. DO NOT clean the aircraft immediately after operations are completed.
A. Fill the spray tank with clean water or soapy water and spray the water through the nozzles until the tank is empty. Repeat
the step twice more.
B. Remove the spray tank strainer, nozzle strainers, and nozzles to clean them and clear any blockage. Afterwards, immerse
them in clean water for 12 hours.
C. Make sure that the aircraft structure is completely connected so that it can be washed directly with water. It is
recommended to use a spray washer lled with water to clean the aircraft body and wipe with a soft brush or wet cloth
before removing water residue with a dry cloth.
D. If there is dust or pesticide liquid on the motors, propellers, or heat sinks, wipe them with a wet cloth before cleaning the
remaining water residue with a dry cloth.
E. Wipe the surface and screen of the remote controller with a clean wet cloth that has been wrung out with water.
Refer to the disclaimer and safety guidelines for more information on product maintenance.
Performing an Operation
●Only take off in open areas and set an appropriate auto-takeoff height according to the operating
environment.
●An operation can be paused by moving the control stick slightly. The aircraft will hover and record the
breakpoint. After which, the aircraft can be controlled manually. To continue the operation, select it again
from the Executing tag in list. The aircraft will return to the breakpoint automatically and resume the
operation. Pay attention to aircraft safety when returning to a breakpoint.
●In Route Operation mode, the aircraft is able to circumvent obstacles, which is disabled by default and can
be enabled in the app. If the function is enabled and the aircraft detects obstacles, the aircraft will slow
down and circumvent the obstacles and return to the original flight path.
●Users can set the action the aircraft will perform after the operation is completed in the app.
Download the Agras T30 User Manual for more information:
https://www.dji.com/t30/downloads
Set operation parameters
and conrm.
Set the auto-takeo height by setting the Connection Routing
Altitude in the app and move the slider to take o. The aircraft
will perform the operation automatically.
Tap Execute Task in the
home screen of the app.
Tap and select the eld
from the eld list.
Tap Edit to edit the waypoints
and ight route again.
Power on the remote
controller and aircraft.
Tap Use and tap Start.

EN
11
Specications
● Product Model 3WWDZ-30A
● Airframe
Max Diagonal Wheelbase 2145 mm
Dimensions 2858×2685×790 mm (arms and propellers unfolded)
2030×1866×790 mm (arms unfolded and propellers folded)
1170×670×857 mm (arms and propellers folded)
● Propulsion System
Motors
Max Power 3600 W/rotor
ESCs
Max Working Current (Continuous) 60 A
Foldable Propellers (R3820)
Diameter × Pitch 38×20 in
● Spraying System
Spray Tank
Volume Fully loaded: 30 L
Operating Payload Fully loaded: 30 kg
Nozzles
Model XR11001VS (standard), XR110015VS (optional, purchase separately),
TX-VK4/ZX-VK4 (optional for Orchard Conguration, purchase separately)
Quantity 16
Max Spray Rate XR11001VS: 7.2 L/min, XR110015VS: 8 L/min
Spray Width 4-9 m (12 nozzles, at a height of 1.5-3 m above crops)
Droplet Size XR11001VS: 130-250 μm, XR110015VS: 170-265 μm (subject to
operating environment and spray rate)
Flow Meter
Measurement Range 0.25-20 L/min
Error <±2%
Measurable Liquid Conductivity >50 μS/cm (liquids such as tap water or pesticides that
contain water)
● Omnidirectional Digital Radar
Model RD2424R
Operating Frequency SRRC/NCC/FCC/MIC/KCC/CE: 24.05-24.25 GHz
Power Consumption 12 W
Transmission Power (EIRP) SRRC: ≤13 dBm, NCC/MIC/KCC/CE/FCC: ≤20 dBm
Altitude Detection & Terrain
Follow[1]
Altitude detection range: 1-30 m
Stabilization working range: 1.5-15 m
Max slope in Mountain mode: 35°
Obstacle Avoidance[1] Obstacle sensing range: 1.5-30 m
FOV: Horizontal: 360°, Vertical: ±15°
Working conditions: ying higher than 1.5 m over the obstacle at a speed
lower than 7 m/s
Safety limit distance: 2.5 m (distance between the front of propellers and
the obstacle after braking)
Obstacle avoidance direction: omnidirectional obstacle avoidance in the
horizontal direction
IP Rating IP67
● Upward Radar
Model RD2414U
Operating Frequency SRRC/NCC/FCC/MIC/KCC/CE: 24.05-24.25 GHz

EN
12
Power Consumption 4 W
Transmission Power (EIRP) SRRC: ≤13 dBm, NCC/MIC/KCC/CE/FCC: ≤20 dBm
Obstacle Avoidance[1] Obstacle sensing range: 1.5-15 m
FOV: 80°
Working conditions: available during takeo, landing, and ascending
when an obstacle is more than 1.5 m above the aircraft.
Safety limit distance: 2 m (distance between the highest point of the
aircraft and the lowest point of the obstacle after braking)
Obstacle avoidance direction: upward
IP Rating IP67
● FPV Cameras
FOV Horizontal: 129°, Vertical: 82°
Resolution 1280×720 15-30fps
FPV Spotlights FOV: 120°, Max brightness: 13.2 lux at 5 m of direct light
● Flight Parameters
Operating Frequency SRRC/NCC/FCC/CE/MIC/KCC: 2.4000-2.4835 GHz
SRRC/NCC/FCC/CE: 5.725-5.850 GHz[2]
Transmission Power (EIRP) 2.4 GHz
SRRC/CE/MIC/KCC: ≤20 dBm, FCC/NCC: ≤31.5 dBm
5.8 GHz
FCC/SRRC/NCC: ≤29.5 dBm, CE: ≤14 dBm
Total Weight (exc. battery) 26.3 kg
Max Takeo Weight Max takeo weight for spraying: 66.5 kg (at sea level)
Max takeo weight for spreading: 78 kg (at sea level)
Hovering Accuracy Range (with
strong GNSS signal)
D-RTK enabled: Horizontal: ±10 cm, Vertical: ±10 cm
D-RTK disabled:
Horizontal: ±0.6 m, Vertical: ±0.3 m (Radar module enabled: ±0.1 m)
RTK/GNSS Operating Frequency RTK: GPS L1/L2, GLONASS F1/F2, BeiDou B1/B2, Galileo E1/E5[3]
GNSS: GPS L1, GLONASS F1, Galileo E1[3]
Battery DJI-approved ight battery (BAX501-29000mAh-51.8V)
Max Power Consumption 13000 W
Hovering Time[4] 20.5 min (takeo weight of 36.5 kg with an 29000 mAh battery)
7.8 min (takeo weight of 66.5 kg with an 29000 mAh battery)
Max Tilt Angle 15°
Max Operating Speed 7 m/s
Max Flying Speed 10 m/s (with strong GNSS signal)
Max Wind Resistance 8 m/s
Max Service Ceiling Above Sea
Level
4500 m
Recommended Operating
Humidity
<93%
Recommended Operating
Temperature
0° to 45° C (32° to 113° F)
● Remote Controller
Model RM500-ENT
Screen 5.5-in screen, 1920×1080, 1000 cd/m2, Android system
RAM 4GB
Built-in Battery 18650 Li-ion (5000 mAh @ 7.2 V)
GNSS GPS+GLONASS
Power Consumption 18 W
Operating Temperature 0° to 45° C (32° to 113° F)
Charging Environment
Temperature
5° to 40° C (41° to 104° F)

EN
13
Storage Temperature -30° to 60° C (-22° to 140° F) (stored for no more than one month with a
built-in battery power of 40% to 60%)
OcuSync Enterprise
Operating Frequency SRRC/NCC/FCC/CE/MIC/KCC: 2.4000-2.4835 GHz
SRRC/NCC/FCC/CE: 5.725-5.850 GHz[2]
Max Transmission Distance
(Unobstructed, free of interference)
FCC/NCC: 7 km, SRRC: 5 km, MIC/KCC/CE: 4 km
Transmission Power (EIRP) 2.4 GHz
SRRC/CE/MIC/KCC: ≤20 dBm, FCC/NCC: ≤30.5 dBm
5.8 GHz
SRRC: ≤21.5 dBm, FCC/NCC: ≤29.5 dBm, CE: ≤14 dBm
Wi-Fi
Protocol Wi-Fi Direct, Wi-Fi Display, 802.11a/g/n/ac
Wi-Fi with 2×2 MIMO
Operating Frequency 2.4000-2.4835 GHz
5.150-5.250 GHz[2]
5.725-5.850 GHz[2]
Transmission Power (EIRP) 2.4 GHz
SRRC/CE: 18.5 dBm, NCC/FCC /MIC/KCC: 20.5 dBm
5.2 GHz
SRRC/NCC/FCC/CE/MIC: 14 dBm, KCC: 10 dBm
5.8 GHz
SRRC/NCC/FCC: 18 dBm, CE/KCC: 12 dBm
Bluetooth
Protocol Bluetooth 4.2
Operating Frequency 2.4000-2.4835 GHz
Transmission Power (EIRP) SRRC/NCC/FCC/CE/MIC/KCC: 6.5 dBm
● Remote Controller Intelligent Battery
Model WB37-4920mAh-7.6V
Battery Type 2S LiPo
Capacity 4920 mAh
Voltage 7.6 V
Energy 37.39 Wh
Charging Environment
Temperature
5° to 40° C (41° to 104° F)
● Intelligent Battery Charging Hub
Model WCH2
Input Voltage 17.3-26.2 V
Output Voltage and Current 8.7 V, 6 A
Operating Temperature 5° to 40° C (41° to 104° F)
● AC Power Adapter
Model A14-057N1A
Input Voltage 100-240 V, 50/60 Hz
Output Voltage 17.4 V
Rated Power 57 W
[1] The eective radar range varies depending on the material, position, shape, and other properties of the obstacle.
[2] Local regulations in some countries prohibit the use of the 5.8 and 5.2 GHz frequencies. In some countries, the 5.2 GHz
frequency band is only allowed for indoor use.
[3] Support for Galileo will be available at a later date.
[4] Hovering time acquired at sea level with wind speeds lower than 3 m/s.

JP
14
Agras T30
AGRASTM T30はDJIの次世代機体で、革新的に変貌を遂げた構造と最大40 kgのペイロードを誇ります。DJIのデジタル農業
ソリューションの使用により、作物保護作業の性能と効率が大きく強化され改善されています。最新のルート作業モードで
は、機体が作業ルートを自動的に飛行し、農地事前計画でマークされた障害物を回避する、コネクションルーティングがあ
ります。新しいスマート供給残量通知は液残量を計算しユーザーの噴霧業務管理に役立ちます。
機体には農産業のための先駆的新システムである、球形レーダーシステムが備わっています。全方向デジタルレーダーと上
方レーダーで構成されるこのシステムは、地形フォロー、障害物検知、障害物回避の機能を備えています。前方/後方FPVカ
メラと高輝度スポットライトにより、このシステムはさまざまな天候で昼夜を問わず作業上の安全性を確保します。
革新的な新しいプランジャーポンプと16基のスプリンクラーにより、噴霧システムでは散布幅、散布速度、分配、効率が向
上しています。2チャンネル電磁流量計と連続液量ゲージにより、今までにない正確な計測を可能にします。果樹への噴霧に
は、別売の果樹噴霧パッケージを購入することで機体を果樹構成に変身させられます。果樹への噴霧時には、新開発の球形
レーダーシステムとDJITM Agrasクラウドの支援により、精密噴霧のために枝照準技術が採用されます。
機体の保護等級はIP67(IEC 60529)で、中核コンポーネントは3層保護を誇ります。これによりT30は耐食性、防塵性、耐水
性を備え、水で直接洗浄できます。
1. プロペラ
2. モーター
3. ESC
4. 機体の前面インジケーター(M2と
M6のアーム上)
5. フレームアーム
6. 折りたたみ検知センサー(内蔵)
7. ホース
8. スプリンクラー
9. ノズル
10. 電磁式排出弁
11. 全方向デジタルレーダー
12. 上方レーダー(内蔵)
13. ヒートシンク
14. 液量ゲージ
15. 噴霧タンク
16. バッテリー収納部
17. 前方FPVカメラ
18. 後方FPVカメラ
19. ランディングギア
20. OCUSYNCTM アンテナ
21. オンボードD-RTKTMアンテナ
22. 機体ステータスインジケー
ター(M1とM4のアーム上)
23. 機体のリアインジケー
ター(M3とM5のアーム上)
折りたたんだ状態背面図
1
2
3
5
6
8
9
11
12
14
15
16
17
19
20
21
22
23
13
47
18
10

JP
15
17
23
569
12
14
11
8
13
4
10
22
24
27
25
26
23
15
16
17 18 19
20
21
送信機
スマート送信機EnterpriseはDJI OcuSync Enterprise伝送技術を採用し、最大伝送距離は4 km*を誇り、Wi-FiとBluetoothに対応
しています。送信機には5.5インチの明るい専用画面が装備され、また最新のDJI Agras内蔵アプリによりスムーズで簡単に使
える体験が得られます。RTKドングルが送信機に接続されているときには、センチメートルレベルの精度で作業を計画でき
ます。送信機の複数機制御モード*は、複数の機体の同時操作を調整でき、パイロットは非常に効率的に作業することができ
ます。内蔵バッテリーと外付けバッテリーはどちらも、送信機に電力を供給するのに使用することができます。送信機の稼
働時間は最大4時間で、長時間で高負荷の作業に最適です。
下図では「モード1」を例にして、各操作スティックの動きで実行される機能を説明しています。モード1では、左スティッ
クで機体の前後の動きと向きを制御し、右スティックで高度と左右の動きを制御します。
* 送信機は、高度約2.5 mで電磁波干渉のない開けた環境下で、最大伝送距離(FCC/NCC:7 km、SRRC:5 km、CE/KCC/
MIC(日本):4 km )に達することができます。
複数機体制御モードの使用時には現地の法令と規制を必ず順守してください。
1. アンテナ
2. 戻る/機能ボタン
3. 操作スティック
4. RTHボタン
5. ボタンC3(カスタム可能)
6. フライトモードスイッチ
7. ステータスLED
8. バッテリー残量LED
9. 5Dボタン(カスタム可能)
10. 電源ボタン
11. 確認ボタン
12. タッチスクリーン
13. USB-C充電ポート
14. ドングル収納部カバー
15. 噴霧流量ダイヤル
16. 噴霧ボタン
17. HDMIポート
18. microSDカードスロット
19. USB-Aポート
20. FPV/マップ切替ボタン
21. 機体制御切替ダイヤル
22. 排気口
23. ボタンC1(カスタム可能)
24. ボタンC2(カスタム可能)
25. バッテリーカバー
26. バッテリーカバー解除ボタン
27. ハンドル
左ス ティック 右ス ティック
上昇
下降
左旋回 右旋回 左右
前方
後方

JP
16
飛行環境の条件
1. 風速が18 km/hを超える場合に機体を使用して噴霧しないでください。
2. 強風(28 km/h超)、12時間雨量が25 mmを超える豪雨、雪、霧などの悪天候時に機体を使用しないでください。
3. 海抜4.5 kmを超えて飛行しないでください。
4. DJI Agrasアプリは現在のステータスと機体の周辺状況に応じてタンクのペイロード重量制限をインテリジェントに推奨し
ます。タンクに材料を追加するときには推奨ペイロード重量制限を超えないようにしてください。推奨値を超えると、飛
行安全性に影響を及ぼすことがあります。
5. 作業中、強いGNSS信号を受信し、D-RTKアンテナを遮るものがないことを確認してください。
Return-to-Home(RTH)
機体は以下の状況で自動的にホームポイントに戻ります:
スマートRTH:ユーザーがRTHを長押ししたとき。
フェールセーフRTH:送信機信号が失われたとき。*
機体の20 m以内に障害物がある場合、機体は減速し、制動してホバリング状態になります。機体はRTHを終了し、その後の
指示を待ちます。
ルート作業中にRTHがトリガーされると、農地の計画時に追加された障害物を回避するよう、機体はRTHに対する飛行経路
を計画できます。
安全飛行
ご自身や周りの人々の安全を守るため、基本的な飛行ガイドラインを理解することが重要です。
1. 開けた場所で飛行:電柱、電力線、その他の障害物に注意してください。水辺、人や動物の周辺や頭上では、飛行させな
いでください。
2. どんなときでも制御を維持:送信機から手を離さずに、飛行中の機体の制御を維持してください。これは、ルート作業モ
ード/A-Bルート作業モード/スマートReturn-to-Homeなどのインテリジェント機能を使用している場合でも同様です。
3. 目視内を維持:常に機体を目視内(VLOS)に入るようにしてください。視界を遮る可能性のある建物や他の障害物の後
ろを飛行させることは避けてください。
4. 機体の高度を監視:有人飛行機や他の航空交通の安全のために、地域の法令や規制に従って、高度100 m未満の高度で飛
行させてください。
GEOゾーンなどの不可欠な安全機能についてはhttps://www.dji.com/ysafeを参照して
ください。
* 送信機信号が失われた時に機体はRTHするかホバリングします。動作についてはアプリで設定できます。フェールセーフ
RTHはRTHが設定されているときにのみ使用可能です。
農薬の使用
1. 粉末状の農薬は使用しないでください。噴霧システムの耐用年数が短くなる可能性があります。
2. 農薬には毒性があり、健康に深刻な危険をもたらします。農薬の使用の際は、必ず農薬に記載されている指示に従ってご
使用ください。
3. ストレーナーの詰まりを避けるため、噴霧タンクに注ぐ前に、浄水を使用して農薬を混合し、混合液をろ過してください。
4. 農薬の効果的な使用は、農薬の濃度、噴霧量、噴霧距離、機体速度、風速、風向、温度、湿度によって左右されます。農
薬を使用する際は、すべての要因を考慮してください。
5. 作業中に、人、動物、または周囲の環境の安全性を損なわないでください。
●障害物回避は機体が姿勢モードのときには無効にされています。GNSS信号が弱いときなどの状況でこのモードに入
ります。障害物回避は、レーダーモジュールが正常に動作しない環境で機体を使用しているときには信頼できない
場合があることに注意してください。前述の状況では、特に注意してください。
ご自身や周りの人々の安全を守るため、基本的な飛行ガイドラインを理解することが重要です。必ず免
責事項と安全に関するガイドラインをお読みくださるようお願いします。

JP
17
1. インテリジェント フライトバッテリーの準備
2. 機体の準備
●バッテリーが機体にしっかり挿入されていることを確認してください。バッテリーは、機体の電源が入っていな
いときにのみ挿入または取り外してください。
●バッテリーを取り外すには、クランプを押し下げたままでバッテリーを持ち上げます。
●M3アームとM5アームを折りたたみ、次にM2アームとM6アームを折りたたみます。アームは機体の両側の保管
クランプに確実に挿入するようにしてください。そうしない場合、アームが破損する恐れがあります。摩耗や傷
を減らすため、M1およびM4アームはゆっくりと上下させてください。
M2アームとM6アームを広げ、2個のアームロ
ックを締め付けます。指を挟まないようにして
ください。
M3およびM5アームを展開し、次にM1およびM4を展
開し、4個のアームロックを締め付けます。指を挟ま
ないようにしてください。
プロペラブレードを広げます。 カチッという音がするまで、インテリジェント フ
ライトバッテリーを機体に挿入します。
純正のDJIフライトバッテリー(モデル:BAX501-29000mAh-
51.8V)のみを使用してください。飛行前にバッテリー残量を確認
し、対応するマニュアル文書に従って充電してください。
M6
M2
M3
M4
M1
M5
M2 M6
T30の使用

JP
18
●インテリジェント バッテリーを取り外すには、バッ
テリー解除ボタンを押したままバッテリーを押し下げ
ます。
●必ずDJIで承認されたドングルをご使用ください。ドングルは様々なネットワーク規格に対応しています。選択
したモバイル ネットワーク プロバイダーに対応するSIMカードを使用して、計画した使用レベルに応じたモバ
イル データ プランを選択します。
●ドングルとSIMカードを使用すると、送信機は特定のネットワークやプラットフォーム(DJI Agras管理プラット
フォームなど)にアクセスできます。必ず正しく挿入してください。正しく使用しない場合、ネットワークにア
クセスできません。
4GドングルとSIMカードの取り付け
外部バッテリーの装着
1送信機背面にあるバッテリーカバー解除ボタンを下に押し
て、カバーを開きます。
2 インテリジェント バッテリーを収納部に挿入し、上方向に押
します。
3 カバーを閉じます。
ドングル収納部のカバーを取り外します。
SIMカードがドングルに挿入されたことを確認してください。ドングルを
USBポートに挿入してドングルをテストします。*
ドングル
カバーをしっかりと取り付けます。
* テスト手順:送信機の電源ボタンを押した後、もう1回長押しして送信機の電源を入れます。DJI Agrasの をタッ
プして、ネットワーク診断を選択します。ネットワークチェーン内のすべてのデバイスのステータスが緑色で表示
されている場合、ドングルとSIMカードは適切に機能しています。
3. 送信機の準備
バッテリーの充電
充電ハブとAC電源アダプターを使用して、外部インテリジェント バッテリーを充電します。USB充電器とUSB-Cケーブ
ルを使用して、送信機の内部バッテリーを充電します。初回使用時にはバッテリーを完全に充電してください。
AC電源アダプター
充電ハブ 電源出力
(100~240 V)
RTKドングルの取り付け
RTK計画方法を使用して作業エリアを計画する場合、送信機のUSB-Aポ
ートにRTKドングルを取り付けます。
USB充電器
USB-Cケーブル
2
3
バッテリー解除ボタン

JP
19
最適な伝送範囲
●初めて使用するときには、DJI Agrasアプリを使用して機体をアクティベートしてください。DJIアカウントとイ
ンターネット接続が必要です。
バッテリー残量を確認する
送信機の電源ボタンを1回押して、内部バッテリー残量を確認します。ボタンを1回押し、次に2秒間長押しすると電源オ
ンまたは電源オフになります。
バッテリー残量を確認するには、外部インテリジェント バッテリーのバッテリー残量ボタンを1回押します。
アンテナの調整
アンテナを立てて、角度を調整します。送信機の信号強度は、アンテナの位置に
影響を受けます。送信機と機体間の接続を最適にするために、アンテナと送信機
の背面との間の角度が必ず80°または180°になるようにしてください。
4. 離陸準備
A. 機体の後面を自分のほうに向けて、機体を屋外の平らな地面に置きます。
B. プロペラがしっかりと取り付けられていること、モーターとプロペラの中または上に異物がないこと、プロペラのブ
レードとアームが展開されていること、およびアームロックがしっかりと締め付けられていることを確認します。
C. 噴霧タンクとフライトバッテリーがしっかりと固定されている
ことを確認します。
D. 噴霧タンクに液体を注ぎ、ふたを締めます。ふたの十字の線が
水平と垂直方向に揃っていることを確認してください。
E. 送信機の電源を入れ、DJI Agrasアプリが起動していることを確
認してから、機体の電源を入れます。
インターネット
●送信機と同一の周波数帯を利用する無線機器は使用しないでください。
●RTKドングルをRTK計画に使用する場合、計画の完了後にモジュールを送信機から取り外す必要があります。
そうしない場合、送信機の通信性能に影響します。
●外部インテリジェント バッテリーを使用する場合にも、内部バッテリーにある程度の電力があることを確認す
る必要があります。電力がない場合、送信機の電源を入れることができません。
機体が最適な伝送範囲から出ないようにしてください。信号が弱い場合は、アンテナを調整するか、機体をより近い範
囲で飛ばしてください。
80°
低高
低
高
Other manuals for AGRAS T30
6
Table of contents
Languages:
Other dji Drone manuals

dji
dji Phantom 3 Advanced User manual

dji
dji R4D Instruction Manual

dji
dji AGRAS MG-1 User manual

dji
dji MATRICE 200 User manual

dji
dji MAVIC AIR 2 User manual

dji
dji Inspire 2 Series User manual

dji
dji spreading wings s900 User manual

dji
dji PHANTOM 4 SDK User manual

dji
dji RM220 User manual

dji
dji Phantom 4 Pro V2.0 User manual