dji Mavic 2 Enterprise User manual

Dual
v1.0
MAVIC 2
ENTERPRISE
Quick Start Guide
快速入门指南
快速入門指南
クイックスタートガイド
퀵 스타트 가이드
Kurzanleitung
Guía de inicio rápido
Guide de démarrage rapide
Guida di avvio rapido
Snelstartgids
Guia de início rápido
Guia de Início Rápido
Краткое руководство пользователя


1
Contents
EN
CHS
CHT
JP
KR
DE
ES
FR
IT
NL
PT-PT
PT-BR
RU
Quick Start Guide 2
快速入门指南12
快速入門指南 22
クイックスタートガイド32
퀵 스타트 가이드 42
Kurzanleitung 52
Guía de inicio rápido 62
Guide de démarrage rapide 72
Guida di avvio rapido 82
Snelstartgids 92
Guia de Início Rápido 112
Guia de início rápido 102
Краткое руководство пользователя 122

EN
2
Aircraft
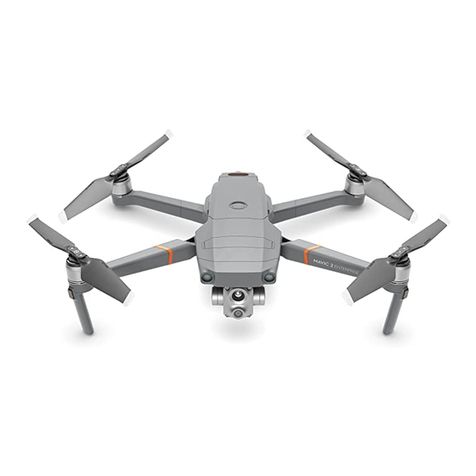
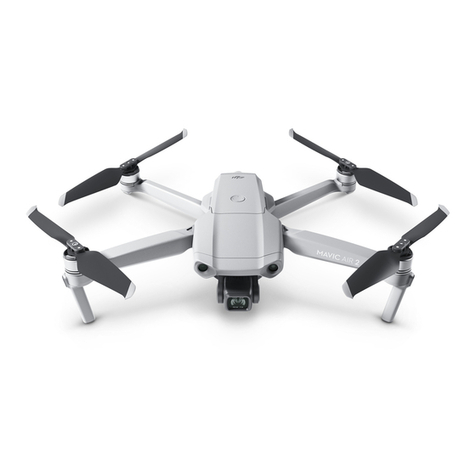
The DJITM MAVICTM 2 Enterprise Dual features omnidirectional Vision Systems and
Infrared Sensing Systems*, and comes with a fully stabilized 3-axis gimbal camera with
a FLIR longwave infrared thermal camera and a visual camera, providing both infrared
and visual images simultaneously. DJI signature technologies such as Obstacle
Sensing help you y and capture complex shots effortlessly. Additional features like
the built-in AirSense makes you aware of your surrounding airspace, and password
protection helps you maintain secure access to your aircraft and protect your data. The
Mavic 2 Enterprise also has attachable modular accessories like the M2E Spotlight, M2E
Beacon and M2E speaker that are purpose built for various applications. The Mavic 2
Enterprise boasts a maximum ight speed of 44.7 mph (72 kph) and a maximum ight
time** of 31 minutes.
7
810
11
12
13
14
19
18
16
17
15
20
22
21
1
AB
2
3
4
56
1. Gimbal and Camera
A. Visual Camera
B. Thermal Camera
2. Forward Vision System
3. Downward Vision System
4. Lateral Vision System
5. Downward Infrared Sensing
System
6. Auxiliary Bottom Light
7. MicroSD Card Slot
8. Front LEDs
* The Vision Systems and Infrared Sensing Systems are affected by surrounding conditions. Read the
Disclaimer and Safety Guidelines, User Manual, and watch the tutorial videos on the ofcial DJI website to
learn more. http://www.dji.com/mavic-2-enterprise
** Maximum ight time was tested in an environment with no wind while ying at a consistent 15.5 mph (25 kph).
This value is for reference only.
9. Motors
10. Propellers
11. Antennas
12. Aircraft Status Indicator
13. Upward Infrared Sensing
System
14. Backward Vision System
15. Intelligent Flight Battery
16. Battery Level LEDs
17. Power Button
18. Battery Buckles
19. USB-C Port
20. Link Button/Linking
Status Indicator
21. Extended Port (to
connect accessories)
22. Extended Port Cover
EN
3
1
3
4
6
7
2
8
9
10
11
5
12 13
14 15
17
16
18
Remote Controller
Built into the remote controller is the DJI’s long-range transmission technology OCUSYNCTM
2.0, offering a maximum transmission range of 5 mi (8 km) and displaying video from the
aircraft to the DJI Pilot app on your mobile device at up to 1080p. An on-board LCD screen
gives real-time aircraft data information and the detachable control sticks make the remote
controller easier to store.
Maximum run time: 2 hours and 15 minutes*
1. LCD Screen
2. Flight Pause Button
3. 5D Button
4. Removable Control Sticks
5. Power Button
6. Antennas
7. RTH Button
8. Control Sticks Storage Slot
9. Reserve Video-Downlink
Port (USB)
10. Mobile Device Clamp
11. Flight Mode Switch
12. Gimbal Dial
13. EV Adjustment Dial
14. Record Button
15. Focus/Shutter Button
16. Video-Downlink/Power Port
(micro USB)
17. C1 Button (Customizable)
18. C2 Button (Customizable)
Folded
* The remote controller is able to reach its maximum transmission distance (FCC) in a wide-open area
with no electromagnetic Interference at an altitude of about 400 ft (120 m).
The maximum runtime is tested in a laboratory environment. This value is for reference only.

EN
4
DJI Pilot is compatible with iOS 10.0 (or later) or Android 5.0 (or later).
1. Download the DJI Pilot App and Watch the Tutorial Videos
Search “DJI Pilot” in the App Store or Google Play or scan
the QR code below to download the app on your mobile
device.
Watch the tutorial videos at www.dji.com/mavic-2-enterprise/
info#video.
2. Preparing the Aircraft
Remove the gimbal
cover from the camera.
Unfold the front arms. Unfold the rear arms.
Unfolded
Unfold the front arms and the propellers before the rear ones. All arms and propellers
must be unfolded before takeoff.
1
2
3
1
2
3
Press the propellers
down rmly and rotate
in the lock direction.
Match the propellers
to motors.
Marked Unmarked
Tutorial videos
DJI Pilot

EN
5
B
A
A
B
Remove the remote controller cable before charging.
3. Charging the Batteries
Install the battery to the aircraft and power it on. Once the battery temperature is lower
than 6° C, it will auto heat to maintain a temperature between 8-10° C. Refer to the
User Manual for more details.
Use the provided charger to fully
charge the Intelligent Flight Battery
before rst use.
Remove the Intelligent Flight Battery
Charging Time:
~1 hour 30 minutes
Charging Time:
~2 hour 15 minutes
Power Outlet
100 - 240V
Low
High
Checking the Battery Levels and Powering On/O
Press once to check the battery level.
Press, then press and hold to turn on/off.
Press once to check the battery level on
the LCD screen.
Press once, then press and hold to turn on/
off the remote controller.

EN
6
1
2
3
Ensure the control sticks are rmly mounted.
The remote controller cable with the Lightning connector is mounted by default. Use
the appropriate cable for your mobile device to connect to the remote controller.
When using an iPad or tablet, use the USB port on the remote controller.
Do not use the Micro USB and the USB ports simultaneously for linking video.
4. Preparing the Remote Controller
Unfold the antennas and mobile device clamps,
then attach the control sticks.
Place one end of the RC cable to the
end of the slot.
Attach your mobile device within the clamps.
Set the antennas parallel to each other
Optimal Transmission Range
Strong
Weak

EN
7
DJI Pilot
App
6. Flight
Ready to Go (GPS)
OR
Left stick up (slowly)
to take off
Left stick down (slowly) until you touch the
ground
Hold a few seconds to stop the motors
Before taking off, make sure the Aircraft Status Bar
in DJI Pilot displays “Ready to Go”.
Combination stick command to
start/stop the motors
Manual Takeo / Landing
The motors can only be stopped mid-flight when the flight controller detects
critical error.
Set a password for the aircraft in the DJI Pilot app to ensure secure access and
protect your onboard data.
5. Preparing for Takeoff
Power on the remote controller Power on the aircraft Launch DJI Pilot
Use your DJI account to activate the aircraft. Activation requires an internet
connection.
Internet

EN
8
Remote Controller Operation
* Modular Accessories
Left Stick
Up
Down
Turn Left Turn Right
Right Stick Forward
Backward
Left Right
The default flight control is known as Mode 2. The left stick controls the aircraft's
altitude and heading, while the right stick controls its forward, backward, left and right
movements. The gimbal dial controls the camera's tilt.
Always set an appropriate RTH altitude before takeoff. When the aircraft is returning to
the Home Point, you should guide it with the control sticks.
Press the Flight Pause button for emergency braking during ight.
M2E Beacon M2E Spotlight M2E Speaker

EN
9
120m
≥10 m/s
Fly in Open
Areas
Strong GPS
Signal
Maintain Line of
Sight
Fly Below 400 Feet
(120 m)
Avoid flying over or near obstacles, crowds, high voltage power lines, trees or
bodies of water.
DO NOT fly near strong electromagnetic sources such as power lines and base
stations as it may affect the onboard compass.
DO NOT use the aircraft in adverse weather conditions such as rain, snow, fog
and wind speeds exceeding 10 m/s or 22 mph.
No Fly Zone
Stay away from the rotating propellers
and motors.
Learn more at:
http://flysafe.dji.com/no-fly
7. Fly Safe
It’s important to understand basic ight guidelines, for the safety of both you and
those around you. Don't forget to read the Disclaimer and Safety Guidelines.

EN
10
Specications
Aircraft
Weight 899 g
Max Speed 44.7 mph (72 kph) in Sport mode without wind
Max Service Ceiling Above Sea Level 19685 ft (6000 m)
Operating Temperature 14° to 104° F (-10° to 40° C)
GNSS GPS + GLONASS
Operating Frequency 2.4-2.4835 GHz; 5.725-5.850 GHz
Transmitter Power
(EIRP)
2.4 GHz
FCC: ≤26 dBm; CE/MIC: ≤20 dBm; SRRC: ≤20 dBm
5.8 GHz
FCC: ≤26 dBm; CE: ≤14 dBm; SRRC: ≤26 dBm
Internal Storage 24 GB
Gimbal
Controllable Range Pitch: -90° to +30°
Thermal Camera
Sensor Uncooled VOx Microbolometer
Lens HFOV: 57°
Aperture: f/1.1
Pixel Pitch 12 μm
Spectral Band 8-14 μm
Image Size 640×480 (4:3); 640×360 (16:9)
Still Photography Modes Single shot
Burst shooting: 3/5/7 frames
Interval (2/3/5/7/10/15/20/30/60 s)
Video Recording Modes 640×360 @8.7fps
Accuracy High Gain: Max ±5% (typical)
Low Gain: Max ±10% (typical)
Scene Range High Gain: -10° to +140°C
Low Gain: -10°to +400°C
Photo JPEG
Video MP4, MOV (MPEG-4 AVC/H.264)
Visual Camera
Sensor 1/2.3" CMOS; Eective pixels: 12M
Lens FOV: approx. 85°
35 mm format equivalent:24 mm
Aperture: f/2.8
Focus: 0.5 m to ∞
ISO Range Video: 100-3200 (auto)
Photo: 100-1600 (auto)
Max Image Size 4056×3040 (4:3); 4056×2280 (16:9)
Still Photography Modes Single shot
Burst shooting: 3/5/7 frames
Interval (2/3/5/7/10/15/20/30/60 s)
Video Recording Modes 4K Ultra HD: 3840×2160 30p
2.7K: 2688×1512 30p
FHD: 1920×1080 30p
Max Video Bitrate 100 Mbps

EN
11
Photo JPEG
Video MP4, MOV (MPEG-4 AVC/H.264)
Remote Controller
Operating Frequency 2.4-2.4835 GHz; 5.725-5.850 GHz
Max Transmission Distance
(Unobstructed and free of interference) FCC: 5 mi (8 km); CE/MIC: 3.1 mi (5 km); SRRC: 3.1 mi (5 km)
Operating Temperature 32° to 104° F (0° to 40° C)
Battery 3950mAh @ 3.83V
Transmitter Power
(EIRP)
2.4 GHz
FCC: ≤26 dBm; CE/MIC: ≤20 dBm; SRRC: ≤20 dBm
5.8 GHz
FCC: ≤26 dBm; CE: ≤14 dBm; SRRC: ≤26 dBm
Operating Voltage 1800mA @ 3.83V (when charging the mobile device)
Supported Mobile Device Size Thickness supported: 6.5 - 8.5 mm, Max length: 160 mm
Supported USB port types: Lightning, Micro USB (Type-B)
USB-C
Charger
Voltage 17.6±0.1 V
Rated Power 60 W
Intelligent Flight Battery
Capacity 3850 mAh
Voltage 17.6 V (max)
15.4 V (typical)
Battery Type LiPo 4S
Energy 59.29 Wh
Net Weight Approx. 297 g
Charging Temperature Range 41° to 104° F (5° to 40° C)
Max Charging Power 80 W
Auto Heating Temperature Range -4° to 43° F (-20° to 6° C)
Auto Heating Time 600 s (max)
Auto Heating Power 35 W (max)
For more information, read the User Manual:
www.dji.com/mavic-2-enterprise
※This content is subject to change without prior notice.
MAVIC is a trademark of DJI.
Copyright © 2018 DJI All Rights Reserved. Designed by DJI. Printed in China.

CHS
12
认识 Mavic 2 行业双光版
MAVICTM 2 行业双光版飞行器配备先进的全方位视觉系统及红外传感系统 *,可在室内外
稳定悬停、飞行,具备自动返航以及障碍物感知功能。飞行器内置 DJI AirSense 可检测
周围航空器情况,支持密码保护以保障设备及数据安全,并且可搭载指定配件以适应不同
应用场景。双光版飞行器配备高精度增稳云台,搭载 FLIR 长波红外非制冷热成像相机与
可见光相机,可同时拍摄热成像与可见光影像,并支持两者融合显示。最大飞行速度为
72 km/h,最长飞行时间 ** 约为 31 分钟。
7
810
11
12
13
14
19
18
16
17
15
20
22
21
1
AB
2
3
4
56
1. 一体式云台相机
A. 可见光相机
B. 红外相机
2. 前视视觉系统
3. 下视视觉系统
4. 侧视视觉系统
5. 底部红外传感系统
6. 下视补光灯
7. 相机 Micro SD 卡槽
8. 飞行器机头指示灯
* 视觉系统及红外传感系统有使用环境与条件要求,请阅读《免责声明与安全概要》及《用户手册》了解
安全注意事项,并在 DJITM 官方网站观看教学视频以正确使用相关功能。
http://www.dji.com/mavic-2-enterprise
** 最长飞行时间为无风环境时以 25 km/h 匀速飞行时测得。
9. 电机
10. 螺旋桨
11. 天线
12. 飞行器状态指示灯
13. 顶部红外传感系统
14. 后视视觉系统
15. 智能飞行电池
16. 电池电量指示灯
17. 电池开关
18. 电池卡扣
19. 调参 /数据接口
(USB-C)
20. 对频按键 /对频指示灯
21. 扩展接口(可连接配件)
22. 扩展接口保护盖

CHS
13
1
3
4
6
7
2
8
9
10
11
5
12 13
14 15
17
16
18
遥控器
遥控器采用 OCUSYNCTM 2.0 高清图传技术,配合完备的功能按键可在最大 8千米 *通信
距离内完成飞行器与相机的操作与设置,并可通过 DJI Pilot App 在移动设备实时显示高
清画面。遥控器状态显示屏可实时显示飞行参数等信息,折叠式手柄可稳定放置移动设备,
可拆卸摇杆设计更便于遥控器收纳。最长工作时间 *约为 2 小时 15 分钟。
1. 状态显示屏
2. 急停按键
3. 五维按键
4. 可拆卸摇杆
5. 电源按键
6. 天线
7. 智能返航按键
8. 摇杆收纳槽
9. 备用图传接口(USB)
10. 手柄
11. 飞行模式切换开关
12. 云台俯仰控制拨轮
13. 曝光调节拨轮
14. 录影按键
15. 对焦 /拍照按键
16. 主图传 /充电接口(Micro USB)
17. 自定义功能按键 C1
18. 自定义功能按键 C2
折叠状态
* 在开阔无遮挡、无电磁干扰的环境飞行,并且飞行高度为 120 米左右,在 FCC 标准下遥控器可以达到
最大通信距离。最长可工作时间为实验环境下测得,仅供参考。

CHS
14
DJI Pilot App 要求使用 iOS 10.0 及以上系统或 Android 5.0 及以上系统。
1. 下载 DJI Pilot App 和观看教学视频
请使用移动设备扫描下方二维码或在软件商店
下载安装 DJI Pilot App。
访问 DJI 官方网站 www.dji.com/mavic-2-enterprise/
info#video 观看教学视频。
2. 准备飞行器
移除云台保护罩 展开前机臂 展开后机臂
展开状态
请确保按顺序展开机臂,在机臂与桨叶全部展开之后再开启飞行器。
1
2
3
1
2
3
嵌入桨座按压到底,沿锁
紧方向旋转直至弹起锁定
匹配标记安装螺旋桨
白色标记 无标记
教学视频
下载 DJI Pilot

CHS
15
B
A
A
B
充电前需将遥控器转接线取下。
3. 充电
安装电池至飞行器后并开启电源后,一旦电池温度低于 6℃,电池将开启自动加热功能,保持
电池温度在 8-10℃之间。详细内容请参考用户手册。
首次使用需给智能飞行电池充满电以
激活电池。
取出智能飞行电池
完全充满约需
1 小时 30 分钟
完全充满约需
2 小时 15 分钟
交流电源
100~240 V
低
高
检查电量与开启 / 关闭
短按一次检查电量。
短按一次,再长按 2 秒可开启、
关闭飞行器。
短按一次电源按键查看电量。
短按一次电源按键,再长按 2 秒以开启、
关闭遥控器。

CHS
16
1
2
3
注意将摇杆拧紧,确保安装到位。
遥控器默认安装 Lightning 接口的转接线,可根据移动设备接口类型更换转接线。若使用
iPad 等较大尺寸移动设备时,可自备数据线连接至遥控器 USB 接口。
Micro USB 接口与 USB 接口作为图传接口时不可同时使用。
4. 准备遥控器
展开天线、手柄,取出收纳于
遥控器上的摇杆并安装
使转接线的一端置于卡槽底部
转接线一端连接移动设备接口,
安装移动设备
确保天线平行
最佳通信范围
强
弱

CHS
17
DJI Pilot
App
6. 飞行
起飞准备完毕(GPS)
或
起飞:
缓慢向上推动油门杆(默
认左摇杆)飞行器起飞。
降落:
向下拉动油门杆至飞行器落地,
在最低位置保持 2秒,电机停止。
起飞前请务必等待 DJI Pilot App 相机界面显示
“起飞准备完毕”。
掰杆动作:
电机启动/停止
手动起飞/降落
如飞行器在空中检测到严重故障,才可执行掰杆动作以紧急停机。
可在 DJI Pilot App 中对飞行器设置安全密码以保证飞行器的使用安全。
5. 准备飞行
开启遥控器 开启飞行器 运行 DJI Pilot App
全新的飞行器需使用 DJI Pilot App 激活才能使用。激活时请确保移动设备可以接入互联网。
Internet

CHS
18
遥控器操作
*可扩展配件
左摇杆 右摇杆
上升
下降
右转左转
前
后
右左
遥控器出厂默认操控方式为“美国手”。左摇杆控制飞行高度与方向,右摇杆控制飞
行器的前进、后退以及左右飞行方向。云台俯仰控制拨轮可控制相机的俯仰拍摄角度。
请预先在 DJI Pilot App 设置合适的自动返航高度。
飞行过程中遇到需要紧急刹车的情况,请按急停按键使飞行器悬停。
夜航灯 探照灯 喊话器
Other manuals for Mavic 2 Enterprise
7
This manual suits for next models
1
Table of contents
Other dji Drone manuals

dji
dji PHANTOM 4 User manual

dji
dji SPARK User manual

dji
dji M100-ZENMUSE X5 Series User manual

dji
dji PHANTOM 3 PROFESSIONAL User manual

dji
dji Mavic 3 User manual

dji
dji INSPIRE 2 Instruction Manual

dji
dji M30 User manual

dji
dji AGRAS T16 User manual

dji
dji Inspire 1 Pro User manual

dji
dji mavic User manual

dji
dji MATRICE 200 series User manual

dji
dji Phantom 3 Advanced User manual

dji
dji TOPODRONE PHANTOM 4 PRO L1 PPK User manual

dji
dji MAVIC MINI User manual

dji
dji Phantom 3 Standard User manual

dji
dji MATRICE 200 series User manual

dji
dji PHANTOM Guide

dji
dji Mini 2 User manual

dji
dji FlameWheel550 User manual

dji
dji AGRAS MG-1 User manual