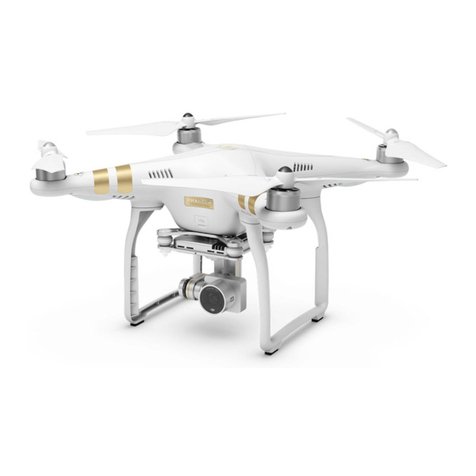
dji PHANTOM 3 PROFESSIONAL Setup guide

DJI Phantom 3 Advanced Manual
(DJI Store, 2020)
Created by: Felix van Leuven, Agnieszka Lisonek and Eline Rentier
Supervisor: Dr. W. M. (Thijs) de Boer
Course: Environmental Measuring Techniques (5264ENMT6Y)
Date: 26-03-2020
University of Amsterdam

DJI Phantom 3 Advanced Manual
Last updated March 27 2020 Page 2of 16
Contents
Important information ............................................................................................................................ 3
Content of the box .................................................................................................................................. 3
Quick Start Guide .................................................................................................................................... 4
SETUP............................................................................................................................................... 4
Flying/landing the drone ................................................................................................................. 6
DJI GO App............................................................................................................................................... 8
2D markers ............................................................................................................................................ 14
Advanced Settings................................................................................................................................. 15
References............................................................................................................................................. 16

DJI Phantom 3 Advanced Manual
Last updated March 27 2020 Page 3of 16
Important information
Registration number: P H –1 X C
Aircraft serial number: P76UDH27B2013A
Both the drone and the controller have registration numbers. It is important to know the registration
number of your drone. The registration number is issued by the official aerial authorities of the
Netherlands and engraved in a fire-resistant copper plate on the downside of the drone. If you lose or
crash your drone, the authorities can track you down via the registration number on the
drone/controller. In the suitcase of the drone, a folder with important documents is kept in the top
compartment. Always carry these documents with you when flying the drone. These documents
contain information about the aircraft’s serial number, safety regulations, licenses and certificates. You
must be able to show these documents to the authorities if needed.
The DJI Phantom 3 is an unmanned aerial vehicle (UAV). In the Netherlands, flying an UAV under 4
kilograms requires a theory certificate from the Dutch Ministry of Infrastructure and the Environment.
Thijs de Boer is licensed with this certificate. Be sure to check the regulations of the local aviation
authorities before flying the drone. For your safety, no-fly zones are restricted by default in drone apps
to ensure safe and legal handling of the drone. Even if you are in the vicinity of a no-fly zone, you will
receive a warning in your drone-app. In the app, you can unlock the no-fly zones before flying. For each
type of no-fly zone (e.g. airports, borders, cities) different maximum height and radius limits are set.
For the official map of forbidden and limited flying areas for drones check:
https://kadata.kadaster.nl/dronekaart/
For more information on drone flying in The Netherlands go to:
https://www.rijksoverheid.nl/onderwerpen/drone/vraag-en-antwoord/regels-drone-particulier
For more information on flying safe in general visit: https://www.dji.com/nl/flysafe
Content of the box
1. LIPO-SAFE battery bags 5. Important documents 9. Propeller blades (4x)
2. Drone 6. (Micro) SD card and a spare set (4x)
3. Controller, 7. Charging cable for iPad & connection between remote
4. Batteries (6x) 8. iPad

DJI Phantom 3 Advanced Manual
Last updated March 27 2020 Page 4of 16
Quick Start Guide
SETUP
1. Attach the propellers to the drone. Make sure that:
-The black propellers are on the black base (see photo)
-The grey propellers are on the grey base (see photo)
-Follow the instructions on the propellers for tightening/loosening
2. Put the battery in the drone
-Make sure that ‘down’ is facing down when inserting the battery into the drone
-It is advisable to start with battery #1 and when this one is empty swap for
battery #2. This way, it is easy to keep track of which batteries are empty and
which are still fully charged.
3. Take the protective cap off the camera

DJI Phantom 3 Advanced Manual
Last updated March 27 2020 Page 5of 16
4. Check if there is an SD card in the drone (with enough free space). Each photo will take up
around 5-7 MB, so multiply that by the number of estimated photos in your flight plan to
calculate the required free space.
5. Mount the iPad on the remote controller (RC) and:
-Check if it is secure so it can’t fall
-Attach the cable to the controller and the iPad
-Turn the iPad on
-Fold out the antennas and position them a little outward for the best reception
6. Turn on the RC by pressing the power button 1x short (1 second) and 1x long (2 seconds).
Green lights should appear and you will hear a sound that indicates that the device is turned
on.
7. Turn the drone on by following the same procedure as described for turning on the RC
(IMPORTANT: firstly turn on the iPad, then the RC and lastly the drone). The drone should
automatically connect to the RC.
-If the small round light on top of the controller is RED, the drone has NOT
connected to the controller.
-If the small round light on top of the controller is GREEN, the drone IS
CONNECTED to the controller. The white lights indicate how full the battery of
the RC is

DJI Phantom 3 Advanced Manual
Last updated March 27 2020 Page 6of 16
8. Depending on what you want to do, you can either choose to fly in P, A or F mode:
-P mode (positioning): if the GPS is used for positioning
-A mode (Attitude): if you want to fly manually without using GPS for positioning.
This is very difficult and not recommended
-F mode (Function): if you want to fly with a function (automatic flight plan) from
the iPad (recommended)
Flying/landing the drone
After finishing the setup you should be good to go. In this manual, we assume you will fly in F mode.
If you are not, we recommend to look up more information in the extensive manual of the DJI
Phantom 3 which can be found here: https://www.drones.nl/media/files/drones/1456520244-dji-
phantom-3-advanced-user-manual-en-v16.pdf
1. Put the drone on some sort of a platform from which it can safely launch itself, for example
the suitcase of the drone. Don’t use the suitcase of other devices as the content of the box
might interfere with the drone’s GPS signal. When you are ready, create a distance of a few
meters between you and the drone before launching.
2. Go to the flight plan you wish to execute and click “Fly”
(If you do not have a flight plan yet, make one first and check the next chapters about the DJI
GO App and advanced settings.)
3. A “prepare for flight”- window will pop up. All checkmarks should be green or at least orange
before you can fly.
a. For the first flight you have to calibrate the GPS of the aircraft. Instructions on how
to calibrate the aircraft will show up automatically. Follow these instructions.
IMPORTANT: make sure there is no interference from metal objects nearby i.e. the
Zeb-Revo or DGPS!
b. If needed, UNLOCK the no-fly zone
c. Wait until all waypoint data is transmitted (this takes about 10-20 seconds)
d. Make sure that the battery has sufficient charge left to finish the flight plan. The
drone will automatically return home when the battery is around 15-17%. (You can
change that number with a minimum of 15%)
e. Check again if you have enough available storage on your SD card
4. Click “start to fly” when you have checked all of the above and it is safe to launch the drone.

DJI Phantom 3 Advanced Manual
Last updated March 27 2020 Page 7of 16
The drone will automatically launch itself and start flying according to the flight plan. When it has
finished, it will return to the home point and land. You can also abort the mission (for example when
you see it might hit something or someone) by hitting the ‘home’ button next to the power button on
the controller. To ensure a safe landing, it is preferred that you do not let the drone land all by itself
but that you “catch” it from the air. This is done as follows:
When the drone is hovering above the home point and starting its descend, control the descend by
steering in the opposite direction. In other words: the drone is automatically landing by flying down
and you want to steer it back up so you can control the speed of the landing. If you steer up as much
as it is going down, it will hover (see explanation and figure below). The goal is to make it hover just
above the person who will catch it (see figure). Pro tip: make sure you are standing with your back to
the sun so you have no trouble seeing the drone when you manually fly it or try to catch it.
From left to right: controlled descend, hovering in the air within reach of your colleague and
catching the drone. The drone is represented by the red shape.
Blue arrow: the drone goes UP
Red arrow: the drone goes DOWN
Yellow
arrow: the drone goes to the LEFT
Green
arrow: the drone goes to the RIGHT

DJI Phantom 3 Advanced Manual
Last updated March 27 2020 Page 8of 16
DJI GO App
This chapter will discuss the most commonly used settings of the DJI GS Pro app. However, we advise
you to consult the extended manual if you encounter any problems that are not covered in this
chapter. The extended manual can be found on:
https://dl.djicdn.com/downloads/groundstation_pro/20181102/GS_Pro_User_Manual_v2.0_EN_201
811.pdf
There are two DJI apps on the iPad: ‘DJI’ and ‘GSP’. You need the GSP-app to create a flight plan and
fly the drone. The app icon looks like this:
When you open the app. You probably see this screen:
On the left, you have your missions and on the right you will
see a map with your (the RC’s) location and the location of
the drone (the arrow).
If you swipe left on a mission, you can delete or copy that
mission. This is very useful when, for example, you wish to
fly the same flight plan several times but change one setting
every flight (e.g. height or angle). By copying the flight plan
and then renaming it you don’t have to fill out all the settings
again.

DJI Phantom 3 Advanced Manual
Last updated March 27 2020 Page 9of 16
When you click on a mission you will automatically zoom to the location of the mission on the map and
a summary of the settings of that mission will be shown on the right. Also, the buttons ‘Fly’ and ‘Edit’
will appear in the bottom left corner:
If you click ‘Fly’ you will be directed to the ‘Fly’ menu of that mission via a shortcut. However, you can
also go to the fly menu from the Edit menu or after you created a new mission. If you click on ‘Edit’
button, the map will expand and you will see a menu on the right where you can modify all the
(advanced) settings of that mission.
If you click on the button, you will create a new mission. You will be asked what kind of mission
you wish to create:
Choose ‘3D map area’ if you want to capture images of the area which you will later convert into a
DEM or orthomosaic. Then choose ‘Tap´ to create a flight path by tapping instead of flying:

DJI Phantom 3 Advanced Manual
Last updated March 27 2020 Page 10 of 16
Follow the instructions: ‘Tap on the map to make a flight area’. It is easiest to first zoom to the area
you wish to fly and then tap to make a flight area.
Once you tapped on the map, a flight area will be created and a menu will pop-up in the right part of
your screen. In this menu, you can modify all the settings for your flight plan. The upper part of the
menu (green box) is an informative part. You can’t directly change these values, but they will
automatically change when you change the settings in the lower part (red box) or when you change
the size of your area. You can modify the flight area by dragging the corners of the area to the desired
position. The Sin the green circle (yellow box) indicates the starting point of your flight.

DJI Phantom 3 Advanced Manual
Last updated March 27 2020 Page 11 of 16
Flight parameters:
Waypoints: number of waypoints (points that instruct the drone
where to fly). Max. 99 points can be set for a mission.
Flight Length: the total length of the flight in meters.
Mainpath No.: The number of lines the drone will have to fly over
the area.
Cover Area: The area that will be covered by the drone in hectares.
Flight Time est.: The estimated flight time. This might be different
under more extreme weather conditions (e.g. wind).
Photo’s est: number of photo’s the drone will make
Batteries: the number of batteries you will need to fly this flight
plan. It is best to create a flight plan that can be flown on 1 battery.
Capture interval: F (forward) indicates the interval between two
consecutive photo’s along the same path, S (sideward) along two parallel paths. The intervals change
with the number of photo’s.
Basic settings:
Camera model: always set the parameters according to the type of
camera in order to calculate the optimal flight path.
Shooting Angle: The direction of the camera when flying along the path.
Capture mode: In the ‘hover & capture’ mode, shooting is stable but it
will take a long time to complete the path and the number of waypoints
will be larger. You can also shoot while flying and set the shutter
interval. Flight time will decrease, but short exposure times are required.
Flight course mode: we recommend using the ‘Inside mode’. This mode
optimizes the course for accuracy.
Speed: flight speed. Ranges from 1 to 15 m/s.
Height: height at which the drone will fly. The higher you fly, the lower
the resolution, but the larger the area you can capture.
Advanced settings:
Front overlap ratio: the overlap ratio of two consecutive photo’s along
the same path. Ranges from 10-99%. A value of 70 or higher is
recommended to be able to make a point cloud out of the photos.
Side overlap ratio: the overlap ratio of two photos along two parallel
paths. Ranges from 10-99%. A value of 70 or higher is recommended to
be able to make a point cloud out of the photos.
Course angle: The angle of the main path. Ranges from 0 to 360, where
0 is east.
Gimbal pitch angle: Angle of the camera that is hanging under the
drone. Ranges from 0 to -90, where 0 is horizontal and -90 is straight
down.
End-mission action: action the aircraft will take when it has completed
its mission. ‘Return to home’ is recommended.

DJI Phantom 3 Advanced Manual
Last updated March 27 2020 Page 12 of 16
After you have set the settings for your flight plan you should give it a name and save it. If you are
ready to fly, you can go to the ‘Fly’ menu by clicking on the blue ‘Fly’ button in the top right corner.
The flight menu looks as follows:
The menu shows a checklist you should follow to prepare for your flight. Right now, the drone is not
connected, so all the fields are red and the ‘Start to fly’ button is disabled. When all fields are green,
you are good to go and you can click on the, then turned blue, button with the aircraft icon to start
to fly.
Whilst flying, you will see on the iPad what the drone is recording. The drone will automatically fly
the path and take photos, but you can adjust some settings while flying. The figure on the next page
is reprinted and modified from the DJI GS Pro app manual and shows what your in-flight-modus looks
like on the iPad.

DJI Phantom 3 Advanced Manual
Last updated March 27 2020 Page 13 of 16
credits of this photo go to the DJI GS Pro User Manual (see references)
1. Camera settings and Micro SD card capacity
2. Focus/metering button. The square indicates auto-focus and is the recommended setting.
3. AF = Auto focus (tap on screen to use), MF = Manual focus (use focal length slider, 5, to focus)
4. Auto exposure lock/unlock
5. Focal length slider
6. Switch between video and photo recording modes
7. Capture photo/record (additionally to the photo’s that are automatically taken according to the
flight plan.
8. Camera settings. Tap to adjust all values visible in the ribbon indicated at 1
9. Check available preview sources
10. Map view
11. Home point setting button. Tap this to set or adjust the home point location
12. Return to home (RTH). If you press this button, the aircraft will return home
13. Auto take-off and landing. You will not need this button if you are flying in F-mode.
14. Current connection between RC and drone
15. Current flight mode (now GPS-mode)
16. GNSS signal strength
17. RC signal strength
18. Camera model and signal strength of downlink
19. Battery level of the drone
20. Battery level of the iPad
21. General settings
22. Flight telemetry (speed, altitude, orientation, location)

DJI Phantom 3 Advanced Manual
Last updated March 27 2020 Page 14 of 16
2D markers
You can analyse your drone photos in Agisoft, a programme that performs photogrammetric
processing of images and creates 3D spatial data. When you analyse your drone photo’s in Agisoft you
will have to align your photos. This is done by manually finding ground control points (GCP) (objects)
in your photo. You tell the program that this particular object, say a parked car, is the same car as in
the next photo and the next and so on. The computer will the stitch all these photos together (align)
and create one large image which will later be transformed into an orthomosaic or DEM. This method
is very time consuming and therefore Agisoft has developed a set of 2D markers which you can print
in A3 format on paper (and then laminate them to protect them from moist and rain) and place on the
ground in your flight area. These markers will function as your ground control points. Later, when you
are analysing the photos, Agisoft will recognise these markers and automatically stitch all photos
together. The markers look like such:
When you are using 2D markers in the field, it is important to keep a couple of things in mind:
-The more markers you use, the better Agisoft will be able to stitch the photo’s
together. In every photo taken by the drone you would ideally see at least one
marker but two or three is best (in theory).
-Fix them properly to the ground, so they can’t be moved by the wind. You can bring
herrings to fixate them, but it is advisable to also put something on the sides so
they don’t curl up.
-Choose strategic places. There should be markers in the corners and at the borders
of your flight area, but also in the middle. Evenly distribute them and if you are
also working with 3D markers, make sure there is enough distance between those
too.
-Check the weather. Ideally you avoid rolling cloud cover as this creates shadows
and inconsistent light in your imagery. A sunny day with blue skies could create
oversaturation in your photos. It is best to have consistent lighting in your photos,
so plan your missions in advance and if you have no other choice, adjust the ISO
sensitivity manually on your iPad while the drone is taking photos to counteract
the effect of clouds or oversaturation.
-Adjust the drone height. Depending on the weather, the markers can be seen up
to approximately 20 meters. If you are flying at a height of 40 meters, there is no
point in placing markers as the pattern on them will not be visible in the photos.

DJI Phantom 3 Advanced Manual
Last updated March 27 2020 Page 15 of 16
Advanced Settings
Shooting images under backward angle
When you fly with the drone to create a 3D image of the area, you must take photos from three angles:
straight down, with a forward tilt and a backward tilt. This way, you will capture all sides of objects in
the field. Unfortunately, the gimbal of the drone can’t tilt backwards. In order to capture photos from
the third perspective, you should change the course angle 180 degrees. This way, the drone will be
flying the path in reverse and with the same tilt as the second perspective, you will capture the objects
from the exact opposite angle.
Camera settings (by van Arkel, 2019)
If you wish to adjust the camera settings. This can best be done via the DJI GO app on the
iPad. The changes that are made in this app will automatically be changed in the DJI GS Pro
app too. In the DJI Go app, click on the ‘settings’ symbol under the ‘capture photo’ button
(you have to be connected to the drone to do this).
Recommended settings:
ISO: 200 (little distortion)
Diaphragm: auto
EV = -0.7 or -0.3 for nature
Shutter: 1/15 for inside, 1/125 … 1/150 … 1/1000 at F8 (diaphragm) for outside
Single shot: is good for environments without movement
Image size: 4:3
Image Format: RAW is good for Adobe Lightroom, but this does take up a lot of storage. If storage is
not a problem, you could also choose RAW+jpeg. The jpegs will then be used for quick visualization
and the RAW’s will contain the uncompressed photos. Each photo has its own spectral profile. This is
exported with the photo and can be changed in ArcGIS if the colors are not properly visualized. You
can then adjust the colors by going to Layer Properties | RGB | Composite | Stretch Type: ‘NONE’.
White Balance: Custom: 5200 K (Kelvin, color temperature) is good for outside; 3000 K for inside.
White balance could give a pinkish glow to green grass.
Style Standard (contrast): Color: Normal.
Ideally you bring a laptop with you to the field on which Adobe Lightroom has been installed so you
can check the quality of the photo’s in the field. You can, however, also work just fine without if you
do not intend to use the imagery in the highest resolution or for further research.
For more advanced settings of the DJI Phantom 3 Advanced, please take a look at the extensive user
manual:
https://dl.djicdn.com/downloads/phantom_3/User%20Manual/Phantom_3_Advanced_User_Manual
_v1.8_en.pdf
or check these video tutorials: https://www.dji.com/nl/phantom-3-
adv/info?redirect_info=true#video
For more advanced settings of the DJI GS Pro app, please take a look at the user manual:
https://dl.djicdn.com/downloads/groundstation_pro/20181102/GS_Pro_User_Manual_v2.0_EN_201
811.pdf

DJI Phantom 3 Advanced Manual
Last updated March 27 2020 Page 16 of 16
References
DJI Store. (2020). Dji Phantom 3 Advanced [Photograph]. Retrieved from https://www.dji-
store.it/prodotto/dji-phantom-3-advanced/
DJI. (2018). GS Pro User Manual. Retrieved from
https://dl.djicdn.com/downloads/groundstation_pro/20181102/GS_Pro_User_Manual_v2.0_EN_201
811.pdf
van Arkel, J. (2019, June 13). Dronecamerasettings tips van Jan van Arkel. Retrieved March 23, 2020,
from .
Other manuals for PHANTOM 3 PROFESSIONAL
8
Table of contents
Other dji Drone manuals

dji
dji Matrice M210 User manual

dji
dji MINI 3 PRO User manual

dji
dji mavic User manual

dji
dji MAVIC MINI Installation guide

dji
dji Phantom 2 Vision + User manual

dji
dji AGRAS MG-1 User manual

dji
dji MAVIC PRO User manual

dji
dji Flamewheel F450 User manual

dji
dji Phantom 4 Pro+ V2.0 User manual

dji
dji MAVIC AIR 2 User manual

dji
dji Robomaster S1 User manual

dji
dji WIND-4 User manual

dji
dji MAVIC PRO User guide

dji
dji TOPODRONE PHANTOM 4 PRO L1 PPK User manual

dji
dji MAVIC 2 ZOOM User manual

dji
dji Mini 2 User manual

dji
dji PHANTOM 4 PRO User manual

dji
dji PHANTOM 4 User manual

dji
dji SPARK User manual

dji
dji MATRICE 350 RTK User manual