6
3 — How to Fly
Learn to Fly Manually
Although DroneDeploy automates
mapping ights, it’s important to have
the skills to take over and y manually
if necessary.
Review your DJI Phantom 4 Pro
manual and pracce ying manually to
familiarize yourself with the drone.
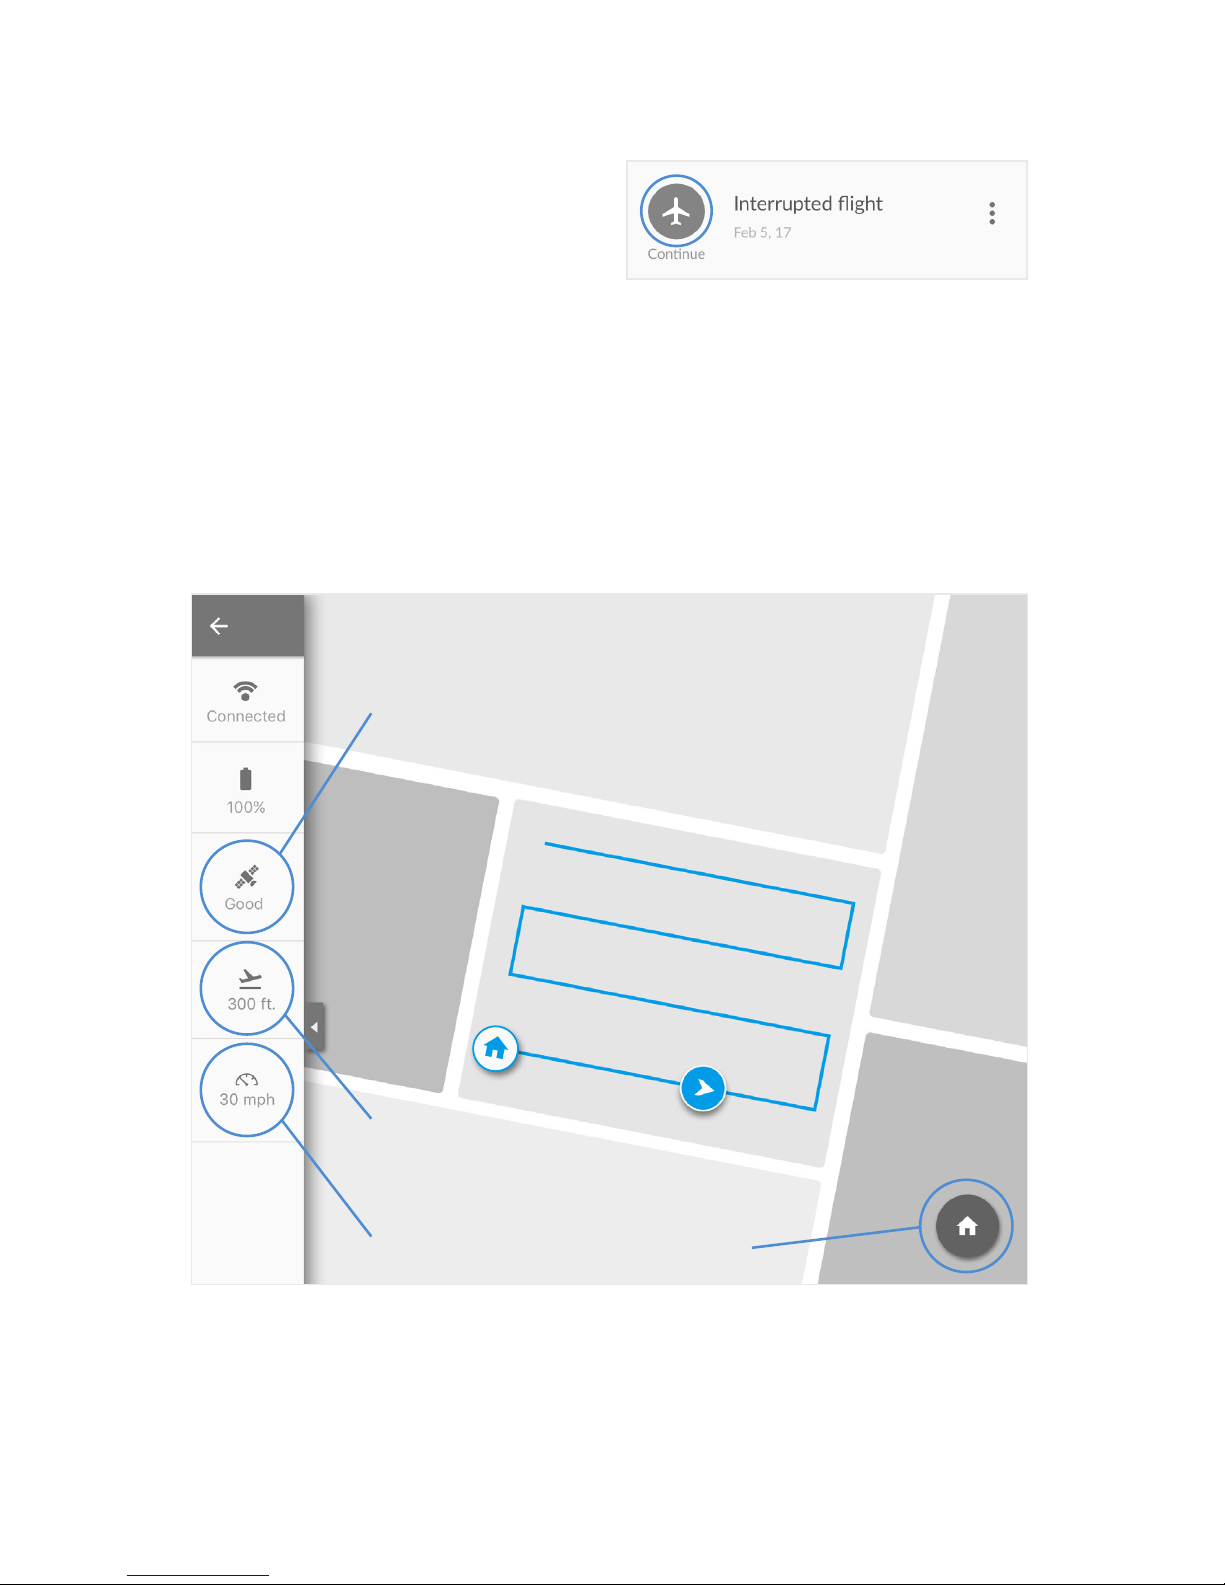
Plan Automated Mapping Flights
The DroneDeploy app makes it quick
and easy to automacally y your drone
to capture imagery needed for mapping.
To plan your rst ight, open the
DroneDeploy app and click the
“Plan” buon.
If you are planning in a locaon other
than your current locaon, click the
magnifying glass icon at the top le of
the screen to search for the area you
want to map.
To change the area you want to map,
either tap and drag the center of the
map to move the enre area, or tap and
drag the circles on the corners of the
ight plan to dene the map perimeter.
If you want to add addional points,
tap and drag the faint circles on the
straight lines.
In the sidebar, you will see adjustment
sliders for the altude and direcon of
ight. Adjust these as needed based
upon the goals of your mission, and
save your ight plan.
To change the overlap of each image
captured, tap the “Advanced” text at
the boom of the sidebar.
We recommend the following
sengs for agricultural mapping:
• 400 for most crop scoung
and large-area mapping (greater
than 60 acres. Standard 60%
overlap should be sucient in
early stage or highly variable
elds, but up to 85% overlap
may be required for closed
canopy, late-stage elds where
the crops are uniform.
• 200-250 for maps that will be
used for stand analysis and plant
counng. If you plan to use an
app to generate a report, check
the imagery requirements to
make sure you capture imagery
at an appropriate resoluon.
Standard 60% overlap should
be sucient, but higher overlap
will reduce the likelihood of map
stching failure.
Don’t have a good connecon
out in the eld? You can also plan
ights on your your computer and
then sync them to your mobile
device for oine ight.
Have a shapele or KML le
dening the eld perimeter you
want to y? Install the KML /
Shapele Uploader app and then
upload your le when on the ight
planning screen.


 user manual")