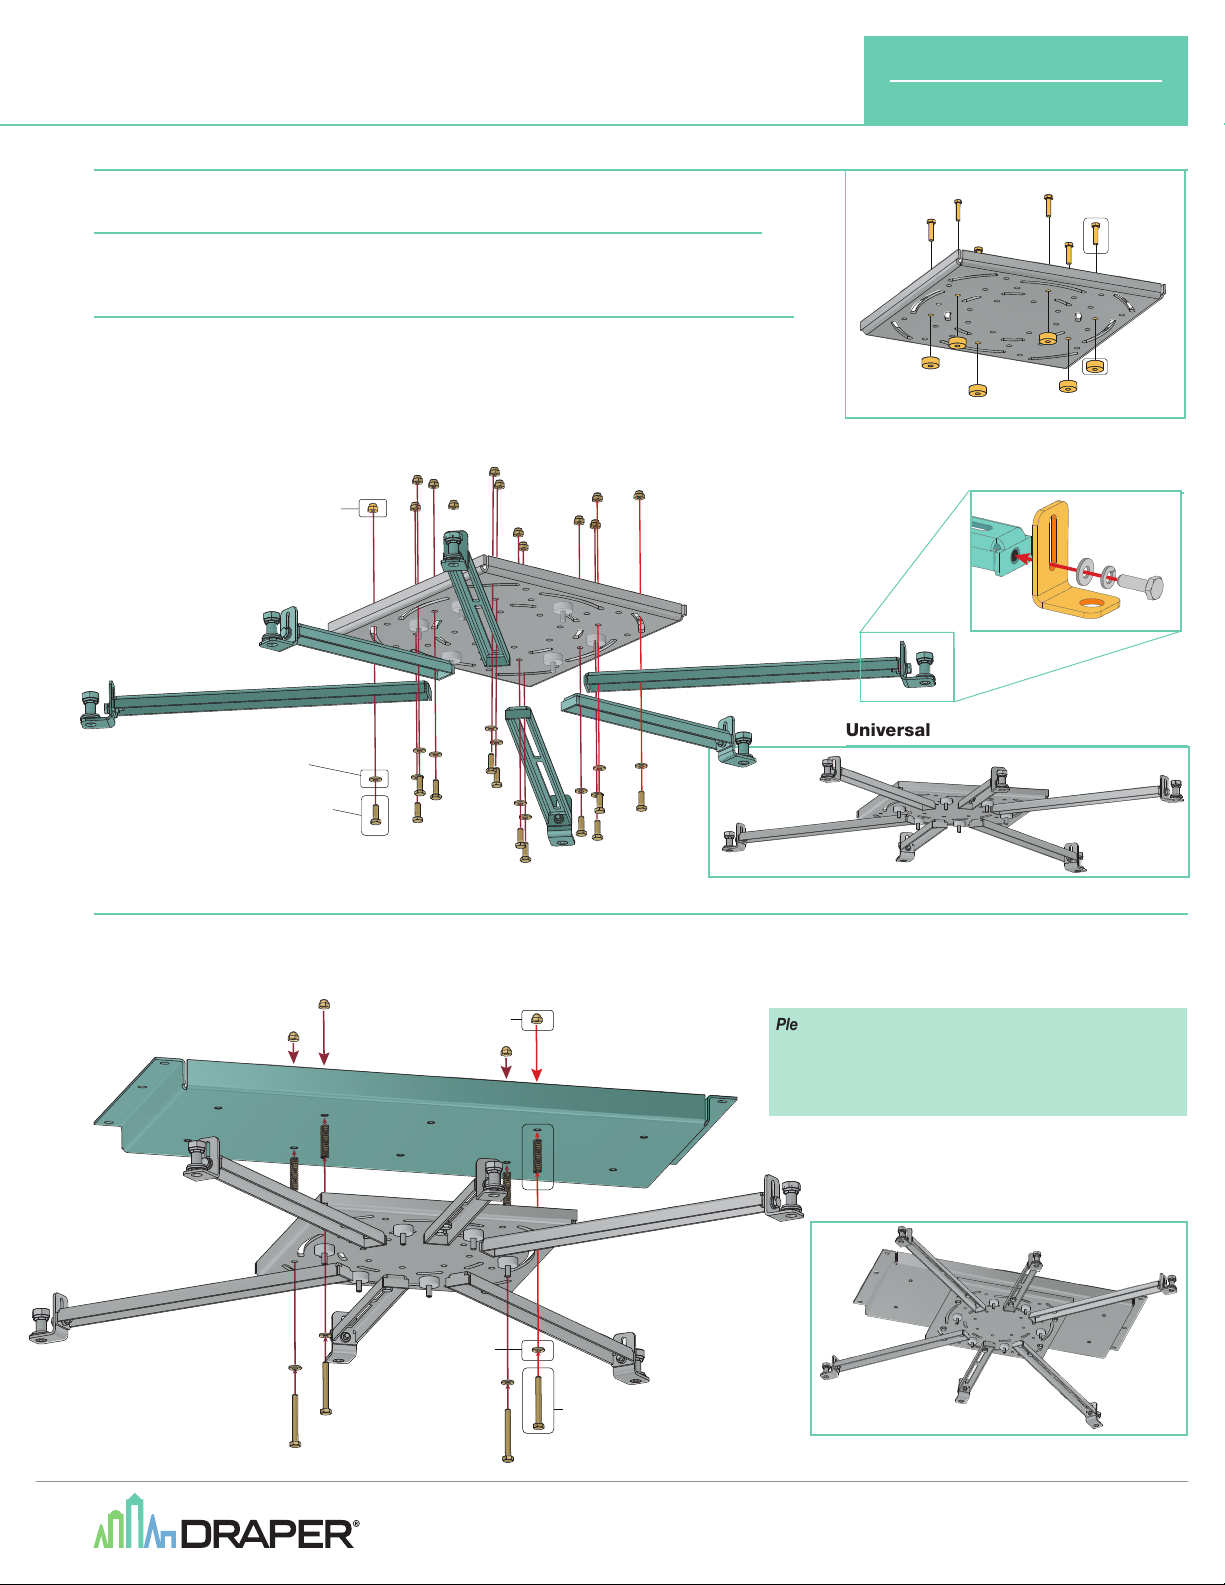
Please note: SLX Projector plate shown in Figure 3.
An identical procedure is used for attaching
the Universal Projector Mount to provided
holes in Scissor Lift and AeroLift 100
/
150
projector plates.
Section 1 - Assembling the Universal Projector Mount
1. Determine the number of mounting points required for the projector and the distance between them.
Section 1.1 - Small Projectors (mounting points less than 12" [30.5cm] apart)
1.
Secure projector to universal mounting plate by inserting the ¼-20 x ¾" bolts through any of the provided
holes, then nylon spacers and then thread directly into projector mounting holes (see Figure 1 at right).
Section 1.2 - Large Projectors (mounting points greater than 12" [30.5cm] apart)
Each universal projector mount has eight (8) adjustable arms included: 4 Long and 4 Short.
1.
One adjustable arm will be used per mounting point. Attach the adjustable foot to the end of each adjustable
arm using the provided hardware (see Fig 2-A)
2.
Secure each of the adjustable arms to the universal mounting plate by threading two (2) of the ¼-20 x ¾"
bolts (with washers) through the provided slots in each of the Adjustable Arms, then through the universal
mounting plate (see Figure 2-B below). Secure with provided ¼-20 lock nuts.
Universal Mount with Arms Attached
Section 2 - Attaching Universal Projector Mount to Projector Plate
1. Remove the projector plate from the projector lift prior to installing the universal projector mount.
2. Thread four (4) ¼-20 x 2¼" bolts with washer through the provided holes in the universal mount plate, then through the four (4) compression springs,
then through the provided holes in the projector plate. Secure the assembly together using the four (4) ¼-20 acorn nuts. (See Figure 3).
Universal Mount Attached to Projector Plate
¼-20 x ¾” Bolt
Nylon
Spacer
Universal
Mounting
Plate
Figure 1
Adjustable Arms
(Number required will vary
depending on projector used)
Washer
(2 per arm)
¼-20 x ¾” Bolt
(2 per arm)
¼-20 Lock Nut
(2 per arm)
Universal
Mounting
Plate
Figure 2-B
Washer (4)
¼-20 x 2¼” Bolt (4)
¼-20 Acorn Nuts (4)
Compression
Spring (4)
SLX Projector Plate
Figure 3
Assembling Adjustable Arms
Washer Split Lock
Washer
Hex Screw
Adjustable
Arm Adjustable
Foot
Figure 2-A
If you have any difficulties installing or servicing your
Universal Projector Mount, call your dealer or Draper, Inc.
Draper, Inc. | 411 S. Pearl St. Spiceland, IN 47385
draperinc.com | 765.987.7999 | 800.238.7999
© 2019 All Rights Reserved | FORM: MED_UniversalProjectorMount_Inst19
Medium Universal Projector Mount
INSTALLATION
INSTRUCTIONS


