manuals.online logo
Brands
  1. Home
  2. •
  3. Brands
  4. •
  5. DREAMS
  6. •
  7. Indoor Furnishing
  8. •
  9. DREAMS Wilson User manual

DREAMS Wilson User manual

Two person
assembly
1.5 hour approx
assembly time
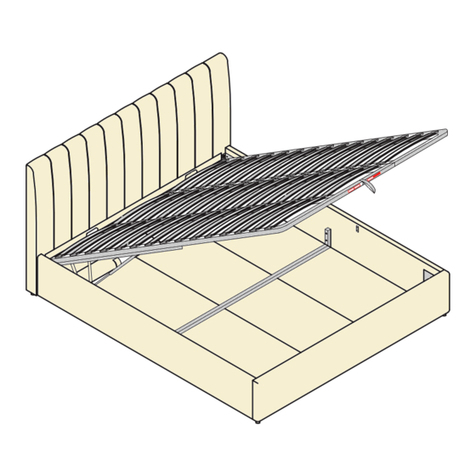
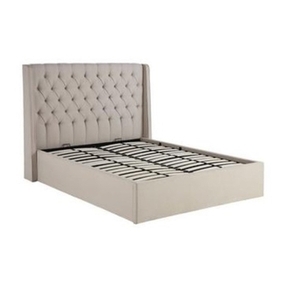
Wilson Ottoman Bed
Double Size
MK3 230413
Bed Bed Size Min Weight (kg) Max Weight (kg)
Wilson
Single
20 45
Small Double
30 50
Double
30 60
King
30 60
IMPORTANT OTTOMAN SAFETY WARNINGS
IMPORTANT – READ CAREFULLY – RETAIN FOR FUTURE REFERENCE
You must ensure that the mattress is on the bed frame before operating the
lift mechanism – Failure to do so could result in injury.
Keep hands clear of the mechanism when opening or closing the ottoman.
Beware of entrapment – Never reach in through the mechanism to access
the storage area.
Always ensure that the ottoman is FULLY opened before accessing the
storage area.
Do not exceed the maximum weight as specified in the table below:
with O.S.B.
WARNING!HAZARD - DO N OT RE
Wilson Ottoman Bed - Assembly guide - Page 2
IMPORTANT OTTOMAN SAFETY WARNINGS Cont.
•Use caution when operating, always use the handle when lifting.
•Note: This bed uses a pressurised mechanism.
•To be operated by adults only.
•Please ensure that children and pets are kept away from the bed when
operating the lift mechanism.
•Keep children and pets away from the storage area.
•Do not overload the internal storage base.
•Do not stand inside the internal storage area of the bed.
•Before removing the mattress secure the frame to ensure it does not open
unexpectedly.
•Do not attempt to lie on the mattress when the ottoman is in the raised
position.
•When lifting the ottoman, remove all bedding except the fitted sheet.
WARNING: ONLY USE THE HANDLE TO LIFT &
LOWER THE BED FRAME TO
AVOID TRAPPING FINGERS!
SAFETY WARNING
PLEASE DO NOT ALLOW CHILDREN
OR PETS INSIDE THE STORAGE AREA.
SAFETY WARNING
PLEASE BE CAREFUL WHEN LIFTING.
ONLY LIFT WITH MATTRESS ON TOP.
TO BE OPERATED BY ADULTS ONLY.
TO AVOID ACCIDENTS
TO ACCESS THE STORAGE AREA THE OTTOMAN FRAME
MUST BE FULLY OPENED AND THEN FULLY CLOSED AFTERWARDS
WARNING! HAZARD - DO NOT REACH INTO THE SPACE BELOW!
Don’t lift without mattress Ensure mattress is on
before lifting
WARNING!HAZARD-
DONOTRE
Read all the instructions before using your Ottoman bed-frame and save the instruction booklet for future reference.
Ottoman Support Bar (O.S.B.)
For optimal safety during operation, always ensure the O.S.B. is engaged when accessing the
ottoman storage area.
Ottoman Beds - Important Safety Features
1 . Always raise the ottoman slat-frame to it's highest position before using the storage area.
Locate the end of the O.S.B and insert into the fixed retaining bracket on the bed frame.
2 . When you are ready to lower the ottoman platform, return the O.S.B to its original parking position.
3 . Always ensure that the O.S.B is in position when the ottoman is open, this prevents injury, or
damage to the product.
Location of the O.S.B
End-lift
:
O.S.B is on
the left
side.
Side-lift: O.S.B is on either the
left side or right side of the
Footend.
WARNING! Risk of Entrapment
oThe pistons on the ottoman bed frame can support a maximum load (evenly spread) as indicated in
the Minimum and Maximum load table, in the main Assembly Instruction.
oOverloading the sleeping platform may contribute to damage to the product resulting in potential
serious injury.
oDo not sit on the mattress whilst the platform is in motion or is in the raised position.
oUsers should only get in and out of bed when platform is in the flat (horizontal) position.
WARNING! HAZARD-DO NOT REACH INTO THE SPACE BELOW!
!
your comfort and safety. Please take time to look at these instruction as they will help remind you how to
operate your ottoman bed safely.
Here’s a few things you need to remember;
Pistons are already assembled in their correct orientation – this improves piston performance and
durability.
“Break in ” the piston seals on first use by raising & lowering the platform at least five times.
Recommended mattress weights - do not exceed the maximum relevant weight specified on the
Assembly Instruction.
Ottoman support bar – always engage the support bar when accessing the ottoman storage area.
Wilson Ottoman Bed - Assembly guide - Page 3
L.
R.
Wilson Ottoman Bed - Assembly guide - Page 4
Thank you
Hello, thanks for choosing to purchase your bed from Dreams - you're now on your way to your best
ever night's sleep. Before you begin building your bed, please take a moment to read through the
instructions and make sure that you've got all the relevant parts listed on the following pages.
Assembly tips
Before you begin, it’s best to identify all parts and fittings to build your bed.
We advise laying these out on the floor to check you have everything, and
familiarising yourself before building.
Help and support
At Dreams, it’s our mission to give the whole nation a great night’s sleep - this
means that the quality of our products is of utmost importance to us. If there
are any issues with your product or any missing parts, please contact our Help
Centre on 0800 652 6750, where a member of our team will be happy to help.
(For customers based in Northern Ireland, please call 028 9050 8300)
Safety and care
It’s really important to ensure children and animals are kept away from the
assembly area, as there are small components used in this bed which could
present a choking hazard. All plastic and wrapping materials should also be
To keep your little ones busy, there is a colouring page inside the back cover.
Recycling
Please ensure that packaging is disposed of in a safe and environmentally
friendly way, and recycle where possible. Our assembly instructions are
printed on recycled paper. Please keep your assembly instructions safe
to refer back to in the future.
We recommend that you build your new bed in the room you’d like it to be
located - this will help prevent any risk of damage to your newly built bed
whilst moving it.
Top tip
A
B
D
E
F
H
G
Wilson Ottoman Bed - Assembly guide - Page 5
Cross head screwdriverTape measure
Tools required
14
H. 'U' shaped cross bar
Important information
The bed you have purchased comes with an Ottoman lift up base, please follow the instructions below
in the current order. Before you begin building your bed, please take a moment to read through the
instructions and make sure that you've got all the relevant parts listed on the following pages.
Fabric hand strap
817161514131211101019876543210cm
O
PQ
1
1
2
1
4
A. Headboard
B.
C.
D.
E.
F. 2
11
2
3
4
4
4
1G.
BoxQtyCode Description BoxQtyCode Description
Footboard
Side Rails
Metal lift up slat frame
Mattress Stoppers
Angle Brackets
Fabric base cover
4
4
4
1
1
Ottoman support bar PACK (O.S.B.)
Ottoman support bar
Fixed retaining bracket - footboard
Parking bracket - slat-frame
O.
P.
Q. 1
Parts
Parts list
C
C
Wilson Ottoman Bed - Assembly guide - Page 6
Fittings
Please check you have all the parts listed below with your product:
g x2
e x6 f x6
l x2
Flangedlock-nuts (M8)
for gas-lift pistons
Nuts for M8 bolt
Metal connection plates
Spring washer for M8 bolts
h x1
Flat washer for M8 bolts
b x6 c x16
Bolts (M8x50mm) for
fitting metal slat frame (D)
to gas-lift support bars
j x4
Bolts (M8x20mm) for fitting
metal connection plates (l)
to metal slat frame (D)
Bolts (M8x30mm) for
fitting gas-lift mechanisms (m)
to headboard & footboard (A&B) Spring washer for M8 bolts Flat washer for M8 bolts
a x8 b x8 c x8
m(a) x1 m(b) x1
d x1
Allen key for M8 bolts
Hardware needed for fitting gas-lift mechanisms packed in side rails pack - hardware pack (A)
Hardware needed for bed assembly packed in side rails pack - hardware pack (B)
Hardware needed for fitting metal slat frame packed in side rails pack - hardware pack (C)
Gas-lift Mechanisms
Bolts (M8x30mm) for
fitting side rails (C) to
headboard & footboard (A&B)
Spring washer for M8 bolts Flat washer for M8 bolts
a x24 b x24 c x24 k x4
Screws (5x50mm) for fitting
‘U’ shaped cross bar (H) to
side rails (C)
Spanner for M8 nut
m x5
b x5 c x5
Bolts (M8x25mm) for fitting
ottoman support bar
Flat washer for M8 bolts
O x1
Q x1
P x1
Spring washers for M8 bolts
Hardware needed for fixing ottoman support bar (O.S.B) to the slat frame
Packed in the ottoman carton, inside Pack 4 - hardware pack (D)
Ottoman support bar
Fixed retaining bracket
- footboard Parking bracket - slat frame
3
3
3
Wilson Ottoman Bed - Assembly guide - Page 7
a x8 b x8 c x8
m(a) x1
d x1
m(b) x1
b
a
c
d
R
F
I
T
H
E
R
E
Align with blue labels
Check the diagram and if access is needed from the left side of
the bed, fit both lift mechanisms to RIGHT side of the headboard
& footboard. Bolt into the holes marked (R) with blue labels.
Choose from which side of bed you would like to access the storage area.
Bolts should be in the centre
of the long holes.
The mechanisms are labeled m(a) & m(b)
please carefully follow the diagram below.
1a Fitting Gas-Lift Mechanisms - Use Pack 'A'
m (b)
m (a)
blue blue
A
B
Left
R
F
I
T
H
E
R
E
L
F
I
T
H
E
R
E
R
F
I
T
H
E
R
E
L
F
I
T
H
E
R
E
R
F
I
T
H
E
R
E
R
F
I
T
H
E
R
E
L
F
I
T
H
E
R
E
L
F
I
T
H
E
R
E
R
F
I
T
H
E
R
E
L
&
R
F
I
T
H
E
R
E
L
&
R
F
I
T
H
E
R
E
R
F
I
T
H
E
R
E
L
F
I
T
H
E
R
E
L
F
I
T
H
E
R
E
Wilson Ottoman Bed - Assembly guide - Page 8
1b
Align with red labels
a x8 b x8 c x8
m(a) x1
d x1
m(b) x1
The mechanisms are labeled m(a) & m(b)
please carefully follow the diagram below.
Bolts should be in the centre
of the long holes
b
a
c
d
L
F
I
T
H
E
R
E
Check the diagram and if access is needed from the right side of
the bed, fit both lift mechanisms to LEFT side of the headboard &
footboard. Bolt into the holes marked (L) with red labels.
Right
m(b)
m(a)
red red
A
B
R
F
I
T
H
E
R
E
L
F
I
T
H
E
R
E
R
F
I
T
H
E
R
E
L
&
L
F
I
T
H
E
R
E
L
F
I
T
H
E
R
E
R
F
I
T
H
E
R
E
R
F
I
T
H
E
R
E
R
F
I
T
H
E
R
E
L
&
R
F
I
T
H
E
R
E
L
F
I
T
H
E
R
E
L
F
I
T
H
E
R
E
L
F
I
T
H
E
R
E
R
F
I
T
H
E
R
E
R
F
I
T
H
E
R
E
Wilson Ottoman Bed - Assembly guide - Page 9
A
A
B
&
A
B
&
B
C
C
C
E
H
C
C
C
Bed Assembly - Use Pack 'B'
Loosely insert two bolt sets (a, b & c) into each side of the headboard & footboard.
Note: Do not tighten fully but leave 10mm protruding as in the diagram. 10mm
a
b
c
a.
b.
Fit the side rails locating the
brackets behind the flat washers.
ii)
i)
Please do not tighten
any bolts yet.
Make certain the bed is
squared up as in the diagram.
Once all four corners are located tighten
all the bolts using the Allen key (d).
a
bc
d
Using bolt sets(a, b & c) fit angle brackets
(E) into the threaded inserts in the corners of
headboard, footboard & each side rail.
iii)
vi)
iv)
k
k
2
a x8 b x8 c x8 d x1
a x16 b x16 c x16 d x1 k x4
Fit bolt sets to
Headboard &
Footboard (A&B)
like this A
B
&
v) Fit the 'U' shaped cross bar (H) to centre of
each side rail (C). Line up the ends of the
bar between the two marked lines & fix into
the side rails using screws (k).
Note the screws drive straight into the side rail
itself, there are no pilot holes.
.
.
.
3
Fitting Slat Frame - Use Pack 'C'
cx4 d x1 x4j x2l
ii)
i)
x2
c
l
j
Wilson Ottoman Bed - Assembly guide - Page 10
5
4
Turn the bed on its side and attach
the fabric base cover (G) to bottom
of the headboard, footboard & side
rails using the velcro tape. Make sure
the fabric is fixed evenly all round.
Open metal slat frame (D) Using four bolt sets (j & c) fit the two metal connection
plates (l) into threaded inserts on top of the slat frame.
Use Allen key (d) to tighten the bolts 100%.
D
6Slat frame support bars
AB
&
WARNING!HAZARD - DO N OT REACH INTO THE SPACE
Hold them forward
G
Wilson Ottoman Bed - Assembly guide - Page 11
8
7
Carefully lay frame down. Make sure there is an even
gap on each side of about 8mm, as in the sketch.
Holding the frame, tighten all six bolt sets 100% using spanner (h) & Allen key (d).
Please note: Make sure the holes for mattress
stoppers are on the correct side of the slat-
frame before bolting frame to the support bars.
With help, lift slat frame (D) onto the
support bars.
Using three bolt sets on each side, (e),
(c), (b) & (f), loosely fix the slat frame
to the six holes.
D
h x1
b x6 c x12 dx1
x6
fx6
e
d
e
c
f
b
c
h
ii)
i)
Bolt into centre of long holes
h x1
dx1
WARNING! HAZARD - DO NOT REACH INTO THE SPACE BELOW!
WARNING!HAZARD - DO NOT REACH IN TOTHE SPACE BELOW!
8mm
.
.
Wilson Ottoman Bed - Assembly guide - Page 12
9
g
h
g x2 hx1
small gap
10 Push x2 mattress stoppers (F) into metal frame, they should
go all the way through the upper & lower metal sections.
Slide gas-lift piston stems (X) onto the axles (Y) then fit the
flanged lock-nuts (g), tightening with spanner (h).
Do not over-tighten the nuts (g), there should be a small gap
so the stems can rotate freely, this is important, see below.
(X)
(Y)
F
Wilson Ottoman Bed - Assembly guide - Page 13
c
m
b
P
90%
B
P
long holes and one may need to slide the
inner bar and the bracket, up or down so
of the O.S.B. stem just
touches the surface - better to do this
iii)
footboard using
Fit the fixed retaining bracket (P) to the
.)c&b,m(stestlobowt
stresnidedaerhtehtotnistlobehtwercS
tekcarbehtniatrecekaM.draobtoofehtno
is level and at the correct height.
Please do not tighten 100% yet.
The bolts should be inthe centre of the
iv)
the bottom
AFTER the mattress is fitted.
11 Unpack the contents of the Ottoman Support Bar (O.S.B.) from it's
carton - this is packed inside Pack 4.
b
x5
c
x5
d
x1
m
x5
ii)
To the underneath of the slat frame, fit the parking
bracket (Q). This is used to safely keep the support
bar out of the way when not in use. Use one bolt set
(m, b & c) - please make sure the bracket is fitted
the correct way round as shown. Screw into the
threaded insert on the underside of the frame.
i)
To underneath of slat frame, fit the
O.S.B. support bar (O) as shown.
Using two bolt sets (m, b & c), screw
the bolts into into the threaded inserts
on the underside of the frame.
Please do tighten 100% yet.
c
b
m
c
b
m
Q
O
100%
100%
Wilson Ottoman Bed - Assembly guide - Page 14
100%
Set the inner stem to the correct length so the end just touches
the retaining bracket - it needs to touch to hold it in position.
Adjust the retaining bracket (P) so
the stem end scrapes the surface.
12 Setting the inner stem of the support bar (O), adjust the inner stem
to the correct length.
Parking position
Overall Dimensions (LWH cm)
Double: 222 x 145 x 107
Storage Dimensions (LWH cm)
Double: 193 x 137 x 22
Ottoman Gas Lift Piston rating
Double: 750n
Slat Dimensions (LWH cm)
Double: 67 x 5.3 x 0.9
Distance between slats (cm)
Double: 9.3
Technical Specifications
L
14
13
W
H
2.5
27.5
Floor to top
of slat
Top of side rail
to top of slat
3
57
4.5
Wilson Ottoman Bed - Assembly guide - Page 15
Wilson Ottoman Bed - Care and maintenance guide - Page 16
Care and maintenance
Here are some tips to keep your new bed in tip-top condition
Cleaning
To clean your new bed, we'd advise using a warm damp cloth or if fabric,
remove dust using a low suction vacuum cleaner - please do not use abrasive
chemicals or bleach as this may damage the product.
Checking and moving
Periodically we recommend you check that the screws or fixtures haven't
become loose over time. To move your new bed, we recommend lifting it
where possible, as dragging or pushing it could cause damage to your flooring.
Wood
Please note each of our wooden pieces are unique, meaning that markings and
shade can vary slightly between beds. Over a period of time, the wood might
lighten or fade slightly due to light exposure.
Fabric
Please note depending on the lighting, positioning and surroundings of your
period of time the colour might lighten or fade slightly due to light exposure.
Metal
Metal tends to be more resilient to everyday wear and tear. We recommend to
gently dust your metal furniture and keep it dry to maintain its look.
Thank you for shopping with us - we hope you have
a great night's sleep
Little dreamers
Keep the little ones entertained while
you assemble your new purchase.

Other DREAMS Indoor Furnishing manuals
DREAMS Westbrook Bunk User manual

DREAMS

DREAMS Westbrook Bunk User manual

DREAMS Emerson Bed Frame User manual

DREAMS

DREAMS Emerson Bed Frame User manual

DREAMS Haan Storage Bed User manual

DREAMS

DREAMS Haan Storage Bed User manual

DREAMS Yardley Single Ottoman User manual

DREAMS

DREAMS Yardley Single Ottoman User manual

DREAMS Isabella Double User manual

DREAMS

DREAMS Isabella Double User manual

DREAMS Seoul Sleepmotion 200i User manual

DREAMS

DREAMS Seoul Sleepmotion 200i User manual

DREAMS Deacon bed User manual

DREAMS

DREAMS Deacon bed User manual

DREAMS Jade Single Bunk User manual

DREAMS

DREAMS Jade Single Bunk User manual

DREAMS Windsor User manual

DREAMS

DREAMS Windsor User manual

DREAMS Jackson Bed King User manual

DREAMS

DREAMS Jackson Bed King User manual

DREAMS AMBER 4FT6 User manual

DREAMS

DREAMS AMBER 4FT6 User manual

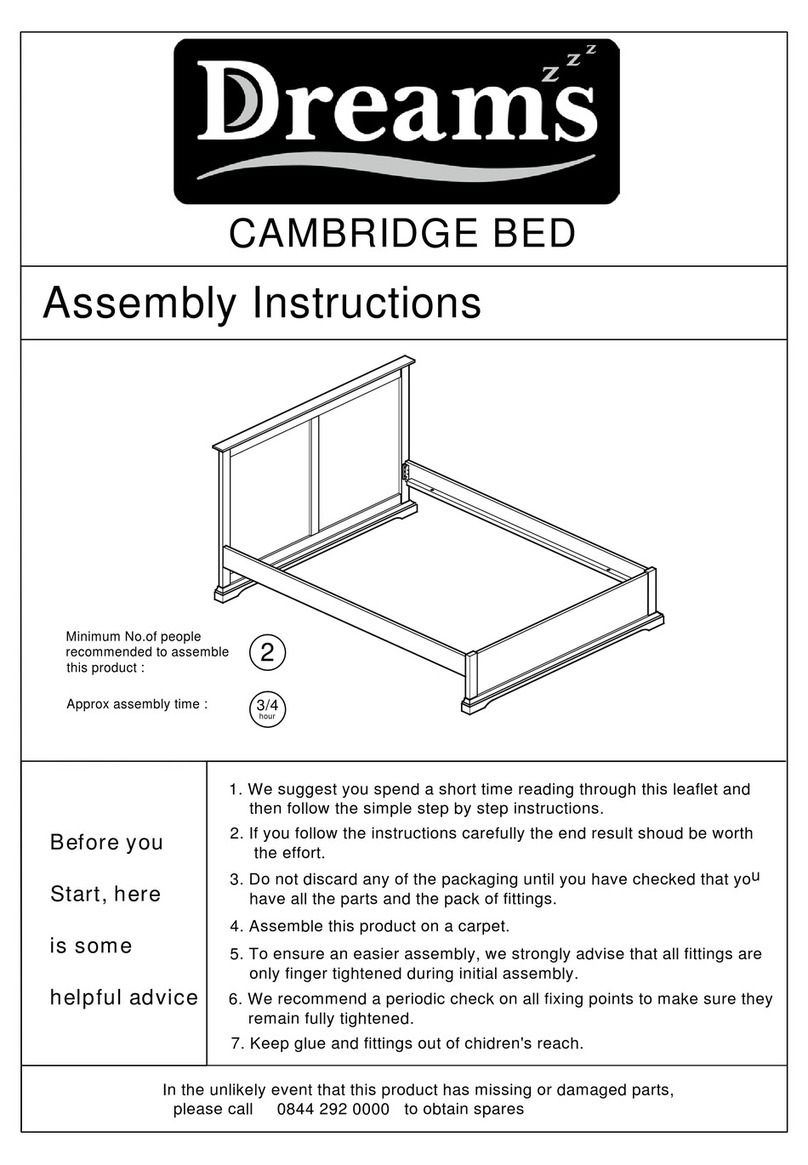
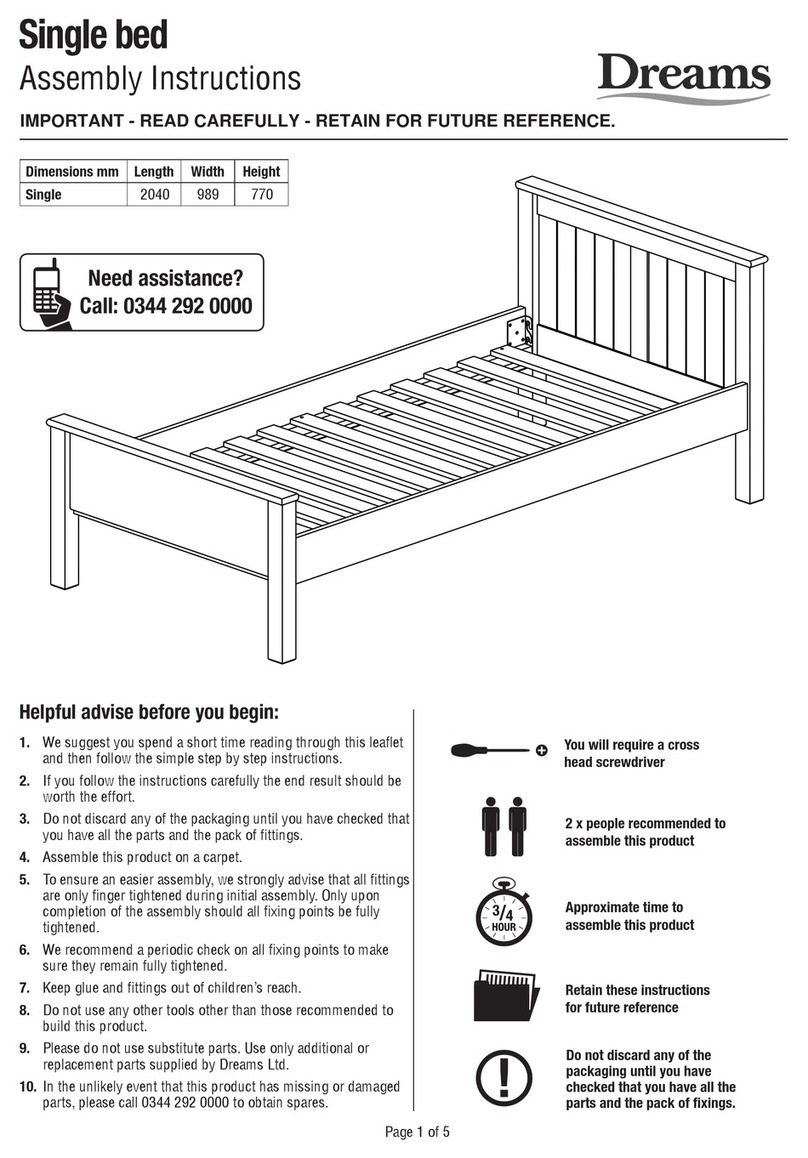
DREAMS Single bed User manual

DREAMS

DREAMS Single bed User manual

DREAMS Addison Bed King User manual

DREAMS

DREAMS Addison Bed King User manual

DREAMS LUGANO SINGLE BED User manual

DREAMS

DREAMS LUGANO SINGLE BED User manual

DREAMS Matisse Bed Double User manual

DREAMS

DREAMS Matisse Bed Double User manual

DREAMS LUCIA User manual

DREAMS

DREAMS LUCIA User manual

DREAMS AVA BED User manual

DREAMS

DREAMS AVA BED User manual

DREAMS ELLIS BEDSTEAD User manual

DREAMS

DREAMS ELLIS BEDSTEAD User manual

DREAMS SANA User manual

DREAMS

DREAMS SANA User manual

DREAMS BRUGES KING B/S User manual

DREAMS

DREAMS BRUGES KING B/S User manual

DREAMS PAXTON User manual

DREAMS

DREAMS PAXTON User manual

DREAMS Cassini User manual

DREAMS

DREAMS Cassini User manual

DREAMS HART LIFESTYLE BED SLEEPMOTION User manual

DREAMS

DREAMS HART LIFESTYLE BED SLEEPMOTION User manual

DREAMS FRANCIS OTTOMAN User manual

DREAMS

DREAMS FRANCIS OTTOMAN User manual

Popular Indoor Furnishing manuals by other brands

Argos 042 3048 Series Assembly instructions

Argos

Argos 042 3048 Series Assembly instructions

LÜTTENHÜTT Fenne 17 Assembly instructions

LÜTTENHÜTT

LÜTTENHÜTT Fenne 17 Assembly instructions

pottery barn kids Grace Bookcase Tower manual

pottery barn kids

pottery barn kids Grace Bookcase Tower manual

Shelfology Mosey Magnet Board install guide

Shelfology

Shelfology Mosey Magnet Board install guide

Next MALVERN 415672 Assembly instructions

Next

Next MALVERN 415672 Assembly instructions

overstock WF296303 Assembly instructions

overstock

overstock WF296303 Assembly instructions

Haworth Improv H.E. instructions

Haworth

Haworth Improv H.E. instructions

Interstuhl Büromöbel EVERYis1 172E operating instructions

Interstuhl Büromöbel

Interstuhl Büromöbel EVERYis1 172E operating instructions

Baxton Studio LC21020907RATTAN2DWCONSOLETABLE Assembly instruction

Baxton Studio

Baxton Studio LC21020907RATTAN2DWCONSOLETABLE Assembly instruction

Brokering Solutions Walnut Ridge Cabinetry STANDARD WALL CABINET Assembly instructions

Brokering Solutions

Brokering Solutions Walnut Ridge Cabinetry STANDARD WALL CABINET Assembly instructions

SEI MISSION SPACESAVER BE7591 manual

SEI

SEI MISSION SPACESAVER BE7591 manual

Mocka Aspen Assembly instructions

Mocka

Mocka Aspen Assembly instructions

Arthur Berndt Alessio 520 Assembly instructions

Arthur Berndt

Arthur Berndt Alessio 520 Assembly instructions

FURNISH 1 Noir ZZTWI203419BLACK Assembly instructions

FURNISH 1

FURNISH 1 Noir ZZTWI203419BLACK Assembly instructions

Universal Furniture 988-657 instruction sheet

Universal Furniture

Universal Furniture 988-657 instruction sheet

Forte STZV7111LB Assembling Instruction

Forte

Forte STZV7111LB Assembling Instruction

Next 944991 Assembly instructions

Next

Next 944991 Assembly instructions

Forte Duro DURS812 Assembling Instruction

Forte

Forte Duro DURS812 Assembling Instruction

manuals.online logo
manuals.online logoBrands
  • About & Mission
  • Contact us
  • Privacy Policy
  • Terms and Conditions

Copyright 2025 Manuals.Online. All Rights Reserved.