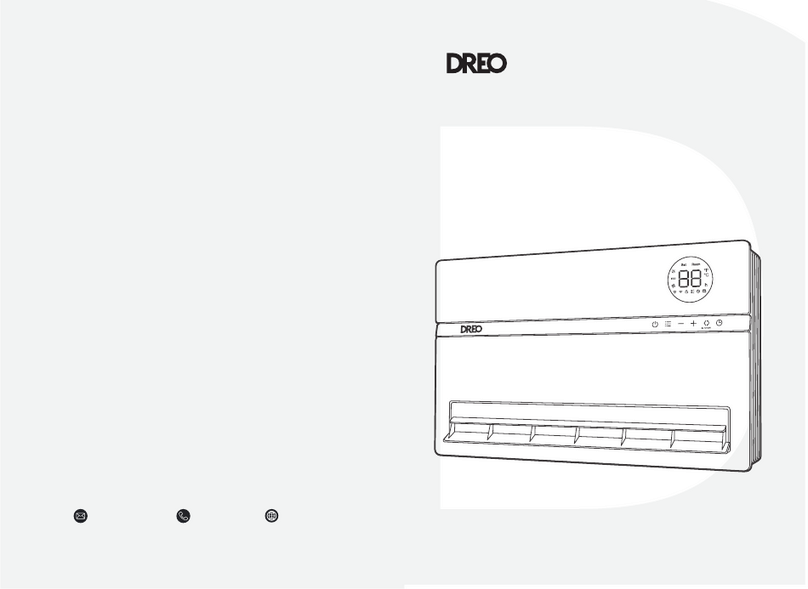
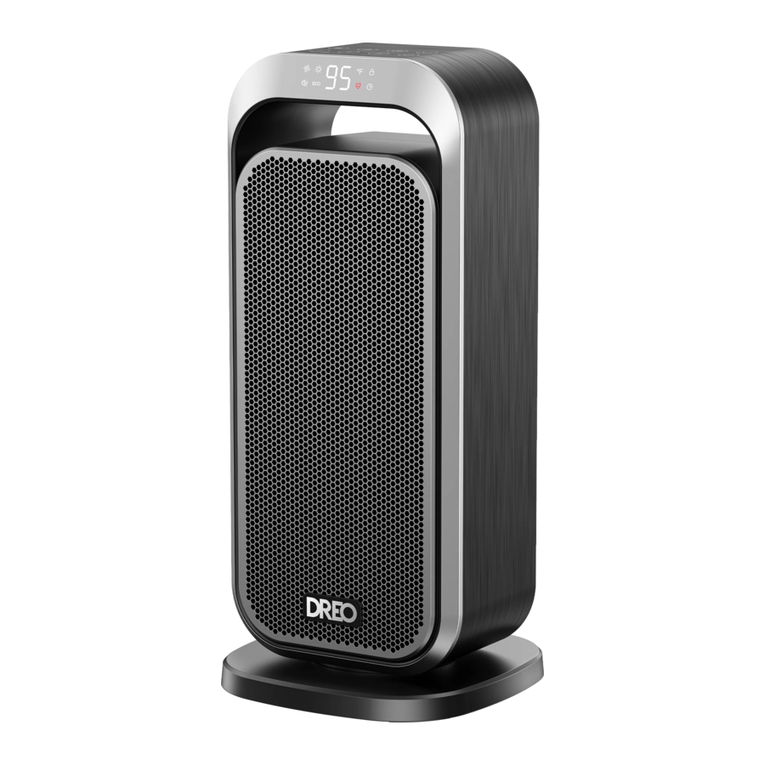
dreo DR-HSH009AS User manual

DREO
Smart
Wall
Mounted
Heater
with
ALCI
Plug
USER
MANUAL

Thanks
for
Choosing
DREO!
Your
support
means
the
world
to
us.
We
hope
you
enjoy
our
product
as
much
as
we
did
creating
it.

EXTEND
YOUR
WARRANTY
FOR
FREE
Scan
or
visit
dreo.com/warranty
To
extend
your
warranty
for
free
by
registering
your
product.
If
you
have
any
product
issues,
we
always
stand
ready
to
help
@
94
@
wwcreocom
Q
(888)
2001688
Mon-Fr,
800
am-500
pm
PSTIPDT

CONTENTS
01
02
IMPORTANT
SAFETY
KNOWING
YOUR
INSTRUCTIONS
HEATER
2 3
03
04
INSTALLATION
OPERATING
INSTRUCTIONS
INSTRUCTIONS
7
910
USING
YOUR
HEATER
CLEANING
AND
MAINTENANCE
114
15-16
TROUBLESHOOTING
DREO
CUSTOMER
CARE
17-18

IMPORTANT
SAFETY
0
1
INSTRUCTIONS
A
®®
Whenusing
electrical
appliances,
basic
precautions
Do
not use
the
fan
heater
shouldalways
be
followed
to
near
flammables
and
combustibles.
reduce
therisk
of
fire,
electric
shock,
and
injury
to
persons,
including
the
following:
CAUTION
-
High
temperature,
risk
of fire,
keep
electrical
cords,
drapery,
furnishings,
and
other
combustibles
at
least
3
feet
(0.9)
from
the
front
of
the
heater
and
away
from
the
side
andrear.
IMPORTANT
INSTRUCTIONS
1.Read
alnstructions
beforeinstaling
or
using
this
heater
2.
This
heateris
hot
when
n
use.
Toavoid
burns,
donot
et
bare
skin
touch
hot
surfaces.
Keep
combustible
materials,
such
as
fumiture.
pilows,
bedding,
papers,
clothes,
etc.
And
curtainsat
least
3
feet
(0.9m) from
the front
of
the
heater
and
keep
them away
from
the
sides
(restrictions
apply
to
location
dedicated
heaters
only).
3.
Extreme
caution
is
necessary
when
any
heater
is
used
by
or
near
children
or
invalids
and
whenever
the
heater
s
left
operating
and
unattended.
4.Donot
operate
any
heater
after
it
malfunctions.
Disconnect
power
at
service panel and
have
heater
inspected
by
a
reputable
electrician
before
reusing
5.
Todisconnect
the
heater,
tun
off
power
from
the control
panel
or
remote
control,
wait
for
the
heater
to
stop
blowing
ai
(about
30
seconds),
and
nplug
the
heater
from
its
power
outlet

6.
CAUTION:
TOPREVENT
ELECTRIC
SHOCK,
MATCH
WIDE
BLADE
OF
PLUG
TOWIDE
SLOT
AND
FULLY
INSERT.
7.In
orderto
avoid
overheating,
do
not
cover
the heater.
It
cannot
be
used
ina
wardrobe.
8.
Donotuseoutdoors.
9.
CAUTION:
Whenever
the
heater
i
left
operating
unattended,
caution
may
be
necessary
it
chilcren
or
invalids
are
nearby.
10.
The
appiiance
shouid
not
be
used
by
children
or
persons
with
reduced
physical,
sensory
or
mental
capabilties, orlack
of
experience
and
knowiedge.
unless
they
have
been
given
supervision
or
nstruction.
11.Donot
insert
or
allow
foreign
objects
to
enter
any
ventilation
or
exnaust
opening
as
this
may cause
an
electric
shock
or
fire,
or
damage
the heater.
12.Donot
operate
the
outlet
fin
manually
as this
may
cause malfunction
and
isk
offire.
Atways
sethe
control
panel,
remote
control
or
the
Dreo
app
to
change
the
blowing
angle.
13.
Unsupervised
children
snould
be
instructed
not
to
play
with
the
appliance.
1.
Donotlet
children
operate
the
appiiance
through
the
Dreo
app.
15.Toprevent
apossiblefire,
donot
block
air
intakes
or
exhaustinany
manner.
16.
Do
ot
operate
any
heater
with
a
damaged
cord
or
plug
or
after
the
heater
malfunctions,
has
been
dropped
or
damaged
i
any
manner.
Discard
heater,or
eturn
to
an
authorized
service
faciity
for
examination
andior
repair
17.
fthe
supply
cord s
damaged,
it
must
be
replaced
by
the
manufacturer.
ts
service
agent,
or
similarly
qualified
persons
in
order
to avoid
hazard.
18.
Aheater
has
hot
and
arcing
or
sparking
partsinside.
Do
not
use
it
in
areas
where
gasoline,
pairt.
or
flammable
vapors
or
liquids
are
used
or
stored.
19.
Thereisa
thermostat
imiter
inside
the
heater.
When
the
inner
temperature
over-heats
or
‘abnormal
heating
occurs,
the
heater
willautomatically
cut
off
power
SUppy
to
avoidiisk
of
fire
ordamage
tothe
heater.
20. Use
this
heater
only
as
described
in
this
manual.
Any
other
use
not
recommended
by
the
menufacturer
may
cause
fire,
electric
shock.
o
injury
topersons.
21,
The
output
of
this
heater
may
vary
and
its
temperature
may
become
hot
enough
toburm
‘exposed
skin.
Use
of
this
heater
s
not
recommended
for
persons
witha
high
sensitivity
to
heat
or
aninabilty
to
react
toavoid
burs.
22,
Donotattempt
tomodify
or
repair
the
product
by
yourself.
Doing
s0
could
void
the
warranty
and
cause
damage
or
personal
njury.
Only
a
epair
technician
may
disassemble
or
repar
this
product.
23
Make
sure that
no
pieces
of
polystyrene
or
other
packaging
material
have
been
left
between
elements
of
the
appliance.
It
may
be
necessary
to
pass
over
the
appliance
witha
vacuum
cleaner.
24
Ifthe
machine
s
not
working
as
it
should,
nas
received
a
sharp
blow,
has
been
dropped.
‘damaged,
left
outdoors,
or
dropped
into
water,
do
not
use
and
contact
Customer
Support
25.Donot
runthe
cord
under
carpeting.
Do
not
cover
the
cord with
throw
rugs,
funners,
or
similar
coverings.
Donot
route
cord
under
furture
or
appliances.
Place
the
cord
away
from
hightraffic
areas.
Place
the
cord
where
it
will
NOT
cause
tripping
hazard,
26,
Extreme
caution
is
necessary
when
any
heater
is
used
by
or
near
children
or
invalids
and
whenever
the
heater
i
left
operating
and
unattended.

27.
This
heater
s
intended
for
use
as
WALL
MOUNTED
heater
only.
Failure
to
properly
secure
the
heater
toa
flat,
level
and
vertical
wall
may
resuitin
heater
malfunction
andor
property.
damage.
28.
CAUTION
-
High
temperature,
keep
electrical
cords,
drapery,
and
other
furnishings
atieast
3
feet
(0.9m)
from
the front
of
the
heater
and
away
from
the
side
and
rear.
29.Voltage
protection:
This
heater
is
intended
for
120V
outlets
only.
If
heater
is
pluggedina
240V
outlet
by
mistake,
the
PCBA
willcut
off
the
heating
immediately,
it
wil
snow
a
“UH"
error
ode,
and
the
heater
must
be
unplugged.
The
heater
will
function
properly
when
pluggedin
theright
voltage.
FOR
HOUSEHOLD
USE
ONLY
READ AND
SAVE
THESE
INSTRUCTIONS
ALCI
(APPLIANCE
LEAKAGE
CURRENT
INTERRUPTER)
SAFETY
This
device
provides
protection
against
electric
shock
due
to
ground
@[]
|
sautcurentsby
sutomatcalysnutingofftne
poier
)
Totest
theaperatonafthe
ALCISafety
Devics,
swich
heheater
ON
ress
the
TEST
uttononthe
ALCIdevie
attached
o
thepugendof
heinecord.
Theneaterandfan
shouidstopoperating
andthe
Poier
Ightshouideextingished.
press
the
RESET
buttonon
(e
ALCI
device
toresume
normal
operation
of
the
heater.
This
device should
not
be
used
ON/OFF
operation
switch.
Riskof
ie.
Do
ot
replace
attachment
piug.Contains
a
safety
device
(ALC)
that
snouid
not
beremoved.Discard
product
i
the
attachment:
Plugis
damaged
CAUTION:
ALTHOUGH
THIS
DEVICE
IS
PROVIDED
WITH
PROTECTION
WHICH
REDUCES
THE
RISK
OF
ELECTRIC
SHOCK,
THIS
PRODUCT
SHOULD
NEVER
BE
USED
NEAR
WATER
CAUTION:
TOPREVENT
ELECTRIC SHOCK,
MATCH
WIDE
BLADE
OF
PLUG
TOWIDE
SLOT,
FULLY
INSERT.

SAVE
THESE
INSTRUCTIONS
Gentle
Reminder:
Check
the
appliance
reglarly
and
refer
to
TROUBLESHOOTING
or
contact
our
customer
support
if
tshows
any
of
the
following
signs:
~Power
cord
or
plugis
damaged.
-
Loud
noise,
unusual
smell
or
excessive
heat.
Model
DR-HSHO09AS
RatedPower
1500W
Input
120V~60Hz
Remote
Control
Bemote
CR2025,3V
HOT
SURFACE
‘THE
FRONT
SURFACE
CAN
BE
VERY
HOT
DURING.
st
USE.
DONOT
TOUCH WHEN
IN
USE.

KNOWING
YOUR
HEATER
Package
Contents
AirInlet/
Filter
02
LED
Display
Control
Panel
OutletFin
®
00000000
0000010
|
Power
&
Plug
i
xDriling
Guideline
with
Lovel
Scwall
_
5¢
2xBase
Anchors
Scrows
A

INSTALLATION
INSTRUCTIONS
‘THE
HEATER
MUST
BE
PROPERLY
INSTALLED
BEFORE
IT
IS
USED.
CAUTION:
YOURHEATER
MUST
BE
INSTALLED
ON
AWALL
DONOT
PROP
THE
HEATER
UP
AGAINST
OBJECTS
OR
USE
THE
HEATER
WITH
THE
GRILL
PLACED
VERTICALLY.
Tools
needed
for
installation:
Electric
Drill
(115
inches,
96mm)
Phillips
Screwdriver
(1/5
inches,
150mm)
pencil
Scan
the
QR
code
towatch
theinstallation
video.
Use
the
drilling
guide
to
MARK
the
position
of
for
the
wall
Finda
suitable
wall
to
install
your
e
anchors.
®
@
ONLYFORDRYWALL
ONLY
FORDRYWALL
Make
the
drillings
for
the
Fixthe
WALL
ANCHORS
onthe.
wallanchors.
dilled
positions.

Screw
ONLY
THETWOTOP
ANCHORS
first
leaving
at
leasta
T/5inches
gap.
Attachthe
TWOBASE
ANCHORS
intothe
bottom
of
the
heater.
(€]
FRONT
|
E
Screw
the
BASE
ANCHORS
to
secure
the
heater.
@
“
o
|
i
Unfold
the
power
cord.
Note:
Make
sure
the
cord
can
reachthe
outiet
wSwwnn
|
\
Hangthe
heater
from
the
top.
Make
suretis
firmly
hanged
before:
securingthe
bottomanchors.
Plug-inthe
heater.

OPERATING
INSTRUCTIONS
Safety
Tips
Before
Use
This
heater
can't
handle
dense
Place
the
heater
as
far
as
possible
fluid
water.
Do
not
splash
water
on
from
water
source
like
bathtub,
the
heater.
shower,
and
sink.
®
@
[c]
Never
place
the
heater
ina
Keep
the
heater
firmly
hanged
on
position
where
it
may
fall
into
the the
wall
and
away
from
water
water.
source.

CONNECTING
TO
YOUR
HEATER
w
e
o=
o
@&
Before
connecting
the
appliance
to
your
mobile
device,
please
scan
the
GR
code
on
the eft
or
go
to
the
app
store
and
search
“Dreo?,
then
select
and
downioad
the
app.
This
device
includes
the
radio
transmitting
module
whose
CMIT
ID
1SFCC
ID:
2A3SYHSHO09.
D
Gogerer
You
can
use the
Dreo
app
to
connect
your
smart
heater
to
Amazon
Alexa
or
Google
Assistant.
Please
follow
the
in-app
instructions
to
set
up
your
voice
assistant.
Note:
You
must
create
a
Dreo
account
to
access
voice
assistants.
LaunchDreoand
signin
or
create
anaccount
by
following in-app
nstructions.
Enable
Bluetoothon
your
mobile device
and
plugin
your
heater.
Hold
the
Fan
Angle
button
{
)
for
5sto
start
WiFi
connection
settings.
(Tip:
The
WiFiicon
=
will
keep
flashing
when
pairing.)
Tap
+
Add
Device
and
select
WHT39S.
Follow
n-appinstructions
to
complete
WIFi
connection.
You're
nowready
to
control
the
appliance
on
your
app.
(Tip:
Torestart
connection
settings,
hold
the Fan
Angle
button
{
()
again
for
5
seconds.)
Longpress
10econds
powerbutton
(©)
tounpair
WiRtand
restorefactoy
sttings

USING
YOURHEATER
0
CAUTION:
Moving
the
outlet
finmanually
could
lead
to
malfunction
andrisk
of
fire.
Always
use
the
control
panel,
remote
control
or
the
Dreo
appto
change
the
blowing
angle.
Control
Panel
Power
On/Off
*
Touchtotumthe
heater
on
or
of.
«
Longpress
for
10s
torestore
factory
settings.
Note:
+
Whenthe
heater
s
plugged
nto
the
electric
outiet,
the
power
indicator
€
willlghtinred.
Mode
Settings
Touchtoswitch
between
[E88
1x
&
Long
press
for
5s
tocalibrate
the
thermostat
temperature.
Power
Heat
with
three
heating
levels:
HI(900W),
H2(1300W),
H3(1500W).
B
The
heater
will
automatically
select
ts
optimal
heating
power,
Gepending
onthe
difference
between
the
set
temperature:
(41-95°F)
and room
temperature.
Note:
-
When
activating
ECO
Mode,
the
display
willflash
the
target
temperature
for
3
seconds.
@
romy

ol
o
‘ol0s
Heat
Levell
Temperature
*
InPower
Heat
mode,
touch
@
or
©
toadjust
the
heating
level.
*
INECOmode,
touch
@
or
©
toadjust
the
set
temperature.
*
InTimer
mode, touch
@
or
©
toset
the
timer
between
(0-24h).
Note:
INECOmode,
the
heater
wil
flash
the
°F/"C
indicatorlight
and
turn
offautomatically
when
the set
temperature
has
been
reached.
If
Yourheater
tums
off
frequently.
or
switchtoPower
Heat
mode.
Timer
When
the heater
is
on,
touch
to
set
a
timer
(0-24h).
After
the
timer
ends,
the
heater
wil
tum
off
automaticaly.
«
Tocancel,or
setthe timer
to*~"
hour.
«
Long
press
for
35 to
deactivate
the
schedule
function.
Note:
You
canactivate
the
schedule
function
through
the
Dreo
ap.
FanAngle
*
Touchtochange
air
blowing
angle
from
120/90/60/Oscillation.
«
The
LED
Display
indicates
the
angle
of
fan
angle
accordingly:
@ 50
®
o0°
120°
@
Oscillation
«
Long
press
for
55
to
enter
WiFi
pairing
mode
(LED
Wifi
indicator
willfiash
and
a
countdown
willbe
shown
on
the
display
while
long
pressing)
foving
the
outiet
finmanually
could
lead
to
malfunction
andriskoffire.
Note:
Wnenturning
offthe
heater,itwill
continue
to
blowair
for
30stoclosetheairoutlet.
Child
Lock
«
Long
press
+
and
-
for
3s
(LED
display
will
show
a
countdown)
to
activateldeactivate
ChidLock.

LED
Display
Target
temperature
indicator
Power
Heat
ECOMode
FanOnly
Pluggedin
Room
temperature.
indicator
Temperature
unit
e
Hour
indicator
Scheduleindicator
Wifilndicator
Timer
indicator
Child
Lock
Indicator
More
Features
Inlow
light
conditions,
the
Led
ights
wil
automaticaly
tum
of.
You
.
may
press
any
buttoninthe
control
panel,remote
control
or
app
o
Display
Auto
‘turn
lights
back
on.
Dimming
Note:
This
functionis
activated
by
defaut,
you can
tum
this
feature
offionthrough
the
Dreoapp.
‘You
can
turn
off
the
beep
sounds
by
touching
on
&g
your
remote:
Mute/Unmute
o)
orin
the
settings
of
your Dreo
app.
Overheat
Whenthe
fin
s
working
abnormally,
the
appliance
willstop
heating
Protection
toavold
isks
offire
(See
troubleshooting
page
17.)
nermostat
This
thermostat
comes
with
a
buit-in
thermostat
toread
room
ermost:
o,
temperatures.
fdesired,
the
thermostat
on
the
heater
can
be
calibrated
to
match
your
HVAC systemusing
the
Dreo
app.

Remote
Control
Power
On/off
Heat/
Temp/Time
- -
|+
Heat/Temp/Time
+
Mode
=
|
%
Mute
FanAngle
o
|
o
Timer
DREO
Battery
Replacement
1.
Press
thelocking
button
topop
out the
battery.
holder.
2.
Replace
with
the
same
battery
typewith
the
(+)
sidefacingup.
3.
Pushinthe
holder
until
securelylocked
nto
place
Note:
Iftheindicator
on
the
remote
control
‘doesn't
turm
on
anymore,
please
consider
replacingthe
battery.
WARNING
\emical
Burn
Hazard.
Keep
batteries
away
from
children.
“This
product
contains
a
ithium
button/coin
cell
battery.
f
anew
or
used
lithium
button/coin
cellbattery
is
swallowed
or
enters
the body.
t
can
cause
severe
internal
burs
and can
lead
to
death
in
as
ittle
t
can
cause
severe
internal
burns
and can
lead
to
deathin
as
ltle
the
battery
compartment
does
not
close
securely,
stop
using
the
product,
remove
the
battery,
and
keepit
away
from
children.
I
you
think
bateries
might
have
been
swallowed
or
placed
inside
any
part
of
the
body,
seek
mmediate
medical
attention
‘The
batteries
must
be
disposed
of
properly,
including
keeping
them away
from
children.
Even
used
cells
may
cause
injury.

CLEANING
AND
MAINTENANCE
Cleaning
and
Maintenance
Always
tumn
off
and
unplug
before
cleaning
Wait
for
the
heating
element
to
cool-off
before
cleaning
Outer
Surface
Use
asoft,
dry
cloth
to
gently
wipe
clean
the
outer surface.
Note:
Do not
move
the
outlet
fin
while
cleaning.
Filter
Cleaning
Recommended
once
every
month.
Unscrew
both
sides
and
press
the
Cleanthe
surface
of
theair
inlet
center
toremove
theair
inlet
cover.
cover
andthe
filter
witha
hancheld
vacuum
cleaner.

Rinse
the
airinlet
cover
and
the
filter
Putthe
filter
backin
place,
thenmatch
the
withlukewarm
water.
DONOT
unscrew
the
unit
tabsin
the
cover
with
the
cavities
inthe
heater,
than
press
the
center
and
screw
bothsides
toreplace
the
cover.
Note:
Let
the
filter
dry
properly
before
placing
it
back
on
the
heater.
DONOT
use
cleaning
DONOT
use
abrasive
agents.
scrubbers.
Fire
or
electrical
shock
hazard,
DONOT
immerse
the
main
unit
in
water.
NEVER
allow
water
to
get
inside
the
heater.
Except
for
cleaning,
any
servicing
should
be
performed
byan
authorized
service
representative.
Storeina
cool,
dry
area
and
keep
the
cable
out
of
high-traffic
areas
to
avoid
tripping
hazards.

TROUBLESHOOTING
()7
Troubleshooting
Foshetass
Wait
until
the
heater
coolsdowntore-startit
Make
sure
the
outlet
finis
G
O?Lmet
FinProtection
10
opery.
Ifthe
problem
persist,
contact
Customer
Support.
Unplugandwait
for
it
to
F2-Overheat
Protection
cool
down
before
pluggingn
again.
Make
sure
there
are
no
Malfunction
codes
on
objects
obstructingthe
LED
display
outletfin,
re-start
the
appliance.
BF-OutletFinDeviation
Do
notmanually
adjust
the
outlet
finangle.
Ifthe
problem
persist,
contact
Customer
Support
froura
Ut
Connection
Error
Customer
Support.
Unplugit
from
the
power
source
and
contact
Customer
Support.
E1-
Temperature
Sensor
Error
Table of contents
Other dreo Heater manuals

dreo
dreo DR-HSH009S User manual

dreo
dreo OmegaHeat OH515 User manual

dreo
dreo Atom One User manual

dreo
dreo DR-HSH003 User manual

dreo
dreo Atom 316 User manual

dreo
dreo Solaris Max User manual

dreo
dreo DR-HSH011 User manual

dreo
dreo Solaris Slim H2 User manual

dreo
dreo Solaris Slim H3 User manual

dreo
dreo DR-HSH002 User manual