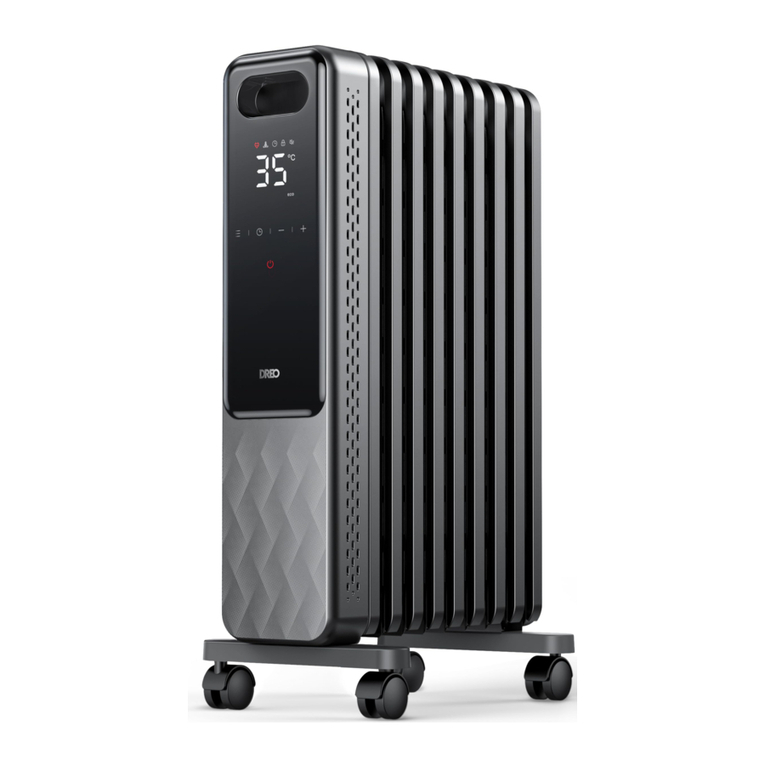
dreo OmegaHeat OH515 User manual

MANUFACTURER:
Shenzhen Hesung Innovation Technology Co., LTD
ADDRESS:
Yousuowei Building, Jiaxian Road, Shenzhen, China
Oil-Filled Heater
User Guide
MODEL: DR-HSH005

for Choosing Dreo
Your support means the world to us
Thank You
!
We hope you enjoy our oil filled heater as much as we did creating
.
.
Scan or visit dreo.com/warranty
to extend your warranty by registering your product. If you need
any help, don't hesitate to email us to get expert support!
-

for Choosing Dreo
Your support means the world to us
Thank You
!
We hope you enjoy our oil filled heater as much as we did creating
.
.
Scan or visit dreo.com/warranty
to extend your warranty by registering your product. If you need
any help, don't hesitate to email us to get expert support!
Email: [email protected]
-

1
CONTENTS
IMPORTANT SAFETY INSTRUCTIONS -------------------------01
USING YOUR HEATER--------------------------------------------------06
Package Contents------------------------------------------------------07
Product Diagram --------------------------------------------------------07
Caster Setup -------------------------------------------------------------08
LED Display ---------------------------------------------------------------10
Control Panel ------------------------------------------------------------10
Remote Control----------------------------------------------------------11
Operations and Functions ------------------------------------------12
Other Features ----------------------------------------------------------14
Replacement of Batteries in Remote Control -----------------15
Specifications ------------------------------------------------------------16
CLEANING AND MAINTENANCE -----------------------------------17
TROUBLESHOOTING----------------------------------------------------19
WARRANTY AND SERVICE-------------------------------------------22
IMPORTANT
SAFETY
INSTRUCTIONS
01
Oil-Filled Heater

23
IMPORTANT SAFETY
INSTRUCTIONS
READ AND FOLLOW ALL SAFETY
INFORMATION AND INSTRUCTIONS.
KEEP FOR FUTURE REFERENCE.
FOR HOUSEHOLD USE ONLY
Thank you for choosing DREO Oil Filled Heater. Please read
this User Guide thoroughly before use and keep it for future
reference.
Extreme caution is necessary when any heater is used
by or near children or invalids and whenever the heater
is left operating and unattended.
Always unplug heater when not in use.
When using electrical appliances, basic precautions
should always be followed to reduce the risk of fire,
electric shock, and injury to persons, including the
following:
Read all instructions before using this heater.
This heater is hot when in use. To avoid burns, do not let
bare skin touch hot surfaces. If provided, use the handle
when moving this heater.
Keep combustible materials, such as furniture, pillows,
bedding, papers, clothes, and curtains at least 3 feet (0.9
m) from the front of the heater and keep them away from
the sides and rear.
Do not operate any heater with a damaged cord or plug
or after the heater malfunctions, has been dropped or
damaged in any manner. Discard heater, or return to
authorized service facility for examination and/or repair.
Do not use outdoors.
This heater is not intended for use in bathrooms,
laundry areas and similar indoor locations. Never locate
heater where it may fall into a bathtub or other water
container.
Do not run cord under carpeting. Do not cover cord with
throw rugs, runners, or similar coverings. Do not route
cord under furniture or appliances. Arrange cord away
from traffic area and where it will not be tripped over.
To disconnect heater, turn controls to off, then remove
plug from outlet.
Do not insert or allow foreign objects to enter any
ventilation or exhaust opening as this may cause an
electric shock or fire, or damage the heater.
To prevent a possible fire, do not block air intakes or
exhaust in any manner. Do not use on soft surfaces,
like a bed, where openings may become blocked.
A heater has hot and arcing or sparking parts inside. Do
not use it in areas where gasoline, paint, or flammable
liquids are used or stored.
Use this heater only as described in this manual. Any
other use not recommended by the manufacturer may
cause fire, electric shock, or injury to persons.
Always plug heaters directly into a wall outlet/receptacle.
Never use with an extension cord or relocatable power
tap (outlet/power strip).

45
If there is a loose fit between the plug and the socket
or the plug becomes very hot, the socket may need
to be replaced. Check with a qualified electrician to
replace the socket.
A loose fitting outlet can cause the plug to overheat or
cause a fire. Be sure plug fits tight in the outlet.
It is normal for the plug and cord to feel warm to the
touch. A plug or cord which becomes hot to the touch
or becomes distorted in shape may be a result of a
worn electrical outlet. Worn outlets or receptacles
should be replaced prior to further use of the heater.
Plugging the heater into a worn outlet / receptacle may
result in overheating of the power cord or fire.
The output of this heater may vary and its temperature
may become hot enough to burn exposed skin. Use of
this heater is not recommended for persons with a high
sensitivity to heat or an inability to react to avoid burns.
should be replaced prior to further use of the heater.
Plugging the heater into a worn outlet / receptacle may
result in overheating of the power cord or fire.
Ensure the heater is on a stable, secure surface to
eliminate the potential of tipping it over.
Make sure that no pieces of polystyrene or other
packaging material have been left between elements
of the appliance. It may be necessary to pass over the
appliance with a vacuum cleaner.
Do not attempt to modify or repair the product by
yourself. Doing so could void the warranty and cause
damage or personal injury. Only a repair technician may
disassemble or repair this product.
Choking hazard – This remote control unit contains
a small battery. Keep the remote control away from
children and do not swallow the battery. If the battery
is swallowed seek medical advice at once.
DANGER - High temperatures may be generated
under certain abnormal conditions. Do not
partially or fully cover or obstruct the front of
this heater.
READ AND SAVE
THESE
INSTRUCTIONS
NOTE: There may be a trace of smoke or odor when the
unit is first operated. This indicates that a drop of oil fell
on the heating coil during the manufacturing process. It
will quickly evaporate and should not re-occur.
IMPORTANT - This appliance has a polarized plug (one
blade is wider than the other). To reduce the risk of
electric shock, this plug is intended to fit in a polarized
outlet only one way. If the plug does not fit fully in the
outlet, reverse the plug. If it still does not fit, contact a
qualified electrician. Do not attempt to rig this safety
feature.
If the machine is not working as it should, has received a
sharp blow, has been dropped, damaged, left outdoors,
or dropped into water, do not use and contact Customer
Support.

67
Package Contents
Product Diagram
1 x Oil-Filled Heater
1 x Remote Control
4 x Casters
1 x Thank You Card
1 x User Guide
USING YOUR
HEATER
02
Oil-Filled Heater
LED Display
Control Panel
Power Cord
and Plug
Fins
Handle
Caster
Assemblies

67
Package Contents
Product Diagram
1 x Oil-Filled Heater
1 x Remote Control
4 x Casters
1 x Thank You Card
1 x User Guide
USING YOUR
HEATER
02
Oil-Filled Heater
LED Display
Control Panel
Power Cord
and Plug
Fins
Handle
Caster
Assemblies

89
Caster Setup Instructions
The heater is packaged with the casters unattached. You
must attach them before operating the heater to prevent the
heater from tipping over.
The casters are inside the foam at the bottom of the package.
Place the heater
upside down and
extend the caster
supports outwards.
Align four casters
with the mounting
holes and press
them into the holes.
Set the heater upright and
plug in.
Tip-over hazard.
Do not operate without the casters attached.
Fire hazard. Operate the heater in the upright position
only. Any other position can cause damage to this heater
and even a fire hazard.
1
2
3

10 11
LED Display
Control Panel
Decrease
Temperature/
Time
Increase
Temperature/
Time
Temperature/Time Fahrenheit
Hour
Power Status
Child Lock
Timer
Timer
Heating Status
Heat Mode
Heat Mode
Power On/Off
F
Remote Control
Power On/Off
Mute
Temp/Time +
ECO Mode
Temp/Time -
Mode
Timer

10 11
LED Display
Control Panel
Decrease
Temperature/
Time
Increase
Temperature/
Time
Temperature/Time Fahrenheit
Hour
Power Status
Child Lock
Timer
Timer
Heating Status
Heat Mode
Heat Mode
Power On/Off
F
Remote Control
Power On/Off
Mute
Temp/Time +
ECO Mode
Temp/Time -
Mode
Timer

12 13
When the unit is on, hold and at the
same time for 2 seconds to enable/disable Child
Lock.
Press on the remote control to turn the buzzer
on/off.
Operations and Functions
Place the heater on a firm, level surface free from obstructions,
and at least 3ft. (0.9m) away from any wall or combustible
materials.
Plug into an appropriate voltage AC 120V outlet, The unit will
enter standby mode with a beep and power indicator on red.
Your heater is ready for use now.
When the unit is plugged in, press on the heater
/ remote control to turn the heater on with default
settings: 95°F and high mode ( ) on the
LED display.
When the unit is on, repeatedly press on the
heater to cycle through High -> Medium -> Low -> ECO
modes, OR simply press or on the remote
control for mode switch.
When ECO mode is on, the heater will adjust the
working mode automatically based on the ambient
temperature.
Press once again to turn the heater off.
Power ON/OFF
Mode / Heat Level Settings
Mute/Unmute
ECO Mode
When the unit is on, press 图图or 图图on the
heater / remote control to adjust the set
temperature from 40 to 95°F in 1°F increments.
When the unit is running, press on the heater /
remote control to enter timer setting.
Press or to select a time (00h-24h) and
press again to start the timer.
When the timer ends, the heater will
automatically shut off and go into standby.
Note:
Note:
Note:
1.
1.
2.
2.
If you set the timer when the unit is on standby, the
heater will automatically start running when the
timer ends.
after the unit is turned off, the heater will continue
radiating heat for a while because of the unique
properties of diathermic oil.
All the buttons will be locked when Child Lock is enabled.
Press the power button to end the timer immediately.
Child Lock is not applicable to the remote control.
When the ambient temperature reaches the
set temperature, the heating element will stop
running and the indicator 图 will go off.
When the ambient temperature is lower than
the set temperature, the heater will start
running again.
Temperature Adjustment
Timer
Child Lock

14 15
Memory
Function
If you turn off the heater and keep it
connected to the power source, the heater
will return to its last status (working mode &
temperature) once turned on again.
Note: not applicable to timer, mute, eco mode
and child lock settings.
Overheat
Protection
When the ambient temperature is above
122°F, the heater will stop heating, with 10
beeps and the error code “FF” flashing on the
display.
Please unplug it from the power source
and power it on again when the ambient
temperature drops below 122°F.
Tip-over
Protection
When the heater is tipped over, the
heater will shut off automatically.
Please place the heater back on a flat,
level and stable surface. Turn it on
again.
Display
Auto-
Dimming
The display will go dim automatically
after 60 seconds if no action is taken by
the user.
Other Features Replacement of Batteries in
Remote Control
CAUTION:
Remove the battery cover in the direction indicated by
the arrow.
Replace with two new AAA 1.5 batteries. Make sure that
the positive(+) and negative(-) terminals are positioned
correctly.
Push the battery cover back into place.
Replace with new batteries of the same type when
replacement is required.
Remove the batteries when the remote control is
unused for long period of time.
Do not attempt to dismantle the batteries.
Do not dispose the batteries in fire, batteries may
explode or leak.
1.
2.
3.

16 17
Specifications
Model DR-HSH005
Input 120V~ 60Hz
Rated Power
1500W (High)
900W (Medium)
600W (Low)
Remote Control
Battery AAA 1.5V
CLEANING AND
MAINTENANCE
03
Oil-Filled Heater
Table of contents
Other dreo Heater manuals

dreo
dreo DR-HSHS004A User manual

dreo
dreo DR-HSH011 User manual

dreo
dreo DR-HSH009S User manual

dreo
dreo DR-HSH004 User manual
dreo
dreo DR-HSH003 User manual

dreo
dreo DR-HSH002 User manual

dreo
dreo Solaris Slim H2 User manual

dreo
dreo Atom 316 User manual

dreo
dreo DR-HSH007 User manual
dreo
dreo Atom One User manual
Popular Heater manuals by other brands

Gude
Gude 85027 Translation of original operating instructions

Elnur
Elnur PHM075 Installation instructions and user guide

Dimplex
Dimplex WMS718N instructions

MasterCraft
MasterCraft 043-5113-0 instruction manual

Consort
Consort Heatsream PHRX Series quick start guide

Soleil Heaters
Soleil Heaters PTC-901A User instructions