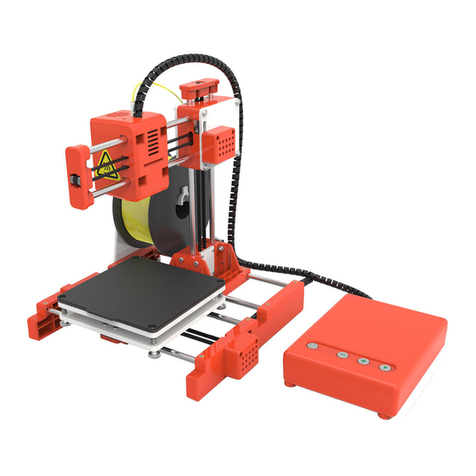
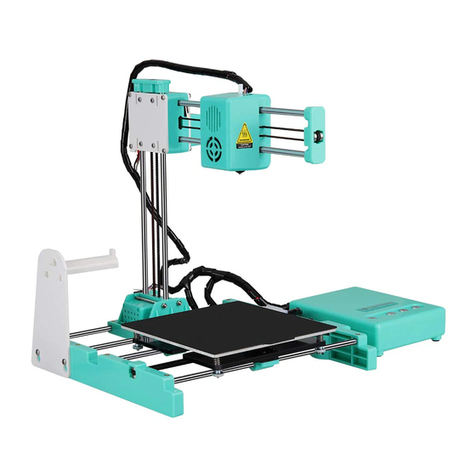
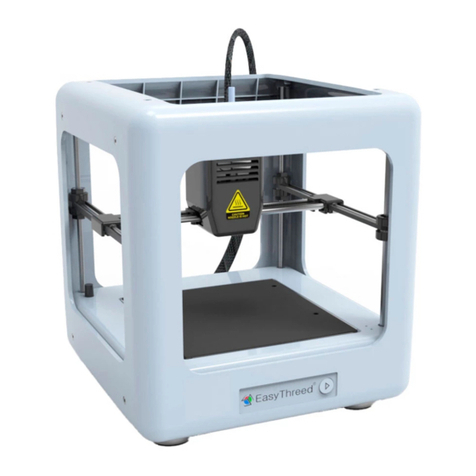
EasyThreed Easythreed X5 Mounting instructions

X5 Use’s Manual

Thanks for purchasing Easythreed X5 3d printer, it’s a 3d machine for consumer, it can make your life creation
come true , the printer is easy operation.
Please go to www.easythreed.com for manual updates .
1.0 Unpack
1, Take out X5 from the packing box , remove foam , PE bag , tapes ( scissors may need ).
2, There is 1 X5 machine and 1 accessory box inside , ( owner manual , filament , USB cable, adaptor , TF card
reader, TF card , scraper,filament holder, cross screwdriver and lubricant grease all include.)
3, please remove these two straps used to fix the X axis, (as above photo attention)
4, put the Filament holder, and hang on the filament(as photo 2)

1. Take out filament holder from the accessory box and fix it to the back side frame , and
hang up the filament(photo 2).
2. ,Insert the filament tube into the extruder gear connector bottom ,at the back
for the printer.(photo3)
3. Make the beginning of the 10 cm filament straight , then Press the extrude as per
below photo to ensure there is a gap beside the gear for filament to go through , insert the
filament to go through extruder to the nozzle bottom, then loose hand.(be sure the
filament is straight before feeding )(photo 4)
4.click home page“preheat”,come to preheat page,and click the "+" to increase
the target temperature value on the right side of the diagonal bar to about 200
degrees (the thermometer icon below can change the value added with each click),
The nozzle starts to heat up. When the left side value rises to the temperature value
set on the right, click "Back"(photo5,photo6)
5.Click the "Extrude" to enter the feeding and retract interface. The value E1 in the middle
is the length of the feeding. Each time you click the "In", the length of the feeding will
increase (click the icon of the left and right arrow below to change the size of the value
change). When the nozzle spits out the filament and spits out the set length, the feeding
is completed(photo 7)
6. If you want to change filament or take out filament from the printer, Click "extrude" to
enter the operation interface of Feeding and Retract, click "Out" to increase the length of
retract filament, until the filament come out from the printer head, the retract is
completed, and click "Back" to return.(photo 7)
(Note:feeding or retract need to be“preheat”, set the required target
temperature. Different materials may require different temperatures.
PLA material is 200 degrees, after the nozzle is heated to the set
value ,then feeding or retract)
Photo 5
Photo 6
Photo 7
2.0 Slicing software installation
1, for beginner user , we recommend own developed slicing software named EASYWARE, it is in the TF card
included in the accessories box , please copy it to your computer and install , operate the software as per the
instruction in TF card .
2,for experienced 3d printer user , recommend to use CURA to slicer, we also put a CURA software install
versions inside the TF CARD , you can install it .
3.0 Connect the machine to power supply
1. Insert power cable to the port at the back of the machine, then connect to power socket .
2. Turn on the power button on the right of the machine, the buttons will be on, the machine connected to
power supply successfully.
3. When need Power off the machine, pls make sure the printer not in printing.
4.0 Start to print with 3 steps.
1,Install filament

Photo 8
Photo 9
Photo 10
Photo 11
2:slice the STL file
Use EASYWARE or CURA to slice the STL model file。
Notice: the building volumn 150x150x150mm, nozzle temperature 180℃for PLA. Heated bed 50℃.
Nozzle 0.4mm, filament 1.75mm.
3:start to print
1),Save the sliced gcode file to a TF card , then insert the TF to TF port on machine.
2),Click hope page”Print”,choose the model you need to print, click“ confirm”(photo 8)
3), When nozzle temperature goes up to a setted value ,The machine is printing(photo 9)
3, Change filament during printing
If you want to change filament during printing ,click “ option” to the operation page,
Click”change”, after the machine stops , click “ unload”, printer will take out current
filament, insert the new filament and click “ load “ till regular filament goes out of
the nozzle, Click “ back” to operation page, Click “ resume” the printer continue to
print with new filament.(photo 10, photo 11)
4,Pause during printing
If pause need during printing, click “ pause” , then the machine stop printing ,
If need to print again, click “ resume”
5,Stop printing
If stop need during printing , click “ Stop “ on the operation page, and “ confirm“ ,
printing stops , ( once stopped printing ,the current model printing can not go on )
6,Power cut continue printing
During printing, if power off suddenly , the printer will stop printing, when power on again,
click RESUME to continue printing.
7, printing completed
you can remove the platform from the printer, as below showing, easy to take off the model .
NOTICE:when you do head home by hand, pls move X,Y axis firstly, move the
Z axis at last, and keep the space more than 5mm between the nozzle and
the platform. This way avoid to break the nozzle.

Photo 12
4:Platform leveling
If you find the the platform is not level properly, you need to adjust the leveling. Pls adjust these 4 screws,
rotating screw clockwise platform will go down , rotating screw counterclockwise platform will rise.
Notice: Online printing(For experienced user):
5.1:Install the USB driver(in TF card or download from easythreed.com)to computer.
5.2:Install Cura-15.04.6 slicing software(in TF card or download from easythreed.com)
5.3:The above software installation and how to print online,please refer to the electronic version of
“Nano online printing user manual”(in TF card or download from easythreed.com)
Burning , keep your fingers away from the NOZZLE and BLACK INSULATOR when the printer is
working as temperature in this area reaches over 200 Celsius degree . Always be sure to keep your hands away
from moving parts when Dora is working .
The platform was well leveled before delivery from factory,if re-level needs for
transportation or other reasons , please adjust as below steps :
Click the home page“Leveling”,come to Leveling page(photo 12)
1,Click“Point 1”or other Point, print head will move to the relative position.
2,The standard distance between the nozzle and printing bed is the
thickness of a piece of A4 paper, move the nozzle to the lower right corner , put
a piece of A4 paper between the nozzle and printing bed , pull the paper gently
and slowly ,you will feel a little scratch on the paper , but there should be no real
scratch marks on the paper.
3,If there is a gap between the nozzle and paper ,or you do not have a gentle
feeling of scratch when pull the paper , means the distance between the nozzle
and printing bed is too far , use the screwdriver to loose the screw anticlockwise
, the bed will go up a bit
4,If there is a scratch mark on the paper , means the distance between the
nozzle and printing bed is too close , use the screwdriver to tight the screw
clockwise , the bed will come down a bit
5,Check the distance between nozzle and bed at the 4 corners one by one with
a piece of A4 paper to make sure bed leveling is finished successfully before
printing.

5.0 Maintenance
1,Do not use the methods that is not mentioned in this manual to disassemble or modify this machine , to
avoid damage to this printer or may cause other serious accident .
2,When the power is off , regularly clean the machine with a piece of cloth to wipe off dust and
residue , if the cloth is wet , do not use inflammable liquid to contact the inner circuit to avoid fire or
electronic shock .
3,When printing finished, clean the residue in nozzle and extrude , to avoid nozzle choke for next printing , it is
also basic maintenance.
4,Recommended temperature for working environment is 5℃-30℃, do not air the machine body with a fan
when the printer is working .
5,Recommended humidity for the working environment is 20%-80% .
6.0:Safety warning
1),Suffocation danger ---- Easythreed 3d printer and filament contains small parts may cause suffocation, or
printed models may have the risk of causing suffocation.
2),Easythreed 3d printer are not toys , kids under 10 years old using this printer must be guarded by adults .
Nozzle and extruded filament are very hot, much keep fingers away from these parts ,wait at least 10
minutes for the machine to cool after disconnect the power supply .
Operate the machine as per the manual , and in good air condition, do not leave the printer running without
people aside .
3),Easythreed 3d printer , filament or printed models do not reach food safety standards , do not mix them
with any food or drinks.
4),Easythreed 3d parts or printed models are not for medical application.
5),If any allergy caused by using easythreed 3d printer or printed models , please stop use .
6),If do not use the machine for quite a long time, nozzle and extrude parts are all need to be cleaned , bed
sticker need to be changed,
7), Take care of sharp tools when detach parts.
7.0 FAQ
Q1, Why the filament do not come out from the nozzle or the thread is too small
A1, Check temperature , Nozzle temperature needs to be higher
A2, Check if nozzle is too close to the printing bed , if so, the filament wont come out ,so adjust the distance
between nozzle and platform .
A3,Check if the nozzle is blocked
A4, The motor did not drag in the filament successfully , or the filament may be hooked by motor teeth.
Q2,The problem of print model misplaced.
A1, The model did not slice properly, need to re-slice the model or change the model position to generate
new Gcode file.
A2, The model file problem, if the model is still misplaced after re-slicing ,it’s the original file problem .

A3, The nozzle is forced to change printing path.
Do not touch the nozzle or any other parts of the machine when it’s printing for safety.
A4, Power supply is not stable
Please check if the machine is connected to power supply successfully, and make sure power supply is
stable.
Q3 , Why the printing accuracy is quite different from the real model.
A1, There is a lot of filament piled up on the model surface
A1.1, Nozzle temperature is too high, filament melt too fast and caused overflowing.
A1.2, The filament flow is too large, there is filament flow setting in slice software , change the default
value 100% to be 80%.
A1.3, Filament diameter setting problem , it’s in slice software, the default settings are different , there are
both 1.75mm and 3mm filament on the market, only 1.75mm filament can be used on Dora.
A2 , Poor surface after removing the support for FDM technology.
A2.1, The support density should be as lower as possible, 10% is proper, then it’s easy to remove.
A2.2, Trim the model with a grinding tool, rub gently with a towel which dipped a little acetone.
8.0 Printing setting
What’s printing quality ?
Printing quality is layer height , if you want better printing quality , the layer height need to be smaller and
print speed need to be slower.
What’s fill density ?
Fill density is the total filament inside the model ( the parts can not be seen). For an empty part , the fill density
is 0%, nothing inside the model, it’s light ,but weak and easy to be broken ; If the fill density is larger , much
more filament will need, also it cost much more time to print, the model will be more stronger.
Can i change the model position, scale and direction ?
Yes you can, when to adjust the model, choose it when slicing, there is a menu on the left, then you can rotate ,
scale, and mirror it , you can also input numbers to adjust.
What support ? when should i use support ?
Support need when the model is hang in the air, if you want print a ball , which just contacted the printing bed
by a point and a large area are in the air, then you need to add support for better printing quality.
If i want the fastest printing , what should i do ?
Printing quality choose “ the lowest “, set layer thickness 0.3mm, 0% fill density and shell lower thickness ,
these setting are for rapid modeling .
What’s bed leveling?
Bed leveling is the distance between bed and nozzle, the machine need to know where is the printing bed ,
otherwise , it may print in the air or scratch the bed , then you need to stop and re-print , good bed leveling
ensure good printing quality .
Thanks for choosing Easythreed, we will try our best to serve you
ShenZhen Easythreed Technology CO.,LTD
Address : No.A2 , 2nd Floor , Avant Low Carbon Innovation Park , No1034 of
Longgang Road , Pingdi Street , Longgang District , ShenZhen , China
Website : www.easythreed.com
Email: [email protected]
Table of contents
Other EasyThreed 3D Printer manuals

EasyThreed
EasyThreed X3 Manual

EasyThreed
EasyThreed X1 User manual

EasyThreed
EasyThreed X7 Configuration guide

EasyThreed
EasyThreed NANO plus User manual

EasyThreed
EasyThreed NANO User manual

EasyThreed
EasyThreed K7 User manual

EasyThreed
EasyThreed X3 User manual

EasyThreed
EasyThreed X4 User manual

EasyThreed
EasyThreed Mars User manual

EasyThreed
EasyThreed X7 Mounting instructions