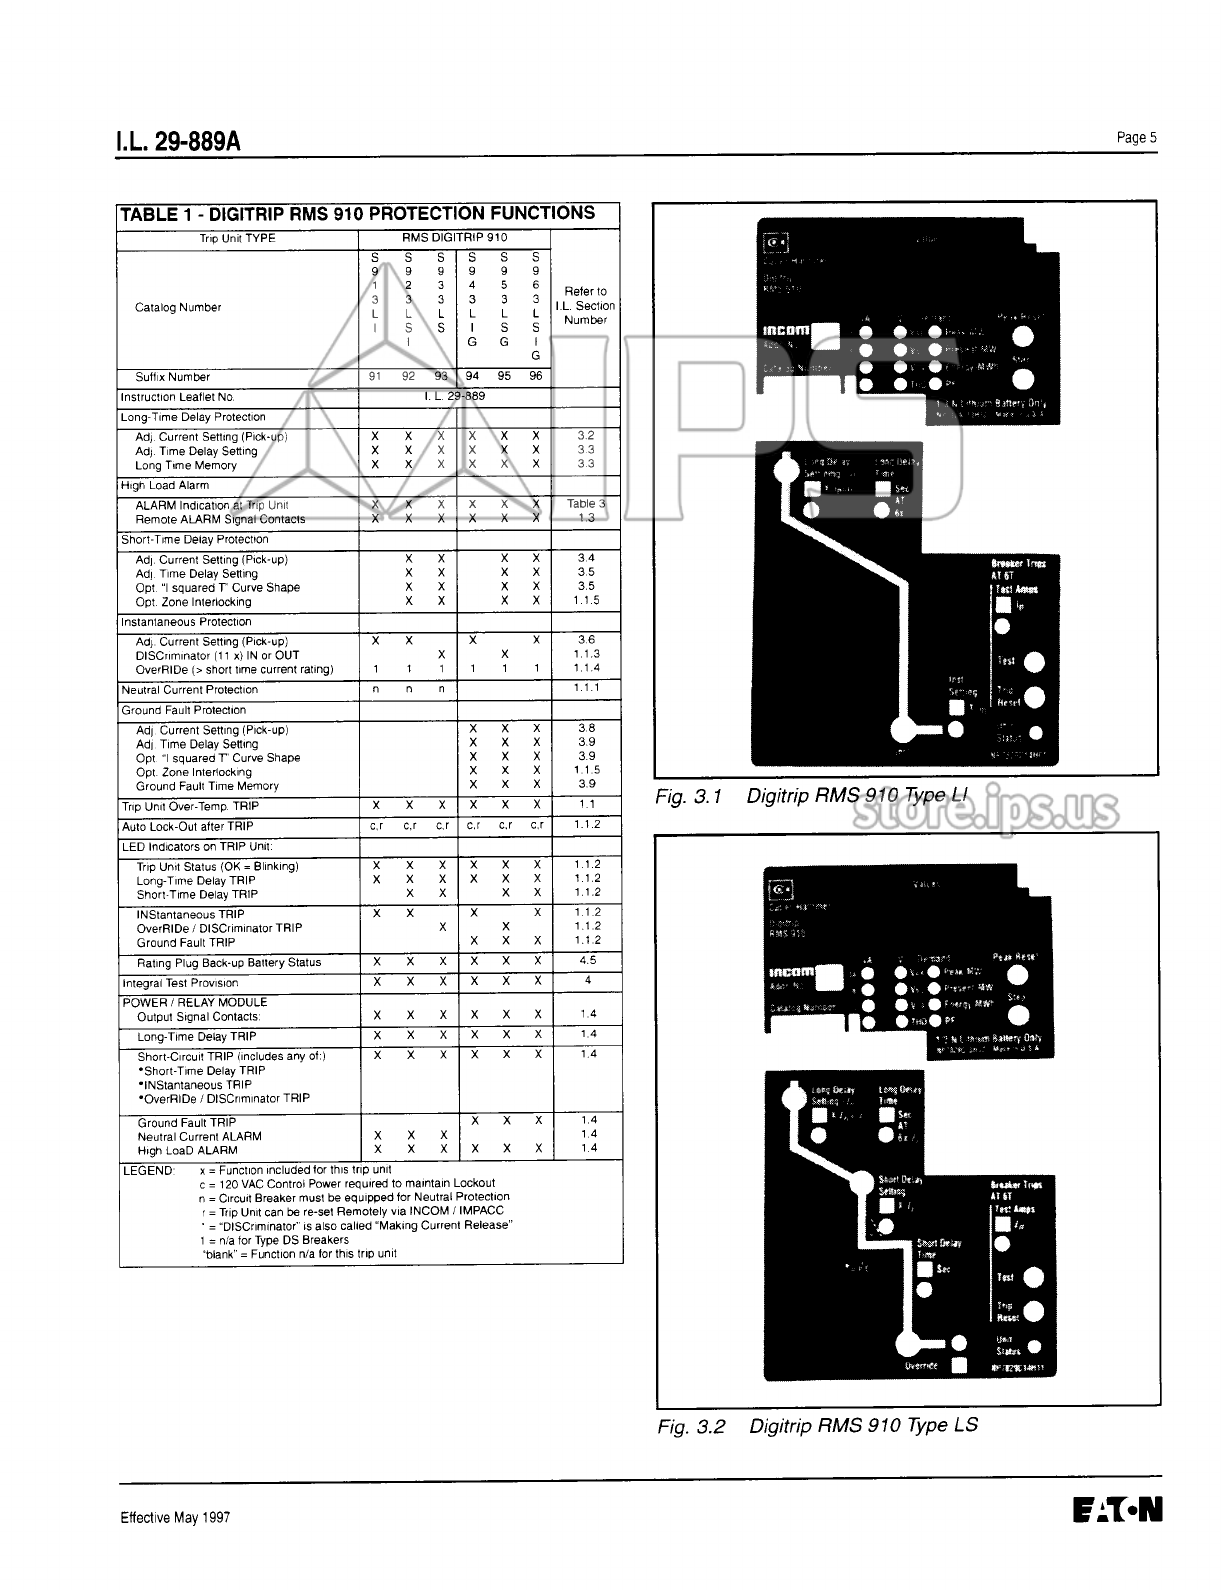
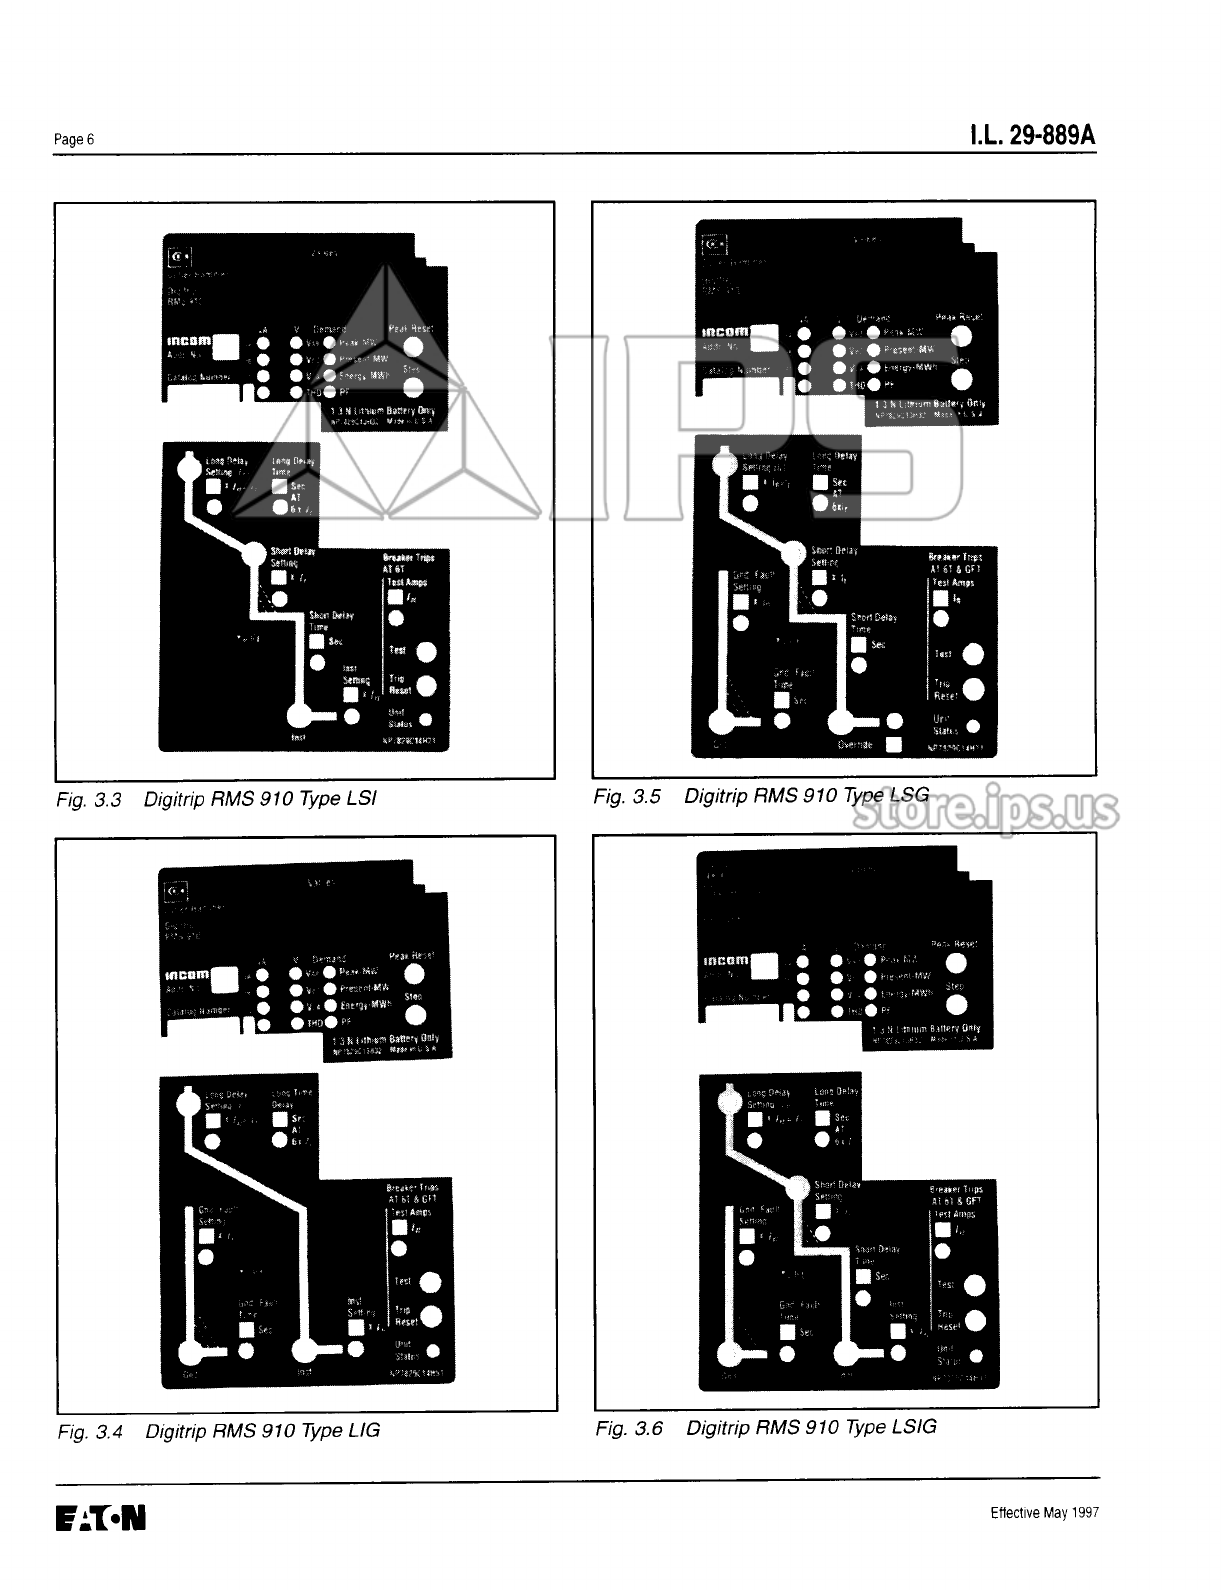
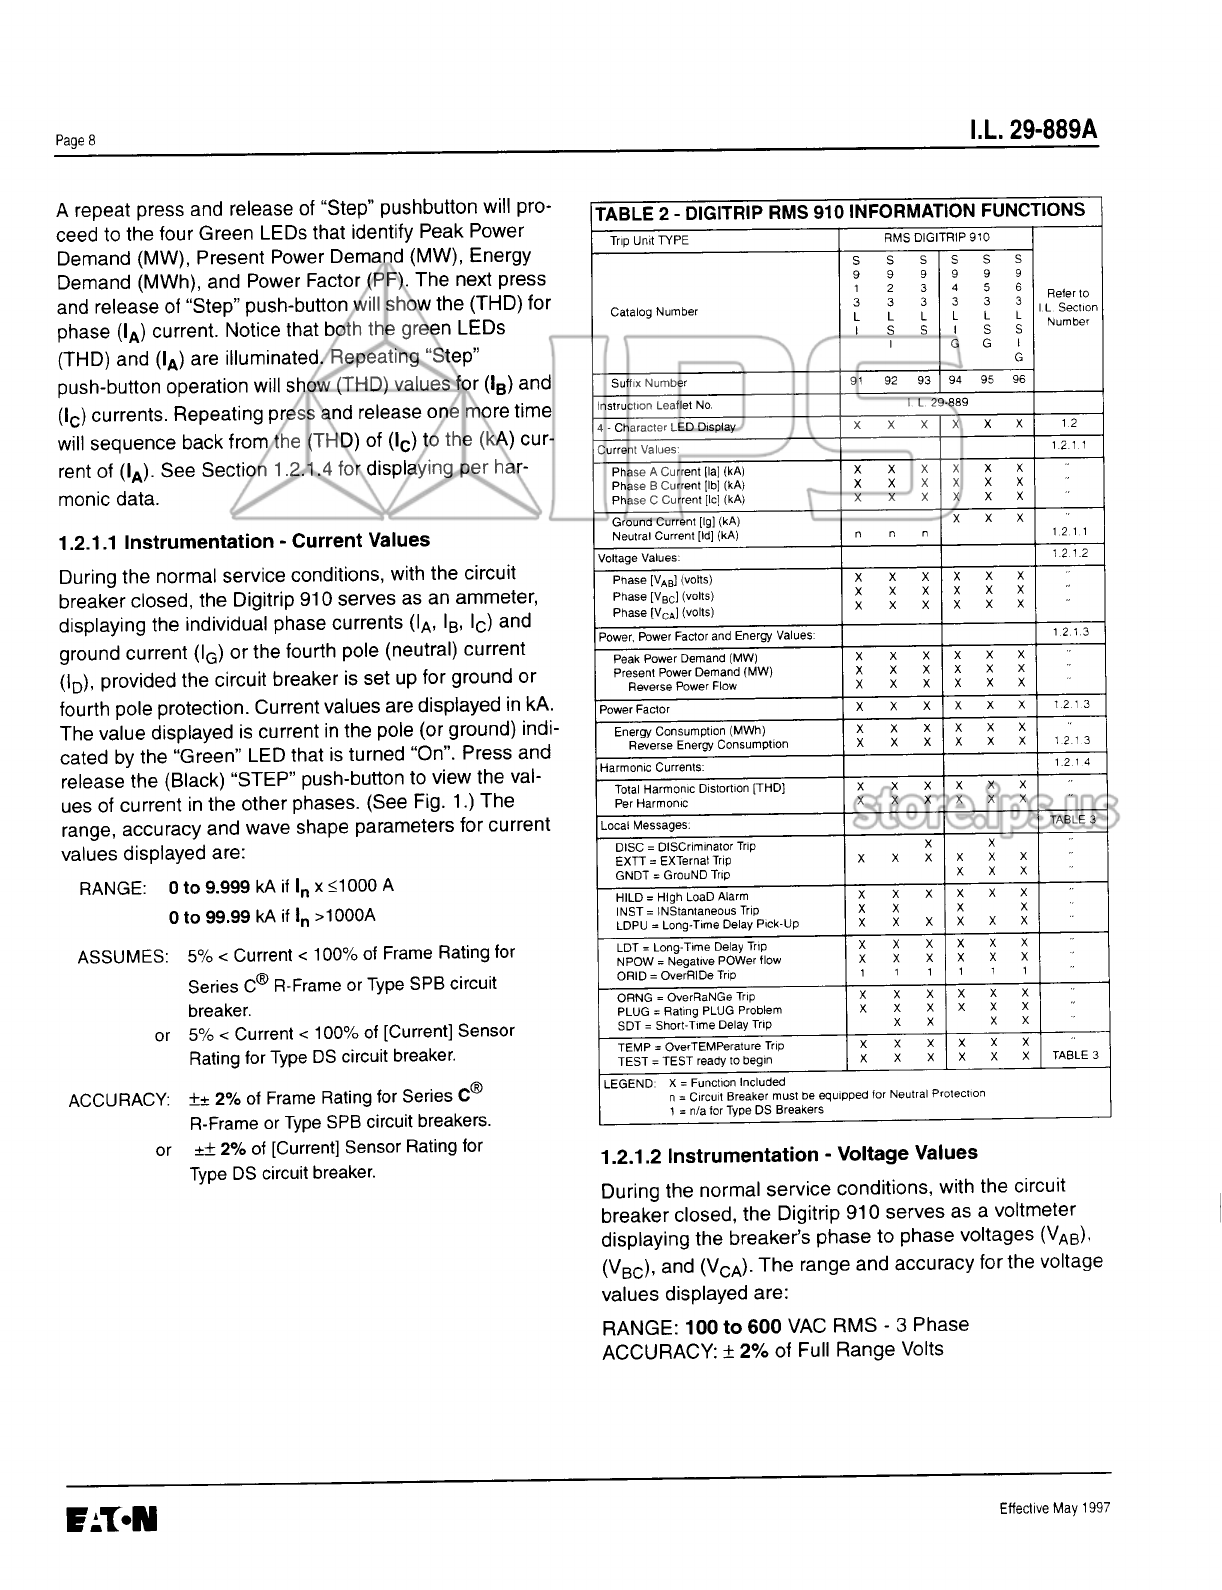
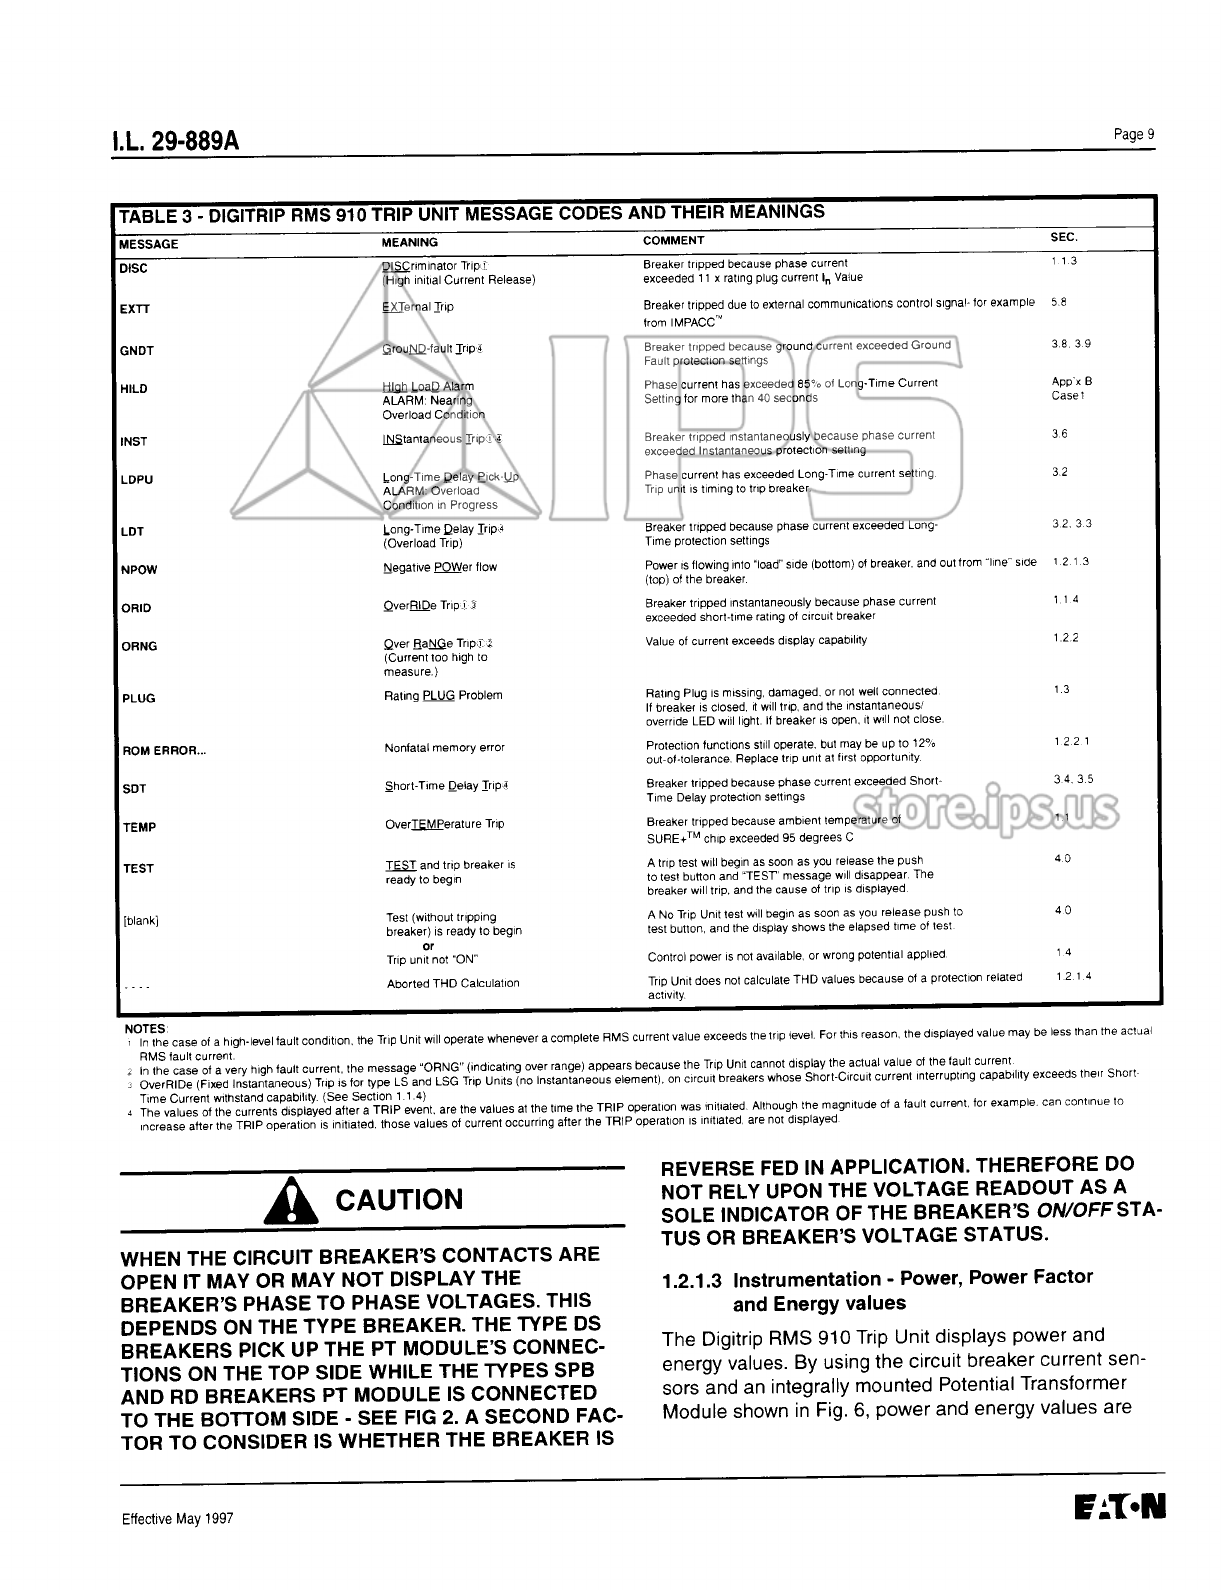
Eaton Digitrip RMS 910 User manual
Other Eaton Industrial Equipment manuals

Eaton
Eaton Airflex CB Guide

Eaton
Eaton CoviO User manual

Eaton
Eaton SH0165/2 Manual

Eaton
Eaton P3 Series Manual

Eaton
Eaton SPD150i User manual

Eaton
Eaton Hydrostatic Transaxle 850 Series Owner's manual

Eaton
Eaton AT-S PLus ESF30 KV Service manual

Eaton
Eaton Crouse-hinds series User manual

Eaton
Eaton RMQ-Titan C22-PV Series User manual

Eaton
Eaton PDI Revit User manual

Eaton
Eaton RMQ-M1C-ASI Manual

Eaton
Eaton Powerware SPD3Gi/A User manual

Eaton
Eaton NN-GW-100-LAN User manual

Eaton
Eaton Digitrip Retrofit System Manual

Eaton
Eaton PKE-XTUACP-36 Manual

Eaton
Eaton DDC-63/2/I5 Series Manual

Eaton
Eaton APS3-400 Series Operating instructions

Eaton
Eaton Power Defense Manual

Eaton
Eaton NZM4-XKV95 Manual

Eaton
Eaton AT4 Manual