manuals.online logo
Brands
  1. Home
  2. •
  3. Brands
  4. •
  5. Elkron
  6. •
  7. Keypad
  8. •
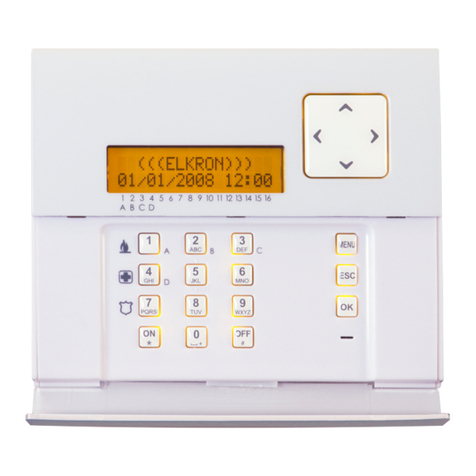
  9. Elkron KP100 User manual

Elkron KP100 User manual

Tastiera Remota
Remote Keypad
IS0097-AH
12.2003
KP100
KP100D
INSTALLAZIONE
• Sono disponibili 2 tipi di tastiere remote:
-KP100D: tastiera con display LCD (collegabile con centrale
MP110);
-KP100: tastiera con display a segmenti (collegabile con
centrali MP110 e MP105).
• Per la connessione delle tastiere è consigliabile l'utilizzo di un
cavo schermato a 4 conduttori di cui due di sezione 0.75 (+/-) e
2 di sezione 0.22 (CK/D).
• La distanza massima tra la centrale e le tastiere non deve
superare i 500 mt.
• Nel caso di installazione di più tastiere (max4) è possibile il
collegamento a festone (fig.2/A), a stella (fig.2/B) o misto fra i due.
• Sul retro del contenitore è presente un micro antimanomissione
antiasportazione.
• Nel caso di utilizzo con la centrale MP110 CHIUDERE GLI
INGRESSI Z1, Z2 A NEGATIVO SE NON UTILIZZATI
• Nel caso di utilizzo con la centrale MP105 gli ingressi Z1 e Z2 NON
sono gestiti e quindi possono essere lasciati aperti.
• Considerare il consumo delle tastiere nel conteggio generale
dell'assorbimento dell'impianto per consentire l'adeguata
autonomia della batteria utilizzata.
Fori per fissaggio al muro Fori per passaggio cavi
Foro per passaggio tamper antiasportazione
Fori per fissaggio su scatola da incasso BTICINO 503
FISSAGGIO AL MURO
TAMPER ANTIASPORTAZIONE/ANTIAPERTURA
Secondo quanto disposto dalle norme CEI 79/2 per una corretta
installazione del sistema antiasportazione/antiapertura dal muro
occorre:
• Rimuovere la molla dal pulsante tamper;
• Inserire nel muro un tassello da 4/5mm e fare in modo che la vite
fuoriesca per circa 4mm come indicato nel disegno;
• Accertarsi che a scatola chiusa il pulsante venga correttamente
premuto.
CARATTERISTICHETECNICHE
Tensione nominale di alimentazione: ............................ 12V—
Tensione minima di funzionamento: .............................. 10,5V—
Tensione massima di funzionamento: ........................... 15V—
Corrente nominale assorbita a 12V (vers. KP100):
Settori tutti in OFF ........................................................ 18mA
Settori tutti in ON .......................................................... 21mA
Settori tutti ON + retroilluminazione ............................. 48mA
Corrente max in test ..................................................... 70mA
Corrente nominale assorbita a 12V (vers. KP100D):
Settori tutti in OFF ........................................................ 21mA
Settori tutti in ON .......................................................... 31mA
Settori tutti ON + retroilluminazione ............................. 90mA
Corrente max in test ..................................................... 105mA
Tipo di colloquio ............................................................ seriale
Protocollo ..................................................................... Elkron
Lunghezza massima della linea seriale dalla centrale: . 500 metri*
Numero max. di tastiere collegabili ............................... 4
Grado di protezione dell’involucro: ................................ IP30/IK02
Numero max. di combinazioni possibili: ....................... 100.000
* La distanza massima raggiungibile è in stretta funzione della
sezione del cavo di alimentazione (+ e –) della seriale stessa e
dell’assorbimento che c’ è all’altro capo. A tal proposito si tenga
presente che ogni 200m di cavo 2x0.75 mm² con 100mA di
assorbimento, determinano una caduta di circa 1V.
ETICHETTA RIEPILOGO ZONE (VERSIONE KP100D)
Al termine dell’installazione, è possibile completare l’etichetta (A)
indicando le ubicazioni e le descrizioni delle zone protette.
Esempio: 01: PORTA ENTRATA.
AB
C
D
B
A
DESCRIZIONE DIP-SWITCHES
INDIRIZZO TASTIERA
TASTIERA 1
TAMPER
TASTIERA 2
TASTIERA 3 TASTIERA 4
TAMPER ABILITATO
TAMPER DISABILITATO
IL DIP-SWITCH N.3 DEVE ESSERE SEMPRE IN POSIZIONE “ON”
L’ESCLUSIONE DEL TAMPER ANTIAPERTURA-ANTIASPORTAZIONE
NON E’ CONSENTITA AI FINI DEL MARCHIO IMQ- ALLARME
ITALIANO
REGOLAZIONE CONTRASTO DISPLAY
Sulla scheda della tastiera KP100D è presente un trimmer per la
regolazione del contrasto del display.
1234
A
A
A A BB B
B
B
C
DD
KP100D
+-
A
APERTURA DEL COPERCHIO
Aprire il contenitore con cautela, (spingendo con un cacciavite a
taglio nel punto indicato) per evitare di danneggiare con il cacciavite
stesso il circuito stampato.
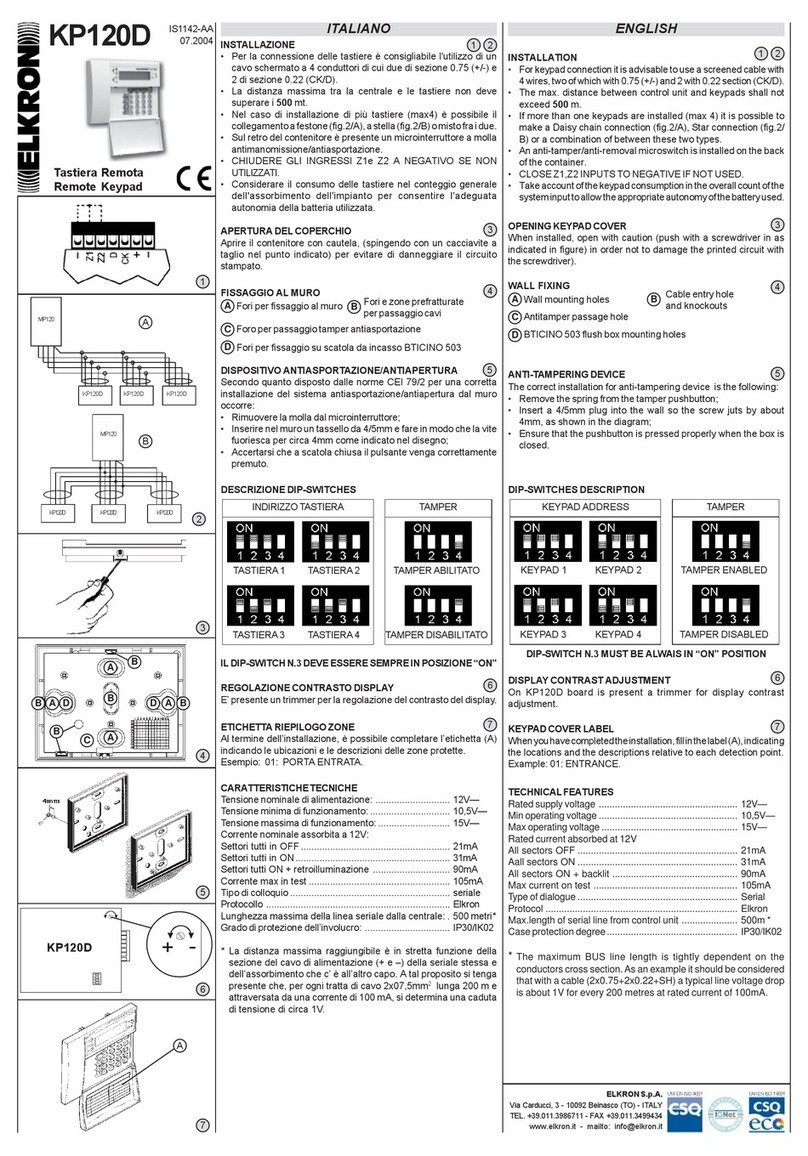
INSTALLATION
• Two types of remote keypads are available:
-KP100D: keypad with LCD display (connectable to MP110,
MP108 and MP106 control units);
-KP100: keypad with segment display (connectable to MP110,
MP108 and MP105 control units).
• For keypad connection it is advisable to use a screened cable with
4 wires, two of which with 0.75 (+/-) and 2 with 0.22 section (CK/D).
• The max. distance between control unit and keypads shall not
exceed 500 m.
• If more keypads are installed (max 4) it is possible to carry out the
Daisy chain connection (fig.2/A), the Star connection (fig.2/B) or
a mixed connection between these two types.
• An anti-tamper/anti-removal microswitch is installed on the back
of the container.
• In case of use with MP110 control unit, CLOSE Z1,Z2 NEGATIVE
INPUTS IF NOT USED.
• In case of use with MP 105 control unit, Z1 and Z2 inputs are NOT
managed and can therefore be left open.
• Take account of the keypad consumption in the overall count of the
system input to allow the appropriate autonomy of the battery used.
Wall mounting holes Cable entry holes
Antitamper passage hole
BTICINO 503 flush box mounting holes
WALL FIXING
ANTI-TAMPERING DEVICE
The correct installation for anti-tampering device is the following:
• Remove the spring from the tamper pushbutton;
• Insert a 4/5mm plug into the wall so the screw juts by about
4mm, as shown in the diagram;
• Ensure that the pushbutton is pressed properly when the box is
closed.
TECHNICALFEATURES
Ratedsupplyvoltage .................................................... 12V—
Min operating voltage .................................................... 10,5V—
Maxoperatingvoltage................................................... 15V—
Ratedcurrentabsorbedat 12V (KP100model)
All sectors OFF ............................................................ 18mA
Aall sectors ON ............................................................ 21mA
All sectors ON + backlit ............................................... 48mA
Max current on test ...................................................... 70mA
Ratedcurrentabsorbed at12V(KP100D model)
All sectors OFF ............................................................ 21mA
Aall sectors ON ............................................................ 31mA
All sectors ON + backlit ............................................... 90mA
Max current on test ...................................................... 105mA
Typeof dialogue............................................................ Serial
Protocol ........................................................................ Elkron
Max.length of serial line from control unit ..................... 500m *
Max.numberofconnectable keypads ........................... 4
Caseprotectiondegree................................................. IP30/IK02
Max.number of possible combinations ......................... 100,000
*The maximum BUS line length is tightly dependent on the
conductorscrosssection.As anexampleitshould beconsidered
thatwithacable (2x0.75+2x0.22+SH)atypicalline voltage drop
is about 1V for every 200 metres at rated current of 100mA.
KEYPAD COVER LABEL (KP100D VERSION)
When you have completed the installation, fill in the label (A), indicating
the locations and the descriptions relative to each detection point.
Example: 01: ENTRANCE.
AB
C
D
DIP-SWITCHES DESCRIPTION
KEYPAD ADDRESS
KEYPAD 1
TAMPER
KEYPAD 2
KEYPAD 3 KEYPAD 4
TAMPER ENABLED
TAMPER DISABLED
DIP-SWITCH N.3 MUST BE ALWAIS IN “ON” POSITION
ENGLISH
DISPLAY CONTRAST ADJUSTMENT
On KP100D board is present a trimmer for display contrast
adjustment.
OPENING KEYPAD COVER
When installed, open with caution (push with a screwdriver in as
indicated in figure) in order not to damage the printed circuit with
the screwdriver).
ELKRON S.p.A.
Via Carducci, 3 - 10092 Beinasco (TO) - ITALY
TEL. +39.011.3986711 - FAX +39.011.3499434
www.elkron.it - mailto: [email protected]
21
3
4
5
6
7
7
6
5
4
3
1 2
1
2
3
4
5
6
7
MP
KP KPKP
KP KPKP
MP
INSTALLATION
• Deux types de claviers distants sont disponibles:
-KP100D: clavier avec écran LCD (avec centrale MP110, MP108
et MP106 connectables);
-KP100: clavier avec écran à segments (avec centrales MP110,
MP108 et MP105 connectables).
• Pour connecter les claviers, il est recommandé d’utiliser un câble blindé
à 4 conducteurs, deux de section 0.75 (+/-) et 2 de section 0.22 (CK/D).
• La distance maximum entre la centrale et les claviers ne peut
excéder 500 mt.
• En cas d’installation de plusieurs claviers (au max. 4), il est
possible de procéder à un groupement à feston (fig.2/A), en étoile
(fig.2/B) ou mixte entre les deux.
• Un détecteur anti-manumission anti-casse est présent à l’arrière
du boîtier.
• Encasd’utilisationaveclacentrale MP110 FERMERLESENTREES
Z1, Z2 A NEGATIF SI ELLES NE SONT PAS UTILISEES
• En cas d’utilisation avec la centrale MP105 les entrées Z1 et Z2 NE
sontpasgéréeset peuvent par conséquent être laissées ouvertes.
• Tenir compte de la consommation des claviers dans le calcul
général de l’absorption de l’installation pour permettre l’autonomie
appropriée de la batterie utilisée.
Trou pour la fixation au mur Passage câbles
Trou pour passage du micro anti-arrachement
Trou pour la fixation au mur dans le boitier encastre BTICINO 503
FIXATION AU MUR
PROTECTION ANTI-OUVERTURE ANTI-ARRACHEMENT
Pour une installation correcte du système anti-arrachement/anti-
ouverture sur le mur il faut:
• Enlever le ressort du bouton tamper
• Introduire dans le mur une cheville de 4/5mm et faire et faire
sortir la vis d’environ 4mm comme indiqué dans lle dessin.
• Vérifier que, la boîte fermée, le bouton soit appuyé correctement.
CARACTÉRISTIQUESTECHNIQUES
Tension nominale d’alimentation ................................... 12V—
Tension de fonctionnement minimum ............................ 10,5V—
Tension de fonctionnement maximum .......................... 15V—
Courant nominal absorbé à 12V (vers. KP100)
Secteurs tous OFF ....................................................... 18mA
Secteurs tous ON ......................................................... 21mA
Secteurs tous ON + retroillumination............................ 48mA
Courant max en test ..................................................... 70mA
Courantnominalabsorbé à12V(vers. KP100D)
Secteurs tous OFF....................................................... 21mA
Secteurs tous ON......................................................... 31mA
Secteurs tous ON + retroillumination............................ 90mA
Courant max en test ..................................................... 105mA
Typede dialogue........................................................... Sérielle
Protocole ...................................................................... Elkron
Longueur maximum de la ligne sérielle de la centrale .. 500m*
Nombre max. de claviers connectables ........................ 4
Degrédeprotection duboîtier....................................... IP30/IK02
Nombre max. de combinaisons possibles .................... 100.000
*Ladistancemaximum possible dépendétroitementde la section
ducâbled’alimentation(+et –)dusérielmêmeet del’absorption
située à l’autre bout.A cet effet, il faut tenir compte du fait que
tous les 200m de câble 2x0.75 mm² avec 100mA d’absorption,
déterminent unechuted’environ1V.
ETIQUETTE COUVERCLE CLAVIER (VERS. KP100D)
Une fois l'installation terminée, compléter l'étiquette (A) en indiquant
les emplacements et descriptions pour chaque point de détection.
Exemple: 01 : PORTE ENTREE.
AB
C
D
DESCRIPTION DIP-SWITCHES
ADRESSE CLAVIER
CLAVIER 1
TAMPER
CLAVIER 2
CLAVIER 3 CLAVIER 4
TAMPER HABILITE
TAMPER NON HABILITE
LE DIP SWITCH N.3 DOIT TOUJOURS ETRE SUR ON
FRANÇAIS
RÉGLAGECONTRASTEECRAN
Sur la carte il y a un trimmer pour le réglage du contraste de l’écran
du clavier KP100D.
OUVERTURE COFFRET
Ouvrir avec soin (en pressant avec un tournevis sur le point indiqué)
pour évite d’endommager avec le tournevis la carte du circuit imprimé.
INSTALACIÓN
• Se dispone de 2 tipos de teclados remotos:
-KP100D: teclado con display LCD (conectable con las centrales
MP110, MP108 y MP106);
-KP100: teclado con display por segmentos (conectable con
las centrales MP110, MP108 y MP105).
• Para la conexión de los teclados se aconseja el empleo de un
cable de 4 conductores encerrados, de los cuales dos de sección
0.75 (+/-) y 2 de sección 0.22 (CK/D).
• La distancia máxima entre la central y los teclados no debe
superar los 500 m.
• En el caso de la instalación de varios teclados (máx. 4) se puede
realizar una conexión de festón (fig. 2/A), de estrella (fig. 2/B) o
mixto entre los dos.
• En la parte posterior del contenedor existe un micro con protección
contra posibles extracciones o daños.
• En el caso de empleo con la central MP110 CIERRE LAS
ENTRADAS Z1, Z2 A NEGATIVO SI NO SE UTILIZAN .
• En el caso de empleo con la central MP105 las entradas Z1 y Z2
NO son controladas y, por lo tanto pueden permanecer abiertas.
• Tenga en cuenta el consumo de los teclados en el cómputo
general de la absorción de la instalación para permitir una
autonomía adecuada de la batería empleada.
Agujero para la fijación a la pared Agujero para los cables
Agujero para el paso del micro antitamper
Agujero para la fijación a la pared en en contenidor BTICINO 503
FIJACIÓN A LA PARED
TAMPER ANTIEXTIRPACIÓN/ANTIABERTURA
Para una corrcta instalación del sistema de antiextirpación/
antiabertura de la pared es necesario:
• Quitar el resorte del interruptor tamper
• Insertar en la pared un taco de 4/5mm hasta que el tornillo no
salga por lo menos unos 4mm como indicado en el dibujo
• Compruébase que, cuando la caja esté cerrada el interruptor se
atrete correctamente.
CARACTERÍSTICAS TÉCNICAS
Tensiónnominal dealimentación...................................12V—
Tensiónde funcionamentomínima.................................10,5V—
Tensiónde funcionamentomáxima................................15V—
Corrientenominalabsorbida a12V(vers. KP100)
Sectores todos en OFF .................................................18mA
Sectores todos en ON ...................................................21mA
Sectores todos en ON + retroil......................................48mA
Corriente max en test ....................................................70mA
Corrientenominalabsorbida a12V(vers. KP100D)
Sectores todos en OFF .................................................21mA
Sectores todos en ON ...................................................31mA
Sectores todos en ON + retroil......................................90mA
Corriente max en test ....................................................105mA
Tipodelenguaje ............................................................Serial
Protocolo .......................................................................Elkron
Longitud máxima de la línea serial desde la central ......500 m
Número max. de teclados conectables .........................4
Gradodeprotección delaenvoltura ..............................IP30/IK02
Número max. de combinaciones posibles .....................100.000
* La distancia máxima alcanzable esta directamente relacionada
con la sección del cable de alimentación (+ y–) de la misma
serial y con la absorción que existe en el otro extremo. Por
ello, tenga presente que cada 200m de cable 2x0.75 mm² con
100mAdeabsorción,determinanunacaídadealrededor de1V.
ETIQUETA TAPA TECLADO (VERS. KP100D)
Al terminar la instalaciõn, acuordanse completar la etiqueta (A) indicando
las ubicaciones y las descripciones para cada punto de señalizaciõn.
Por ejemplo: 01: PUERTA INGRESO.
AB
C
D
DESCRIPCIÓN DIP-SWITCHES
DIRECCIONES TECLADO
TECLADO 1
TAMPER
TECLADO 2
TECLADO 3 TECLADO 4
TAMPER HABILITADO
TAMPER DESHABILITADO
IL DIP SWITCH N.3 TIENE QUE ESTAR SIEMPRE EN POSICIÓN ON
ESPAÑOL
AJUSTE CONTRASTE DISPLAY
Sobre la ficha está presente trimmer para el ajuste del contraste
del display en el teclado KP100D.
ABRIR CONTENEDOR
Abrir con cautela (premendo con el tornillo en el punto indicado)
para evitar de dañar con el tornillo el circuito impreso.
ELKRON S.p.A.
Via Carducci, 3 - 10092 Beinasco (TO) - ITALY
TEL. +39.011.3986711 - FAX +39.011.3499434
www.elkron.it - mailto: [email protected]
21
3
4
5
6
7
7
6
5
4
3
1 2
Clavier Déporté
Teclado Remoto
IS0097-AH
12.2003
KP100
KP100D
B
A
1234
A
A
A A BB B
B
B
C
DD
KP100D
+-
A
1
2
3
4
5
6
7
MP
KP KPKP
KP KPKP
MP
This manual suits for next models

1

Other Elkron Keypad manuals

Elkron KP500D User manual

Elkron

Elkron KP500D User manual

Elkron KP600 Assembly instructions

Elkron

Elkron KP600 Assembly instructions

Elkron KP500D User manual

Elkron

Elkron KP500D User manual

Elkron KP120D User manual

Elkron

Elkron KP120D User manual

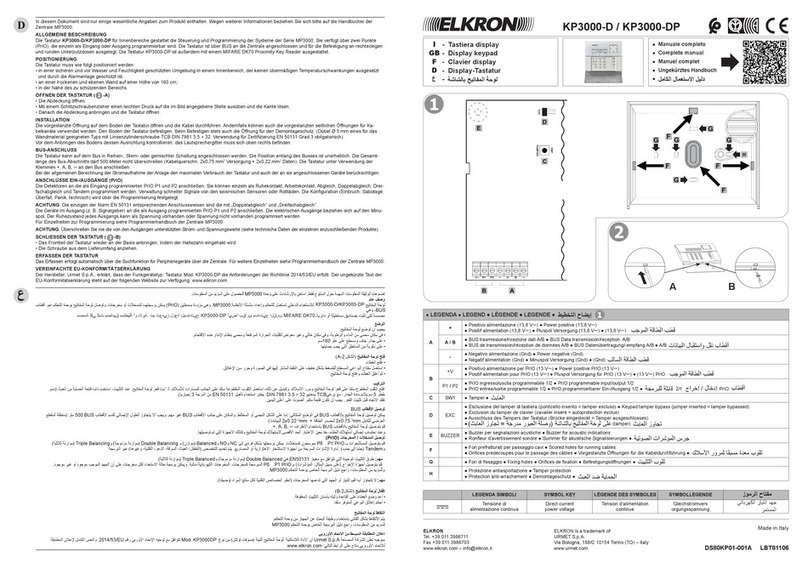
Elkron KP3000D User manual

Elkron

Elkron KP3000D User manual

Elkron MP504 Operating manual

Elkron

Elkron MP504 Operating manual

Elkron KP200 User manual

Elkron

Elkron KP200 User manual

Elkron KP500D/N User manual

Elkron

Elkron KP500D/N User manual

Elkron PRO MEDEA KP710D User manual

Elkron

Elkron PRO MEDEA KP710D User manual

Elkron KP3000-D User manual

Elkron

Elkron KP3000-D User manual

Elkron KP500DV/N User manual

Elkron

Elkron KP500DV/N User manual

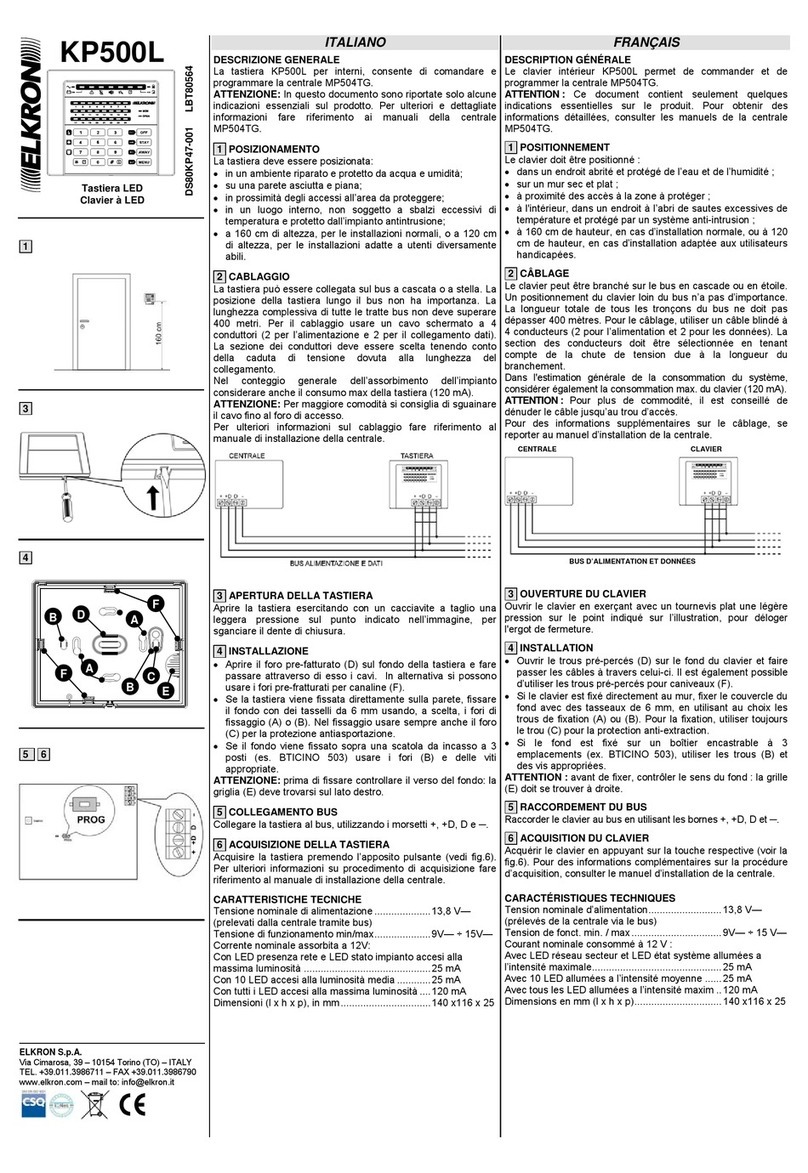
Elkron KP500L User manual

Elkron

Elkron KP500L User manual

Popular Keypad manuals by other brands

Blink Marine PKP-2400-SI user manual

Blink Marine

Blink Marine PKP-2400-SI user manual

Fermax MDS-AC+ Installer manual

Fermax

Fermax MDS-AC+ Installer manual

Sebury K2 manual

Sebury

Sebury K2 manual

SEA CUBE READER manual

SEA

SEA CUBE READER manual

Eurobraille ESYTOUCH user manual

Eurobraille

Eurobraille ESYTOUCH user manual

AMX MIO-ATTACHE Specifications

AMX

AMX MIO-ATTACHE Specifications

Ortek MS9600-02 user manual

Ortek

Ortek MS9600-02 user manual

Maxouttech RF-Keyfob-319 manual

Maxouttech

Maxouttech RF-Keyfob-319 manual

Contro l4 C4-SKC installation guide

Contro l4

Contro l4 C4-SKC installation guide

Orion OCL(B)1 operating instructions

Orion

Orion OCL(B)1 operating instructions

RCI 9325 quick start

RCI

RCI 9325 quick start

Interlogix NX1192E installation manual

Interlogix

Interlogix NX1192E installation manual

Radionics D205 installation instructions

Radionics

Radionics D205 installation instructions

SECO-LARM SK3133-PPQ installation manual

SECO-LARM

SECO-LARM SK3133-PPQ installation manual

Intratone Haussmann 10-0201 manual

Intratone

Intratone Haussmann 10-0201 manual

Conlan C1000 user manual

Conlan

Conlan C1000 user manual

LEGRAND Vantage RK12E-A Series installation instructions

LEGRAND

LEGRAND Vantage RK12E-A Series installation instructions

Fasttel FT23K user guide

Fasttel

Fasttel FT23K user guide

manuals.online logo
manuals.online logoBrands
  • About & Mission
  • Contact us
  • Privacy Policy
  • Terms and Conditions

Copyright 2025 Manuals.Online. All Rights Reserved.