manuals.online logo
Brands
  1. Home
  2. •
  3. Brands
  4. •
  5. Emerson
  6. •
  7. Transmitter
  8. •
  9. Emerson Rosemount 4600 User manual

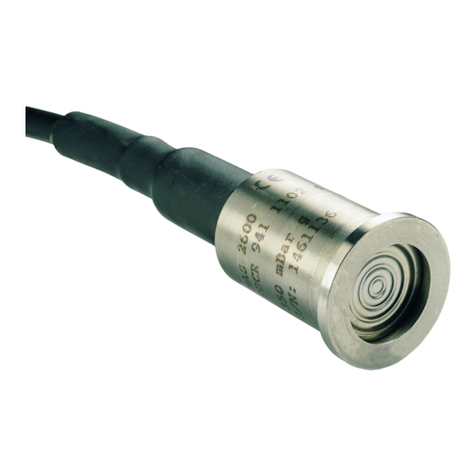
Emerson Rosemount 4600 User manual

Other manuals for Rosemount 4600

2

Other Emerson Transmitter manuals

Emerson Rosemount 708 User manual

Emerson

Emerson Rosemount 708 User manual

Emerson Rosemount 8732EM User manual

Emerson

Emerson Rosemount 8732EM User manual

Emerson Rosemount Oxymitter 4000 User manual

Emerson

Emerson Rosemount Oxymitter 4000 User manual

Emerson Rosemount 3051 Series User manual

Emerson

Emerson Rosemount 3051 Series User manual

Emerson Rosemount 3051P User manual

Emerson

Emerson Rosemount 3051P User manual

Emerson Rosemount 2051 Wireless Series User manual

Emerson

Emerson Rosemount 2051 Wireless Series User manual

Emerson Magtech LTM-350 Series Manual

Emerson

Emerson Magtech LTM-350 Series Manual

Emerson Rosemount 2051 User manual

Emerson

Emerson Rosemount 2051 User manual

Emerson Rosemount 702DX22 User manual

Emerson

Emerson Rosemount 702DX22 User manual

Emerson Rosemount 3051HT User manual

Emerson

Emerson Rosemount 3051HT User manual

Emerson Rosemount 2051 User manual

Emerson

Emerson Rosemount 2051 User manual

Emerson Rosemount 3051G User manual

Emerson

Emerson Rosemount 3051G User manual

Emerson Rosemount Oxymitter 4000 User manual
Emerson

Emerson Rosemount Oxymitter 4000 User manual

Emerson Micro Motion 4700 User manual

Emerson

Emerson Micro Motion 4700 User manual

Emerson Rosemount 8732EM User manual

Emerson

Emerson Rosemount 8732EM User manual

Emerson Micro Motion 5700 Quick guide

Emerson

Emerson Micro Motion 5700 Quick guide

Emerson Rosemount 1066 User manual

Emerson

Emerson Rosemount 1066 User manual

Emerson Rosemount MultiVariable 3051SMV User manual

Emerson

Emerson Rosemount MultiVariable 3051SMV User manual

Emerson Rosemount 3051S Series User manual
Emerson

Emerson Rosemount 3051S Series User manual

Emerson Rosemount Wireless Permasense WT210 User manual

Emerson

Emerson Rosemount Wireless Permasense WT210 User manual

Emerson Rosemount 248 User manual

Emerson

Emerson Rosemount 248 User manual

Emerson CSI 9420 User manual

Emerson

Emerson CSI 9420 User manual

Emerson Rosemount 705 User manual

Emerson

Emerson Rosemount 705 User manual

Emerson PT5N FLR Series User manual

Emerson

Emerson PT5N FLR Series User manual

Popular Transmitter manuals by other brands

Seneca K120RTD installation manual

Seneca

Seneca K120RTD installation manual

Nautel GV40 installation manual

Nautel

Nautel GV40 installation manual

HumanTechnik cm-light operating instructions

HumanTechnik

HumanTechnik cm-light operating instructions

INOR APAQ C130 TC User instructions

INOR

INOR APAQ C130 TC User instructions

Linear DXS-64 operating instructions

Linear

Linear DXS-64 operating instructions

FeinTech ABT00102 instruction manual

FeinTech

FeinTech ABT00102 instruction manual

Geo Web Pack quick start guide

Geo

Geo Web Pack quick start guide

Inovonics EchoStream EN1210W installation instructions

Inovonics

Inovonics EchoStream EN1210W installation instructions

IKONNIK KA-6 quick start guide

IKONNIK

IKONNIK KA-6 quick start guide

Rohde & Schwarz SR8000 Series System manual

Rohde & Schwarz

Rohde & Schwarz SR8000 Series System manual

Audio Technica UniPak ATW-T93 Installation and operation

Audio Technica

Audio Technica UniPak ATW-T93 Installation and operation

NIVELCO EasyTREK SCA-300 Series Programming manual

NIVELCO

NIVELCO EasyTREK SCA-300 Series Programming manual

Honeywell 5816WMBR installation instructions

Honeywell

Honeywell 5816WMBR installation instructions

Kamstrup READy MTU Installation and operation guide

Kamstrup

Kamstrup READy MTU Installation and operation guide

Omega ZW Series user guide

Omega

Omega ZW Series user guide

ABB Field 264H Instructions for installation

ABB

ABB Field 264H Instructions for installation

Dejero EnGo 3x manual

Dejero

Dejero EnGo 3x manual

Rosemount 4600 Reference manual

Rosemount

Rosemount 4600 Reference manual

manuals.online logo
manuals.online logoBrands
  • About & Mission
  • Contact us
  • Privacy Policy
  • Terms and Conditions

Copyright 2025 Manuals.Online. All Rights Reserved.

Quick Start Guide
00825-0100-4022, Rev FA
September 2016
Rosemount™4600 Oil & Gas
Panel Pressure Transmitter
September 2016
2
Quick Start Guide
NOTICE
NOTICE
This guide provides basic guidelines for the Rosemount 4600 Oil & Gas Panel Pressure Transmitter. It
does not provide instructions for diagnostics, maintenance, service, troubleshooting,
explosion-proof, flameproof, or intrinsically safe (I.S.) installations. Refer to the Rosemount 4600
Reference Manual for more instruction. This manual is also available electronically on
EmersonProcess.com/Rosemount.
Explosions can result in death or serious injury.
Transmitters located in hazardous areas should be installed in accordance with local codes and
requirements for that area.
Use appropriately rated Ex adapters, blanking elements, and glands during installation.
Keep process insulation at least 1-in. [25 mm] from transmitter connection.
Electrical shock can result in death or serious injury.
Avoid contact with the leads and the terminals. High voltage that may be present on leads can
cause electrical shock.
Apply torque only to the hex flat located at the process end of the transmitter. Do not apply torque to
the transmitter body or electrical connection - severe damage could result. Do not exceed 100 ft-lbs.
Contents
Mount the transmitter . . . . . . . . . . . . . . . . . . . . 3
Connect the wiring and power . . . . . . . . . . . . . 3
Configure the transmitter . . . . . . . . . . . . . . . . . 4
Trim the transmitter . . . . . . . . . . . . . . . . . . . . . . 6
Product Certifications . . . . . . . . . . . . . . . . . . . . 10
Quick Start Guide
3
September 2016
1.0 Mount the transmitter
1.1 Electrical connection
1. Pull the leads through the threaded mounting hole in the panel wall.
2. Hand tighten the electrical connection into the mounting hole.
3. Using a wrench on the hex flat at the process connection, apply sufficient
torque to prevent transmitter vibration. Do not exceed 100 ft-lbs.
1.2 Process connection
1. Hand tighten the appropriate sized impulse piping connector into the process
connection.
2. Using a wrench on the hex flat at the impulse piping connection, apply
enough torque to prevent process fluid leakage. Do not exceed 100 ft-lbs.
2.0 Connect the wiring and power
Use the following steps to wire the transmitter:
1. Connect the red lead to the “+” terminal of the power supply.
2. Connect the black lead to the “-” terminal of the I/O card on the PLC.
3. Connect the green lead to panel ground.
The figure below shows the wiring connections necessary to power a Rosemount
4600 and enable communications with a hand-held Field Communicator.
Figure 1. Rosemount 4600 Field Wiring
A. Rosemount 4600
B. RL> 250 ohm
C. Power supply
D. I/A card
E. PLC
F. Field Communicator
A
F
B
C
D
E
September 2016
4
Quick Start Guide
2.1 Power supply
The dc power supply should provide power with less than two percent ripple. The
total resistance load is the sum of the resistance of the signal leads and the load
resistance of the controller, indicator, and related pieces. Note that the resistance
of intrinsic safety barriers, if used, must be included.
3.0 Configure the transmitter
Note:
A check (✓) indicates the basic configuration parameters. At a minimum, these parameters should
be verified as part of the configuration and startup procedure.
Figure 2. Load Limitation
Maximum Loop Resistance = 43.5 * (Power Supply Voltage – 11.25)
The Field Communicator requires a minimum loop resistance of 250Ωfor communication.
Table 1. Field Communicator Fast Key Sequence
Function Fast Key sequence
Alarm Level Config. 1, 4, 2, 7, 7
Alarm and Saturation Levels 1, 4, 2, 7
Analog Output Alarm Direction 1, 4, 2, 7, 6
Analog Output Trim 1, 2, 3, 2
Burst Mode On/Off 1, 4, 3, 3, 3
Burst Options 1, 4, 3, 3, 4
✓Damping 1, 3, 6
Date 1, 3, 4, 1
Descriptor 1, 3, 4, 2
1387
11.25 20 30 42.4
0
500
1000
Voltage (V dc)
Load (Ohms)
Operating
Region
Quick Start Guide
5
September 2016
Digital To Analog Trim (4-20 mA Output) 1, 2, 3, 2, 1
Field Device Information 1, 4, 4, 1
Loop Test 1, 2, 2
Lower Sensor Trim 1, 2, 3, 3, 2
Message 1, 3, 4, 3
Number of Requested Preambles 1, 4, 3, 3, 2
Pressure Alert Config. 1, 4, 3, 5, 3
Poll Address 1, 4, 3, 3, 1
Poll a Multidropped Transmitter Left Arrow, 4, 1, 1
Re-mapping 1, 4, 3, 6, 4
Rerange- Keypad Input 1, 2, 3, 1, 1
Saturation Level Config. 1, 4, 2, 7, 8
Scaled D/A Trim (4–20 mA Output) 1, 2, 3, 2, 2
Scaled Variable Config. 1, 4, 3, 4, 7
Self Test (Transmitter) 1, 2, 1, 1
Sensor Information 1, 4, 4, 2
Sensor Temperature 1, 1, 4
Sensor Trim 1, 2, 3, 3
Sensor Trim Points 1, 2, 3, 3, 5
Status 1, 2, 1, 2
✓Tag 1, 3, 1
Temperature Alert Config. 1, 4, 3, 5, 4
Transmitter Security (Write Protect) 1, 3, 4, 5
✓Units (Process Variable) 1, 3, 2
Upper Sensor Trim 1, 2, 3, 3, 3
Zero Trim 1, 2, 3, 3, 1
Table 1. Field Communicator Fast Key Sequence
Function Fast Key sequence
September 2016
6
Quick Start Guide
4.0 Trim the transmitter
Note
Transmitters are shipped from Emerson™Process Management fully configured per request or by
the factory default of full scale (span = upper range limit.)
4.1 Zero trim
A zero trim is a single-point adjustment to compensate mounting position and
sealed gauge pressure effects. When performing a zero trim, ensure the
transmitter is vented to atmosphere.
4.2 Using the Field Communicator
1. Vent the transmitter to atmosphere and connect Field Communicator.
2. At the main menu, input the Fast Key sequence.
3. Follow the commands to perform a zero trim.
4.3 Using the transmitter zero adjustment target
1. Vent the transmitter.
2. Set the 4 mA point by touching the magnetic end of the provided adjustment
tool to the zero target (Z) on the transmitter. You must maintain contact for at
least two seconds, but no longer than 10 seconds for the zero function to
activate.
3. Verify the output is 4 mA.
Figure 3. Local Zero and Span Target Locations
A. Magnetic span target
B. Magnetic zero target
Fast Keys 1, 3, 3, 2
A
B
Quick Start Guide
7
September 2016
5.0 Safety Instrumented Systems
The following section applies to Rosemount 4600 Transmitters used in SIS
applications.
Note
Transmitter output is not safety-rated during the following: configuration changes, multidrop,
loop test. Alternative means should be used to ensure process safety during transmitter
configuration and maintenance activities.
Installation
No special installation is required in addition to the standard installation practices
outlined in this document.
The loop must be designed so the terminal voltage does not drop below
11.25 Vdc when the transmitter output is 22.5 mA.
Configuration
Use any HART®-compliant master to communicate with and verify configuration
of the Rosemount 4600.
User-selected damping will affect the transmitters ability to respond to changes
in the applied process. The damping value + response time must not exceed the
loop requirements.
Note
DCS or safety logic solver must be configured to match transmitter configuration. Figure 4
identifies the two alarm levels available and their operation values. Change the alarm direction to
the required HI or LO alarm position.
Figure 4. Alarm Levels
Reference Table 1 for the Fast Keys to change alarm position.
Namur alarm Level
1. Transmitter Failure, alarm in LO position.
2. Transmitter Failure, alarm in HI position.
Normal
Operation 20.8 mA
high saturation
21.75(2)
3.9 mA
low saturation
3.75 mA(1) 20 mA
4 mA
Normal
Operation
4 mA 20 mA20.5 mA
high saturation
22.5(2)
3.8 mA
low saturation
3.6 mA(1)
September 2016
8
Quick Start Guide
Note
Some detected faults are indicated on the analog output at a level above high alarm regardless of
the alarm selection.
6.0 Operation and maintenance
Proof test and inspection
The following proof tests are recommended. Proof test results and corrective
actions taken must be documented at
EmersonProcess.com/Rosemount/Safety-Products/Equipment-List.in the event
that an error is found in the safety functionality.
Reference Table 1 for the Fast Keys to perform a Loop Test, Analog Output Trim,
or Sensor Trim. See the Rosemount 4600 Reference Manual for additional
information.
Proof test
This proof test will detect 90 percent of DU failures not detected by the
Rosemount 4600 automatic diagnostics.
1. Conduct a loop test. On Field Communicator enter the Fast Key sequence
1,2,2.
a. Enter the milliampere value representing a high alarm state and verify that
the analog current reaches that value(1).
b. Enter the milliampere value representing a low alarm state and verify that
the analog current reaches that value(2).
2. Perform a two-point sensor calibration check(3) using the 4–20 mA range
points as the calibration points.
a. If necessary, use one of the trim procedures available in the Rosemount
4600 Reference Manual to calibrate.
Note
The user determines the proof-test requirements for impulse piping.
Product repair
All failures detected by the transmitter diagnostics or by the proof-test must be
reported. Feedback can be submitted electronically at
EmersonProcess.com/Rosemount/Safety-Products/Equipment-List
1. This tests for compliance voltage problems such as a low loop power supply voltage or increased wiring resistance.
This also tests for other possible failures.
2. This tests for possible quiescent current related failures.
3. If the two-point calibration is performed with electrical instrumentation, this proof tests will not detect any failures
of the sensor.
Quick Start Guide
9
September 2016
6.1 Reference
Specifications
The transmitter must be operated in accordance to the functional and
performance specifications provided in the reference manual.
Failure rate data
The FMEDA report includes failure rates. This report is available at
EmersonProcess.com/Rosemount.
Rosemount 4600 safety failure values
Safety accuracy: 2.0%(1)
Safety response time- 1.5 seconds
Product life
50 years – based on worst case component wear-out mechanisms – not based on
wear-out process wetted materials.
1. A 2% variation of the transmitter mA output is allowed before a safety trip. Trip values in the DCS or safety logic
solver should be derated by 2%.
September 2016
10
Quick Start Guide
7.0 Product Certifications
Rev 1.3
7.1 European directive information
A copy of the EU Declaration of Conformity can be found at the end of the Quick
Start Guide. The most recent revision of the EU Declaration of Conformity can be
found at EmersonProcess.com/Rosemount.
7.2 Ordinary Location Certification
As standard, the transmitter has been examined and tested to determine that the
design meets the basic electrical, mechanical, and fire protection requirements
by a nationally recognized test laboratory (NRTL) as accredited by the Federal
Occupational Safety and Health Administration (OSHA).
North America
E5 US Explosionproof (XP) and Dust-Ignitionproof (DIP)
Certificate: 3012302
Standards: FM Class 3600 - 2011; Class 3615 - 2006; FM Class 3810 - 2005;
NEMA 250 - 1991; ANSI/ISA-S12.0.01 - 1998; ANSI/ISA-S12.22.01- 1998;
ANSI/ISA-60079-0 - 2009;
Markings: Explosionproof for Class I, Division 1, Groups B, C, and D; Flameproof for
Class 1, Zone 1 AEx d IIC T5 (–40 °C to 85 °C); Dust-ignition proof for Class II
and Class III, Division 1, Groups E, F, and G; Temperature Code T5
(Tamb= –40 °C to 85 °C); Enclosure Type 4X; Conduit seal not required.
I5 US Intrinsic Safety (IS), Nonincendive (NI)
Certificate: 3012302
Standards: FM Class 3600 - 2011; Class 3610 - 2010; Class 3611-2004; NEMA 250 -
1991; ANSI/ISA-S12.0.01 - 1998; ANSI/ISA-S12.22.01 - 1998;
ANSI/ISA-60079-0-2009; ANSI/ISA-60079-11- 2009
Markings: Intrinsically Safe for use in Class I, Division 1, Groups A, B, C, and D;
Temperature Code T4 (–50 °C to 70 °C); Intrinsically Safe for use in Class I,
Zone 0 AEx ia IIC T4 (–50 °C to 70 °C) in accordance with control drawing
04620-5007; Nonincendive for Class I, Division 2, Groups A, B, C, and D
when connected in accordance with Rosemount drawing 04620-5007;
Enclosure Type 4X
E6 Canada Explosionproof and Division 2
Certificate: 1384913
Standards: CSA Std C22.2 No. 25-1966; CSA Std C22.2 No. 30-M1986; CAN/CSA-C22.2
No. 94-M91; CSA Std C22.2 No. 142-M1987; CAN/CSA-C22.2 No. 157-92;
CSA Std C22.2 No. 213-M1987; CAN/CSA-E79- 0-95; CAN/CSA- E79-1-95;
CAN/CSA- E79-11-95; ANSI/ISA No. 12.27.01-2011
Markings: Explosionproof for Class I, Division 1, Groups B, C, and D; Dust-Ignitionproof
for Class II and Class III, Division 1, Groups E, F, and G; Temperature Code T5
(–50 °C to 40 °C); Explosion-proof for Class 1, Zone 1 Ex d IIC T5 (–20 °C to
40 °C); Suitable for Class I, Division 2, Groups A, B, C, and D when installed
per Rosemount drawing 04620-5005; Enclosure Type 4X; Conduit seal not
required.