ENCAD CADJET 3D User manual

CADJET
®
3D
Wide Format Inkjet Printer
Quick Start Guide
P/N 215058-02 Rev. AA
(Text P/N 215318-1 Rev. C)
Copyright © ENCAD, Inc. 2000-2001
ENCAD®, NovaJet®, CADJET®, NovaXsell™, Posterizer™, Quality
Imaging Supplies™, Extreme Color Printing™, and Graphic Outdoor
Matched System™ (GO) are trademarks of ENCAD, Inc.
Other trademarks and registered trademarks are the property of their
respective owners.
No part of this manual may be copied or distributed, transmitted,
transcribed, stored in a retrieval system, or translated in any human or
computing language, in any form or by any means, electronic,
mechanical, magnetic or otherwise, or disclosed to a third party without
the express written permission of: ENCAD, Inc., 6059 Cornerstone Court
West, San Diego, CA 92121, U.S.A.
Revision History
Rev.A March 2000
Rev. B April 2000
Rev. C March 2001
ENGLISH

CADJET®3D Quick Start Guide
2
Other reference materials
In addition to this guide, the following additional documentation is included with your
printer:
Three CD-ROMs
One CD-ROM contains sample images.
The System CD-ROM contains:
•User Guide, which provides complete information regarding the printer's options;
•Maintenance Guide, instructions for maintaining your printer; and
•print server software.
The remaining CD-ROM contains the V/R Xpress RIP software.
Check ENCAD's website atwww.encad.com for the latest documentation for your printer.

ENGLISH
CADJET®3D Quick Start Guide
3
Unpacking your printer................................................................................. 5
Assembling the printer stand........................................................................ 5
Removing protective shipping material ........................................................... 8
Connecting power and your computer ........................................................... 8
Using the control panel ................................................................................ 9
Choosing menu functions ............................................................................. 9
Setting the language ..................................................................................10
Loading media ...........................................................................................10
Moving the carriage ....................................................................................11
Installing the cutter.....................................................................................12
Filling the ink reservoirs ..............................................................................13
Inspecting the ink cartridges .......................................................................14
Installing the ink cartridges .........................................................................15
Priming the ink delivery lines .......................................................................16
Printing the color test .................................................................................19
Printing the prime pattern............................................................................20
Clogged jets ..............................................................................................21
Aligning the ink cartridges ...........................................................................22
Paper axis calibration .................................................................................24
Cartridge recognition ..................................................................................25
Connecting the printer to your computer .......................................................26
Installing software ......................................................................................37
Making a test print .....................................................................................41
Pausing the printer .....................................................................................42
Cancelling a print .......................................................................................42
Registering your printer...............................................................................42
Contents

CADJET®3D Quick Start Guide
4
This page is intentionally blank.

ENGLISH
CADJET®3D Quick Start Guide
5
Quick Start
Congratulations on your purchase of an ENCAD CADJET 3D wide format
color printer. This guide gives you details on the following:
•unpacking and assembling the printer
•loading media
•filling ink reservoirs
•installing ink cartridges
•installing the media cutter
•testing ink cartridges
•installing software.
Unpacking your printer
Your printer is shipped in two boxes.
Box 1 contains the printer and accessory box (which contains CDs, Quick
Start Guide, screws, screwdriver, cartridges, loupe, cutters, inks, print server,
power cord and roll guides).
Box 2 contains the stand, basket and ink primer.
You will need to provide an IEEE 1284 parallel cable for connecting to a PC
parallel port locally or an RJ45 crossover cable to connect the print server on a
network.
Assembling the printer stand
1Locate the box containing the printer and turn it upside down.
Open the box and remove the plastic bag from around the printer.
Then, remove the accessory box which contains the screws and
screwdriver to use for the following steps.
2Open the box containing the stand and remove the stand from the
box. Remove the packing material from the legs.
3Note that each foot has two casters, only one of which locks.
Lock the casters to prevent the stand from rolling during
subsequent assembly.

CADJET®3D Quick Start Guide
6
4Orient the stand legs so that they align with the holes in the bottom of
the printer head. Attach both stand legs to the printer head using the
screwdriver and eight screws contained in the accessory box.
5Two persons are required to lift the printer. Remove the assembled
printer and stand from the box. Save the boxes and packing
materials in case you need to ship the printer.

ENGLISH
CADJET®3D Quick Start Guide
7
6Attach the basket to the legs using the screws and thumbscrews
provided. Use the two thumbscrews on the front portion of the
basket. When the basket is not in use, you can loosen the
thumbscrews and move the basket up out of the way. Tighten the
thumbscrews to secure the basket out of the media path.
7Attach the left and right roll guides to the back of the printer as
shown below. Turn the thumbscrew (blue knob) to secure them in
position.

CADJET®3D Quick Start Guide
8
Removing protective shipping material
CAUTION: Before turning on the printer, make sure to remove the protective
material that secures the carriage. Remove the protective film from the control
panel and remove the tape from the ink reservoir cover. Do not remove black
tape affixed to left and right sides of the carriage assembly. Remove the tie wrap
that secures the cartridge carriage.
Connecting power and your computer
An IEEE 1284 parallel cable is required to connect the printer directly to your PC
computer. For network configuration, refer to the section on Network Consid-
erations later in this guide. For serial cable configuration and setting serial
communications options, refer to Appendix B in the User Guide on your System
CD-ROM.
1Plug the power cord into the power inlet at the rear of printer.
2Plug the printer cable into the connector at the rear of the printer. For
connecting to a PC, use an IEEE 1284 parallel cable.
3To turn on the printer, turn the power switch on at the rear of the
printer. The control panel will display the printer's model name, the
firmware version, status and progress of the power on self-test, and
status.

ENGLISH
CADJET®3D Quick Start Guide
9
Using the control panel
The control panel at the right side of the printer includes eight buttons and a
display which indicates modes and settings. An overview is provided here so that
you can load media and ink cartridges. Details on menu options are included in
the User Guide on the system CD-ROM. The menu tree in Appendix C of the
User Guide also gives you a summary of all the printer modes and their func-
tions.
Two types of menus are displayed: action menus provide a list of additional
menus or immediate tasks to perform, such as Cut, Load Media, etc. Selection
menus let you view and modify values.
Choosing menu functions
To select a function, press the button adjacent to the function displayed.
The display will list options available for the selected function. Press the button
for the option you want and press OK to accept the selection.
Depending on the type of menu, you can return to the previous menu level by
pressing the OK or Exit button. There is no way to immediately return to the top
level menu.
Press the Cancel button to restore the previous setting and exit the menu.
Refer to the User Guide on the System CD for a description of all the menu
features.

CADJET®3D Quick Start Guide
10
Setting the language
With the appropriate firmware version, your printer can display menu items and
messages in English, German, French, Italian, Portuguese, Spanish, Japanese,
Simplified Chinese, Traditional Chinese or Korean.
➪To change the language
1Press Setup Menu/User Setup Menu/Language, and select the
language you want.
2Press OK.
Loading media
You can use either roll or single sheet media. To ensure straight paper loading
and avoid skewing, be sure to hold the media parallel to the platen. Use the load
lines on the back of the platen as a guide to correctly align the media. Be sure to
load from the back only. Set the roll holders to the width of the media.
!IMPORTANT! It is very important to use only ENCAD media with your
printer. Some third party media have been found to generate electrostatic
discharge in excess of 20 KV. Emissions of this level can cause arcing.
These conditions can be temporary or permanent.
!If your roll media has wrinkled or damaged edges, cut off the damaged part
of the roll prior to loading to prevent the media from jamming in the printer.
➪To load roll media
1Mount the roll media on the back of the printer, orienting it as shown
in the following illustration. Slide the roll holders into the media core,
and tighten the thumbscrews on the roll holders to secure the roll.
2Insert the media's leading edge into the back of the printer, aligning
the paper edge with the alignment mark on the platen. The printer will
sense the presence of the media and feed it automatically.

ENGLISH
CADJET®3D Quick Start Guide
11
Feed Roll
Left side view
Media presence
sensor
Loading roll media
➪To load sheet media
1Press Setup Menu/Paper Options Menu/Supply Type/Sheet.
Press OK.
2Load the sheet from the back of the printer, aligning it with the
alignment mark on the platen.
3Make sure that the media is flat and under the rollers. After a few
seconds, the printer will automatically sense the media's presence
and load it until it reaches the start position on the platen.
Note: Make sure the roll guides are moved out of the paper path. If not,
the paper exiting the printer and hitting the roll guides could cause
skewing.
Moving the carriage
When not in use, the ink cartridges rest in the service station at the right side of
the printer. This device seals the inkjets to prevent them from drying out. With
the power turned on, select Utility Menu/Access Cartridge on the control
panel to move the carriage away from the service station so that you can install,
change, adjust or clean the ink cartridges, change the cutter, or clean the service
station. Do not move the carriage manually as you could damage the
printer.

CADJET®3D Quick Start Guide
12
Installing the cutter
A cutter located in the ink cartridge carriage cuts roll media. The printer is
shipped with the cutter installed.
!Be careful when handling the cutter to avoid injury.
!Cutting media with a worn cutter can cause the media to jam and create
a ragged cut line. Replace the cutter to avoid this condition. Do not cut
media on the printer with an external knife, as you could seriously dam-
age the platen and void the warranty.
➪To install the cutter
1Press Utility Menu/Access Cartridge button to move the carriage
out from the service station.
2The cutter fits in the printer on the left side of the carriage. To remove
an older cutter, push the cutter lever down and pull it out. Install the
new cutter by pushing it into the slot until it clicks into place.
3Press Utility Menu/Access Cartridge to move the carriage back
into the service station. This ensures that the cutter blade is in the
home position.

ENGLISH
CADJET®3D Quick Start Guide
13
Filling the ink reservoirs
The printer can support long, uninterrupted printing runs because of the large
capacity of each of the four ink reservoirs. The ink reservoirs are located in the
printer's left side cover.
A reorder line on the reservoir reminds you when to reorder ink. You may refill
above the fill line, but never higher than one inch from the top of the reservoir.
Note: Refill reservoirs when the ink level is approximately 50ml or 1/4 inch
from the bottom. Allowing ink levels to drop lower increases the risk of getting
air in the ink lines and losing pressure.
➪To fill the ink reservoirs
1Open the cover on the left side of the printer to access the ink
reservoirs. Unscrew and remove the cap of one reservoir. Open
only one reservoir at a time to prevent contamination with other ink
colors.
2Make sure the ink color and type matches the reservoir and pour in.
Be sure there is no excess ink on the inside of the reservoir cap.
Replace the cap loosely on the reservoir - do not overtighten.
3Repeat for the remaining reservoirs, then close the cover.

CADJET®3D Quick Start Guide
14
Inspecting the ink cartridges
Ink cartridges are supplied in housings which must be removed before
the cartridge is installed. To remove the cartridge housing, press back on
the tab and pull the cartridge forward.
Shipping Cap
Pull back on
tab to remove
cartridge
Visually inspect each cartridge before installing. Make sure the blue tape
is intact on the jet area of the cartridge. (Do not remove the tape or
shipping cap at this time! They will be removed later.)
Inspect the IC chip on the cartridge. Make sure it is secure and in
approximately the location shown on the following figure. If any cartridge
is damaged, contact your authorized reseller for return/replacement of
the defective cartridge.
Shipping Cap
Cartridge
Recognition
Chip
Flex
Contact
Area
Jet Area

ENGLISH
CADJET®3D Quick Start Guide
15
Installing the ink cartridges
This printer uses only cartridges specifically designed for it. They are not com-
patible with cartridges designed for other printer models. Use of other cartridges
may damage the printer and/or prevent it from printing. Ink cartridges ship
prefilled with ink.
➪To install the ink cartridges
!Do not touch the jet area or the flex contact area of the ink cartridge.
!Work with only one ink color at a time to prevent contamination.
!Caution: Never manually move the carriage. Injury can result from
unintentional carriage movement.
1With printer power on, press Utility Menu/Access Cartridge to
move the carriage to the position which allows replacement of the ink
cartridges.
2Cartridges are prefilled and preprimed. Remove the cartridge from
the housing and remove the shipping cap.
3Install the cartridge bottom first into the correct slot on the carrier.
DO NOT REMOVE THE BLUE TAPE FROM THE JET PLATE. Tilt
the cartridge up until it clicks into place. Make sure the cartridge is
firmly seated.
Cartridge
tube assembly

CADJET®3D Quick Start Guide
16
Priming the ink delivery lines
After filling the ink reservoirs, you will need to prime each of the four ink deliv-
ery lines to establish ink flow through the lines and ink cartridges. The ink primer
is provided for this purpose. Be sure it has batteries in it before continuing.
Switch
Sight
Tube
When filling more than one color of ink, be sure to thoroughly wipe any excess
ink from the ink primer before working with the next color to avoid the possibility
of contamination.
➪To install tube needle assemblies and prime the delivery
lines
1Snap the tube needle assembly connector into the fitting on the
carrier. Insert the needle into the small hole on the ink primer.

ENGLISH
CADJET®3D Quick Start Guide
17
2Press the button on the ink primer to activate the vacuum and draw
ink from the reservoir into the needle.
3When ink is visible in the ink primer sight tube (should take 5-10
seconds), remove the cartridge needle from the ink primer and
quickly insert it into the hole in the top of the ink cartridge. Be sure
the needle is tightly connected by turning the fitting clockwise until
finger-tight.
4Gently tighten the fitting (about 1/4 turn) to prevent air leaks. Do not
overtighten. Wait 20 seconds for the ink pressure to stabilize.
5Remove the cartridge from the carriage and remove the blue tape
from the jet area of the cartridge. CAUTION! Do not tilt the
cartridge up higher than a 30 degree angle. This could cause
the cartridge to lose pressure.
6Rotate the cartridge one complete revolution counterclockwiseto
ensure that there are no twists in the ink delivery line.
Check for ink on the jet plate. Continuous bleeding of the jet plate
indicates a loss of vacuum in the cartridge or an air leak in the lines.
A small amount of ink can be cleaned off the jet plate by dabbing with
a moist, lint-free cloth.

CADJET®3D Quick Start Guide
18
7Insert the cartridge into the carriage.
8Repeat with each cartridge.
9Press Utility Menu/Access Cartridge to return the carriage to the
service station.
10 Print the color test, prime test pattern and paper axis test as
described later in this guide.
11 If all colors look fine, go on to step 15. If any color drops out, prime
cartridges as necessary, using the ink primer. Place the suction end
of the ink primer over the jet area of the cartridge.
Switch
Sight
Tube
12 Make sure the ink primer is making good contact with the jet area.
Pulse the pump 3 - 5 times, until the ink is visible in the ink primer
sight tube. Maintain good contact between the inkjet plate and the
pump for an additional 5 seconds.

ENGLISH
CADJET®3D Quick Start Guide
19
When removing the ink primer, use the silicon tip to wipe and clean
the jet plate. Remember to clean the silicon tip of ink before moving
to the next cartridge.
13 Reprint the color test and prime test pattern. (The paper axis test is
only required when changing media). Inspect to ensure proper
pressure is maintained for each color.
14 Re-prime cartridges as necessary to remove clogs. Manually
bypass (compensate) clogged jets as necessary. Manual
compensation is described later in this guide.
15 Once all cartridges are working correctly, print the color deadband
and color calibration test patterns as described in the section on
Aligning the ink cartridges which follows.
Printing the color test
Printing the color test verifies a proper manual prime and that pressure is set
properly.
➪To print the color test
1Be sure media is loaded in the printer.
2Select Utility Menu/Service Menu/Diagnostics/Color Test.
3Change the color test percentage to 100% and pressOK.
The test prints.
4Verify that all bands print a solid pattern. This indicates that the
cartridges were properly primed. If it doesn't print a solid pattern,
run the color test again.

CADJET®3D Quick Start Guide
20
Printing the prime pattern
Before printing and during printing, the printer wipes the ink cartridge jets at the
service station. This function is user selectable during printing or between prints.
Still, ink cartridge jets can become clogged, especially with prolonged exposure to
the air or with nonuse. Printing the Prime pattern helps to clear the jets and to
check that the ink cartridges fire properly. We recommend that you print the
prime pattern daily to ensure the best possible print quality.
The printer includes a feature called Open Jet Detection and Compensation. This
feature helps maintain optimal print quality and gives you the confidence to print
long, unattended jobs. During multi-pass printing, the printer will automatically
compensate for jets found to be electrically damaged. The only intervention
needed is to verify that there are no clogged jets and then choose which print
mode is most appropriate for your needs. This is done by printing the Prime test
pattern and then setting the print mode accordingly.
➪To print the prime pattern
1With media loaded, press Utility Menu/Prime.
A test pattern prints. It should be smooth with no obvious banding.
2If the printed results are unsatisfactory, run the test several more
times to unclog the inkjet nozzles.
➪To interpret the Prime test pattern
The test pattern consists of bands of color for each cartridge and a
sloping line. Within the Prime test pattern, each jet is represented
with a short horizontal line. Together, these short horizontal lines
form a “stair step” pattern. Clogged jets appear as missing or
misdirected lines in the “stair step” pattern. Electrically defective jets
appear as solid bars. Electrically defective jets can be automatically
compensated in certain modes. The print modes for which
compensation is available are shown clearly above the Prime.
Other manuals for CADJET 3D
1
Table of contents
Other ENCAD Printer manuals
ENCAD
ENCAD Encad NovaJet 1000i User manual
ENCAD
ENCAD NovaJet PRO 600e User manual

ENCAD
ENCAD NovaJet 500 Manual
ENCAD
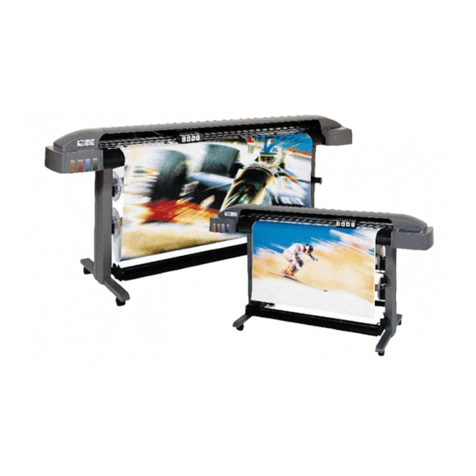
ENCAD CADJET 3D User manual
ENCAD
ENCAD 60e User manual
ENCAD
ENCAD CADJET 2 User manual
ENCAD
ENCAD 215319-1 User manual
ENCAD
ENCAD CADJET User manual
ENCAD
ENCAD NovaJet 4 User manual

ENCAD
ENCAD VinylJet 36 User manual
ENCAD
ENCAD NovaJet 630 User manual

ENCAD
ENCAD Croma 24 User manual
ENCAD
ENCAD NovaJet 800 Series User manual

ENCAD
ENCAD NovaJet 880 User manual

ENCAD
ENCAD ENCAD T200+ User manual
ENCAD
ENCAD CROMA24 User manual

ENCAD
ENCAD VinylJet 36 User manual

ENCAD
ENCAD NovaJet PRO 600e User manual

ENCAD
ENCAD NovaCut 24 User manual

ENCAD
ENCAD CROMA24 User manual
