manuals.online logo
Brands
  1. Home
  2. •
  3. Brands
  4. •
  5. Epilog Laser
  6. •
  7. Engraver
  8. •
  9. Epilog Laser MINI User manual

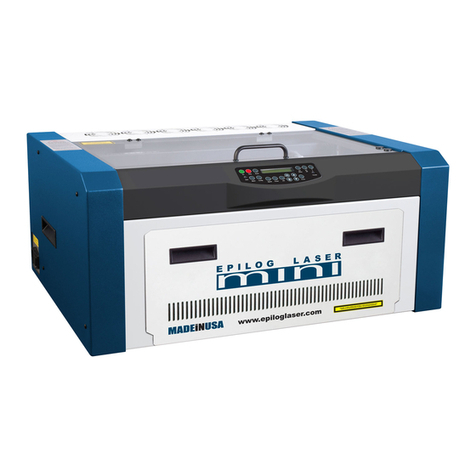
Epilog Laser MINI User manual

Fan Assembly Upgrade
Mini / Helix
Revision Date: 2/21/2013 pg. 1 of 11
EPILOG LASER
16371 Table Mountain Parkway
Golden, Colorado 80403
Phone 303-215-9171
FAX 303-277-9669
www.epiloglaser.com
Fan Assembly Upgrade
For the Epilog Mini / Helix
2/21/2013
Requirements:
Tools:
•Phillips Head Screwdriver
•Flathead Screwdriver
•3/16” Nut Driver or Socket Wrench
•Wire Snips
Parts
:
•MT314 – Motor Fan Kit Upgrade
•(or) MT315 – Motor Fan Kit Upgrade w/ AS07000ATT-03-M-02 X Motor
Overview:
This procedure will cover installing the fan assembly for the X axis motor.
Fan Assembly Upgrade
Mini / Helix
Revision Date: 2/21/2013 pg. 2 of 11
Procedure A: Removing the Old Motor
Step 1
Unplug the engraver from its power source
Step 2
Remove both side panels.
Step 3
Remove cover on I-Beam.
Step 4
Loosen the X axis belt as follows.
1. On the left side of the I-Beam, locate the idler
pulley that the Belt wraps around. It is mounted to
a sliding plate which has two screws and a spring
attached.
2. Loosen the two Philips screws that hold the sliding
plate in place. (Do not remove the screws).
3. Push the pulley to the right hand side of the
engraver. The pulley should slide with the plate
towards the center of the machine forcing the
spring to stretch.
4. While holding the pulley to the right hand side of
the engraver, tighten the screw towards the rear of
the engraver. This will hold the pulley in place.
Step 4-B
Step 4-C & 4-D
Fan Assembly Upgrade
Mini / Helix
Revision Date: 2/21/2013 pg. 3 of 11
Step 5
Identify the Motor Assembly on the right side of the I-Beam. Locate the motor wires (red and
Black twisted wire with a black quick disconnect at the end) and disconnect them by unplugging the black
quick disconnect which is connected to the circuit board just to the rear of the motor.
Step 6
Identify and unscrew the Captive Screws which mount the motor to the I-Beam.
NOTE: The captive screws will not release from the Motor Bracket.
Step 7
Remove the motor by pulling it straight up. You may need to angle the motor slightly so that the
belt falls from the drive pulley.
Fan Assembly Upgrade
Mini / Helix
Revision Date: 2/21/2013 pg. 4 of 11
Fan Assembly Upgrade
Mini / Helix
Revision Date: 2/21/2013 pg. 5 of 11
Procedure B: Removing the old PCB and Cover Plate
Step 1
Disconnect the Y Axis ribbon cable from the X/Y Interface PCB.
Step 2
Disconnect the X axis ribbon cable from the X/Y Interface PCB.
Step 3
Remove the screws on the top of the Cover Plate, remove and discard the cover plate.
Fan Assembly Upgrade
Mini / Helix
Revision Date: 2/21/2013 pg. 6 of 11
Step 4
Using a 3/16 Nut Driver or Socket Wrench remove the standoffs from the X/Y Interface PCB. You
may then remove and discard the PCB.
Fan Assembly Upgrade
Mini / Helix
Revision Date: 2/21/2013 pg. 7 of 11
Procedure C: Installing the new PCB and Fan Assembly
Step 1
Locate and cut the cable tie that holds the X-Axis Air Assist Coil Tube in place. Remove and
discard the cable tie.
Step 2
Align the new PCB’s mounting holes with the mounting studs on the I-beam and fasten it with the
standoffs.
Step 3
Align the Fan Assembly’s mounting holes with the standoffs on the PCB. Do not fasten the fan to
the PCB yet. The Air Assist Tube will have to be moved out of the way.
Fan Assembly Upgrade
Mini / Helix
Revision Date: 2/21/2013 pg. 8 of 11
Step 4
Locate the fitting for the X-Axis Air Assist Coil Tube. Using a Flat head screw driver loosen the
fitting. (Do not remove the screw.)
Step 5
Turn the fitting so that the tube goes up and over the Fan and retighten the fitting.
Step 6
Remove the fan assembly so that the motor can be remounted.
Step 7
Put the motor back in place, with your index finger, pull the belt and loop the belt around the silver
pulley.
Fan Assembly Upgrade
Mini / Helix
Revision Date: 2/21/2013 pg. 9 of 11
Step 9
Place the motor so that the captive screws are aligned with the mounting posts.
Step 10
Tighten the captive screws to hold the motor in place.
Step 11
Replace the Fan assembly over the circuit board. Fasten in place with the screws. Be sure that
the Ground Line is connected to one of the screws.
Fan Assembly Upgrade
Mini / Helix
Revision Date: 2/21/2013 pg. 10 of 11
Step 12
Connect the motor wires (red and black twisted wire with a black quick disconnect at the end) by
plugging the black quick disconnect in to the circuit board just to the rear of the motor.
Step 13
Connect the Fan wires by plugging the black quick disconnect in to the circuit board just to the
rear of the motor.
Step 14
On the left side of the I-beam locate the Pulley which the belt wraps around. (See Procedure A -
Step 4.) Loosen the Philips screw holding the pulley in place. The spring will pull the belt tight. Retighten
both Philips screws to keep the belt tight as the engraver operates.
M
Fan Assembly Upgrade
Mini / Helix
Revision Date: 2/21/2013 pg. 11 of 11
Conclusion
Power on the engraver and check to see if the fan is spinning. You may then replace all of the
covers on the machine. If you encounter any problems please contact Epilog Tech Support at (303) 215-
9171.

Other manuals for MINI

3

This manual suits for next models

1

Other Epilog Laser Engraver manuals

Epilog Laser Zing User manual

Epilog Laser

Epilog Laser Zing User manual

Epilog Laser FiberMark Fusion 13000 User manual

Epilog Laser

Epilog Laser FiberMark Fusion 13000 User manual

Epilog Laser Helix Installation and operation manual

Epilog Laser

Epilog Laser Helix Installation and operation manual

Epilog Laser Edge 12 User manual

Epilog Laser

Epilog Laser Edge 12 User manual

Epilog Laser MINI 18 User manual

Epilog Laser

Epilog Laser MINI 18 User manual

Epilog Laser Zing User manual

Epilog Laser

Epilog Laser Zing User manual

Epilog Laser Fusion Pro 32 User manual

Epilog Laser

Epilog Laser Fusion Pro 32 User manual

Epilog Laser Fusion Use and care manual

Epilog Laser

Epilog Laser Fusion Use and care manual

Epilog Laser FiberMark User manual

Epilog Laser

Epilog Laser FiberMark User manual

Epilog Laser FusionPro 16000 User manual

Epilog Laser

Epilog Laser FusionPro 16000 User manual

Epilog Laser FiberMark User manual

Epilog Laser

Epilog Laser FiberMark User manual

Epilog Laser FiberMark User manual

Epilog Laser

Epilog Laser FiberMark User manual

Epilog Laser Fusion Pro 32 User manual

Epilog Laser

Epilog Laser Fusion Pro 32 User manual

Epilog Laser Fusion Use and care manual

Epilog Laser

Epilog Laser Fusion Use and care manual

Epilog Laser Helix User manual

Epilog Laser

Epilog Laser Helix User manual

Epilog Laser Fusion User manual

Epilog Laser

Epilog Laser Fusion User manual
Epilog Laser Mini Series User manual

Epilog Laser

Epilog Laser Mini Series User manual
Epilog Laser Fusion User manual

Epilog Laser

Epilog Laser Fusion User manual

Epilog Laser Fusion User manual

Epilog Laser

Epilog Laser Fusion User manual

Epilog Laser MINI User manual

Epilog Laser

Epilog Laser MINI User manual

Epilog Laser LEGEND 24EX 6000 User manual

Epilog Laser

Epilog Laser LEGEND 24EX 6000 User manual

Epilog Laser Fusion User manual

Epilog Laser

Epilog Laser Fusion User manual

Epilog Laser Fusion Pro 32 User manual
Epilog Laser

Epilog Laser Fusion Pro 32 User manual

Epilog Laser Fusion User manual

Epilog Laser

Epilog Laser Fusion User manual
Popular Engraver manuals by other brands

ALDI WORKZONE 10283 user manual

ALDI

ALDI WORKZONE 10283 user manual

Parkside 89959 Operation and safety notes

Parkside

Parkside 89959 Operation and safety notes

Chicago Pneumatic CP710 instruction manual

Chicago Pneumatic

Chicago Pneumatic CP710 instruction manual

Opt Lasers Grav PLH3D-6W Series Upgrade instructions

Opt Lasers

Opt Lasers Grav PLH3D-6W Series Upgrade instructions

CamFive Qustom Laser CFL-Q2012K installation manual

CamFive

CamFive Qustom Laser CFL-Q2012K installation manual

HT WainLux JL4 Assembly and quick start guide

HT

HT WainLux JL4 Assembly and quick start guide

Opt Lasers PLH3D-CNC Adapter Product user manual

Opt Lasers

Opt Lasers PLH3D-CNC Adapter Product user manual

Omron MX-Z2000H-V1 Series Setup manual

Omron

Omron MX-Z2000H-V1 Series Setup manual

CO/Tech S1J-AJ8-10-UK instruction manual

CO/Tech

CO/Tech S1J-AJ8-10-UK instruction manual

GCC Technologies LaserPro S400 user manual

GCC Technologies

GCC Technologies LaserPro S400 user manual

GRAVOGRAPH M20 PIX user manual

GRAVOGRAPH

GRAVOGRAPH M20 PIX user manual

G-WEIKE G1 user manual

G-WEIKE

G-WEIKE G1 user manual

Foy GR350 User manual and warranty

Foy

Foy GR350 User manual and warranty

Ortur Laser Master 2 user manual

Ortur

Ortur Laser Master 2 user manual

manuals.online logo
manuals.online logoBrands
  • About & Mission
  • Contact us
  • Privacy Policy
  • Terms and Conditions

Copyright 2025 Manuals.Online. All Rights Reserved.