Ezviz A1 User manual

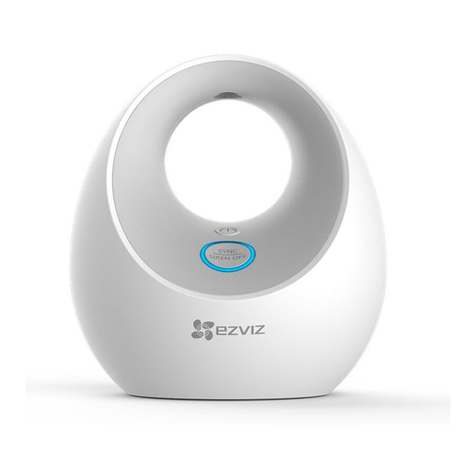
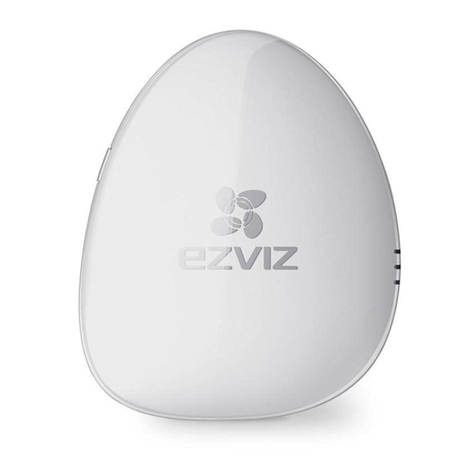
INTERNET ALARM HUB

COPYRIGHT ©2015 Hangzhou Hikvision Digital Technology Co., Ltd. or its subsidiaries. ALL RIGHTS RESERVED.
About this Manual
The Manual includes instructions for using and managing the product. Pictures, charts, images and all other
information hereinafter are for description and explanation only. The information contained in the Manual is subject to
change, without notice, due to firmware updates or other reasons. Please find the latest version in the
™ website (http://www.ezvizlife.com).
Any and all information, including, among others, wordings, pictures, graphs are the properties of Hangzhou Hikvision
Digital Technology Co., Ltd. or its subsidiaries (hereinafter referred to be “Hikvision”). This user manual (hereinafter
referred to be “the Manual”) cannot be reproduced, changed, translated, or distributed, partially or wholly, by any
means, without the prior written permission of Hikvision. Unless otherwise stipulated, Hikvision does not make any
warranties, guarantees or representations, express or implied, regarding to the Manual.
Trademarks Acknowledgement
™, ™, and other Hikvision’s trademarks and logos are the properties of Hikvision in various jurisdictions.
Other trademarks and logos mentioned below are the properties of their respective owners.
Legal Disclaimer
TO THE MAXIMUM EXTENT PERMITTED BY APPLICABLE LAW, THE PRODUCT DESCRIBED, WITH ITS HARDWARE,
SOFTWARE AND FIRMWARE, IS PROVIDED “AS IS”, WITH ALL FAULTS AND ERRORS, AND HIKVISION MAKES NO
WARRANTIES, EXPRESS OR IMPLIED, INCLUDING WITHOUT LIMITATION, MERCHANTABILITY, SATISFACTORY
QUALITY, FITNESS FOR A PARTICULAR PURPOSE, AND NON-INFRINGEMENT OF THIRD PARTY. IN NO EVENT WILL
HIKVISION, ITS DIRECTORS, OFFICERS, EMPLOYEES, OR AGENTS BE LIABLE TO YOU FOR ANY SPECIAL,
CONSEQUENTIAL, INCIDENTAL, OR INDIRECT DAMAGES, INCLUDING, AMONG OTHERS, DAMAGES FOR LOSS OF
BUSINESS PROFITS, BUSINESS INTERRUPTION, OR LOSS OF DATA OR DOCUMENTATION, IN CONNECTION WITH
THE USE OF THIS PRODUCT, EVEN IF HIKVISION HAS BEEN ADVISED OF THE POSSIBILITY OF SUCH DAMAGES.
TO THE MAXIMUM EXTENT PERMITTED BY APPLICABLE LAW, IN NO EVENT SHALL HIKVISION’S TOTAL LIABILITY
FOR ALL DAMAGES EXCEED THE PURCHASE PRICE THE PRODUCT.

HIKVISION does not undertake any liability for personal injury or property damage, as the result of product interruption
or service termination cause by: a) improper installation or usage other than as requested; b) the protection of national
or public interests; c) Force Majeure; d) yourself or the third party, including not limitation, using any third party’s
products, software, applications, and among others.
REGARDING TO THE PRODUCT WITH INTERNET ACCESS, THE USE OF PRODUCT SHALL BE WHOLLY AT YOUR OWN
RISKS. HIKVISION SHALL NOT TAKE ANY RESPONSIBILITES FOR ABNORMAL OPERATION, PRIVACY LEAKAGE OR
OTHER DAMAGES RESULTING FROM CYBER ATTACK, HACKER ATTACK, VIRUS INSPECTION, OR OTHER INTERNET
SECURITY RISKS; HOWEVER, HIKVISION WILL PROVIDE TIMELY TECHNICAL SUPPORT IF REQUIRED.
The purpose of the Products is to provide an adequate warning in the event of illegal encroachment in certain area;
however, the proper installation of the Products will not eliminate, but only reduce, that accidents will not occur or that
there will be no personal injury or property loss as a result. You are highly recommended to raise your vigilance and
strengthen the safety awareness in the daily life.
SURVEILLANCE LAWS VARY BY JURISDICTION. PLEASE CHECK ALL RELEVANT LAWS IN YOUR JURISDICTION
BEFORE USING THIS PRODUCT IN ORDER TO ENSURE THAT YOUR USE CONFORMS TO THE APPLICABLE LAW. YOU
FUTHER AGREE THAT THIS PRODUCT IS ONLY FOR CIVIL USE, AND HIKVISION SHALL NOT BE LIABLE IN THE EVENT
THAT THIS PRODUCT IS USED WITH ILLEGITIMATE PURPOSES, SUCH AS THIRD PARTY RIGHTS INFRINGEMENT,
MEDICAL TREATMENT, SAFETY EQUIPMENT OR OTHER SITUATIONS WHERE THE PRODUCT FAILURE COULD LEAD
TO DEATH OR PERSONAL INJURY, OR WEAPON OF MASS DESTRUCTION, CHEMINCAL AND BIOLOGICAL WEAPON,
NUCLEAR EXPLOSION, AND ANY UNSAFE NUCLEAR ENERGY USES OR ANTI-HUMANITY USAGES. YOU SHOULD
UNDERTAKE ALL RESPONSIBILITIES FOR LOSSES OR DAMAGES RESULTING FROM THE ABOVE USAGES
WHATSOEVER.
IN THE EVENT OF ANY CONFLICTS BETWEEN THE ABOVE AND THE APPLICABLE LAW, THE LATER PREVAILS.

Regulatory Information
This device complies with Part 15 of the FCC Rules. Operation is subject to the following two conditions:
(1) This device may not cause harmful interference, and
(2) This device must accept any interference received, including interference that may cause undesired operation.
Please take attention that changes or modification not expressly approved by the party responsible for compliance
could void the user’s authority to operate the equipment.
Note: This product has been tested and found to comply with the limits for a Class B digital device, pursuant to Part 15
of the FCC Rules. These limits are designed to provide reasonable protection against harmful interference in a
residential installation. This product generates, uses, and can radiate radio frequency energy and, if not installed and
used in accordance with the instructions, may cause harmful interference to radio communications. However, there is
no guarantee that interference will not occur in a particular installation. If this product does cause harmful interference
to radio or television reception, which can be determined by turning the equipment off and on, the user is encouraged to
try to correct the interference by one or more of the following measures:
—Reorient or relocate the receiving antenna.
—Increase the separation between the equipment and receiver.
—Connect the equipment into an outlet on a circuit different from that to which the receiver is connected.
—Consult the dealer or an experienced radio/TV technician for help.
EU Conformity Statement
This product and - if applicable - the supplied accessories too are marked with "CE" and comply therefore
with the applicable harmonized European standards listed under the EMC Directive 2004/108/EC, the RoHS
Directive 2011/65/EU.
2012/19/EU (WEEE directive): Products marked with this symbol cannot be disposed of as unsorted
municipal waste in the European Union. For proper recycling, return this product to your local supplier
upon the purchase of equivalent new equipment, or dispose of it at designated collection points. For more
information see: www.recyclethis.info.
2006/66/EC (battery directive): This product contains a battery that cannot be disposed of as unsorted
municipal waste in the European Union. See the product documentation for specific battery information.
The battery is marked with this symbol, which may include lettering to indicate cadmium (Cd), lead (Pb), or
mercury (Hg). For proper recycling, return the battery to your supplier or to a designated collection point.
For more information see: www.recyclethis.info.

Box Contents
A1 x1 Remote Control x1 USB Data Cable x1
Power Adapter x1
Quick Start Guide x1
The figures in this manual are for reference only and may differ from the actual product.
ENGLISH
1

Basics
Name Description
ALARM LED Indicator
Mounting Hole Hole for hanging the device.
Power Input Power supply for the device (by USB port).
RESET Button Connect the device to the power supply (by USB port). Press and hold the
RESET button with a needle and release until the 3 indicators flicker at
the same time for once. The device restarts and all settings are restored
except the connected detectors and remote control.
Setting Button
Power Input
Speaker
LED Indicators
(ALARM, LINK,and READY)
RESET Button
Mounting Hole
Steady Red: The A1 is in the normal status.
Red Flicker: An alarm occurs.
LINK LED Indicator
READY LED Indicator
Yellow Flicker:The Wi-Fi is connected.
Unlit: The Wi-Fi is disconnected.
Steady White: The A1 is powered on (by USB port).
2

Operations
Preparation
1Starting A1
Connect the A1 and power adapter with the USB data cable, and then plug the power adapter into
the power socket. The white indicator turns on indicating the A1 is starting, and then the red
indicator turns on when the A1 starts completely.
Connect the A1 and power adapter with the USB data cable, and then plug the power adapter into
the power socket. The white indicator turns on indicating the A1 is starting, and then the red
indicator turns on when the A1 starts completely.
2Installing the EZVIZ App
- Connect your mobile phone to Wi-Fi.
- Download and install the EZVIZ app by searching the “EZVIZ” in App Store (iOS version) and
Google PlayTM (Android version).
- Start the app and register for an EZVIZ user account following the start-up wizard.
- Connect your mobile phone to Wi-Fi.
- Download and install the EZVIZ app by searching the “EZVIZ” in App Store (iOS version) and
Google PlayTM (Android version).
- Start the app and register for an EZVIZ user account following the start-up wizard.
Step 1
Power Socket
USB Data Cable
Power Adapter
Make sure the environment and the power supply meet the requirements below:
Power voltage: DC 5V (Micro USB)
Working temperature: -10°C to 55°C (14°F to 131°F)
Working humidity: 10% to 90% (non-condensing)
3

- Connect the mobile phone to a Wi-Fi.
- Log in the EZVIZ app and scan the QR code on the A1 to add it to your EZVIZ account.
- Follow the prompts to configure the A1 Wi-Fi connection, such as SSID (Wi-Fi name) and password.
Quick Settings
1Adding A1
Make sure the mobile phone is connected to the Wi-Fi and the A1 has not connect to any
Wi-Fi yet, or the connection will be failed.
The distance between the A1 and the mobile phone should be no further than 50 cm.
Step 2
Press and hold the Setting Button if you want to enable the Wi-Fi modification function. For
example: the procedure for connecting the device A1 to the Wi-Fi (router) is not successful
and you have to repeat the operation; or you want to change the Wi-Fi connection (to connect
the device A1 to a new Wi-Fi network).
The LINK indicator flickers in yellow when the A1 has been successfully connected to the Wi-Fi
(of the router).
The LINK indicator flickers in yellow when the A1 has been successfully connected to the Wi-Fi
(of the router).
2Completing Configuration
4

1Enabling the Adding Detectors Mode
Press the Setting Button for once and the voice prompt of the adding detectors mode is enable
starts. The yellow and red indicators flicker twice every second indicating the Adding Detectors
Mode is enabled.
3Disabling the Adding Detectors Mode
Press the Setting Button for once to disable the Adding Detectors Mode after all the detectors are
added.
Adding Detectors
2Adding Detectors
Take the detector close to the A1 (within 50cm) and trigger alarm manually. A voice prompt of the
type and the serial number of the detector starts indicating the corresponding detector is added
(up to 32 detectors are allowed).
T
U
R
N
T
O
R
E
M
O
V
E
D
O
N
O
T
P
A
I
N
T
……
Step 3
The Adding Detectors Mode will be disabled if no operation in 3 minutes.
The Max. effective distance between detectors and the A1 is 100m (no barrier is allowed).
5

EZVIZ App Operation
Add the A1 to your EZVIZ account with the EZVIZ app. You can realize the information checking
and remote management operations.
You can customize the A1 name and upgrade according to your requirement.
If any exception of detector occurs, for example, low battery and offline, the EZVIZ app
will detect it and prompt in time.
Switch the arming mode at anytime (At-Home mode, Leaving-Home mode, and
Sleeping mode).
6

Remote Control Introduction
Name Description
Press and hold the button for 2 s to send an emergency alarm to the EZVIZ platform.
LED Indicator Flicker when any button is pressed.
When you are at home and still want to feel protected: only the perimeter parts of the
house (doors and windows) are armed. The Sleeping mode is appropriate during the day or
sleeping time at night. Press the button to activate the Sleeping mode.
If anyone stays at home or you are going to get into the house, you need to disarm the
alarm system. Press the button to activate the At-Home mode.
If no one stays at home, you need to activate the alarm system to protect it from intruders. The
Leaving-Home mode is appropriate. Press the button to activate the Leaving-Home mode.
Press to turn off the voice prompts.
The remote control in the package is connected to the A1 by default. Refer to the step 3 in the Operation to
connect another remote control to A1 if the remote control does not work normally or you have a new one.
The above descriptions for arming mode are the default settings. You can customize the detectors arming
status in each arming mode and switch the arming mode by EZVIZ app.
Emergency Button
LED Indicator
At-Home Mode Leaving-Home Mode
Sleeping Mode
Mute
7

Function Introduction
Convenient Network Configuration
One-push Wi-Fi connection.
EZVIZ Cloud P2P Service
Receiving alarm and remote control on mobile phone and PC.
Irreplaceable Home Guard
Accessable to various wireless detectors and provide a comprehensive protection to
your home.
World’s leading Communication Technology
Convenient security deployment with wireless detectors.
8

FAQ
“The device is offline.” or “The device is not registered.” prompts when adding A1 by EZVIZ app.
Q:
A:
The mobile phone cannot receive alarm when the A1 is online and alarm occurs.
Q:
A:
The status of the detector is displayed as offline on the EZVIZ app.
Q:
A:
The detector can detect alarm and the A1 works normally, but no voice prompts.
Q:
A:
1. Check the Wi-Fi is connected with the A1 and make sure it’s working.
2. Check whether the yellow indicator flickers; if not, please restart the A1 and connect to the Wi-Fi
again.
1. Make sure the EZVIZ app is running on your mobile phone.
2. For Android OS mobile phone, make sure the app is running background; and for the iOS, enable
the message push function in “Settings > Notification”.
1. Make sure the Wi-Fi status that the A1 connected with is normal.
2. Make sure the distance between the detectors and the A1 is less than 100m and no barrier is
allowed.
3. Make sure the detector’s battery does not run out.
1. Make sure the distance between the detector and the A1 is less than 100m and no barrier is
allowed.
2. Adjust the installation position of A1. You’re recommended to install the A1 in the center of your
house.
3. Make sure the A1 is not in the Mute mode.
9

Lieferumfang
A1 x1 Fernbedienung x1 USB-Datenkabel x1
Netzteil x1
Die Abbildungen in diesem Handbuch dienen lediglich zur Veranschaulichung und können
vom tatsächlichen Produkt abweichen.
DEUTSCH
10
Schnellstartanleitung x1

Allgemeines
Bezeichnung Beschreibung
ALARM LED-Anzeige
Versorgungseingang
Einstelltaste
Lautsprecher
LED-Anzeigen
(ALARM, LINK und READY)
RESET-Taste
Montageöffnung
Versorgungs-
eingang
LINK LED
READY LED
11
Montageöffnung
RESET-Taste
Spannungsversorgung für das Gerät (via USB-Port).
Durchgehend rot: Der A1 befindet sich im Normalstatus.
Blinkt rot: Ein Alarm ist aufgetreten.
Blinkt gelb: Das Wi-Fi-Netz ist verbunden.
Aus: Das Wi-Fi-Netz ist nicht verbunden.
Durchgehend weiß: Der A1 ist eingeschaltet (via USB-Port).
Öffnung zum Aufhängen des Geräts.
Verbindet das Gerät mit der Spannungsversorgung (via USB-Port).
Drücken und halten Sie die RESET-Taste mit einer Nadel und lassen Sie
sie los, wenn die drei LEDs gleichzeitig blinken. Das Gerät wird daraufhin
neu gestartet, und alle Einstellungen bis auf die angeschlossenen
Melder und die Fernbedienung werden zurückgesetzt.

Betrieb
Vorbereitung
1A1 einschalten
Schließen Sie den A1 mit dem USB-Datenkabel und am Netzteil und dieses dann an einer
Steckdose an. Die weiße LED leuchtet als Hinweis darauf auf, dass der A1 aktiviert wird.
Anschließend leuchtet die rote LED auf , wenn der A1 vollständig gestartet ist.
Schließen Sie den A1 mit dem USB-Datenkabel und am Netzteil und dieses dann an einer
Steckdose an. Die weiße LED leuchtet als Hinweis darauf auf, dass der A1 aktiviert wird.
Anschließend leuchtet die rote LED auf , wenn der A1 vollständig gestartet ist.
2EZVIS App installieren
- Smartphone mit dem Wi-Fi-Netz verbinden.
- EZVISZ App herunterladen und installieren, indem Sie „EZVIZ" im App Store (iOS-Version) oder
bei Google PlayTM (Android-Version) suchen.
- Die App starten und ein EZVIZ-Anwenderkonto nach Anweisungen des Assistenten erstellen.
- Smartphone mit dem Wi-Fi-Netz verbinden.
- EZVISZ App herunterladen und installieren, indem Sie „EZVIZ" im App Store (iOS-Version) oder
bei Google PlayTM (Android-Version) suchen.
- Die App starten und ein EZVIZ-Anwenderkonto nach Anweisungen des Assistenten erstellen.
Schritt 1
Achten Sie darauf, dass die Umgebung und die Spannungsversorgung die nachstehenden
Anforderungen erfüllen:
Versorgungsspannung: 5V DC (Micro USB)
Temperatur (Betrieb): -10°C bis 55°C
Luftfeuchtigkeit (Betrieb) 10% bis 90% (nicht kondensierend)
12
Versorgungsbuchse
USB-Datenkabel
Netzteil

- Verbinden Sie Ihr Mobiltelefon mit einem Wi-Fi-Netz.
- Melden Sie sich bei der EZVIZ App an und scannen Sie den QR-Code am A1, um ihn zu Ihrem
EZVIZ-Account hinzuzufügen.
- Befolgen Sie die Anweisungen, um die A1-Wi-Fi-Verbindung zu konfigurieren (z.B. SSID
(Wi-Fi-Name) und Passwort.
Schnelleinstellungen
1A1 hinzufügen
Achten Sie darauf, dass nur das Smartphone eine Wi-Fi-Verbindung hat, der A1 jedoch noch
nicht. Andernfalls kommt keine Verbindung zustande.
Der Abstand zwischen dem A1 und dem Smartphone darf nicht mehr als 50cm betragen.
Schritt 2
Drücken und halten Sie die Einstelltaste, um die Wi-Fi-Modifikationsfunktion zu
aktivieren. Beispiel: Die Verbindung zwischen A1 und Wi-Fi (Router) konnte nicht
hergestellt und der Vorgang muss wiederholt werden, oder Sie wollen die Wi-Fi-Verbin-
dung wechseln (um den A1 mit einem neuen Wi-Fi-Netz zu verbinden).
Die LINK-LED blinkt gelb, wenn der A1 erfolgreich mit dem Wi-Fi (des Routers) verbunden ist.Die LINK-LED blinkt gelb, wenn der A1 erfolgreich mit dem Wi-Fi (des Routers) verbunden ist.
2Konfiguration abschließen
13

1"Adding Detectors"-Modus aktivieren
Drücken Sie die Einstelltaste einmal. Der Voice Guide bestätigt daraufhin den "Adding
Detectors"-Modus. Die gelbe und die rote LED blinken zweimal pro Sekunde als Hinweis
darauf, dass der "Adding Detectors"-Modus aktiviert ist.
3"Adding Detectors"-Modus deaktivieren
Drücken Sie die Einstelltaste einmal, um den "Adding Detectors"-Verbindungsmodus zu
deaktivieren, nachdem alle Melder hinzugefügt wurden.
Melder hinzufügen
2Melder hinzufügen
Bringen Sie den Melder nahe an den A1 (min. 50cm) und lösen Sie manuell Alarm aus.
Daraufhin bestätigt der Voice Guide Typ und Seriennummer des Detektors als Hinweis
darauf, dass der entsprechende Melder hinzugefügt wurde (bis zu 32 Melder sind möglich).
T
U
R
N
T
O
R
E
M
O
V
E
D
O
N
O
T
P
A
I
N
T
……
Schritt 3
Der "Adding Detectors"-Modus wird nach drei Minuten Inaktivität automatisch deaktiviert.
Die maximal zulässige Arbeitsdistanz zwischen Meldern und dem A1 beträgt 100m (keine
Hindernisse zulässig).
14

EZVIZ App-Funktionen
Fügen Sie den A1 zu Ihrem EZVIZ-Konto der EZVIZ App hinzu. Damit stehen Ihnen die Funktio-
nen zur Informationsprüfung und Fernverwaltung zur Verfügung.
Sie können den Namen des A1 ändern und je nach Erfordernis ein Upgrade durchführen.
Im Fall einer Melder-Ausnahmesituation (z.B. Batterie schwach und offline) wird dies
von der EZVIZ App erkannt und umgehend signalisiert.
Wechseln des Aktivierungsmodus (Anwesenheitsmodus, Abwesenheitsmodus und
Nachzeitmodus).
15

Fernbedienungsfunktionen
Bezeichnung Beschreibung
LED-Anzeige Blinkt, wenn eine Taste betätigt wird.
Wenn Sie zu Hause sind und dennoch ein Gefühl der Sicherheit haben wollen: nur die
Außenelemente des Hauses (Türen und Fenster) sind aktiviert. Der Schlafen-Modus ist
sowohl bei Tag als auch bei Nacht geeignet. Betätigen Sie diese Taste, um den Nachtzeit-
modus zu aktivieren.
Wenn jemand zu Hause ist oder Sie das Haus betreten wollen, müssen Sie das Alarmsys-
tem deaktivieren. Betätigen Sie diese Taste, um den Im-Haus-Modus zu aktivieren.
Wenn niemand zu Hause ist, müssen Sie das Alarmsystem aktivieren, um sich vor
Einbrechern zu schützen. Geeignet ist der Abwesenheitsmodus. Betätigen Sie diese Taste,
um den Abwesenheitsmodus zu aktivieren.
Drücken, um den Voice Guide zu deaktivieren.
Die mitgelieferte Fernbedienung ist standardmäßig mit dem A1 verbunden. Siehe Schritt 3 in der
Bedienungsanleitung, um eine andere Fernbedienung mit dem A1 zu verbinden, falls die Fernbedienung
nicht normal funktioniert oder Sie eine neue Fernbedienung haben.
Die vorgenannten Beschreibungen für den Aktivierungsmodus beziehen sich auf die Standardvorgaben.
Mit der EZVIZ App können Sie den Aktivierungsstatus der Melder in jedem Aktivierungsmodus anpassen
und den Aktivierungsmodus umschalten.
Notalarmtaste
LED-Anzeige
Anwesenheitsmodus Abwesenheitsmodus
Nachtzeitmodus
Ton Aus
16
Taste 2 Sekunden lang gedrückt halten, um einen Notalarm an die EZVIZ-Plattform zu
senden.
Other manuals for A1
4
Table of contents
Languages:
Other Ezviz Security System manuals