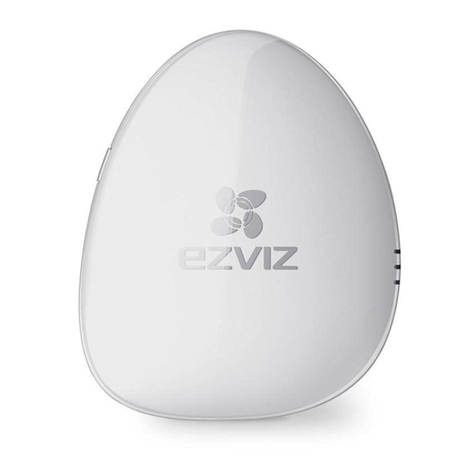
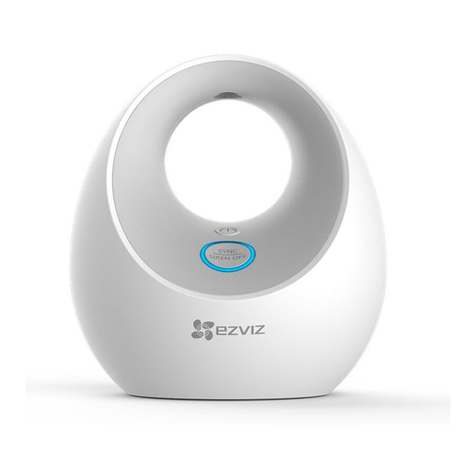
Ezviz Home Sense User manual


COPYRIGHT ©2017 Hangzhou Hikvision Digital Technology Co., Ltd. or its subsidiaries. ALL RIGHTS RESERVED.
About this Manual
The Manual includes instructions for using and managing the product. Pictures, charts, images and all other information hereinafter
are for description and explanation only. The information contained in the Manual is subject to change, without notice, due to
firmware updates or other reasons. Please find the latest version in the ™ website (http://www.ezvizlife.com).
Any and all information, including, among others, wordings, pictures, graphs are the properties of Hangzhou Hikvision Digital
Technology Co., Ltd. or its subsidiaries (hereinafter referred to be “Hikvision”). This user manual (hereinafter referred to be “the
Manual”) cannot be reproduced, changed, translated, or distributed, partially or wholly, by any means, without the prior written
permission of Hikvision. Unless otherwise stipulated, Hikvision does not make any warranties, guarantees or representations,
express or implied, regarding to the Manual.
Trademarks Acknowledgement
™, ™, and other Hikvision’s trademarks and logos are the properties of Hikvision in various jurisdictions. Other
trademarks and logos mentioned below are the properties of their respective owners.
Legal Disclaimer
TO THE MAXIMUM EXTENT PERMITTED BY APPLICABLE LAW, THE PRODUCT DESCRIBED, WITH ITS HARDWARE, SOFTWARE AND
FIRMWARE, IS PROVIDED “AS IS”, WITH ALL FAULTS AND ERRORS, AND HIKVISION MAKES NO WARRANTIES, EXPRESS OR IMPLIED,
INCLUDING WITHOUT LIMITATION, MERCHANTABILITY, SATISFACTORY QUALITY, FITNESS FOR A PARTICULAR PURPOSE, AND NON-
INFRINGEMENT OF THIRD PARTY. IN NO EVENT WILL HIKVISION, ITS DIRECTORS, OFFICERS, EMPLOYEES, OR AGENTS BE LIABLE TO
YOU FOR ANY SPECIAL, CONSEQUENTIAL, INCIDENTAL, OR INDIRECT DAMAGES, INCLUDING, AMONG OTHERS, DAMAGES FOR LOSS
OF BUSINESS PROFITS, BUSINESS INTERRUPTION, OR LOSS OF DATA OR DOCUMENTATION, IN CONNECTION WITH THE USE OF THIS
PRODUCT, EVEN IF HIKVISION HAS BEEN ADVISED OF THE POSSIBILITY OF SUCH DAMAGES. TO THE MAXIMUM EXTENT PERMITTED BY
APPLICABLE LAW, IN NO EVENT SHALL HIKVISION’S TOTAL LIABILITY FOR ALL DAMAGES EXCEED THE PURCHASE PRICE THE PRODUCT.
HIKVISION does not undertake any liability for personal injury or property damage, as the result of product interruption or service
termination cause by: a) improper installation or usage other than as requested; b) the protection of national or public interests; c)
Force Majeure; d) yourself or the third party, including not limitation, using any third party’s products, software, applications, and
among others.
REGARDING TO THE PRODUCT WITH INTERNET ACCESS, THE USE OF PRODUCT SHALL BE WHOLLY AT YOUR OWN RISKS. HIKVISION
SHALL NOT TAKE ANY RESPONSIBILITES FOR ABNORMAL OPERATION, PRIVACY LEAKAGE OR OTHER DAMAGES RESULTING FROM
CYBER ATTACK, HACKER ATTACK, VIRUS INSPECTION, OR OTHER INTERNET SECURITY RISKS; HOWEVER, HIKVISION WILL PROVIDE
TIMELY TECHNICAL SUPPORT IF REQUIRED.
SURVEILLANCE LAWS VARY BY JURISDICTION. PLEASE CHECK ALL RELEVANT LAWS IN YOUR JURISDICTION BEFORE USING THIS
PRODUCT IN ORDER TO ENSURE THAT YOUR USE CONFORMS TO THE APPLICABLE LAW. YOU FUTHER AGREE THAT THIS PRODUCT
IS ONLY FOR CIVIL USE, AND HIKVISION SHALL NOT BE LIABLE IN THE EVENT THAT THIS PRODUCT IS USED WITH ILLEGITIMATE
PURPOSES, SUCH AS THIRD PARTY RIGHTS INFRINGEMENT, MEDICAL TREATMENT, SAFETY EQUIPMENT OR OTHER SITUATIONS
WHERE THE PRODUCT FAILURE COULD LEAD TO DEATH OR PERSONAL INJURY, OR WEAPON OF MASS DESTRUCTION, CHEMINCAL AND
BIOLOGICAL WEAPON, NUCLEAR EXPLOSION, AND ANY UNSAFE NUCLEAR ENERGY USES OR ANTI-HUMANITY USAGES. YOU SHOULD
UNDERTAKE ALL RESPONSIBILITIES FOR LOSSES OR DAMAGES RESULTING FROM THE ABOVE USAGES WHATSOEVER.
IN THE EVENT OF ANY CONFLICTS BETWEEN THE ABOVE AND THE APPLICABLE LAW, THE LATER PREVAILS.

Safety Instruction
CAUTION: THE PRODUCT IS BUILT IN A REPLACEABLE BATTERY. RISK OF EXPLOSION IF BATTERY IS REPLACED BY AN
INCORRECT TYPE. DISPOSE OF USED BATTERIES ACCORDING TO THE INSTRUCTIONS.
Due to the product shape and dimension, the name and address of the importer/manufacturer are printed on the
package.
Regulatory Information
EU Conformity Statement
This product and - if applicable - the supplied accessories too are marked with "CE" and comply therefore with
the applicable harmonized European standards listed under the Radio Equipment Directive 2014/53/EU, the EMC
Directive 2014/30/EU, the RoHS Directive 2011/65/EU.
2012/19/EU (WEEE directive): Products marked with this symbol cannot be disposed of as unsorted municipal waste
in the European Union. For proper recycling, return this product to your local supplier upon the purchase of equivalent
new equipment, or dispose of it at designated collection points. For more information see: www.recyclethis.info.
2006/66/EC and its amendment 2013/56/EU (battery directive): This product contains a battery that cannot be
disposed of as unsorted municipal waste in the European Union. See the product documentation for specific battery
information. The battery is marked with this symbol, which may include lettering to indicate cadmium (Cd), lead (Pb),
or mercury (Hg). For proper recycling, return the battery to your supplier or to a designated collection point. For more
information see: www.recyclethis.info.
Гарантийный срок-1 год
Срок службы-3 года
Производитель:Ханджоу Хиквижн Диджитал Технолоджи(Китай)
Импортер-поставщик в России: ЗАО ''Хиквижн''
Импортер-поставщик в Республике Беларусь:ООО ''Торговый Дом ''АВАНТ-ТЕХНО''
Сайт:www.ezviz.ru
EC DECLARATION OF CONFORMITY
Hereby, Hangzhou Hikvision Digital Technology Co., Ltd. declares that the radio equipment type [CS-T9-A] is in compliance with
Directive 2014/53/EU.
The full text of the EC DECLARATION OF CONFORMITY is available at the following web link:
http://www.ezvizlife.com/declaration-of-conformity.
SAVE THIS MANUAL FOR FUTURE REFERENCE

5
Operations
Step 1
Starting Home Sense Siren
1Connect the Siren to the power adapter with the
power cable.
2Plug the power adapter into the power outlet to
power on the Siren. The red indicator lights on
for 2 seconds indicating the siren has started
up.
Step 2
Adding to Internet Alarm Hub
The Siren must be linked with the A1 Home Sense Alarm Hub and other detectors such as Open/Close and
Motion Detectors. The EZVIZ Home Sense Alarm Hub and detectors are sold separately.
• Option 1 (Recommended) Adding by EZVIZ App
1Installing the EZVIZ App
- Search for the EZVIZ App in Google PLAY or APP Store
and install it on your mobile device.
- Open the app and register for an EZVIZ user account.
2Adding Siren
Log in the EZVIZ app and scan the device QR code to add
it to the Home Sense Alarm Hub.

6
• Option 2 Adding by Operating the Home Sense Alarm Hub
1Enable the “Adding Detectors Mode” of your Home Sense Alarm Hub. Refer to Quick Start Guide of your
Home Sense Alarm Hub for details.
2Bring the Siren close to the Alarm Hub (within 2in.) and press the button on Siren, the status indicator
will flash a red light once indicating the adding signal is sent..
3The Alarm Hub announces the device type and serial number being added.
4Test the Siren.
- Press the Emergency button on the remote control of the Alarm Hub to trigger an emergency alarm. If
the Siren starts to alarm, it has been added to the Internet Alarm Hub successfully.
- Press the Mute button on the remote control of the Alarm Hub to clear the alarm, and stop the Siren
sound.
Alarm Hub
Settings Button
Within 50 cm

7
Step 3
Installing Siren
1Choose a clean flat surface to install the Siren
2Installing Siren
Option 1 (Recommended)
Mount the Siren to the chosen location using the
supplied foam sticker as illustrated below.
Option 2
Use the supplied screw kit to hang the Siren onto
the chosen mounting location.
Basics
Function
If the connected Alarm Hub receives alarms from other detectors, Siren will be triggered and start to alarm.
Red Indicators
Setting Button
Press Once: Add Siren to the Home Sense Alarm Hub
Press and Hold for 1s: Mute

8
Box Contents
Home Sense Siren with Strobe Lightx1 Foam Sticker x1 Screw Kit x1
Power Adapter x1 USB Cable x1 Quick Start Guide x1
Specifications
Power Voltage DC 5V (Micro USB)
Working Current Static: 22mA Maximum: 200mA
Working Environment Indoor
Working Temprature -10°C to 55°C (14°F to 131°F)
Working Humidity 10% to 90%
Storage Temperature -20°C to 70°C (-4°F to 158°F)
Weight 77g
Dimension (H*W*D) 67 mm*33mm*121mm (2.6"*1.3" *4.8")
Alarm Volume 85dB (within 3 m)
Alarm Light Red indicators blink when alarm occurs.
Appendix

9
Operations
Étape 1
Démarrage du T9
1Branchez le T9 au transformateur électrique au
moyen du cordon d'alimentation.
2Raccordez le transformateur électrique à une
prise secteur pour alimenter le T9. Le témoin
rouge clignote pendant 2secondes, indiquant
que le T9 a démarré.
Étape 2
Ajout au concentrateur d'alarme Internet
Il convient d'utiliser le T9 conjointement à un concentrateur d'alarme Internet (tel qu'un A1, vendu séparément)
et à d'autres détecteurs (à contact magnétique et IR). Ceux-ci doivent être achetés séparément.
• Option 1 (recommandé) Ajout par l'application EZVIZ
1Installation de l'application EZVIZ
- Raccordez votre téléphone portable au réseau Wi-Fi.
- Téléchargez et installez l'application EZVIZ depuis App
Store (version iOS) ou Google PlayTM (version Android).
- Démarrez l'application et ouvrez un compte d'utilisateur
EZVIZ.
2Ajout de T9
Ouvrez une session dans l'application EZVIZ et scannez
le code QR de l'appareil pour l'ajouter au concentrateur
d'alarme Internet.

10
• Option 2 Ajout en actionnant le concentrateur d'alarme Internet
1Activez le mode Ajout de détecteurs de votre concentrateur d'alarme Internet. Pour plus de précisions sur
le fonctionnement de votre concentrateur d'alarme Internet, reportez-vous au Guide de prise en main.
2Placez le T9 à proximité du concentrateur d'alarme Internet (50cm maxi) puis appuyez sur le bouton; le
témoin rouge clignote une fois, indiquant que le signal d'ajout est envoyé.
3Le concentrateur d'alarme Internet émet un message vocal indiquant que le type de matériel et le n° de
série, signalant que le T9 a été ajouté.
4Vous pouvez tester le matériel après l'installation.
- Pour déclencher une alarme d'urgence, appuyez sur la touche correspondante de la télécommande du
concentrateur d'alarme Internet. Si le T9 déclenche une alarme, cela indique qu'il a bien été ajouté au
concentrateur d'alarme Internet.
- Pour supprimer l'alarme, appuyez sur la touche Muet de la télécommande du concentrateur d'alarme
Internet. Le T9 met alors fin à l'alarme.
Concentrateur d'alarme
Internet
Touche de réglage
Moins de 50cm

11
Étape 3
Installation du T9
1Choix d'un emplacement d'installation
Installez le T9 sur un emplacement propre et plat.
2Installation du T9
Option 1 (recommandé)
Collez le patin adhésif en mousse au dos du T9
puis collez celui-ci à son emplacement, comme le
montre la figure ci-dessous.
Option 2
- Percez un trou pour vis à l'emplacement prévu
pour l'installation.
- Sur un mur en ciment, enfoncez la vis taraudée
dans le trou.
- Enfoncez la vis dans le trou.
- Accrochez le T9 à la vis.
Éléments de base
Fonctions
Si le concentrateur d'alarme Internet reçoit les alarmes d'autres détecteurs, le T9 déclenche l'alarme.
Indicateurs rouges
Touche de réglage
Appuyer une fois: Ajoute le T9 au concentrateur d'alarme
Internet.
Maintenez enfoncé pendant 1s. : Muet

12
Contenu de l'emballage
T9 x1 Patin adhésif en mousse x1 Jeu de vis x1
Transformateur électrique x1 Câble USB x1 Guide de prise en main x1
Spécifications
Tension d'alimentation 5Vcc (Micro USB)
Courant de service Fixe: 22mA Maximum: 200mA
Environnement de fonctionnement Intérieur
Température de fonctionnement -10 °C - 55 °C (14 °F - 131 °F)
Hygrométrie de fonctionnement 10% - 90%
Température d'entreposage -20 °C - 70 °C (-4 °F - 158 °F)
Poids 77g
Dimensions (HxLxP) 67 mm*33mm*121mm (2.6"*1.3" *4.8")
Volume de l'alarme 85dBm (jusqu'à 3m)
Témoin d'alarme Le témoin rouge clignote en cas d'alarme.
Annexe

13
Funciones
Paso 1
Adición del T9
1Conecte el T9 al adaptador de corriente con el
cable de alimentación.
2Enchufe el adaptador de corriente a la toma
de corriente para suministrar alimentación al
T9. El indicador rojo se enciende durante dos
segundos para indicar que se ha iniciado el T9.
Paso 2
Adición a la central de alarmas por Internet
El T9 debe utilizarse junto con una central de alarmas por Internet (como, por ejemplo, el A1) y otros
detectores (como, por ejemplo, los detectores de IR y contacto magnético). Además, estos componentes
deben adquirirse por separado.
• Opción 1 (recomendada) Adición mediante la aplicación EZVIZ
1Instalación de la aplicación EZVIZ
- Conecte el teléfono móvil a la red Wi-Fi.
- Descargue la Aplicación Móvil EZVIZ buscando "EZVIZ" en
App Store (versión iOS) y Google PlayTM (versión Android).
- Inicie la aplicación y regístrese para obtener una cuenta
de usuario de EZVIZ.
2Adición del T9
Inicie sesión en la aplicación y escanee el código QR del
dispositivo para añadirlo a la central de alarmas por Internet.

14
• Opción 2 Adición mediante la central de alarmas por Internet
1Active el modo de adición de detectores en la central de alarmas por Internet. Consulte la Guía de inicio
rápido del centro de alarmas por Internet para obtener información.
2Acerque el T9 al centro de alarmas por Internet (en un área de 50 cm) y pulse el botón del dispositivo; el
indicador rojo parpadea una vez para indicar que se ha enviado la señal de adición.
3La central de alarmas por Internet emitirá un aviso de voz sobre el tipo de dispositivo y el número de
serie, lo que indica que el T9 se ha añadido.
4Puede probar el dispositivo tras la instalación.
- Pulse el botón de emergencia del mando a distancia de la central de alarmas por Internet para activar
una alarma de emergencia. Si el T9 inicia la alarma, esta se ha añadido correctamente a la central de
alarmas por Internet.
- Pulse el botón de silencio del mando a distancia de la central de alarmas por Internet para borrar la
alarma. A continuación, el T9 detendrá la alarma.
Central de alarmas por Internet
Botón de configuración
Dentro 50 cm

15
Paso 3
Instalación del T9
1Selección de una ubicación de instalación
Elija un lugar limpio y plano para instalar el T9.
2Instalación del T9
Opción 1 (recomendada)
Pegue el adhesivo de espuma en la parte posterior
del T9 y fije el dispositivo en el lugar de instalación,
como se muestra en la figura siguiente.
Opción 2
- Perfore un agujero para tornillos en la ubicación
de instalación.
- En las paredes de cemento, introduzca el tornillo
de expansión en el orificio.
- Introduzca el tornillo en el orificio o el orificio de
expansión.
- Cuelgue el T9 en el tornillo fijado.
Conceptos básicos
Funciones
Si la central de alarmas por Internet recibe una alarma de otros detectores, el T9 se activará e iniciará la alarma.
Indicadores rojos
Botón de configuración
Pulsar una vez: Añada el T9 a la central de alarmas por
Internet.
Mantener pulsado durante 1 s: Silencio

16
Contenido del paquete
T9 x1 Adhesivo de espuma x1 Juego de tornillos x1
Adaptador de corriente x1 Cable USB x1 Guía de inicio rápido x1
Especificaciones
Voltaje de fuente de alimentación DC 5 V (Micro USB)
Corriente de trabajo Estático: 22 mA Máximo: 200 mA
Entorno de trabajo Interior
Temperatura de trabajo De -10°C a 55°C (de 14°F a 131°F)
Humedad de trabajo De 10% a 90%
Temperatura de almacenamiento De -20°C a 70°C (de -4°F a 158°F)
Peso 77g
Dimensiones (Al.*An.*Pr.) 67*33*121 mm (2,6*1,3*4,8)
Volumen de alarma 85dB (en un área de 3 m)
Luz de alarma Los indicadores rojos parpadean cuando se produce una alarma.
Apéndice

17
Операции
Шаг 1
Запуск блока T9
1Подключите блокT9 к адаптеру питания с
помощью кабеля питания.
2Чтобы подать питание на блокT9, вставьте
адаптер питания в розетку электросети.
Красный индикатор загорается на 2 секунды,
указывая, что идет запуск блокаT9.
Шаг 2
Подключение к интернет-концентратору сигнализации
Блок T9 необходимо использовать вместе с интернет-концентратором сигнализации (например, A1)
и датчиками (например, с герконовым и инфракрасным детекторами). Все эти устройства должны
приобретаться отдельно.
• Вариант 1 (рекомендуется). Подключение с помощью приложения EZVIZ
1Установка приложения EZVIZ
- Подключите мобильный телефон к сетиWi-Fi.
- Загрузите и установите приложение EZVIZ.
Приложение можно найти, выполнив поиск по слову
«EZVIZ», в App Store (версия для iOS) или в Google
PlayTM (версия для Android).
- Запустите приложение и зарегистрируйте аккаунт
пользователя EZVIZ.
2Подключение блокаT9
Для подключения к интернет-концентратору
сигнализации выполните вход в приложение EZVIZ и
отсканируйте QR-код устройства.

18
• Вариант 2. Подключение с помощью интернет-концентратора сигнализации
1Активируйте режим Adding Detectors Mode (Режим добавления датчиков) на интернет-концентраторе
сигнализации. Для получения подробных сведений см. «Краткое руководство пользователя»,
прилагаемое к интернет-концентратору сигнализации.
2Поднесите блок T9 к интернет-концентратору сигнализации (расстояние должно быть не более 50см)
и нажмите кнопку на корпусе T9. Красные индикаторы должны мигнуть однократно, подтверждая
отправку запроса на подключение.
Интернет-концентратор
сигнализации
Кнопка Setting (Настройка)
Не более 50см
3Концентратор сигнализации воспроизведет голосовое сообщение о типе устройства и его серийном
номере. Это значит, что датчикT9 добавлен.
4После установки вы можете проверить устройство.
- Нажмите кнопку экстренного сигнала тревоги на пульте ДУ интернет-концентратора сигнализации,
чтобы активировать сигнализацию. Если блок T9 начнет подавать сигналы тревоги, значит он
успешно подключился к интернет-концентратору сигнализации.
- Нажмите кнопку выключения звука, чтобы сбросить сигнал тревоги на интернет-концентраторе
сигнализации. После этого блокT9 должен прекратить подачу сигналов тревоги.

19
Шаг 3
Установка блока T9
1Выбор места для установки
Выберите для установки блокаT9 чистое и ровное место.
2Установка блокаT9
Вариант 1 (рекомендуемый)
Приклейте наклейку из пеноматериала к
задней поверхности блокаT9 и приклейте блок
к установочной поверхности, как показано на
рисунке ниже.
Вариант 2
- Просверлите отверстие для шурупа в месте
установки.
- Если стена бетонная, вставьте в отверстие
дюбель.
- Закрутите шуруп в отверстие или в дюбель.
- Подвесьте блокT9 на закрученный шуруп.
Основные компоненты
Красные
индикаторы
Кнопка Setting (Настройка)
Однократное нажатие: подключение блока T9 к
интернет-концентратору сигнализации
Нажатие и удержание на 1 секунду: Выключение звука
Функционирование
Когда интернет-концентратор сигнализации получает сигналы тревоги от других датчиков, блок T9 начинает
подавать звуковые сигналы.

20
Содержимое упаковочной коробки
БлокT9, 1 шт. Наклейка из пеноматериала, 1 шт. Комплект винтового крепления, 1 шт
Адаптер питания, 1 шт. USB-кабель, 1 шт. Краткое руководство пользователя, 1 шт.
Технические характеристики
Напряжение питания 5В пост. тока (Micro USB)
Рабочий ток В статическом режиме: 22мА Максимальный: 200 мА
Место эксплуатации внутри помещений
Рабочая температура от -10 до +55 °С (от -14 до +131 °F)
Влажность в рабочем режиме 10–90%
Температура при хранении от -20 до 70 °С (от -4 до 158 °F)
Вес 77 гр.
Размеры (В х Ш х Д) 67 х 33 х 121 мм (2,6" х 1,3" х 4,8")
Громкость сигнала тревоги 85 дБ (в пределах 3 м)
Световая сигнализация красные индикаторы мигают, когда подается звуковой сигнал тревоги.
Приложение
Other manuals for Home Sense
1
Table of contents
Languages:
Other Ezviz Security System manuals
Popular Security System manuals by other brands

murco
murco MGS Installation and operation manual

BV Security
BV Security SK-DVR-DIY-CVI quick start guide

Omni
Omni OMNI-624 Installation and setup guide

Atwood
Atwood LPCO User and installation instructions

Octalarm
Octalarm T2 user manual

Absolute Process Instruments
Absolute Process Instruments APD 1431 quick start guide