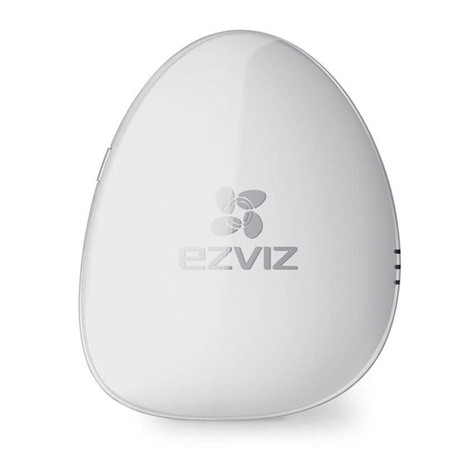
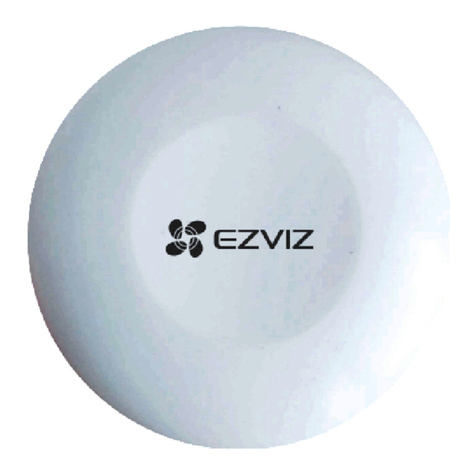
Ezviz T9 User manual

KO
UD04266B

COPYRIGHT ©2017 Hangzhou Hikvision Digital Technology Co., Ltd. or its subsidiaries. ALL RIGHTS RESERVED.
About this Manual
The Manual includes instructions for using and managing the product. Pictures, charts, images and all other
information hereinafter are for description and explanation only. The information contained in the Manual is
subject to change, without notice, due to firmware updates or other reasons. Please find the latest version in the
™ website (http://www.ezvizlife.com).
Any and all information, including, among others, wordings, pictures, graphs are the properties of Hangzhou
Hikvision Digital Technology Co., Ltd. or its subsidiaries (hereinafter referred to be “Hikvision”). This user manual
(hereinafter referred to be “the Manual”) cannot be reproduced, changed, translated, or distributed, partially or
wholly, by any means, without the prior written permission of Hikvision. Unless otherwise stipulated, Hikvision
does not make any warranties, guarantees or representations, express or implied, regarding to the Manual.
Trademarks Acknowledgement
™, ™, and other Hikvision’s trademarks and logos are the properties of Hikvision in various
jurisdictions. Other trademarks and logos mentioned below are the properties of their respective owners.
Legal Disclaimer
TO THE MAXIMUM EXTENT PERMITTED BY APPLICABLE LAW, THE PRODUCT DESCRIBED, WITH ITS
HARDWARE, SOFTWARE AND FIRMWARE, IS PROVIDED “AS IS”, WITH ALL FAULTS AND ERRORS, AND
HIKVISION MAKES NO WARRANTIES, EXPRESS OR IMPLIED, INCLUDING WITHOUT LIMITATION,
MERCHANTABILITY, SATISFACTORY QUALITY, FITNESS FOR A PARTICULAR PURPOSE, AND
NON-INFRINGEMENT OF THIRD PARTY. IN NO EVENT WILL HIKVISION, ITS DIRECTORS, OFFICERS,
EMPLOYEES, OR AGENTS BE LIABLE TO YOU FOR ANY SPECIAL, CONSEQUENTIAL, INCIDENTAL, OR INDIRECT
DAMAGES, INCLUDING, AMONG OTHERS, DAMAGES FOR LOSS OF BUSINESS PROFITS, BUSINESS
INTERRUPTION, OR LOSS OF DATA OR DOCUMENTATION, IN CONNECTION WITH THE USE OF THIS PRODUCT,
EVEN IF HIKVISION HAS BEEN ADVISED OF THE POSSIBILITY OF SUCH DAMAGES.
TO THE MAXIMUM EXTENT PERMITTED BY APPLICABLE LAW, IN NO EVENT SHALL HIKVISION’S TOTAL
LIABILITY FOR ALL DAMAGES EXCEED THE PURCHASE PRICE THE PRODUCT.
HIKVISION does not undertake any liability for personal injury or property damage, as the result of product
interruption or service termination cause by: a) improper installation or usage other than as requested; b) the
protection of national or public interests; c) Force Majeure; d) yourself or the third party, including not limitation,
using any third party’s products, software, applications, and among others.
REGARDING TO THE PRODUCT WITH INTERNET ACCESS, THE USE OF PRODUCT SHALL BE WHOLLY AT YOUR
OWN RISKS. HIKVISION SHALL NOT TAKE ANY RESPONSIBILITES FOR ABNORMAL OPERATION, PRIVACY
LEAKAGE OR OTHER DAMAGES RESULTING FROM CYBER ATTACK, HACKER ATTACK, VIRUS INSPECTION, OR
OTHER INTERNET SECURITY RISKS; HOWEVER, HIKVISION WILL PROVIDE TIMELY TECHNICAL SUPPORT IF
REQUIRED.
The purpose of the Products is to provide an adequate warning in the event of illegal encroachment in certain
area; however, the proper installation of the Products will not eliminate, but only reduce, that accidents will not
occur or that there will be no personal injury or property loss as a result. You are highly recommended to raise
your vigilance and strengthen the safety awareness in the daily life.
SURVEILLANCE LAWS VARY BY JURISDICTION. PLEASE CHECK ALL RELEVANT LAWS IN YOUR JURISDICTION
BEFORE USING THIS PRODUCT IN ORDER TO ENSURE THAT YOUR USE CONFORMS TO THE APPLICABLE LAW.
YOU FUTHER AGREE THAT THIS PRODUCT IS ONLY FOR CIVIL USE, AND HIKVISION SHALL NOT BE LIABLE IN
THE EVENT THAT THIS PRODUCT IS USED WITH ILLEGITIMATE PURPOSES, SUCH AS THIRD PARTY RIGHTS
INFRINGEMENT, MEDICAL TREATMENT, SAFETY EQUIPMENT OR OTHER SITUATIONS WHERE THE PRODUCT
FAILURE COULD LEAD TO DEATH OR
PERSONAL INJURY, OR WEAPON OF MASS DESTRUCTION, CHEMINCAL AND BIOLOGICAL WEAPON, NUCLEAR
EXPLOSION, AND ANY UNSAFE NUCLEAR ENERGY USES OR ANTI-HUMANITY USAGES. YOU SHOULD
UNDERTAKE ALL RESPONSIBILITIES FOR LOSSES OR DAMAGES RESULTING FROM THE ABOVE USAGES
WHATSOEVER.
IN THE EVENT OF ANY CONFLICTS BETWEEN THE ABOVE AND THE APPLICABLE LAW, THE LATER PREVAILS.
SAVE THIS MANUAL FOR FUTURE REFERENCE
Hereby, Hangzhou Hikvision Digital Technology Co., Ltd. declares that the radio equipment
type [CS-T9-A] is in compliance with Directive 2014/53/EU.
The full text of the EC DECLARATION OF CONFORMITY is available at the following web link:
http://www.ezvizlife.com/declaration-of-conformity
Due to the product shape and dimension, the name and address of the
importer/manufacturer are printed on the package.
EC DECLARATION OF CONFORMITY

Regulatory Information
This device complies with Part 15 of the FCC Rules. Operation is subject to the following two conditions:
(1) This device may not cause harmful interference, and
(2) This device must accept any interference received, including interference that may cause undesired operation.
Please take attention that changes or modification not expressly approved by the party responsible for compliance
could void the user’s authority to operate the equipment.
Note: This product has been tested and found to comply with the limits for a Class B digital device, pursuant to
Part 15 of the FCC Rules. These limits are designed to provide reasonable protection against harmful interference
in a residential installation. This product generates, uses, and can radiate radio frequency energy and, if not
installed and used in accordance with the instructions, may cause harmful interference to radio communications.
However, there is no guarantee that interference will not occur in a particular installation. If this product does
cause harmful interference to radio or television reception, which can be determined by turning the equipment off
and on, the user is encouraged to try to correct the interference by one or more of the following measures:
—Reorient or relocate the receiving antenna.
—Increase the separation between the equipment and receiver.
—Connect the equipment into an outlet on a circuit different from that to which the receiver is connected.
—Consult the dealer or an experienced radio/TV technician for help.
EU Conformity Statement
This product and - if applicable - the supplied accessories too are marked with "CE" and comply
therefore with the applicable harmonized European standards listed under the EMC Directive
2004/108/EC, the RoHS Directive 2011/65/EU.
2012/19/EU (WEEE directive): Products marked with this symbol cannot be disposed of as
unsorted municipal waste in the European Union. For proper recycling, return this product to your
local supplier upon the purchase of equivalent new equipment, or dispose of it at designated
collection points. For more information see: www.recyclethis.info.
2006/66/EC (battery directive): This product contains a battery that cannot be disposed of as
unsorted municipal waste in the European Union. See the product documentation for specific
battery information. The battery is marked with this symbol, which may include lettering to
indicate cadmium (Cd), lead (Pb), or mercury (Hg). For proper recycling, return the battery to your
supplier or to a designated collection point. For more information see: www.recyclethis.info.

T9 x1 Foam Sticker x1
USB Cable x1
Power Adapter x1
Box Contents
Screw Kit x1
Quick Start Guide x1
ENGLISH
The figures in this manual are for reference only and may differ from the actual
product.
Basics and Functions
Setting Button
Press Once: Add T9 to the Internet Alarm
Hub
Press and Hold for 1s: Mute
Red Indicators
If the connected Internet Alarm Hub receives alarms from other detectors, T9 will be
triggered and start to alarm.
Functions
1

Operations
Connect the T9 to the power adapter with the
power cable.
Power Socket
Step 1 Starting T9
1
2Plug the power adapter into the power socket
to power on the T9. The red indicator lights on
for 2 seconds indicating the T9 has started up.
The T9 should be used cooperating with an Internet Alarm Hub (such as A1) and other detectors (such
as magnetic contact and IR detectors). And they are required to be purchased separately.
……
……
……
Step 2 Adding to Internet Alarm Hub
Installing the EZVIZ App
- Connect your mobile phone to Wi-Fi.
- Download and install the EZVIZ app by searching
the “EZVIZ” in App Store (iOS version) and Google
PlayTM (Android version).
- Start the app and register for an EZVIZ user
account.
Option 1 (Recommended) Adding by EZVIZ App
1
Adding T9
Log in the EZVIZ app and scan the device QR code to
add it to the Internet Alarm Hub.
2
2

Enable the “Adding Detectors Mode” of your Internet Alarm Hub. Refer to Quick Start Guide of your
Internet Alarm Hub for details.
The Internet Alarm Hub issues a voice prompt of the device type and serial No. indicating T9 is
added.
Option 2 Adding by Operating the Internet Alarm Hub
1
Within 50CM
Internet
Alarm Hub
Seng Buon
1
Take T9 close to the Internet Alarm Hub (within 50cm) and press the button on the T9, the red
indicators flicker once indicating the adding signal is sent.
2
3
4You can test the device after the installation.
- Press the Emergency button on the remote control of the Internet Alarm Hub to trigger an
emergency alarm. If the T9 starts to alarm, it has been added to the Internet Alarm Hub
successfully.
- Press the Mute button on the remote control of the Internet Alarm Hub to clear the alarm. And
then the T9 will stop alarm.
3

Working Current Static: 22mA Maximum: 200mA
Working Temprature -10°C to 55°C (14°F to 131°F)
Working Environment Indoor
Working Humidity 10% to 90%
-20°C to 70°C (-4°F to 158°F)
77g
Alarm Volume 85dB (within 3 m)
Storage Temperature
Alarm Light Red indicators blink when alarm occurs.
67 mm*33mm*121mm (2.6"*1.3" *4.8")
Weight
Dimension (H*W*D)
Power Voltage DC 5V (Micro USB)
Specifications
Picking an Installation Place
Pick a clean and plat place to install T9.
Installing T9
1
Installing T9
Paste the foam sticker onto the back of T9 and
stick T9 to the installation place, as shown in
the figure below.
2
Wall
Option 1 (Recommended)
- Drill a screw hole in the installation place.
- For the cenment wall, push the expansion
screw into the hole.
- Push the screw into the hole or the
expansion hole.
- Hang the T9 onto the fixed screw.
Option 2
4

5
박스 내용물
T9 x1
전원 어댑터 x1
발포 스티커 x1
USB 케이블 x1
나사 세트 x1
퀵스타트 가이드 x1
이설명서에 있는 그림은 참고용이며 실제 제품과 다를 수있습니다.
기본 사항 및기능
빨간색 표시등
설정 버튼
한번누름: 인터넷 경보 허브에 T9 추가
1초간 길게 누름: 음소거
기능
연결된 인터넷 경보 허브가 다른 탐지기에서 경보를 수신하면 T9가작동하여 경보를
울립니다.
한국어

6
작동
1단계 T9 부팅
전원 소켓
1전원 케이블을 사용해 T9를전원 어댑터에
연결합니다.
2전원 어댑터를 전원 소켓에 꽂아 T9를켭니다.
T9 부팅 완료를 나타내기 위해 빨간색 표시등이
2초간 켜집니다.
2단계 인터넷 경보 허브에 추가
T9는인터넷 경보 허브(A1 등) 및다른 탐지기(자기 접점, 적외선 탐지기 등)와함께 사용해야
합니다. 이러한 장비는 별도 구매품입니다.
• 옵션 1(권장) EZVIZ 앱을 통한 추가
⋯⋯
⋯⋯
⋯⋯
1EZVIZ 앱설치
- 모바일 폰을 Wi-Fi에연결합니다.
- App Store (iOS 버전) 및Google PlayTM(Android
버전)에서 “EZVIZ”를검색하여 EZVIZ 앱을
다운로드한 다음 설치합니다.
- 앱을 실행하고 EZVIZ 사용자 계정을 등록합니다.
2T9 추가
EZVIZ 앱에 로그인한 다음 장비 QR 코드를 스캔하여
인터넷 경보 허브에 장비를 추가합니다.

7
• 옵션2인터넷경보허브작동을통한추가
1인터넷경보허브의“탐지기추가모드”를활성화합니다.자세한내용은인터넷경보허브의퀵스타트
가이드를참조합니다.
2T9를인터넷경보허브에가까이(50cm이내)가져간다음T9에있는버튼을누르면추가신호전송을
나타내기위해빨간색표시등이한번깜박입니다.
설정 버튼
50CM 이내
인터넷 경보
허브
3인터넷경보허브가장비유형및일련번호에대한음성프롬프트를통해T9가추가되었음을
나타냅니다.
4설치후장비를테스트할수있습니다.
-인터넷 경보 허브 리모컨에 있는 비상 버튼을 눌러 비상 경보를 작동합니다. T9가 경보를 울리면
인터넷경보허브에성공적으로추가된것입니다.
-인터넷 경보 허브 리모컨에 있는 음소거 버튼을 눌러 경보를 해제합니다. 그러면 T9가 경보를
중지합니다.

8
T9설치
1설치위치선택
T9를설치하기위해깨끗하고평평한장소를선택합니다.
2T9설치
• 옵션1(권장)
아래그림과같이T9뒷면에발포스티커를붙인
다음T9를설치위치에부착합니다.
• 옵션2
-설치위치에나사구멍을뚫습니다.
-시멘트벽의경우구멍에확장스크류를
박습니다.
-구멍또는확장구멍에나사를박습니다.
-고정된나사에T9를겁니다.
벽
사양
전압 DC5V(MicroUSB)
작동전류 정적:22mA 최대:200mA
작동환경 실내
작동온도 -10°C~55°C(14°F~131°F)
작동습도 10%~90%
보관온도 -20°C~70°C(-4°F~158°F)
무게 77g
크기(높이*폭*깊이) 67mm*33mm*121mm(2.6”*1.3”*4.8”)
경보음량 85dB(3m이내)
경보등 경보발생시빨간색표시등이깜박임.

9
Español
T9 x1 Adhesivo de espuma x1
Cable USB x1
Adaptador de corriente x1
Contenido del paquete
Juego de tornillos x1
Guía de inicio rápido x1
Las figuras de este manual solo se incluyen a modo de referencia y pueden no ser
idénticas al producto en cuestión.
Si la central de alarmas por Internet recibe una alarma de otros detectores, el T9 se
activará e iniciará la alarma.
Funciones
Conceptos básicos y funciones
Botón de configuración
Pulsar una vez: Añada el T9 a la central
de alarmas por Internet.
Mantener pulsado durante 1 s: Silencio
Indicadores rojos

10
Funciones
Conecte el T9 al adaptador de corriente con el
cable de alimentación.
Toma de corriente
Paso 1: adición del T9
1
2Enchufe el adaptador de corriente a la toma de
corriente para suministrar alimentación al T9.
El indicador rojo se enciende durante dos
segundos para indicar que se ha iniciado el T9.
El T9 debe utilizarse junto con una central de alarmas por Internet (como, por ejemplo, el A1) y otros
detectores (como, por ejemplo, los detectores de IR y contacto magnético). Además, estos componentes
deben adquirirse por separado.
……
……
……
Paso 2: adición a la central de alarmas por Internet
Instalación de la aplicación EZVIZ
- Conecte el teléfono móvil a la red Wi-Fi.
- Descargue la Aplicación Móvil EZVIZ buscando
"EZVIZ" en App Store (versión iOS) y Google PlayTM
(versión Android).
- Inicie la aplicación y regístrese para obtener una
cuenta de usuario de EZVIZ.
Opción 1 (recomendada) Adición mediante la aplicación EZVIZ
1
Adición del T9
Inicie sesión en la aplicación y escanee el código QR del
dispositivo para añadirlo a la central de alarmas por
Internet.
2

11
Active el modo de adición de detectores en la central de alarmas por Internet. Consulte la Guía de
inicio rápido del centro de alarmas por Internet para obtener información.
La central de alarmas por Internet emitirá un aviso de voz sobre el tipo de dispositivo y el número
de serie, lo que indica que el T9 se ha añadido.
Opción 2 Adición mediante la central de alarmas por Internet
1
Dentro 50 cm
Central de alarmas
por Internet
Botón de configuración
1
Acerque el T9 al centro de alarmas por Internet (en un área de 50 cm) y pulse el botón del dispositi-
vo; el indicador rojo parpadea una vez para indicar que se ha enviado la señal de adición.
2
3
4Puede probar el dispositivo tras la instalación.
- Pulse el botón de emergencia del mando a distancia de la central de alarmas por Internet para
activar una alarma de emergencia. Si el T9 inicia la alarma, esta se ha añadido correctamente a
la central de alarmas por Internet.
- Pulse el botón de silencio del mando a distancia de la central de alarmas por Internet para
borrar la alarma. A continuación, el T9 detendrá la alarma.

12
Selección de una ubicación de instalación
Elija un lugar limpio y plano para instalar el T9.
Instalación del T9
1
Instalación del T9
Pegue el adhesivo de espuma en la parte
posterior del T9 y fije el dispositivo en el
lugar de instalación, como se muestra en
la figura siguiente.
2
Pared
Opción 1 (recomendada)
- Perfore un agujero para tornillos en la
ubicación de instalación.
- En las paredes de cemento, introduzca el
tornillo de expansión en el orificio.
- Introduzca el tornillo en el orificio o el orificio
de expansión.
- Cuelgue el T9 en el tornillo fijado.
Opción 2
Corriente de trabajo Estático: 22 mA Máximo: 200 mA
Temperatura de trabajo De -10°C a 55°C (de 14°F a 131°F)
Entorno de trabajo Interior
Humedad de trabajo De 10% a 90%
De -20°C a 70°C (de -4°F a 158°F)
77 g
Volumen de alarma 85dB (en un área de 3 m)
Temperatura de
almacenamiento
Luz de alarma Los indicadores rojos parpadean cuando se
produce una alarma.
67*33*121 mm (2,6*1,3*4,8)
Peso
Dimensiones (Al.*An.*Pr.)
Voltaje de fuente de
alimentación DC 5 V (Micro USB)
Especificaciones

13
1 T9 1 Autocolante de espuma
1 Cabo USB
1 Adaptador de alimentação
Conteúdo da caixa
1 Kit de parafusos
1 Manual de iniciação rápida
As figuras deste manual servem apenas de referência e podem ser diferentes do
produto real.
Se o hub de alarme de Internet ligado receber alarmes de outros detetores, o T9
dispara e inicia o alarme.
Funções
Aspetos básicos e funções
Botão de definição
Prima uma vez: Adicione o T9 ao hub de
alarme de Internet
Prima sem soltar durante 1 seg: Silêncio
Indicadores
vermelhos

14
……
……
……
Operações
Ligue o T9 ao adaptador de alimentação com o
cabo de alimentação.
Tomada de
alimentação
Passo 1 Ligação do T9
1
2Ligue o adaptador de alimentação à tomada de
alimentação para ligar o T9. O indicador
vermelho acende-se durante 2 segundos
indicando que o T9 está ligado.
O T9 deve ser utilizado em cooperação com um hub de alarme de Internet (como o A1) e com outros
detetores (como o contacto magnético e detetores IV). Este equipamento tem de ser adquirido em
separado.
Passo 2 Adição ao hub de alarme de Internet
Instalação da aplicação EZVIZ
– Ligue o telemóvel à rede Wi-Fi.
– Transfira e instale a aplicação EZVIZ pesquisando
por "EZVIZ" na App Store (versão iOS) e na Google
PlayTM (versão Android).
– Inicie a aplicação e registe-se para ter uma conta de
utilizador EZVIZ.
Opção 1 (recomendada) Adição por meio da aplicação EZVIZ
1
Adição do T9
Inicie sessão na aplicação EZVIZ e digitalize o código
QR do dispositivo para adicioná-lo ao hub de alarme
de Internet.
2

15
Ative o "Modo de adição de detetores" do seu hub de alarme de Internet. Consulte o Manual de
iniciação rápida do hub de alarme de Internet para obter mais informações.
O hub de alarme de Internet emite um comando de voz com o tipo e o n.º de série do dispositivo,
indicando que o T9 foi adicionado.
Opção 2 Adição utilizando o hub de alarme de Internet
1
Até 50 cm
Hub de alarme de
Internet
Botão de definição
1
Aproxime o T9 do hub de alarme de Internet (numa distância até 50cm) e prima o botão no T9. Os
indicadores vermelhos piscam uma vez informando que o sinal de adição foi enviado.
2
3
4Pode testar o dispositivo depois da instalação.
– Prima o botão de emergência no controlo remoto do hub de alarme de Internet para disparar
um alarme de emergência. Se o T9 emitir um alarme, significa que a sua adição ao hub de
alarme de Internet foi bem-sucedida.
– Prima o botão de silêncio no controlo remoto do hub de alarme de Internet para desativar o
alarme. O T9 deixa de emitir o alarme.

16
Seleção de um local de instalação
Escolha um local limpo e liso para instalar o T9.
Instalação do T9
1
Instalação do T9
Cole o autocolante de espuma na parte de
trás do T9 e cole o T9 no local de instalação,
conforme ilustrado na figura abaixo.
2
Parede
Opção 1 (recomendada)
– Faça um orifício no local de instalação para
introduzir um parafuso.
– Para uma parede de betão, introduza o
parafuso de expansão no orifício.
– Introduza o parafuso no orifício ou no orifício de
expansão.
– Pendure o T9 no parafuso fixo.
Opção 2
Corrente de funcionamento Estática: 22mA Máximo: 200mA
Temperatura de funcionamento -10°C a 55°C (14°F a 131°F)
Ambiente de trabalho Interior
Humidade na área de funcionamento 10% a 90%
-20°C a 70°C (-4°F a 158°F)
77g
Volume de alarme 85dB (até 3m)
Temperatura de armazenamento
Luz de alarme Os indicadores vermelhos piscam quando o alarme dispara.
67 mmx33mmx121mm (2,6"x1,3"x4,8")
Peso
Dimensão (AxLxP)
Tensão de alimentação CC 5V (micro USB)
Especificações
Other manuals for T9
4
Table of contents
Other Ezviz Security System manuals